


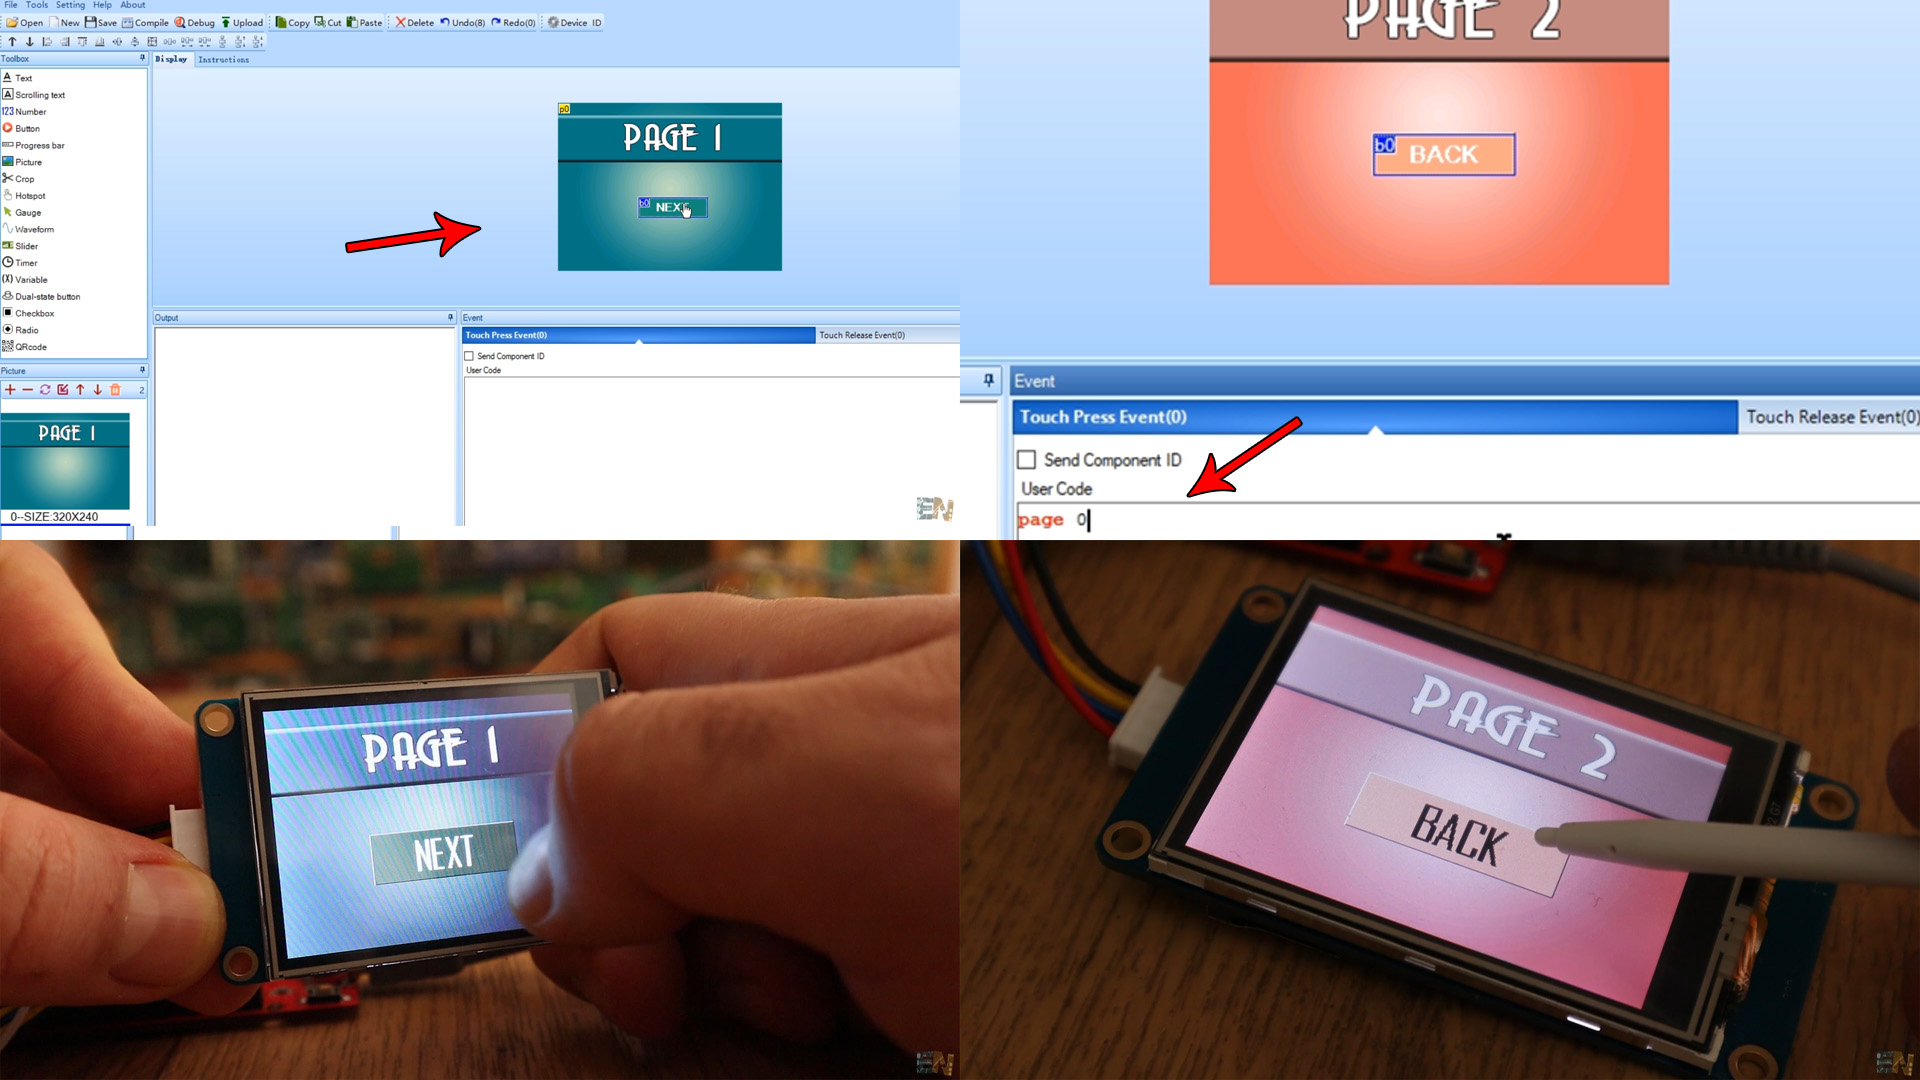
In this part we will see how to go from one page to another on the Nextion display. We will create two pages with one button each. Then in the Even we will write "page 0" to go to first page and "page 1" to go to second page of our platform. You have all you need below for downlaod.
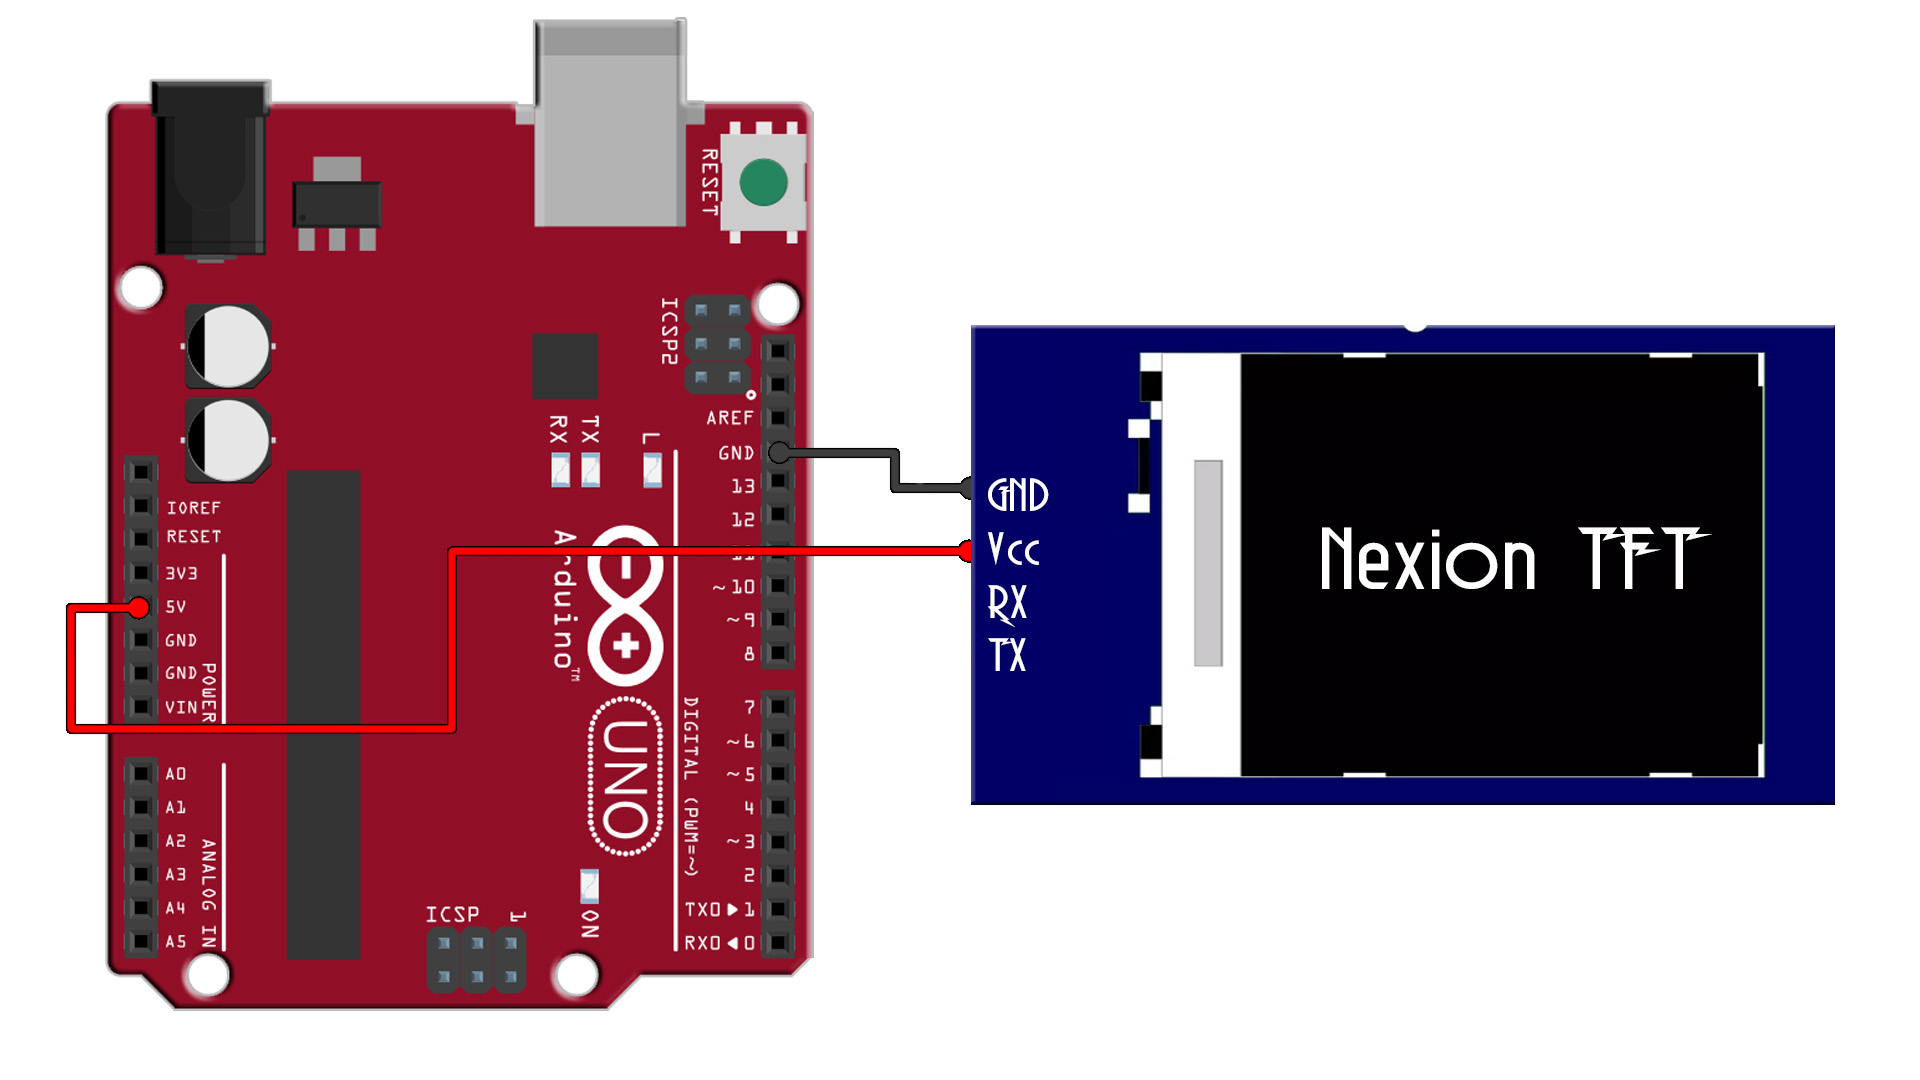
Ok, first of all, for this first example we need the schematic below. But only make the connections after we uplaod the code since the display uses the RX and TX pins and if something is connected to those pins, we can't uplaod the code. But we need the Arduino code part but also the Nextion TFT interface. For that we will use Nextion editor and create our interface.
Downlaod from below the Nextion editor software and install it. Then run the aplication and create a new file. Once again select the type of display and the horizonal mode. Then add a second page witha different background. On each page add a button as in the first example. On each even page for each button type "page 0" or "page 1" to go from one page to the other. You could test this in the console without the Display.
Ok, so I've placed two screens each with one button that will go to the other screen. To uplaod the TFT file we have to compile the project. If we have no errors in the console, we go to File and select open build folder anc copy the tft file. Insert a micro SD card into your PC and copy the tft file there. The SD card must be empty and formated to a fat32 format.
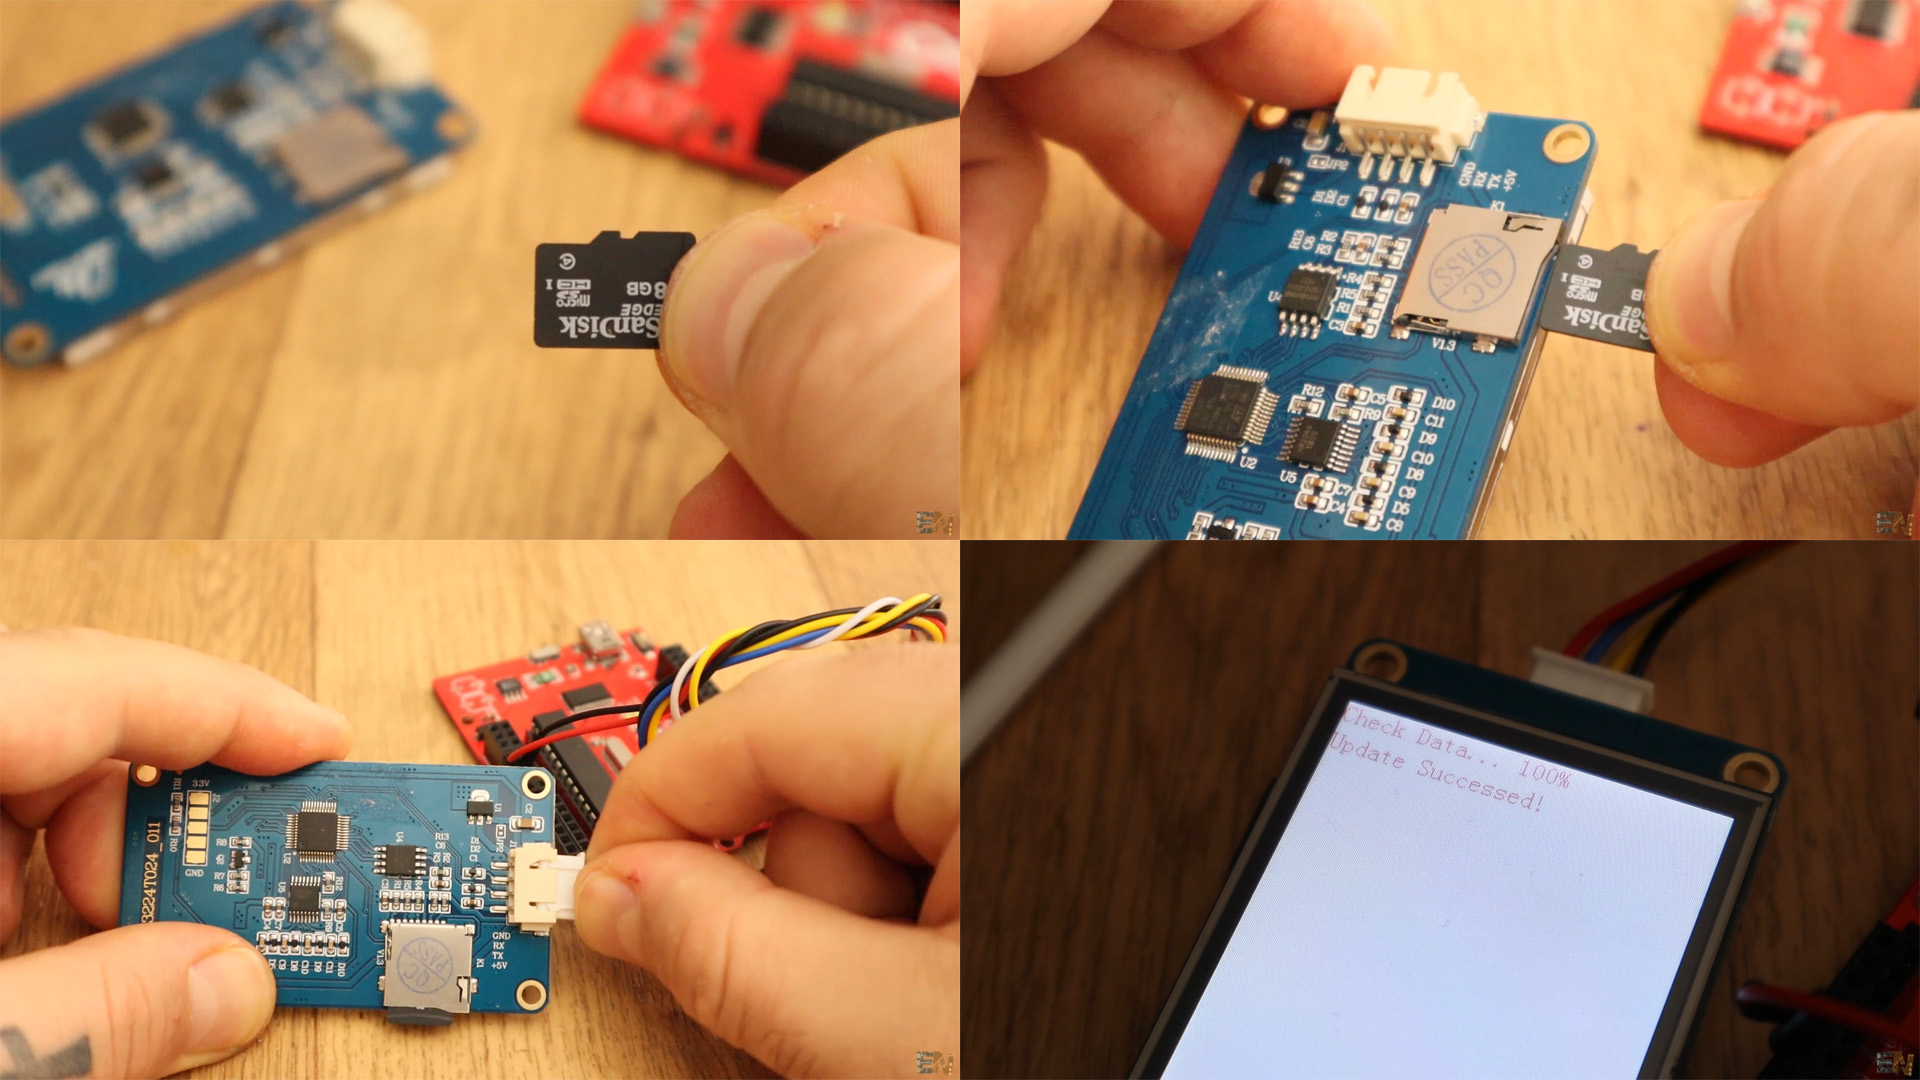
Now that the tft file is on the SD card make sure the Nextion display is not powered on. Insert the SD card into the card slot. Now power up the display with 5V. You will see on the screen that the new tft interface is being uploaded. Once you see 100%, power off the display and remove the SD card. Now power back the display and connect the TX and RX pins as in the schematic.


