Hi guys. This will be a homemade, 3D printed and Arduino based Halloween skull. I’ve designed it in such a way that the jaw will move with a servo motor, we have RGB LEDs behind the eyes and also below the jaw, it has a speaker inside and it can play scary sounds, it can detect movement with a PIR sensor that we have on top of the skull and the most interesting part, inside it has a homemade mini smoke machine and I will also show you how to make that. When I flip the switch we can hear the welcome sound and then once it detects movement it will make scary noises, blink the LEDs, move its jaw and also create smoke just below the jaw. So what do you think, pretty cool right? So, let’s get started.
We are around Halloween days and I want to make another cool project. Remember that last year we had a 3D printed pumpkin that was able to play sounds and was creating water mist out of its mouth together with some addressable LEDs. This time I want to make a scary 3D printed skull. I’ve made this design so you could easily 3D print it, and then it would have a moving jaw that you could control with a servo motor. The eyes holes have spaces for some LEDs that we could also control with an Arduino for example. Inside I have enough space to add a battery, an Arduino a DF player and a speaker to be able to play some scary sounds. But the best part of this project is a homemade mini smoke machine. You see, water mist is cool but sometimes you can barely see it. That’s why, for this Halloween I’m making my own mini smoke machine so stay tuned till the end to see how to make it and how cheap are the parts that we need. So let’s start with the components for the project.
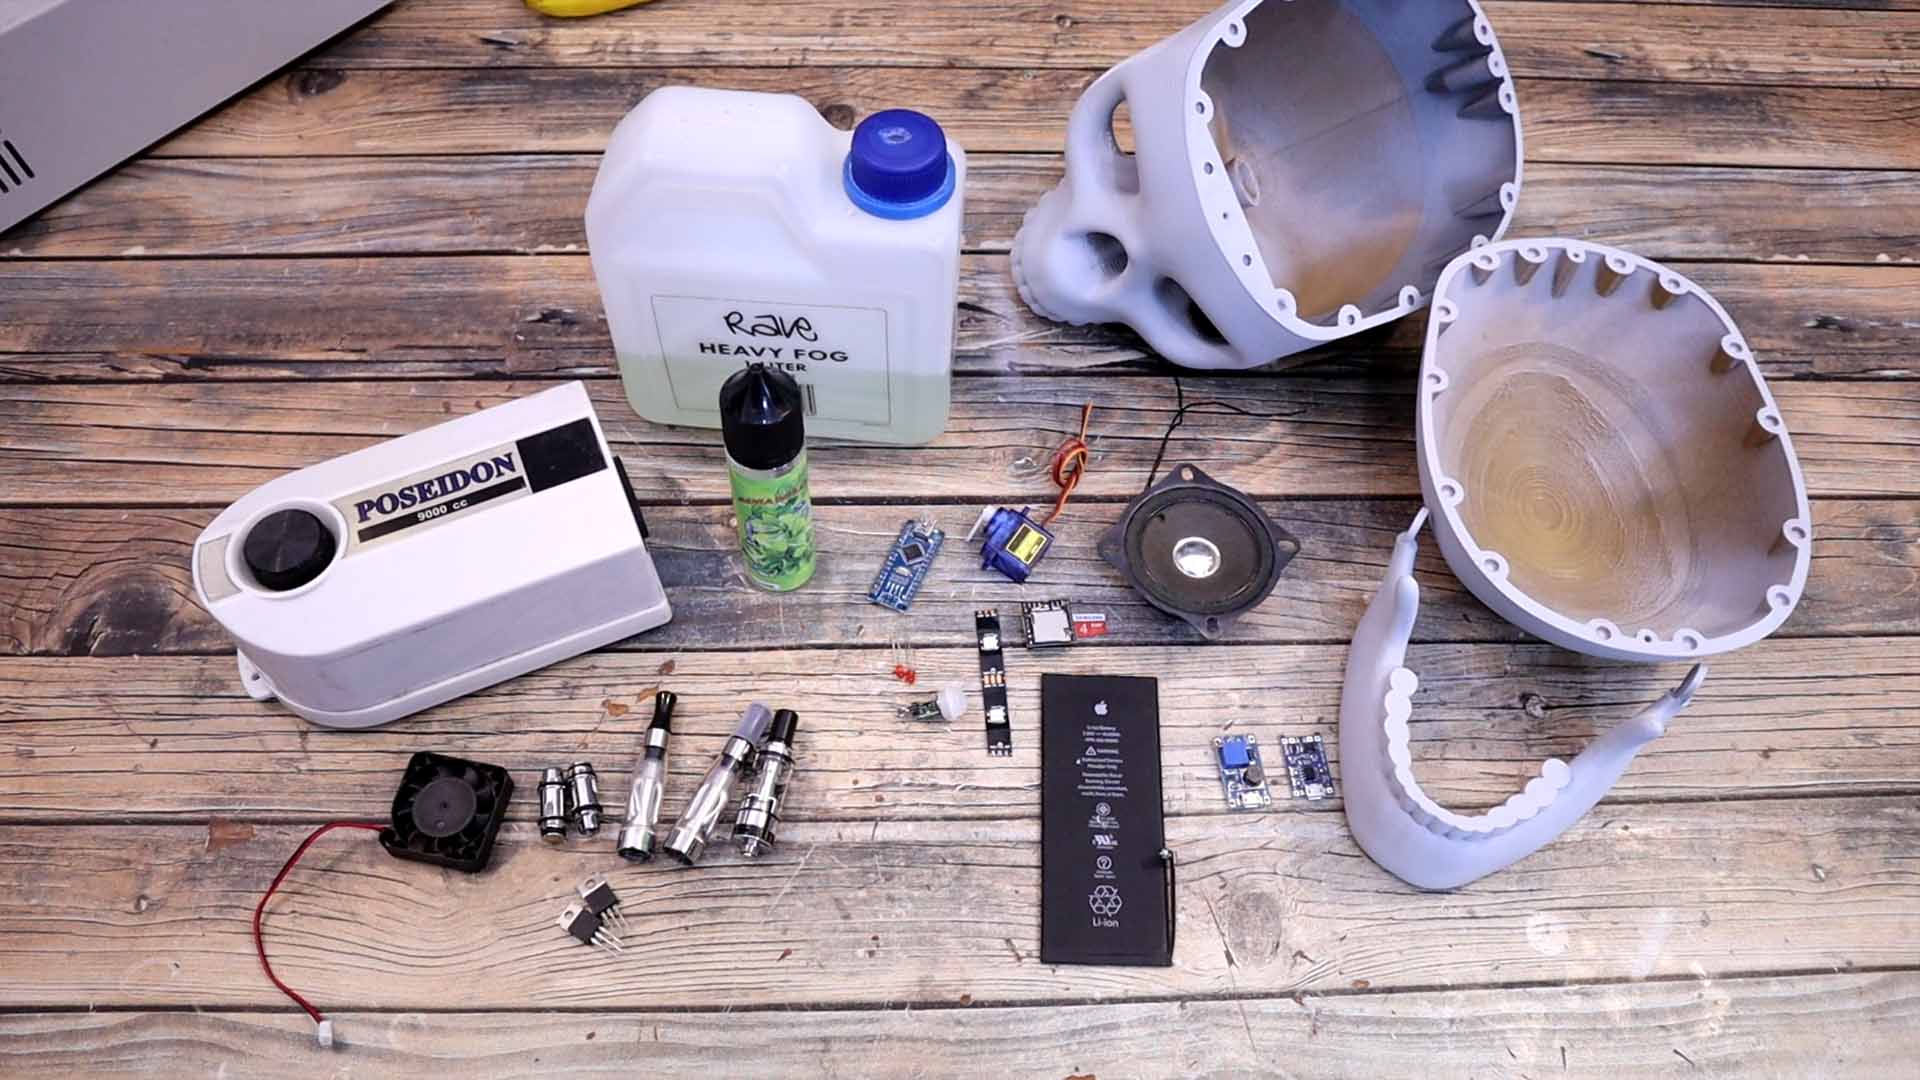
First of all, we need the 3D printed skull so download my designs from the next chapter below and 3D print it. Is made out of 3 main parts. The jaw, the bottom part of the skull and the top part. I will use an Arduino as always. To move the jaw, I will use a servo motor, a micro 9G. For the LEDs I will use addressable RGB LEDs, the WS2812. To create sounds, as always, we can use a DF player with a micro-SD card and palace some mp3 files on it. This is very easy to control with the Arduino. It has enough power for an 8-ohm speaker so we also need that. To supply everything, I’m planning to use a 1S battery of 3.8V so we will need a voltage booster in order to get 5V for the digital part. And to protect and recharge the battery I will use a protection module with USB connector. We also want to make the skull react to movement so for that I will use a PIR sensor.
What we need for the mini smoke machine? Well I want to use the heating element of a vaping cigarette. I’ve bought a few models and see which one is best. To push the smoke out I will sue a 12V fan. We also need some smoke liquid. To control the power of the heater and the pump we will need two MOSFETs which we can control with the Arduino. That’s pretty much all we need. So let’s start.
First of all, we need the 3D printed skull so download my designs from below and 3D print it. Is made out of 3 main parts. The jaw, the bottom part of the skull and the top part. You have to print all of the parts using supports because none of them is flat and they all have round shapes. Inside the skull we have a lot of support for the 3D printing process. Everything was printed with PLA material, 0.4mm nozzle and 0.2mm layer height and 20% infill and 2 perimeters. As you can see one was printed with two colors and that’s because while I was printing it, which by the way, it was around 30 hours of printing time, I was running out of grey filament so I had to pause the print and continue with gold color. We have to remove the supports. For the jaw and the top part of the skull, that was easy. But the middle part has a lot of supports. So carefully remove everything from the inside and all the small holes. It took me a while to get it all out. Anyway, now all parts are clean, more or less. Finally, you should sandpaper all the parts, especially where we had supports, so we had a smoother finish. I passed two levels of sandpaper and they look better now. In order to have the same color, I will use some spray paint and give it a few layers of paint. So apply one or more layers of paint. In the end, once the parts are fully dry I might use some acrylic paint and add some shadow and details. Let the paint dry and till then let’s see what else we need for this project.
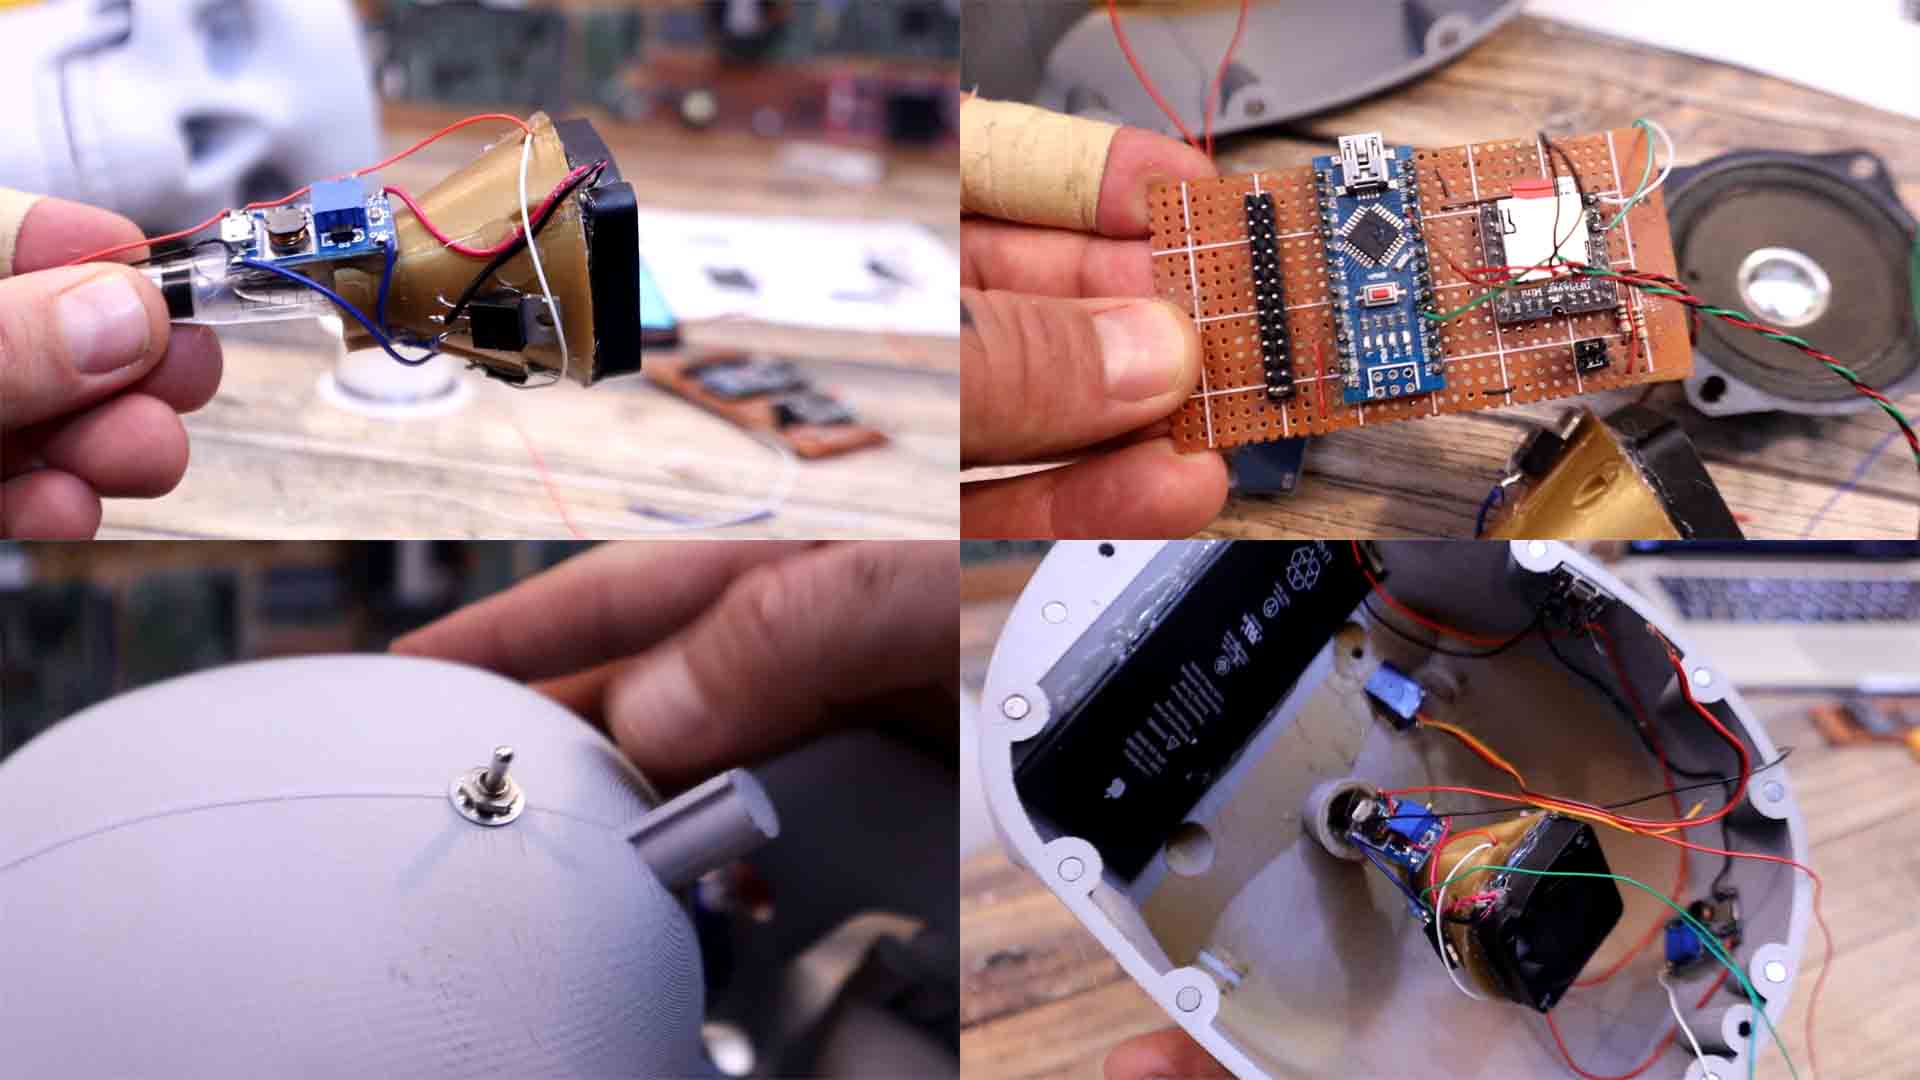
Once everything will be prepared we will use the enxt schematic for all the connections. First you need to mount the smok machine. Add 2 mosfets to that and they both will be controlled with the D6 pin from the Arduino. The rest are basic connection. Be careful and check the output of the boost converters and make sure is 5V for one and 12V for the other one. The TP4056 has current and under voltage protection but I will use this module just to recharge the battery. Why? Well, because the vaper heating element needs around 4A and the TP4056 module has a 1.5A current limit and it would power off if we actrivate the vaper. So we need to jump over that protection, that's why we connect the main switch directly to the B+ pad of the module. For less noise, the DFplayer needs two 1K resistors for the Tx and Rx pins. We need 3 WS2812 LEDs, 2 for the eyes and one more below the jaw.

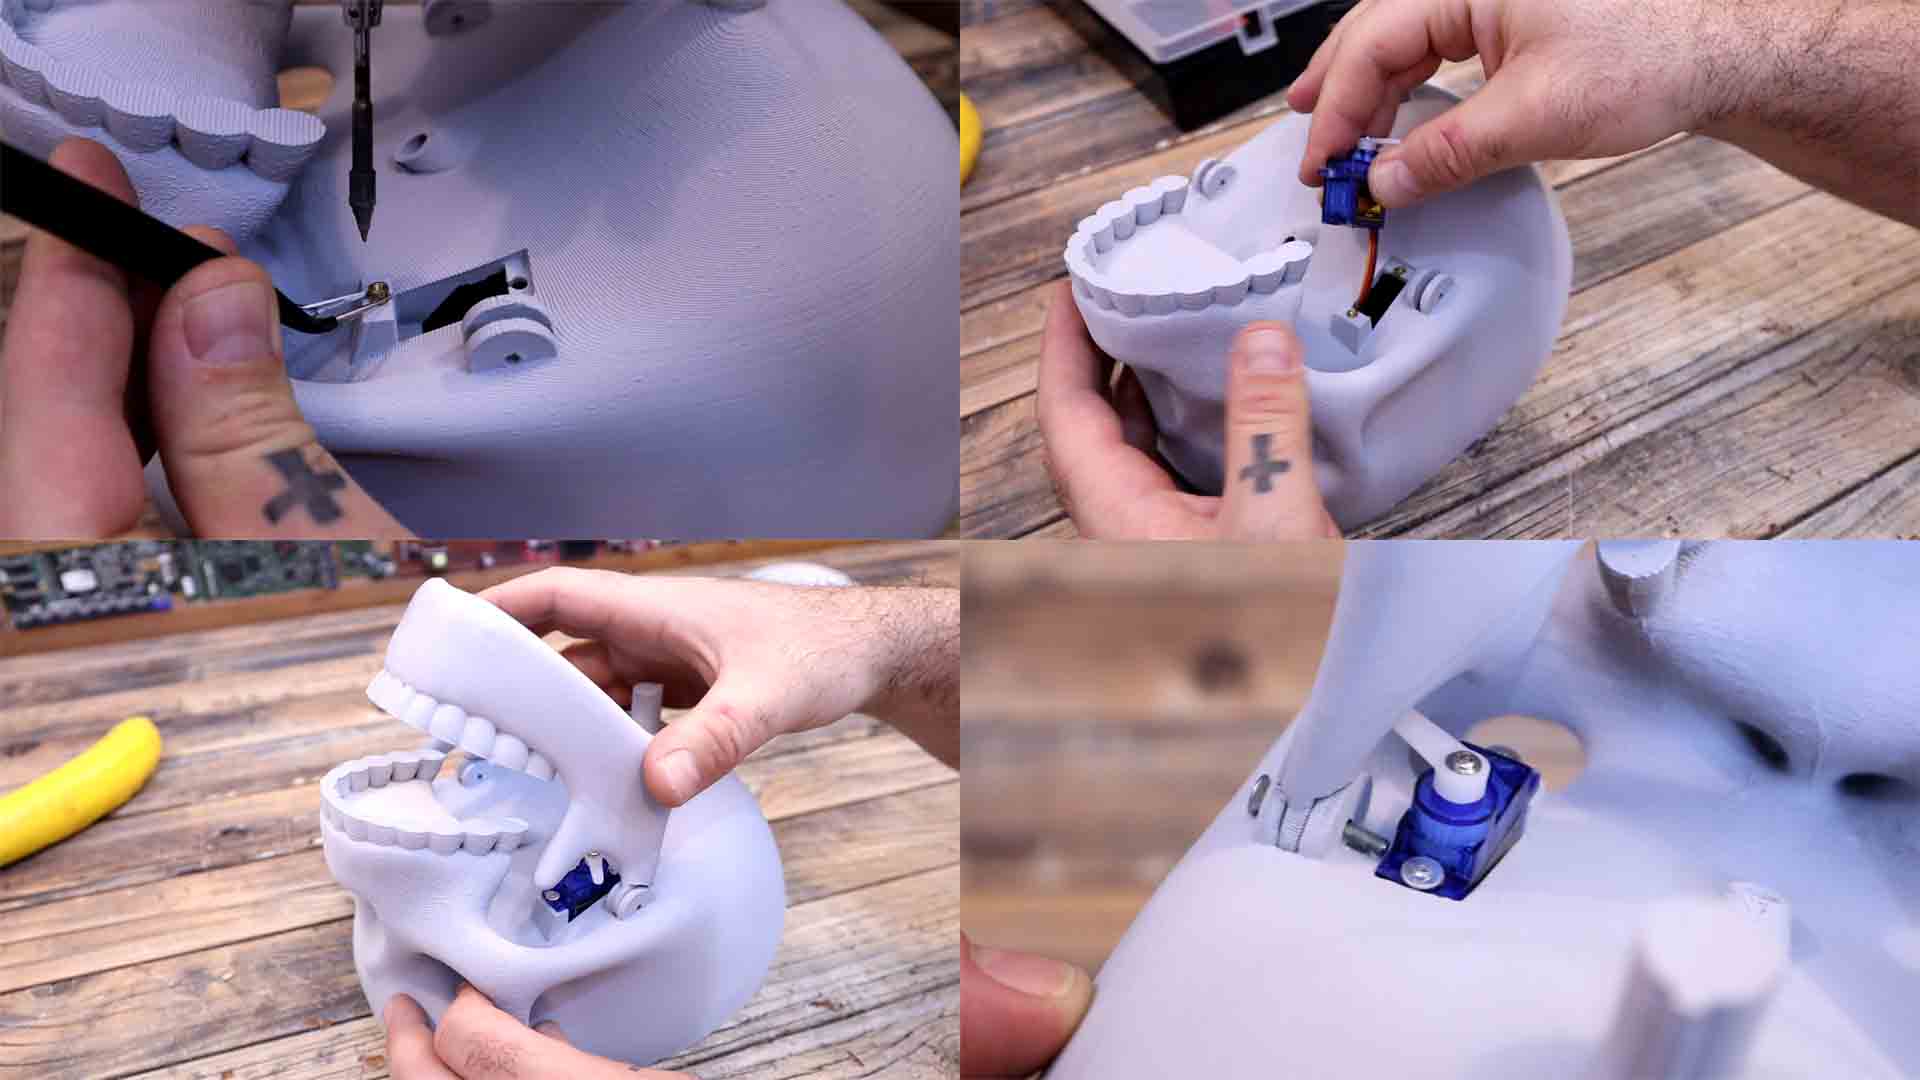
First thing first is to prepare the skull which by now should be dry and have a nice grey color. We might paint it more later with details and shadows, but for now, it is good like this. First we must add the servo motor in place, otherwise, once we have the jaw mounted it would be more difficult. So first we add some insertion threads as always using my soldering iron. We pass the wires inside the skull and fix the servo in place. Then add and tight the screws. The servo is in place and we have the wires inside the skull. Now we can add the jaw. Slide it inside of those two holes. Then I add a screw, but I had to use some glue to fix it in place, because there was no more space for a screw nut. I guess I’ve made a bad design choice. Anyway, glued in place it will be ok as well.
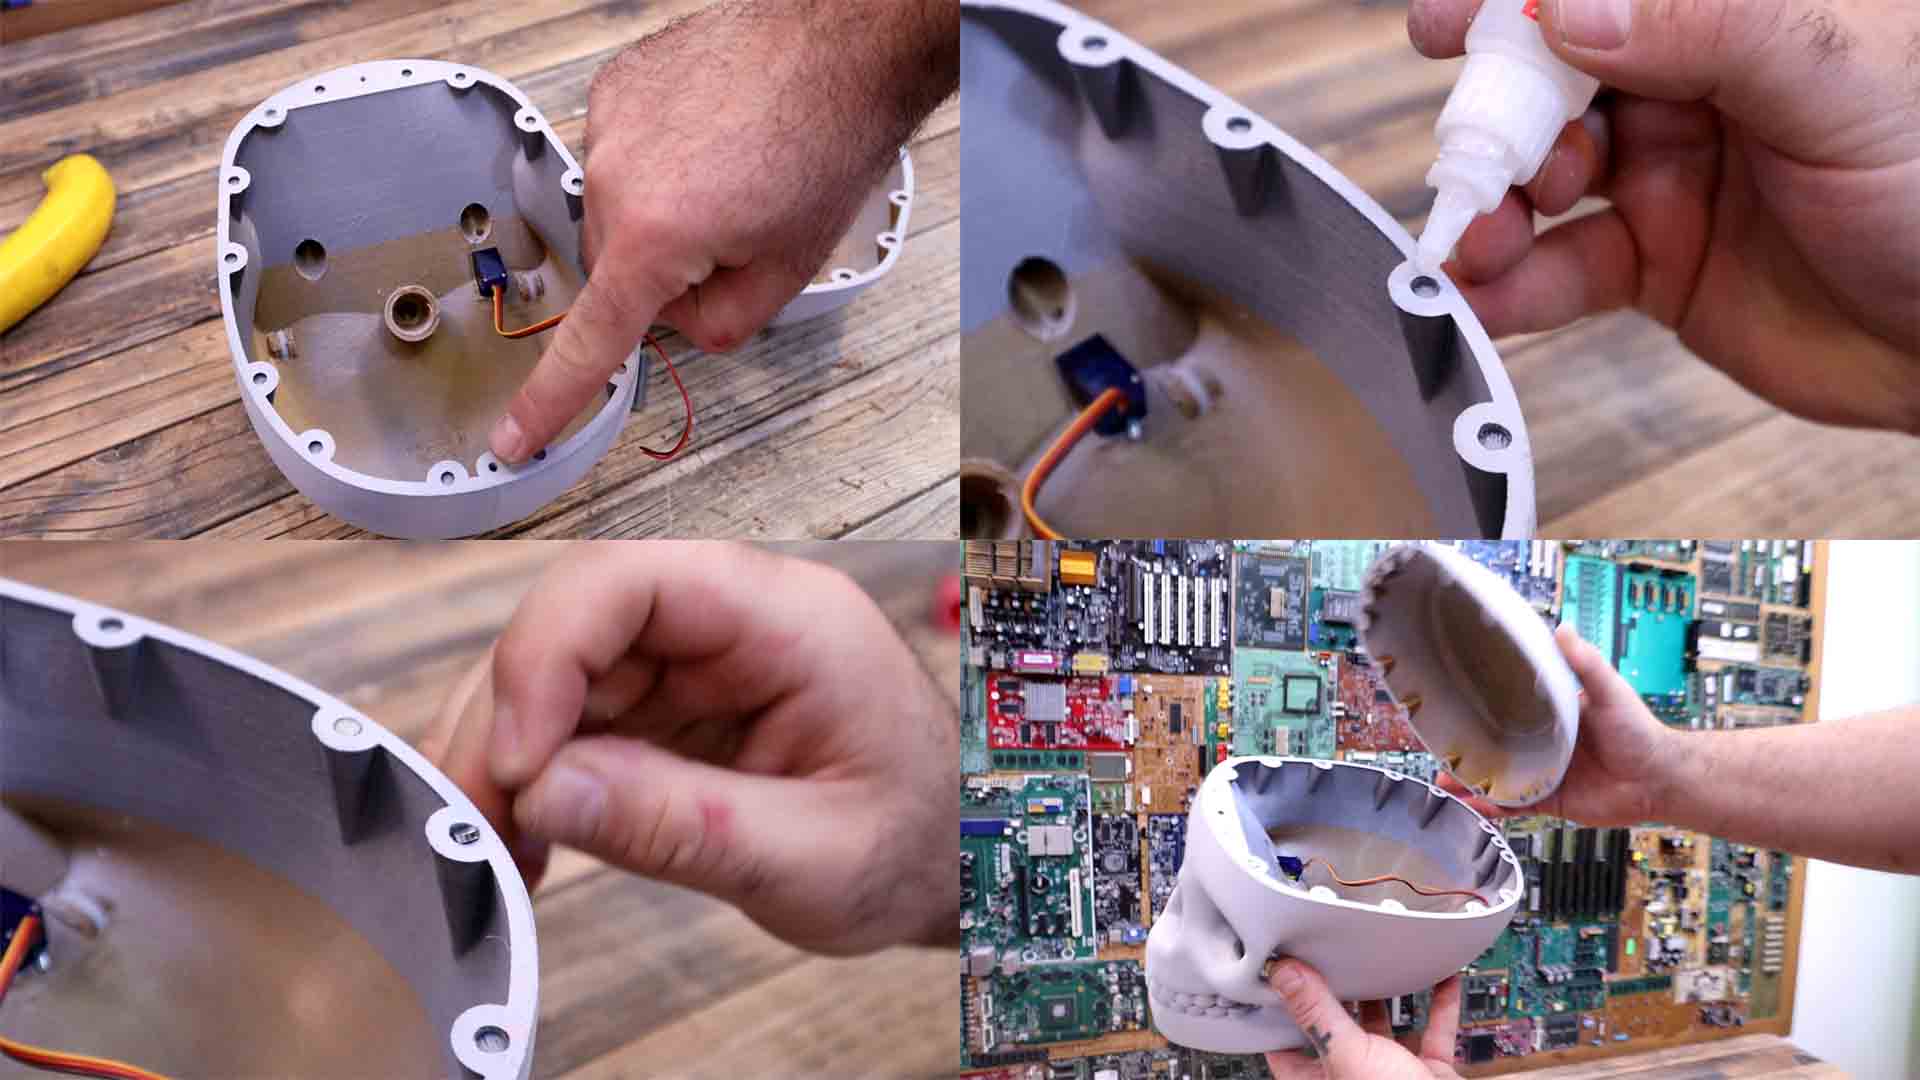
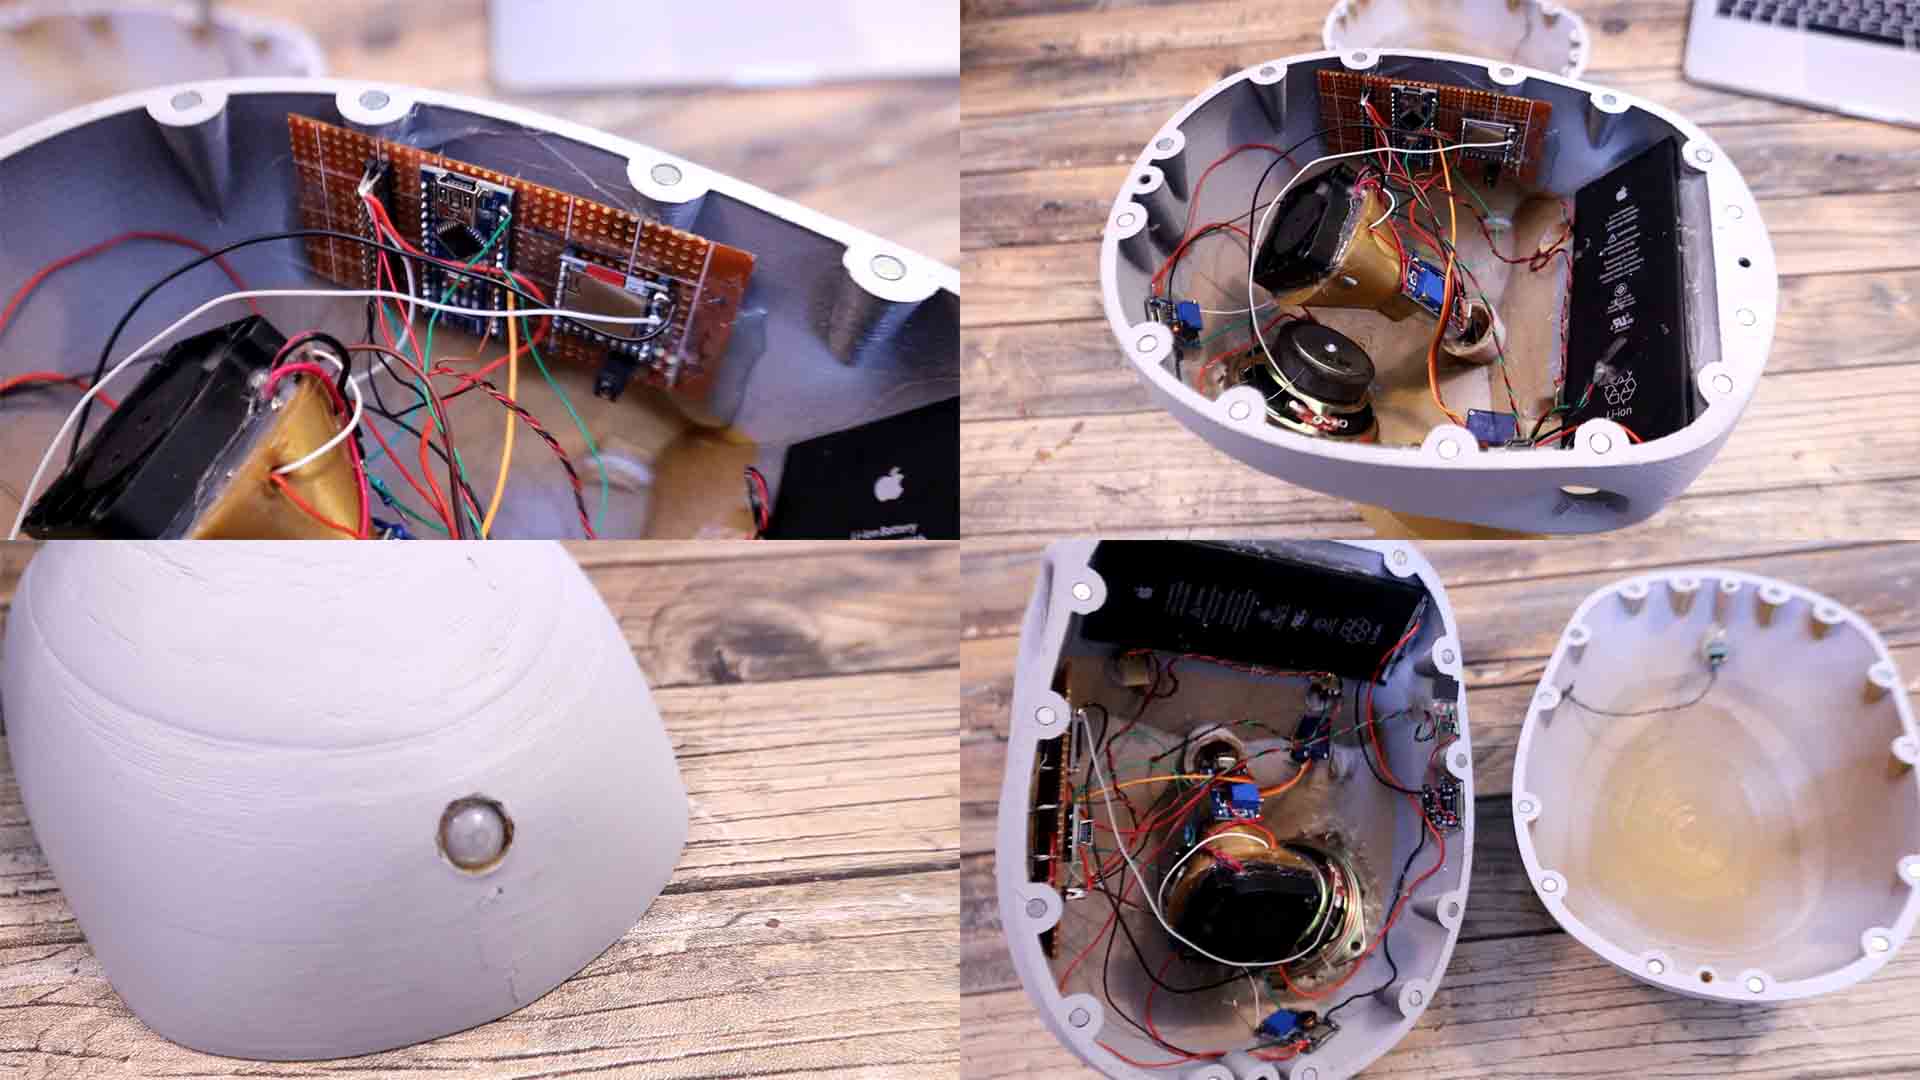
To fix in place the top part I thought of using magnets. So we have a lot of slots all around the skull. We have to add a neodymium magnet on each slot except these two holes. So I use some super glue and add a magnet on each hole but make sure that the ones on the bottom side have opposite polarity than the ones on the top side so they will attract each other. Now that we have the magnets, look how easy is to close it. The plastic part is ready. Let’s pass to the electronics but before we make connections, let’s make the mini smoke machine.
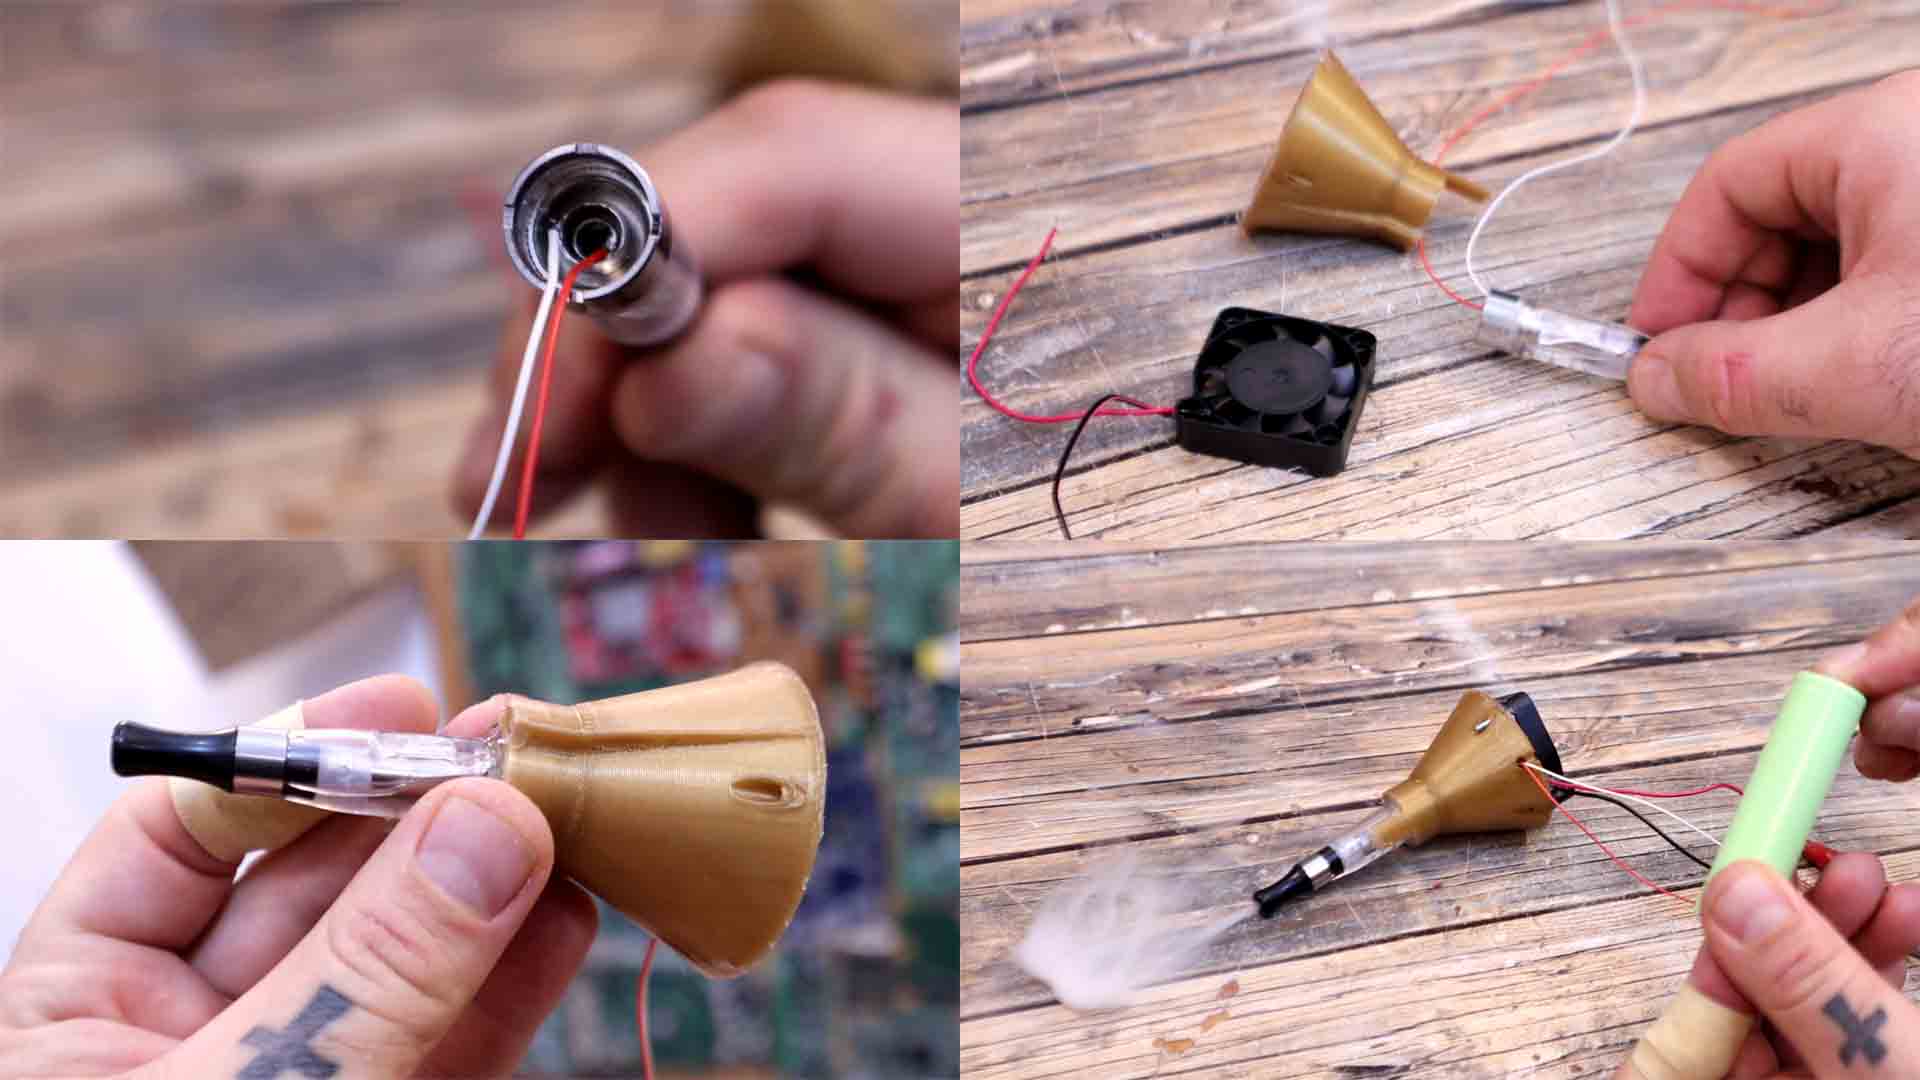
I solder wires to positive and negative connections of the heater. I amke sure the hole in the middle is not covered by the wires so air could flow. I’ve 3D printed a small plastic part and this will support the vaper pipe and the 12V fan. Then I glued the vaper pipe inside and made sure air could flow to that hole on the side. Then I screw in place the fan and I hope this will work. I use hot glue and screws and fix everything in place. I supply the fan and then I connect the heater and smoke is comming out so I’m happy with the results. But the fans needs 12V so I will use another separate boost converter to increase the battery voltage up to 12V just for the fan. So check the schematic above and let's connect everything.
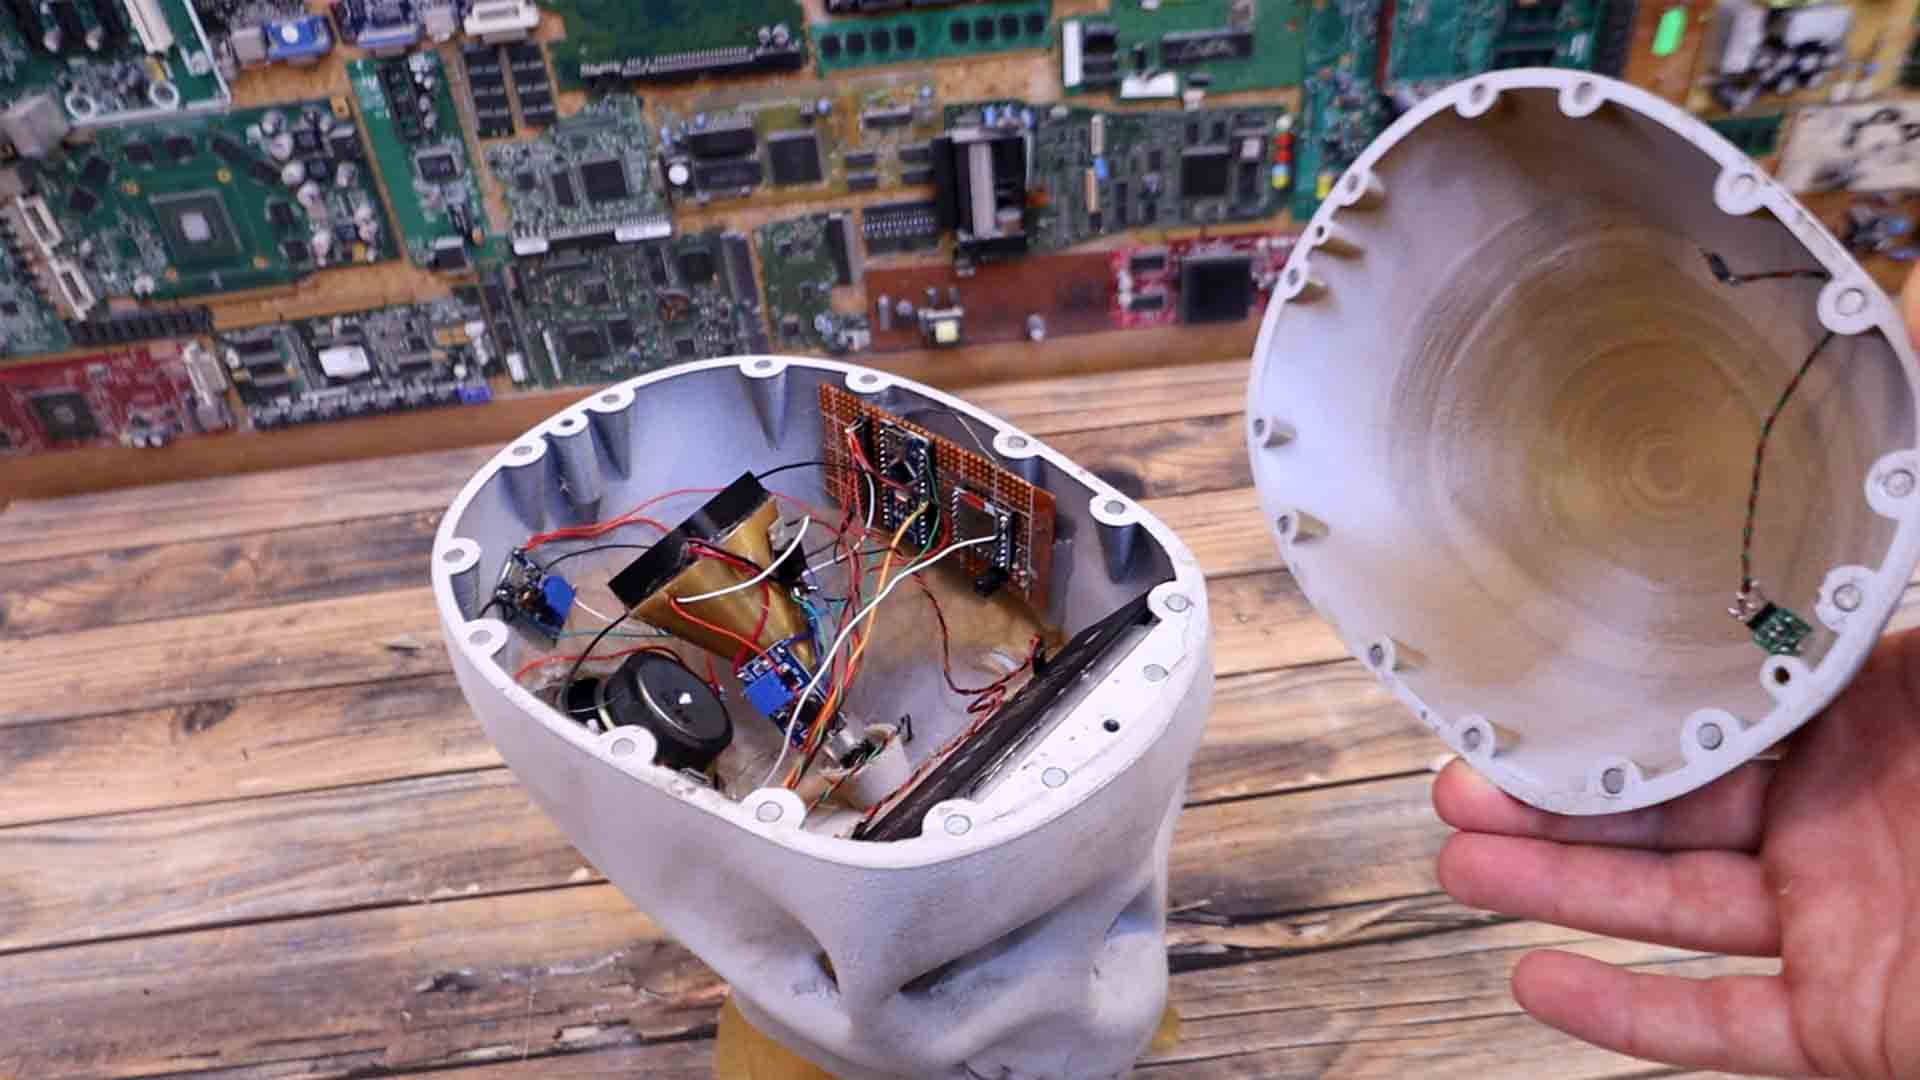
I glue the boost converter to the smoke machine and I solder the wires and make sure I set the output to 12V. Then I also add the MOSFETs we use to control when the smoke and the fan are turned on. I solder the Arduino and the DF player on a prototyping PCB. I solder the speaker at the DF player output. I also add a switch on the back of the skull and this will be connected to the battery and the 5V boost converter. I connect the protection and charger module to the battery. I also solder wires to the PIR sensor and the addressable LEDs. Everything is now prepared just as in the schematic. So, I will glue them inside the skull and make the connections.
I connect the 5V boost converter to the switch and glue it inside the skull. Then I also add the battery with the charger and glue them in place. Then I add the smoke machine module on the hole the 3D printed skull has on the bottom. Then I glue one LED inside each eye. Finally I glue the Arduino and DFplayer PCB on the other side. We can make all connections here at this point. On the other 3D printed part I’ve made a hole and glued in place the PIR sensor that will detect movement. I add wires with male pins so we could connect them to the wires on the other 3D printed part and be able to close and open the skull. I also glue the speaker in place, and I had to make a few holes on the back so the sound could exit. I will have to repaint this part. I finally decided to add another LED below the jaw so we could light it up and like that the smoke will be more visible. I get the SD card and upload the mp3 files to it. Then I insert it into the DFplayer.
The code is more than easy. We detect if the PIR sensor is active. If yes we activate a “movement detected” variable. While this is active, we make a loop where we play a scary sound and we blink the eyes LEDs with red color. We also move the jaw with the servo. When 9 seconds have passed, we reset the “movement detected” variable and it will wait again to detect movement. That’s it for the code. To move the jaw we must connect the servo to the plastic part. For that I will use some metal wire. Bend it and connect it to the servo in such a way that it will push and pull the jaw. The scary skull is ready for the first test, so let me close the top part and give it a run. By the way I’ve also 3D printed a support, so the skull will stay streight and not touch the table with the jaw.
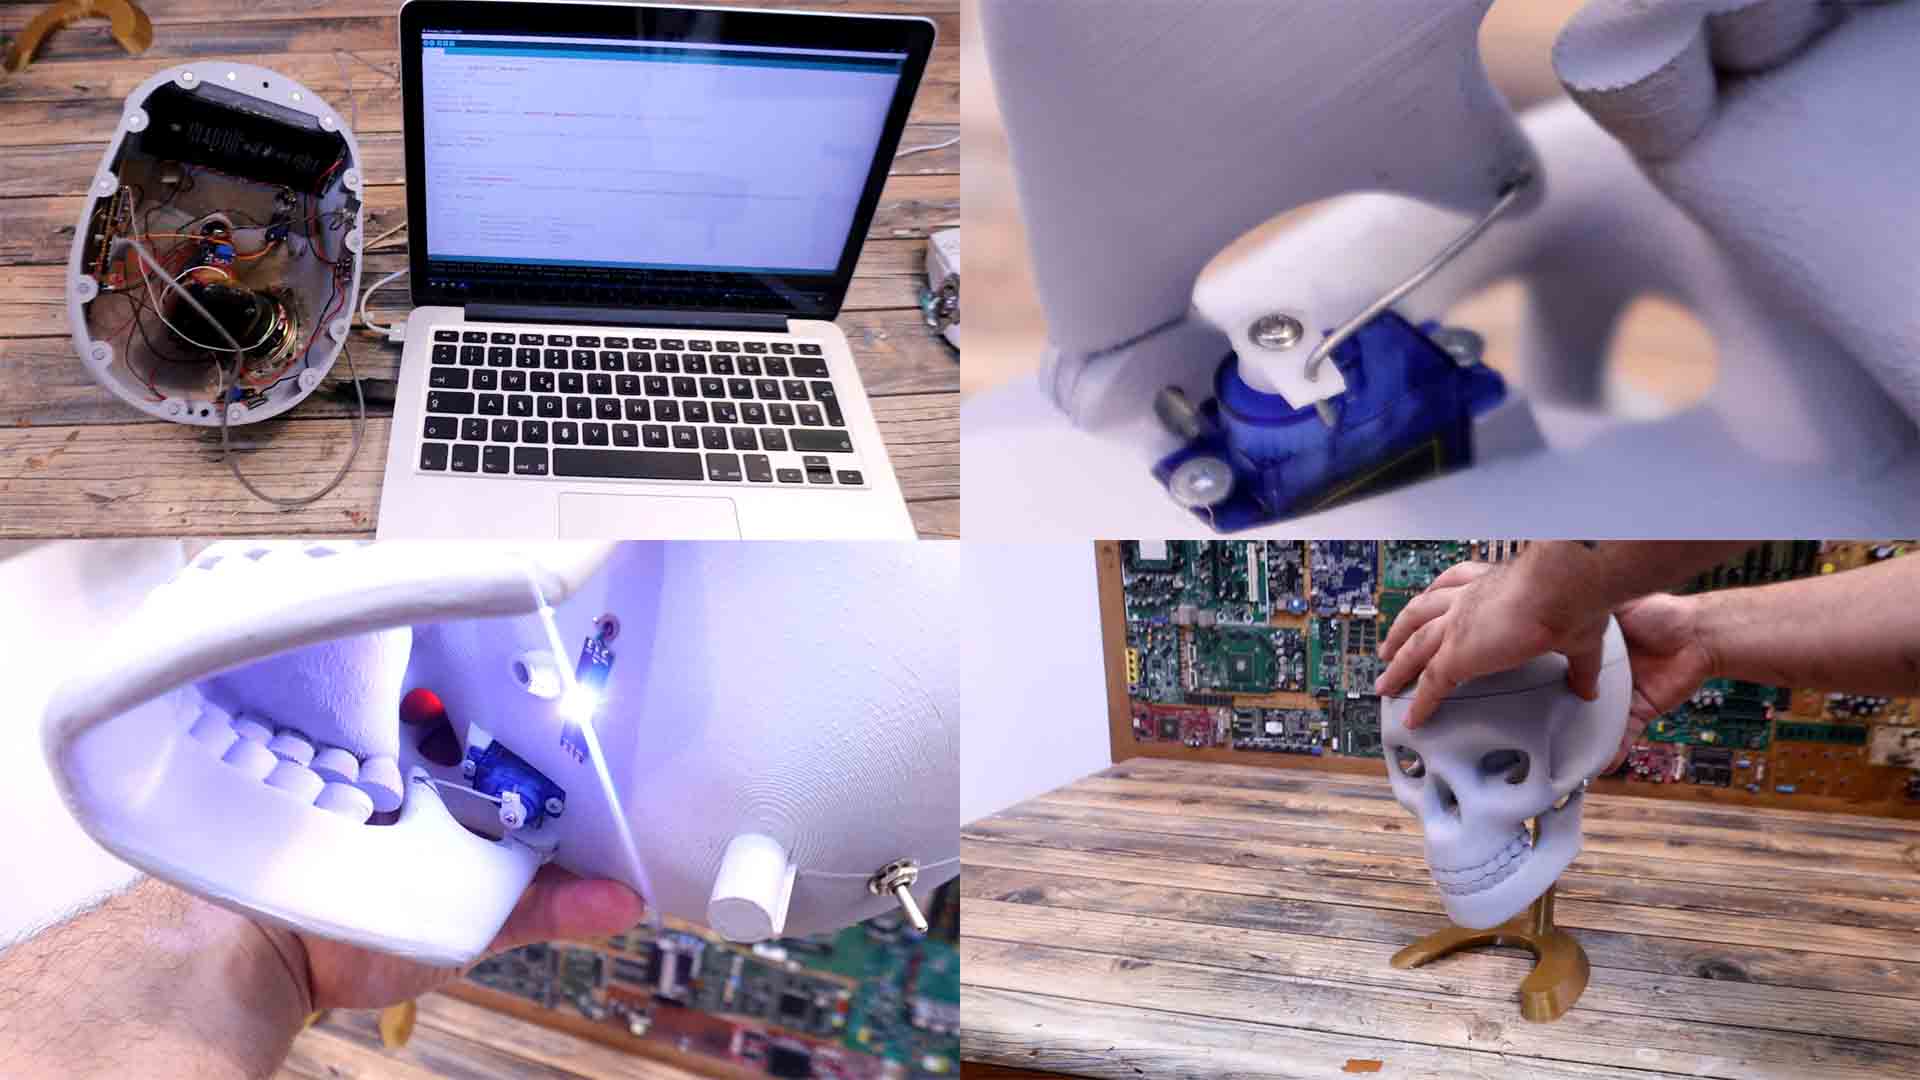
Flip the switch on the back. The welcome sound will play. Now when I move, this happens. We can hear an evil laugh and the eyes LED are blinking. For 3 seconds smoke will come out from below the jaw. You can see here how smoke is coming out so the mini smoke machine is working perfectly. Also, the bottom LED will turn white so we can better see the smoke. And on top of that the jaw will move up and down. Pretty cool, right?
Finally I’ve decided to use some acrylic paint and add some shadows and details. A bit around the eyes, between the teeth and some extra shadows and it looks like it was a bit dirty. Now it looks better. So guys, that’s how I’ve made my own automatic scary skull with a smoke machine, moving parts, scary sounds and flashing lights. You can easily open it with the magnet system. Then plug a USB cable and charge the battery. I hope that you like my design. You have everything here ready for download.
If my videos help you, consider supporting my work on my PATREON or a donation on my PayPal. Thanks again and see you later guys.