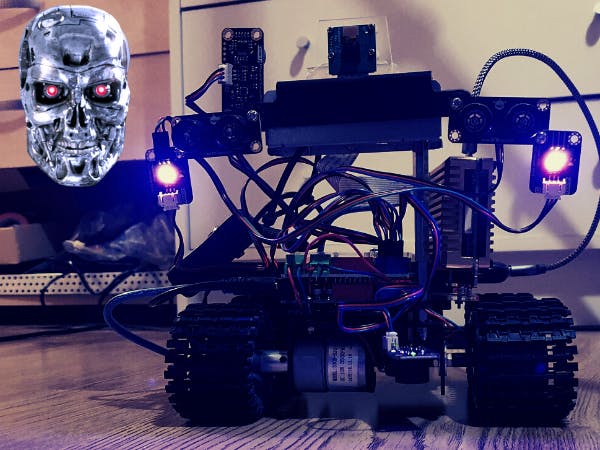
In the Terminator films we are given glimpses of the future wars; with bipedal robotic skeletons, flying drones and ground tanks (known as HK’s – Hunter Killers) hunting down humans – Check out the Terminator Wiki.
DFRobot contacted me the other month and asked if I wanted to try out some of their stuff – I had a look through their products and found this awesome robot chassis: Gladiator. They sent it to me and while building it I realised the design was starting to resemble a HK tank mentioned above:
So I decided to chuck some extra hardware at it alongside some cool machine learning stuff and really make a cool representation of the HK in Arduino/Raspberry Pi form.
So thanks to DFRobot for most of the gear in this project! Check them out at DFRobot.com
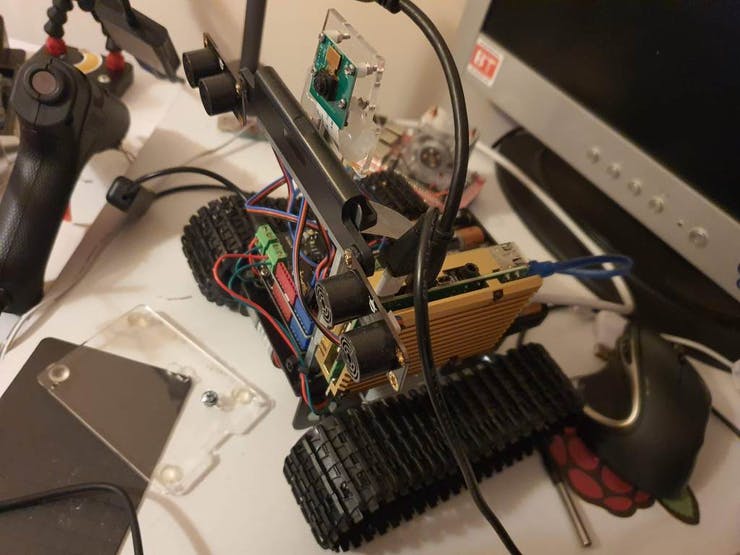
After this video I had to make some changes – I changed the quad motor driver to a dual-motor driver + IO expansion board from DFRobot: https://www.dfrobot.com/product-1667.html
This was because I wanted to power the motors from the main battery pack that was also powering the Arduino – the previous quad-motor board I believe required separate power for the motors and I didn’t want to have 3 power supplies (Arduino, motors and the Pi).
I also flipped the direction of the pylons so that the overall look matched that of the in-film HK’s more. With the majority of the chassis being behind the sensors rather than in front. I mounted the Pi camera on top of the pylon I made, also added in 3 more ultrasonic sensors; facing back, underneath front and underneath back. To prevent the HK from reversing into something or driving off an edge. Also added was 2 RGB LED’s that would act as ‘plasma cannons’ – being able to launch either red or purple plasma.
The base of the HK is built from the DFRobot Gladiator robot chassis – here is the construction video:
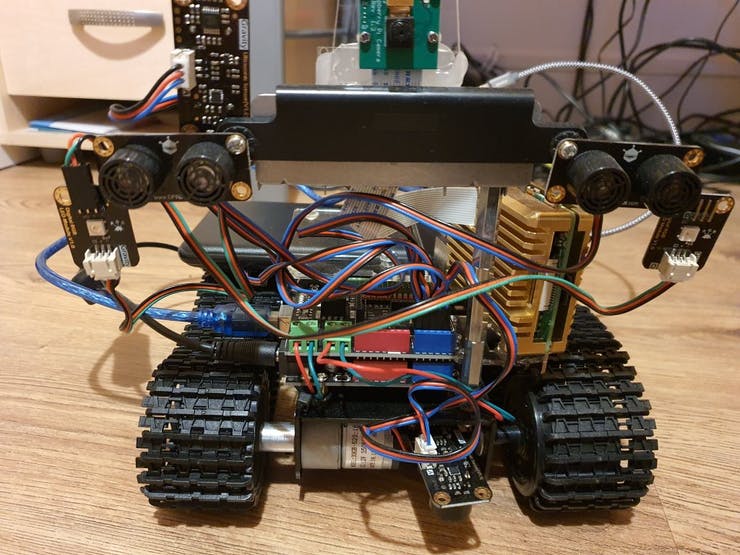
I mounted the Pi camera on top of the pylon I made, also added in 3 more ultrasonic sensors; facing back, underneath front and underneath back. To prevent the HK from reversing into something or driving off an edge. Also added was 2 RGB LED’s that would act as ‘plasma cannons’ – being able to launch either red or purple plasma. After some motor tests I soldered the wires up to the motors. I moved the battery box slightly from the video also – to make room for the power supply that will be powering the Pi 4, this Pi iteration requires a lot of power so I got in a huge power bank that can supply 3 amps.