Welcome to another Arduino 101 video. As always, in these posts we do something more than just basic Arduino programming. Today we will see something that even myself didn’t know was possible. Instead of writing a code to the Arduino, we will see how to extract an existing code from the Arduino and save it in a hexadecimal format, which basically means 1s and 0s (Actually .hex has letters too). I will show you how a code is stored or burned to an Arduino and what software we need to extract it back. Then I will show you how to write back that extracted code to the Arduino. Sounds interesting? So, let’s get started.
Use the link below and download the AVRDUDESS software. It will be inside of a .zip file so make sure you extract it. Then double click it and install it. Now we could use it to comunicate with an Arduino using an ISP connection.
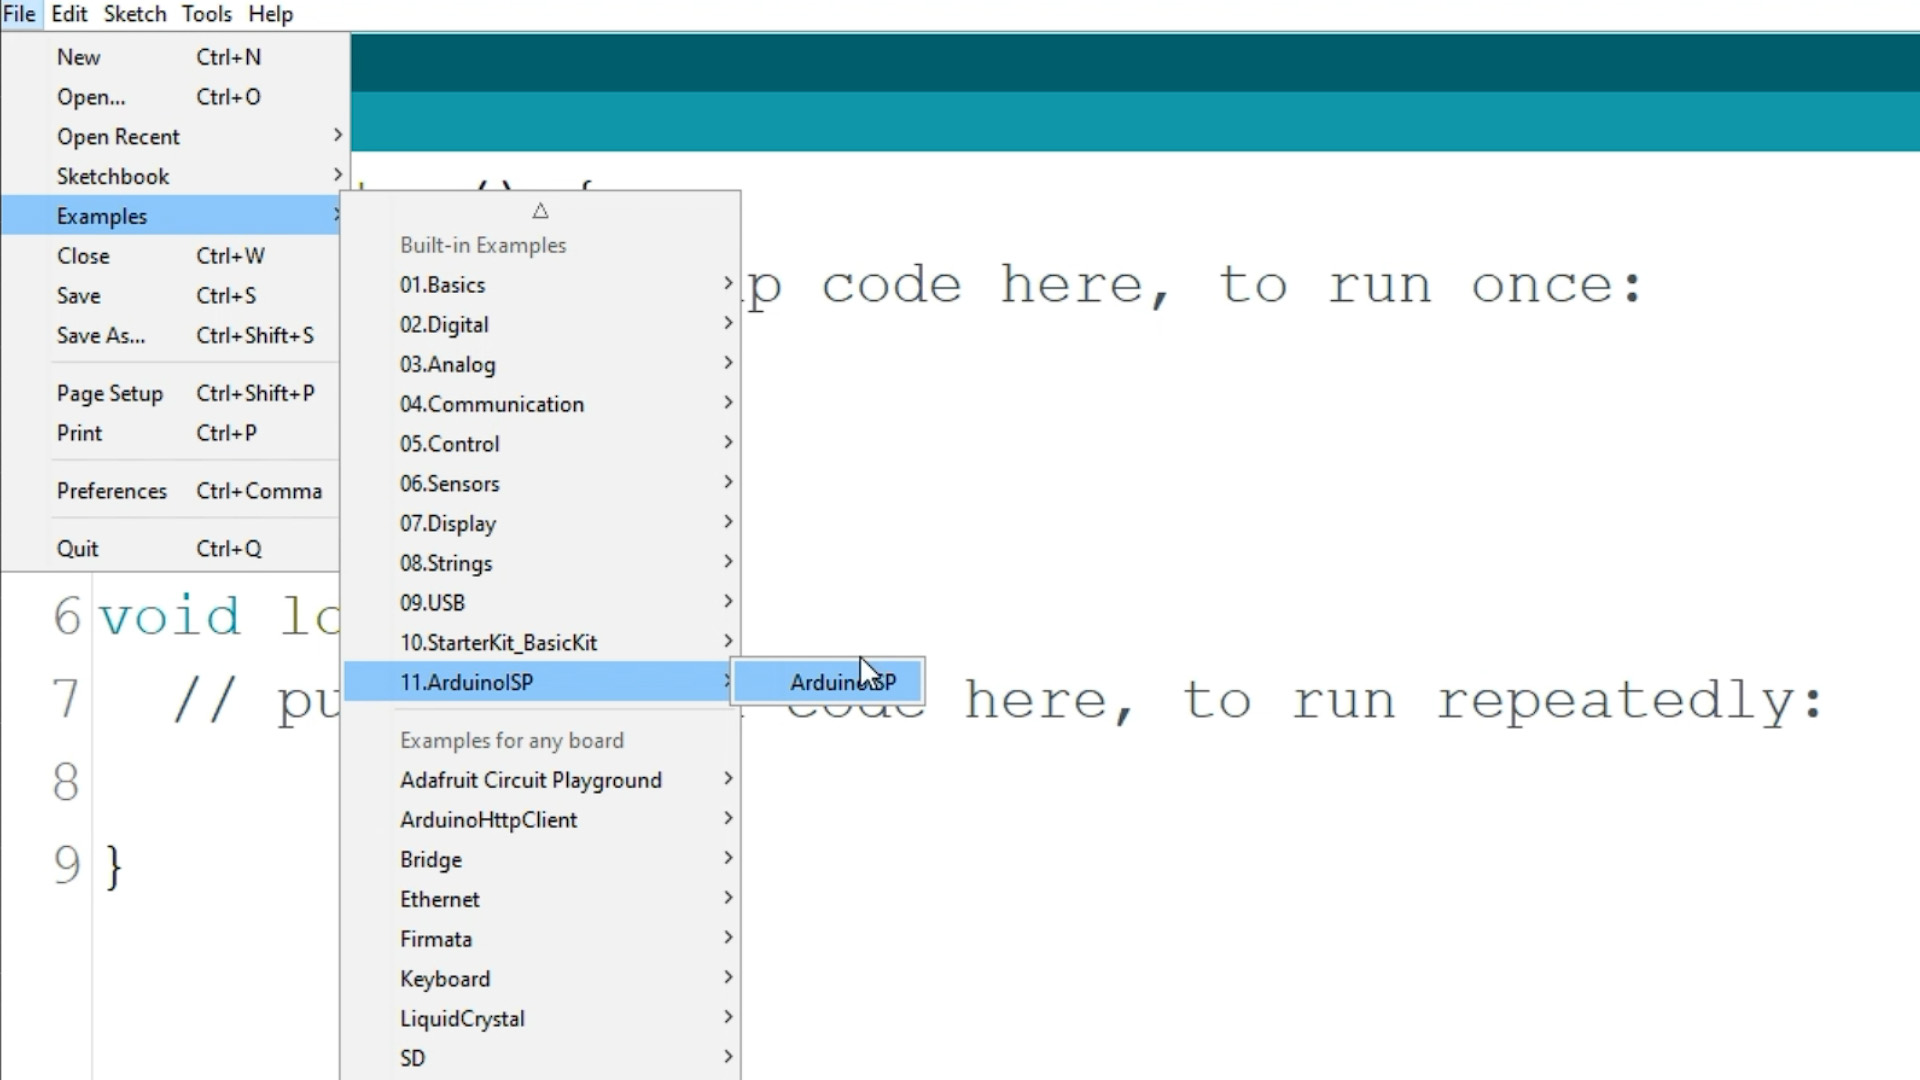
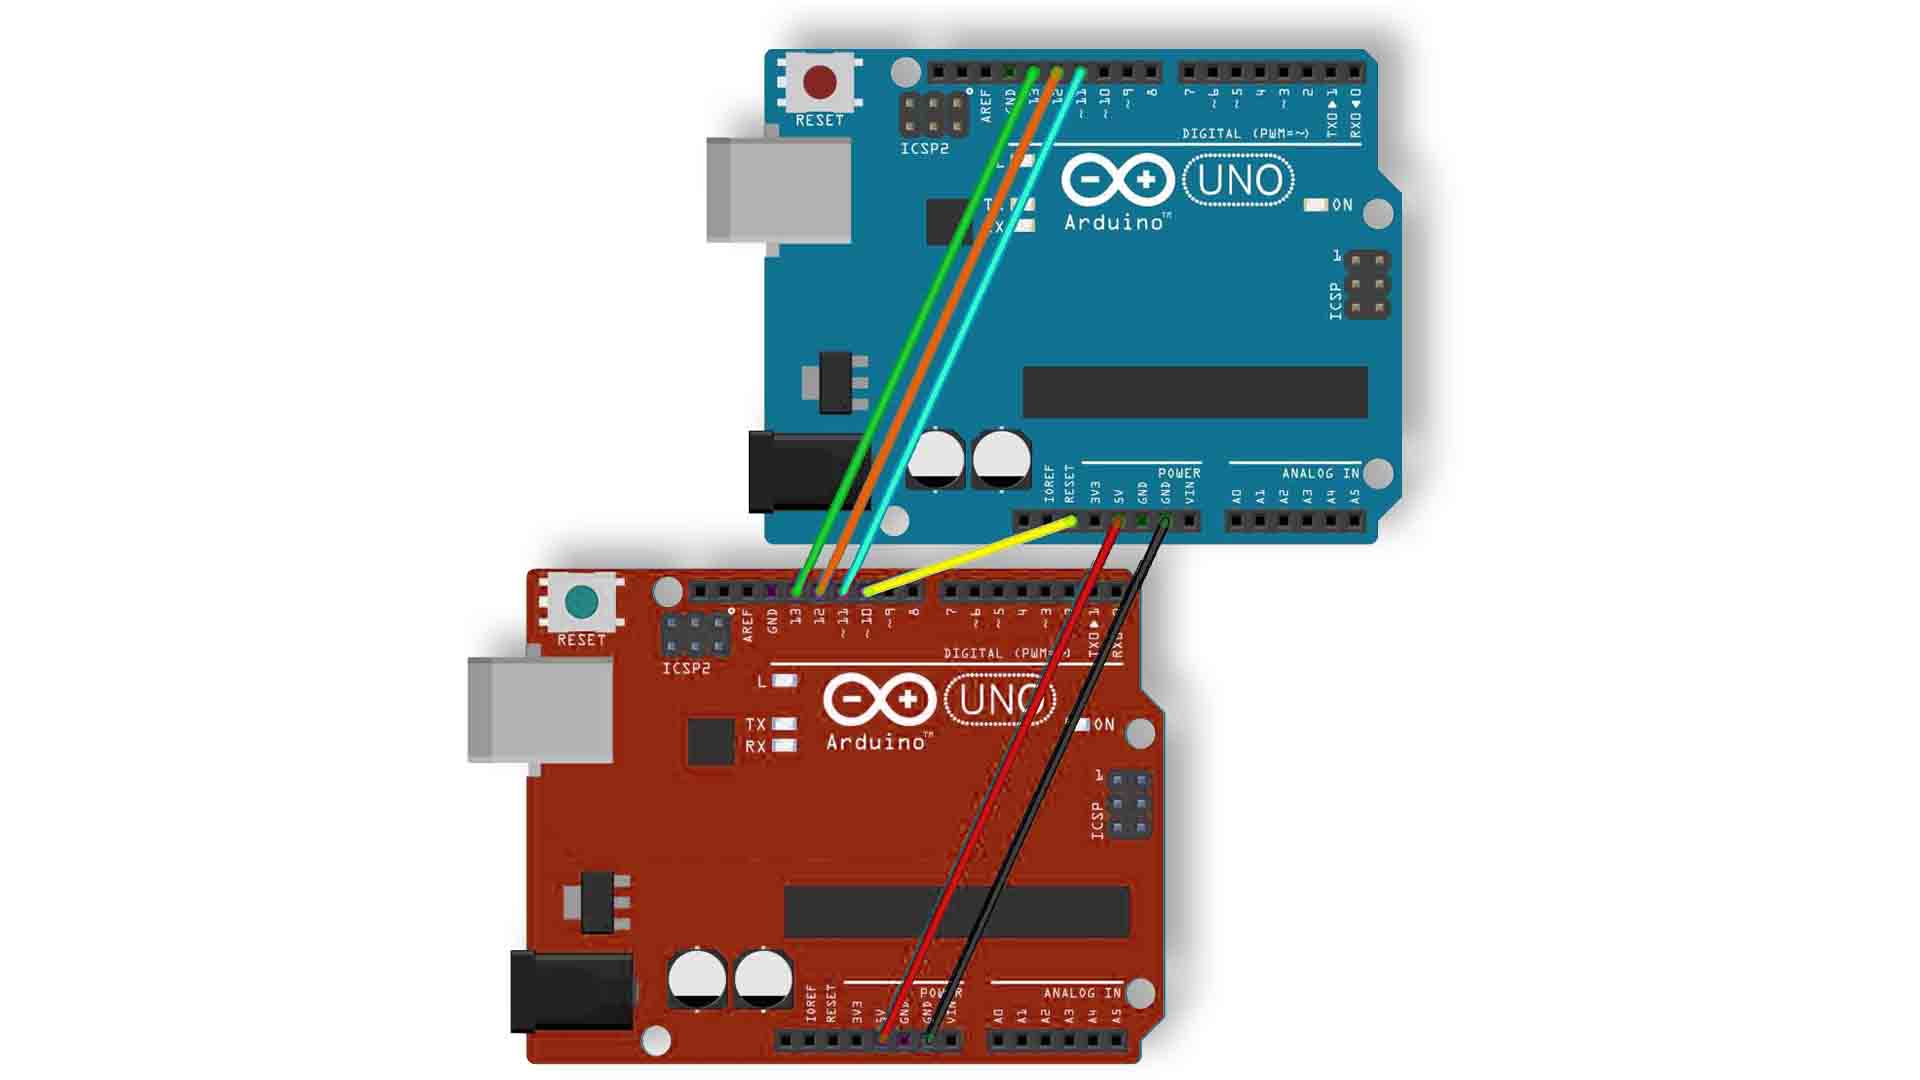
Tomcommunicate with the ATMega chip we need an ISP communication. You could use an ISP programmer like this one, but to make it easier, we will use another Arduino as an ISP programmer. For that we need to upload the ISP example code to a normal Arduino UNO. I will name the programmer arduino as "master" and the Arduino from which we get the code, we name it "salve". First, get the "master" Arduino, connect it to your PC and run the Arduino IDE. Here, we go to file, examples, Arduino ISP and open this example code. Select Arduino UNO board, compile and upload this code to the master Arduino. And just like that we make it act as an ISP programmer.
Now make these connections from the master Arduino to the Arduino from which we want to extract the code. These are the ISP communication pins. Then get back to AVR DUDESS software.
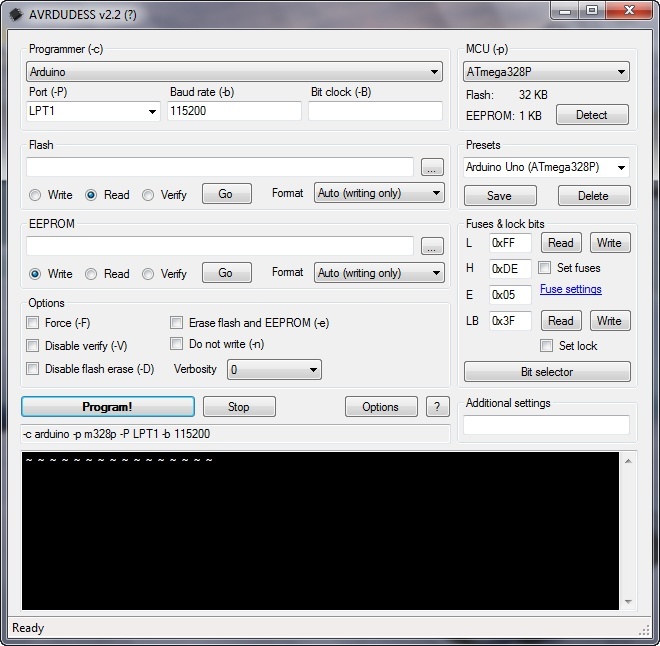
For programmer, obviously, select Arduino. Make sure you have the master Arduino USB connected to your PC. In the com list, select the com of the master Arduino, in my case is this one. For the baud rate I set it to 19200 but in your case it might be 115200 since I’ve seen some models working at a different speed. On the right side, for MCU select the ATMega328p because the Arduino UNO is using that chip. Now click detect, and if the ISP connection between the master Arduino and the code Arduino is good, you should get an "ATMega328 detected"" message.
Ok, so as you can see we can access the flash memory where the code is, the EEPROM memory and the fuses configuration.
To read the code, select the "read" check box for the Flash tab. For the format select intel hex for hexadecimal. Click the 3 dots and select where you want to save the code file. I give it a name, for example in my case I name it blink 100ms dot hex, and save it in a folder on my PC. Now that you have the file root, make sure you have all the settings as I have and click go. The code is now extracted from the blue Arduino.
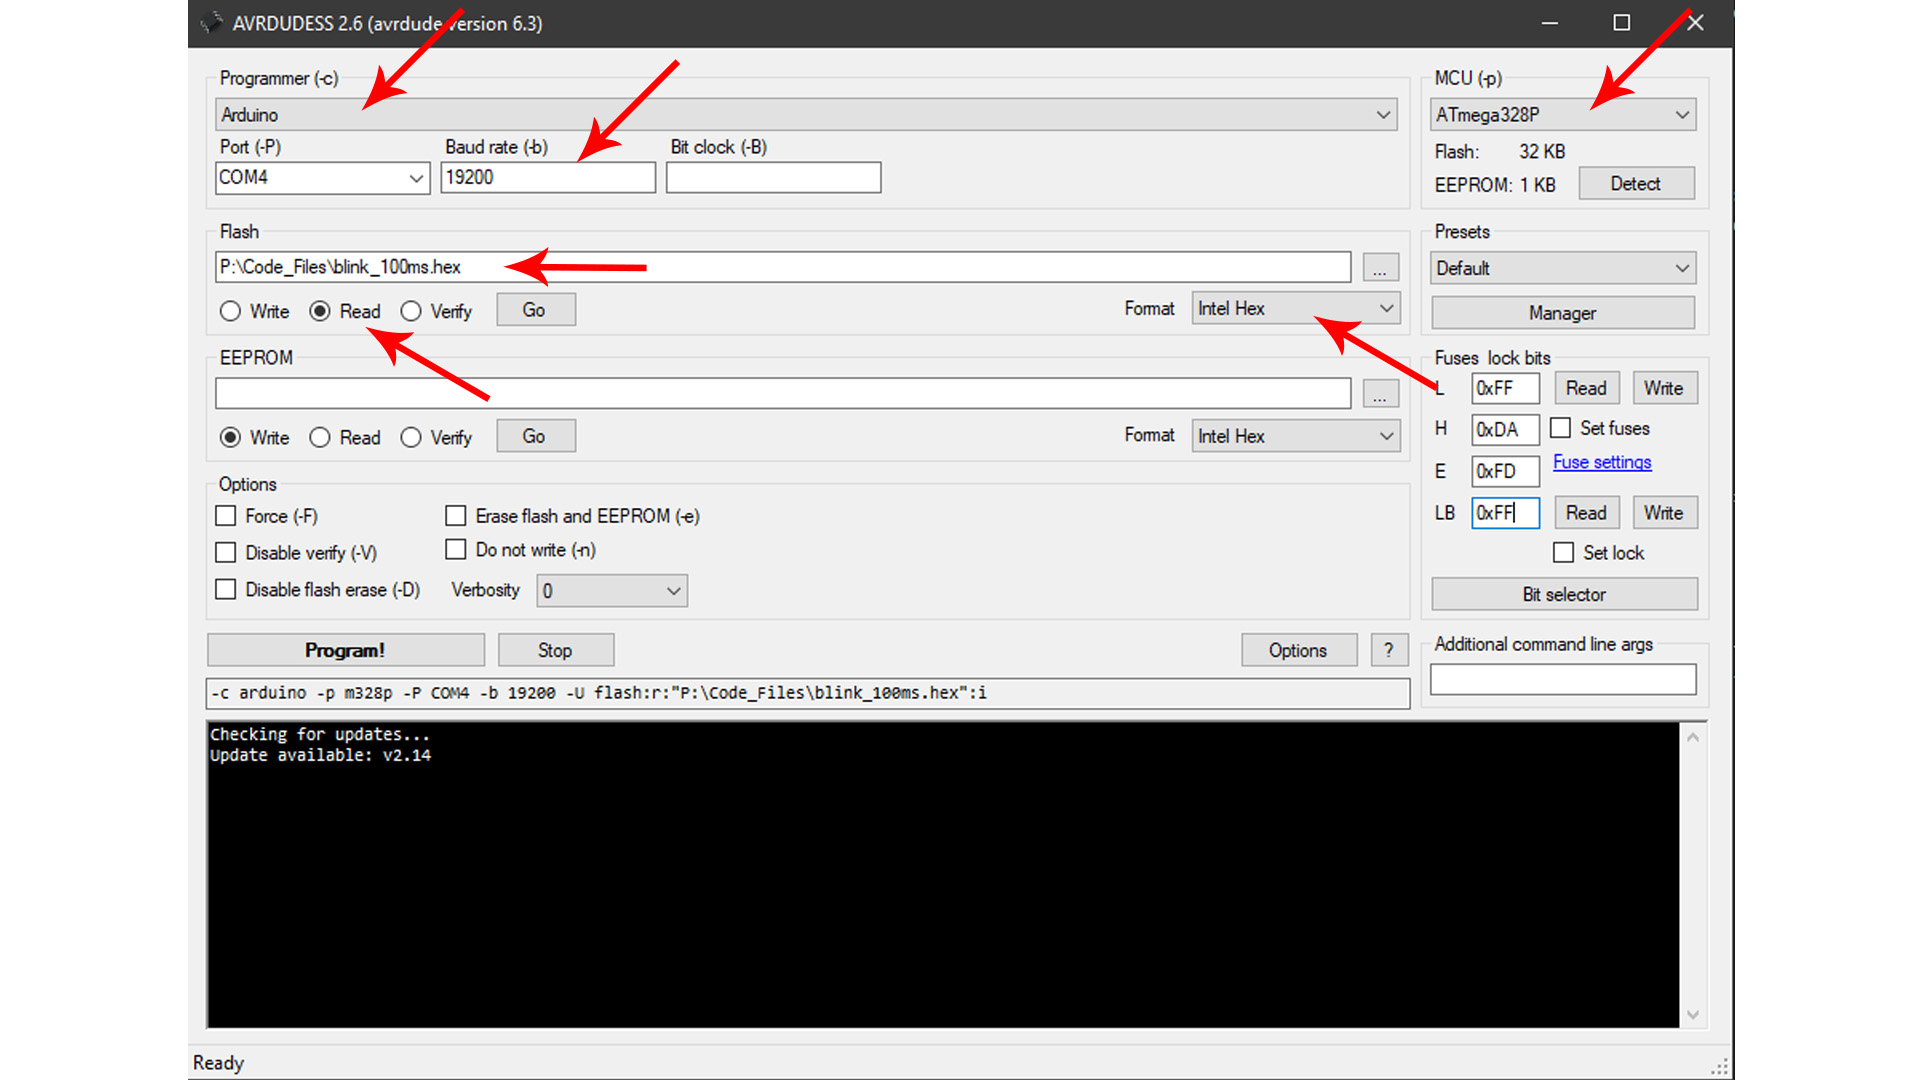
To extract the EEPROM is the same. Just go to the EEPROM tab and check the read checkbox, give the file a name and save it to a folder and click go. For the the fuses we have 2 buttons. These fuses are like switches and they could be 0 or 1 and they basically control the configuration of the microcontroller. For Arduino we have the low fuse byte, high fuse byte, extended and the LB fuse. So, in the AVR software, click the read button next to the fuse bits and get the values. There is no way of storing this so you must write down these values, maybe open a notepad and paste the values there. In the example above the fuse values are 0xFF, 0xDA, 0xFD and 0xFF. Ok, now we have the fuses.
To upload back the code, the EEPROM memory or write back the fuses, just click the "write" checkbox for each part, select the .hex file, make sure all the settings are correct for the MCU type and speed, check the erase flash and EEPROM checkbox and click go. The code will be uploaded back to the Arduino.
If you want to fully copy and upload a code, you must re-upload all the parts (Flash, EEPROM and fuses). So, get the fuse values from your notepad file you've stored before. Place them in the AVRDUDESS software and check the set fuses check box. Then select the hexadecimal file (.hex) of the code and check the write checkbox. Then select the EEPROM file (.eep) and also check the write checkbox. Make sure all the settings are correct for the MCU type and speed, check the erase flash and EEPROM checkbox and click program. Now, all 3 parts are uploaded to the slave Arduino.
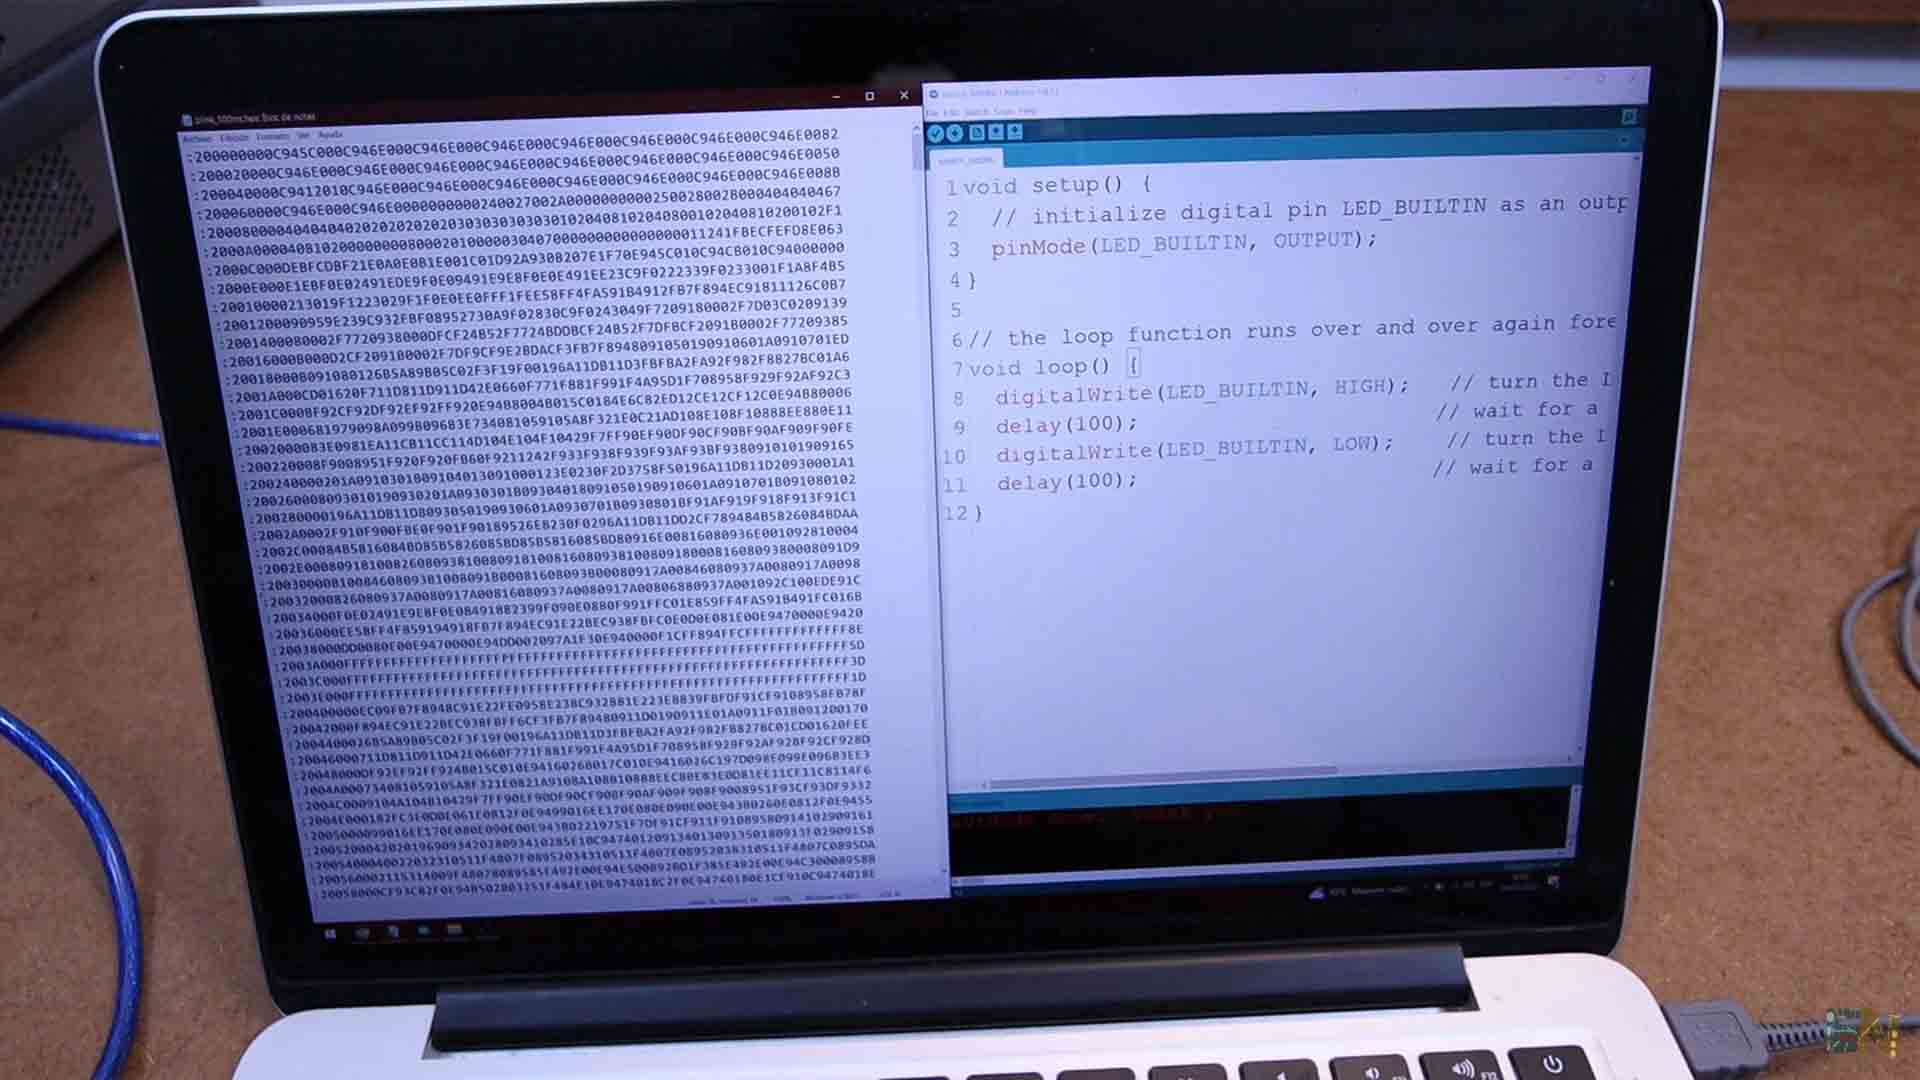
Have in mind that you will only have access to the hexadecimal format of the code. You won’t be able to edit this code in Arduino IDE for example. You can only copy it and upload it again, without editing the code. And you can do this with Arduino UNO, an Arduino NANO or even to an ATmega328 chip that is soldered to a prototyping board. All you need is access to the ISP pins.
If my videos help you, consider supporting my work on my PATREON or a donation on my PayPal. Thanks again and see you later guys.