
 About me
  History
  Let's learn
  Contact us
  Arduino tutorials
 Circuits tutorials
  Robotics tutorials
 Q&A
Q&A Blog
Blog  Arduino
  Circuits
 Robotics
  Modules
  Gadgets
  Printers
  Materials
  3D objects
  3D edit
  Donate
  Reviews
  Advertising


EleksMaker A3 laser engraver
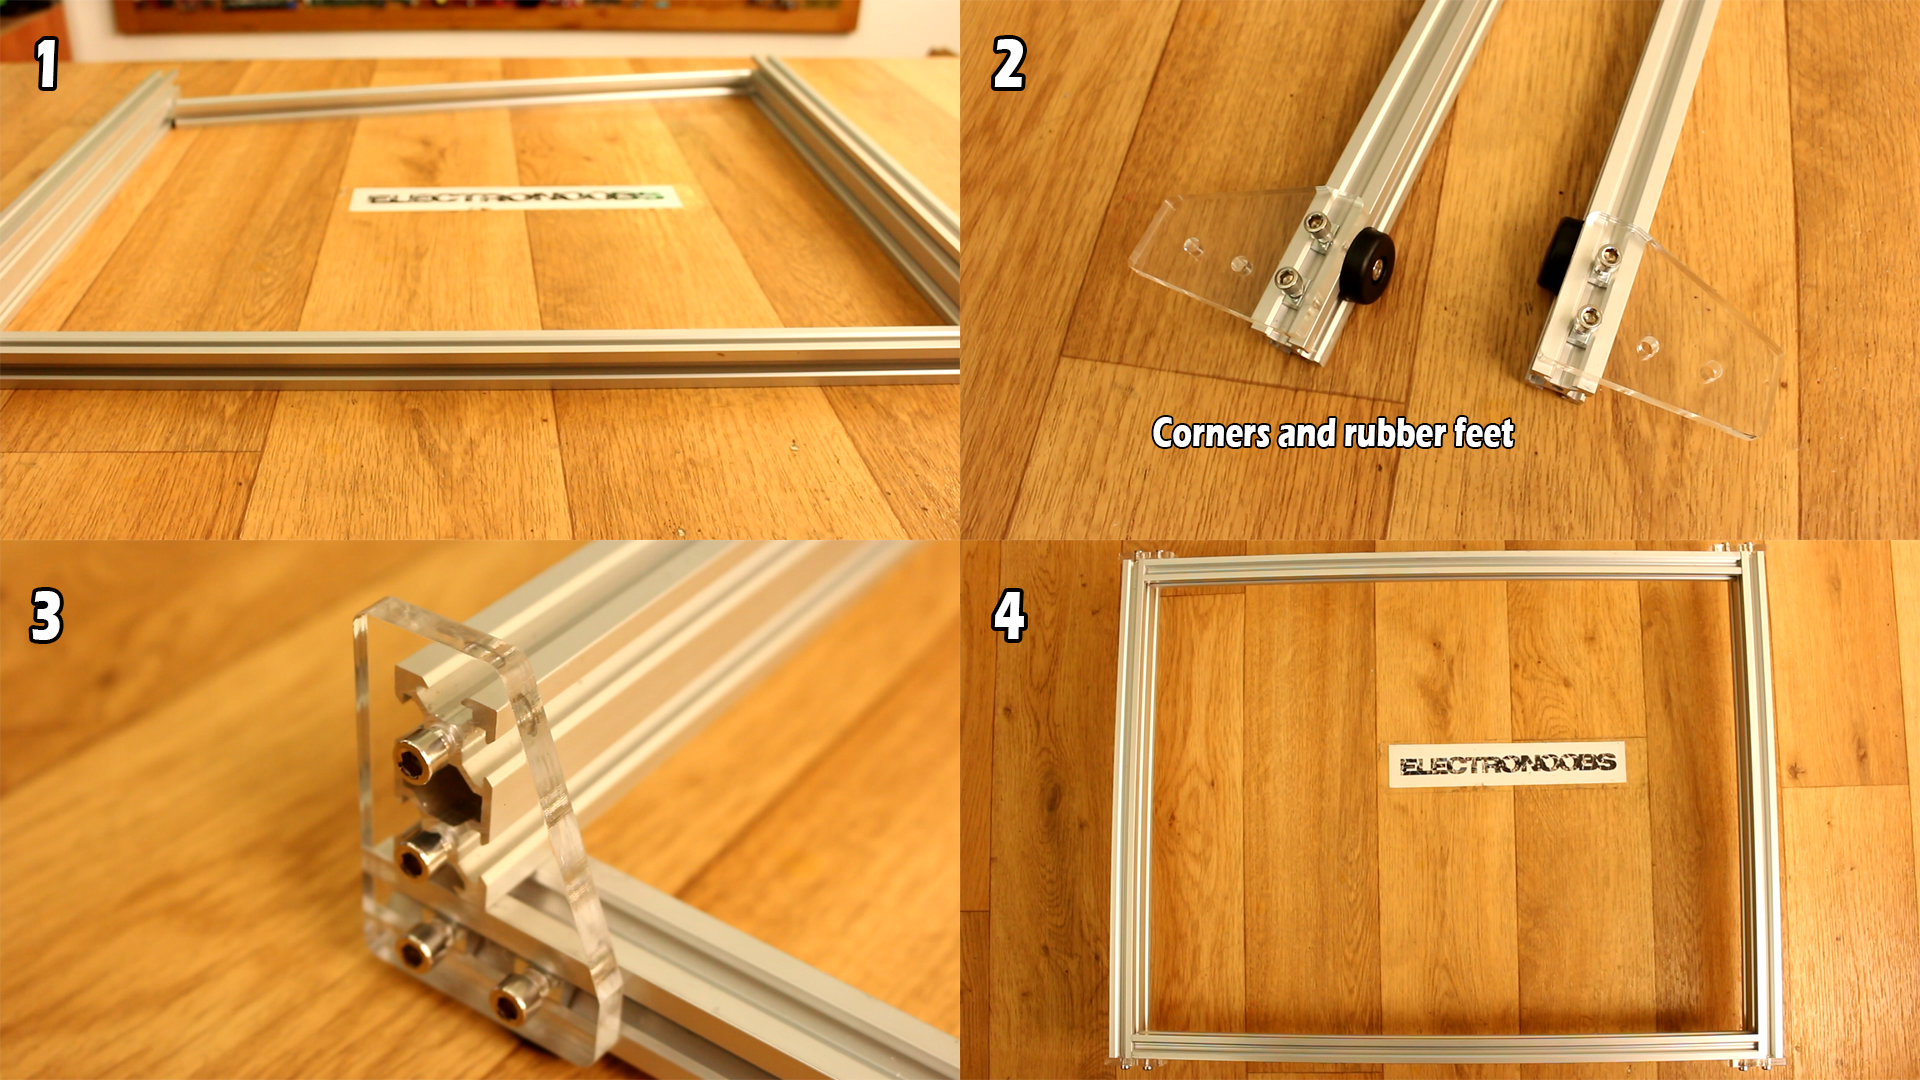
Mounting the frame
As you can see we have few parts so this should be quick. Before we start peal all the acrylic parts. Ok so first we mount the metal frame. For that we will use the 4 metal bars below and the acrylic corners.
I first add two M5 screws to the acrylic parts and fit those parts on the long metal bars. I also add the rubber feet using the same m5 screw. Once I do that to both sides of the bar I place two nuts on each bar since I’ll need those for the belt grip pieces later. Now I close the frame with the thick metal bars and we should have the main frame of the machine.
Coupons
EleksMaker A3 best price
Creality Cr10 gold best price
Creality Cr10 blue best price
TronXY x5 best price
Tevo Tarantula best price
The X axis
Once the main frame is ready we prepare the Y axis supports with all the wheels and the step motors. We first add the step motor in place using m3 screws. Once that is done we add the 4 rollers using M5 screws and nuts. Leave the bottom rollers loose so we could later fit them on the metal bar. Do the same for the other side and we are done.
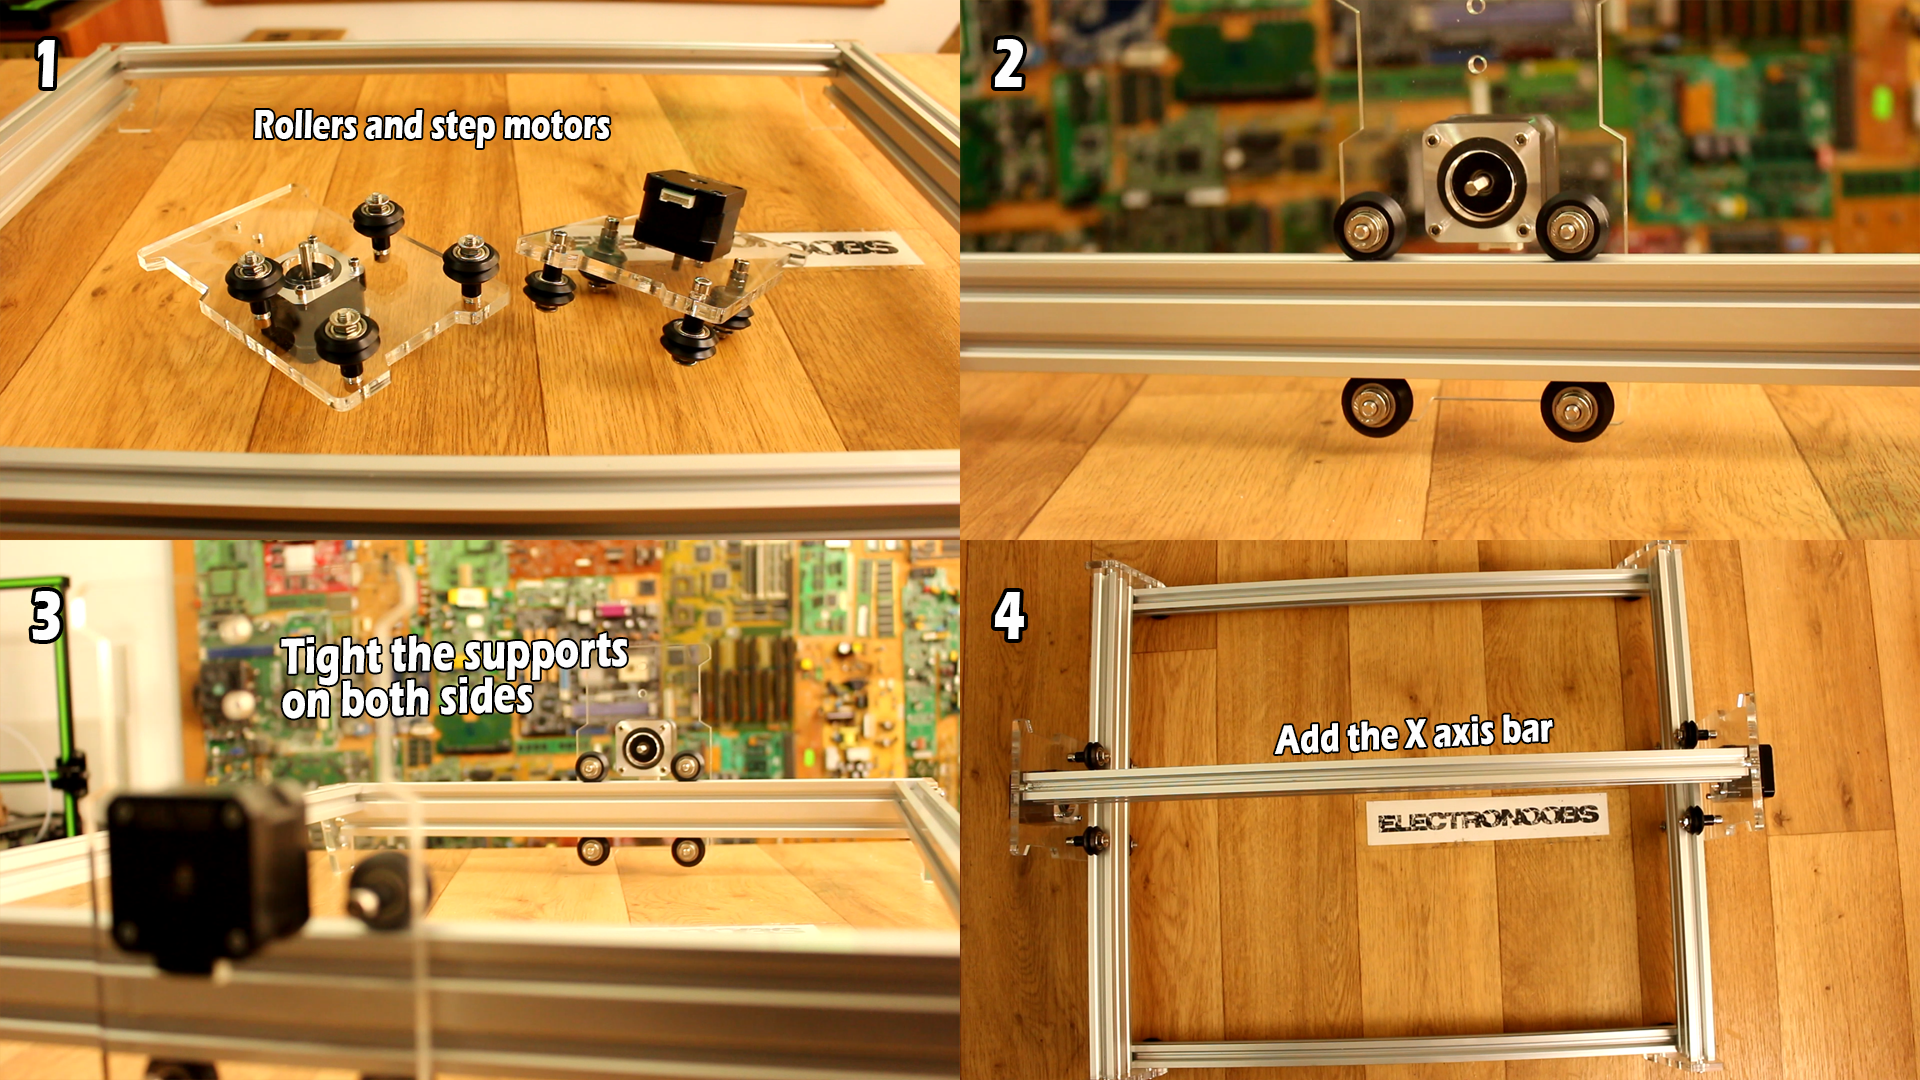
Now place the supports on the thick metal part of the frame and tight the screws so the rollers will move smooth. Is now time to add the X axis bar between these two supports that we have just added. Fit the bar in place using M5 screw and don’t forget to add two nuts for the belt grippers later on the bottom part of this metal bar. Make sure that everything moves smooth and we are done.
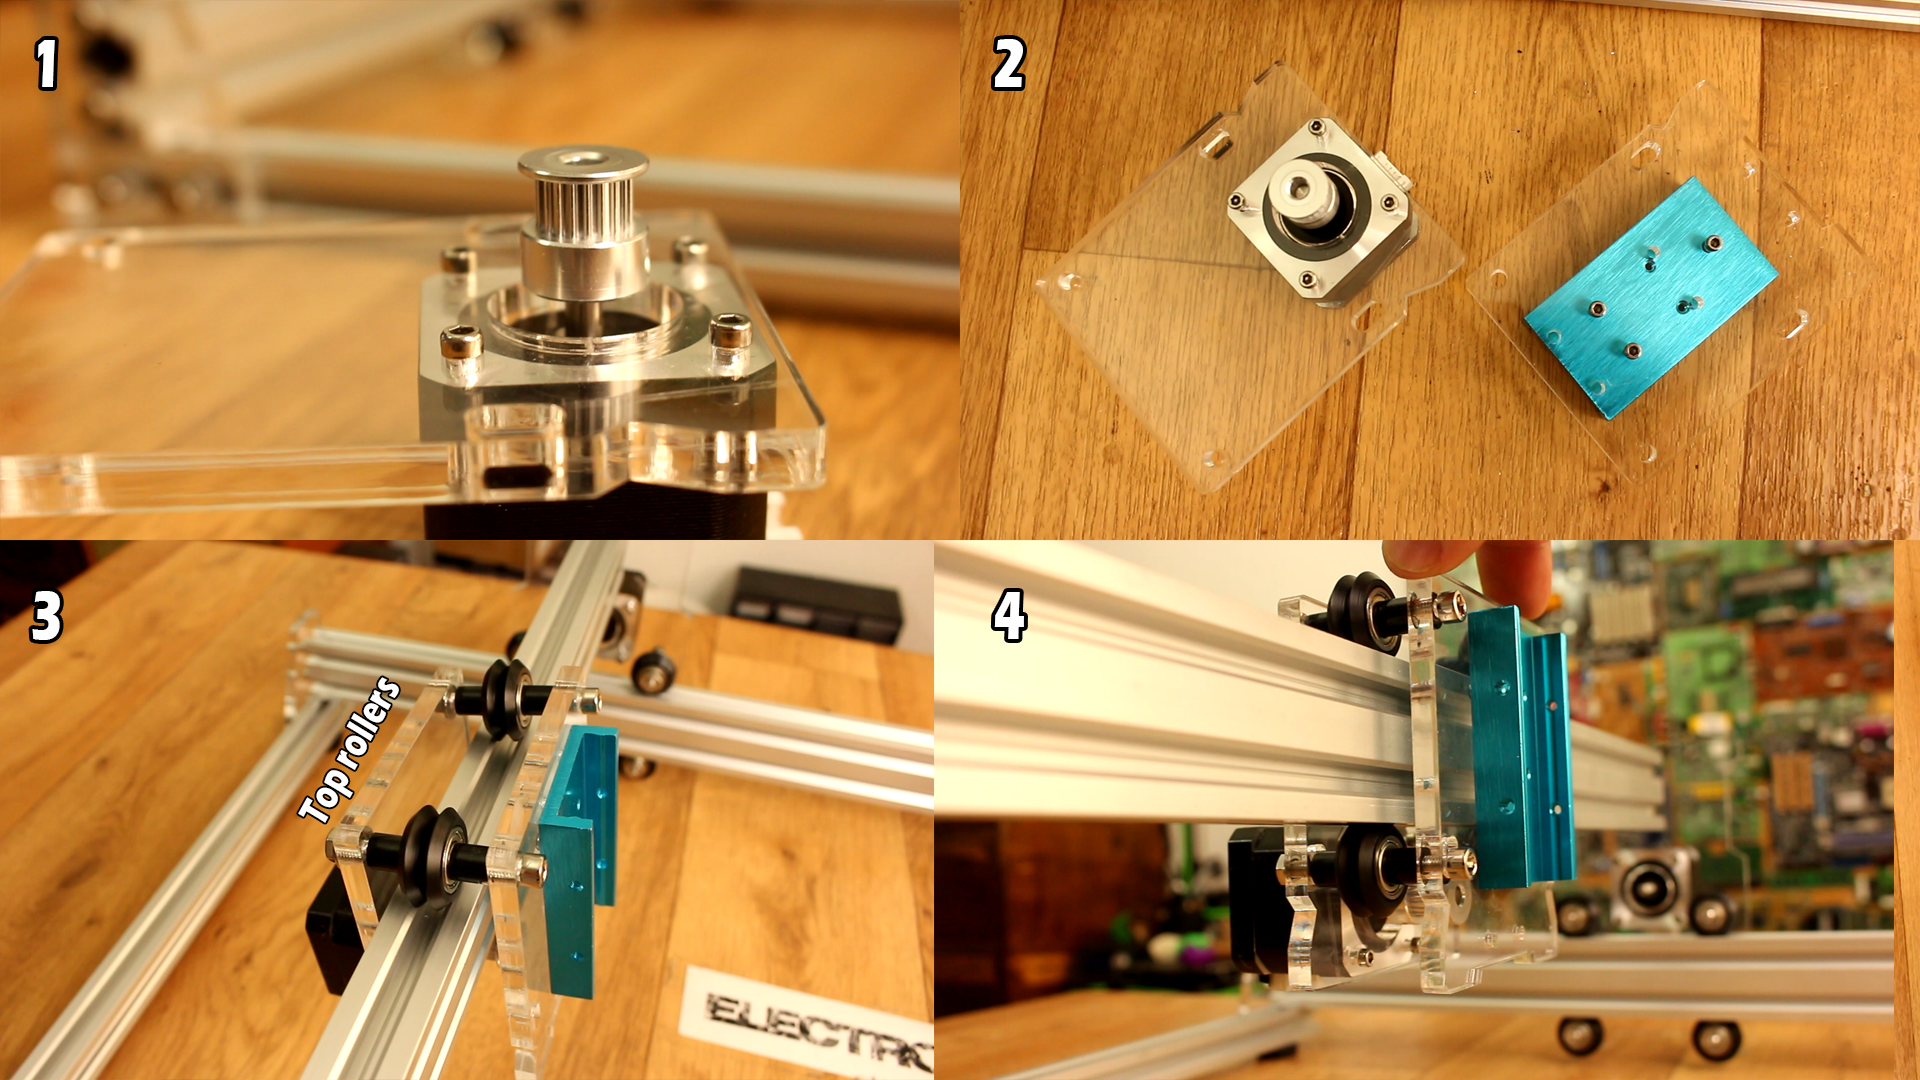
Now let’s prepare the X axis support for the laser module. As before, we first add the step motors and the metal support for the laser on the other acrylic part. Now we join both parts together with long M5 screws and the top rollers in between. Don’t forget to add the pulley to the motor before you close this part on the metal bar. Finally add the bottom rollers, tight the screws and we are done. Make sure that the axis will move smooth.
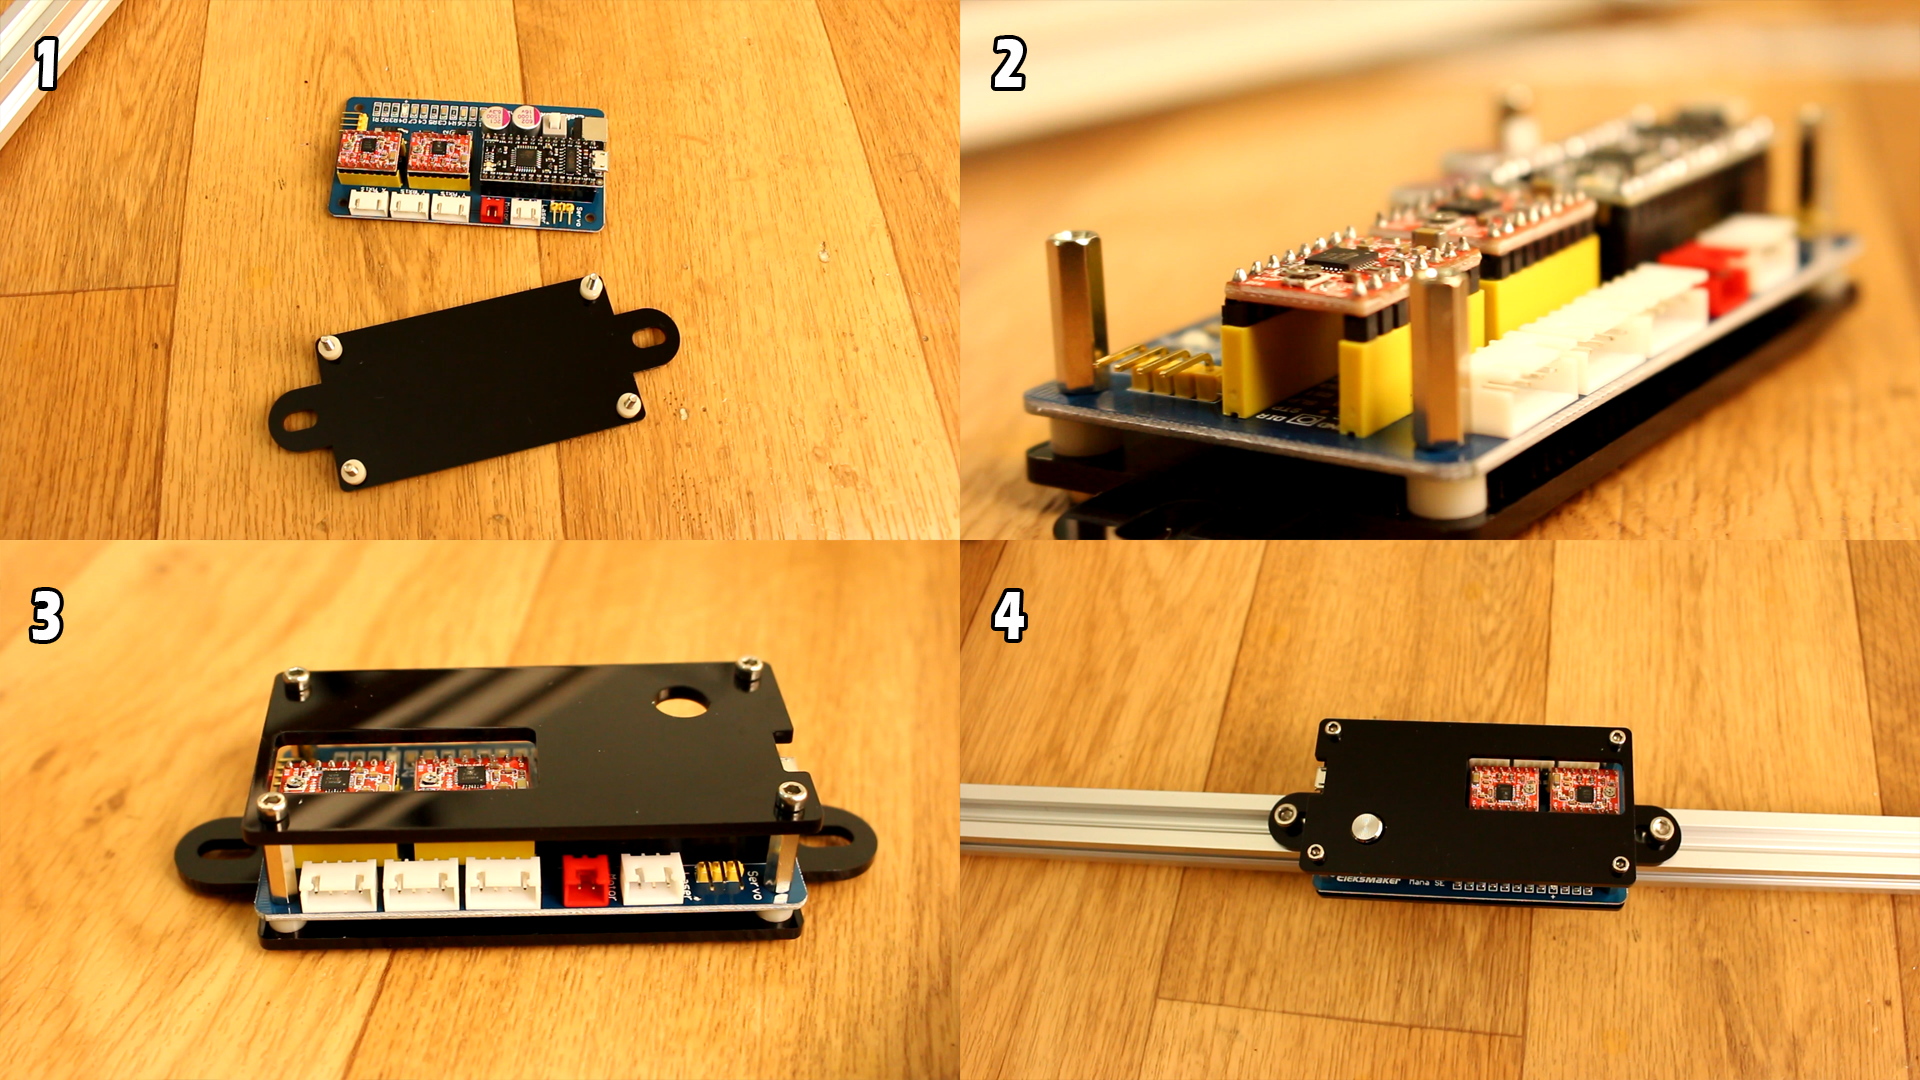
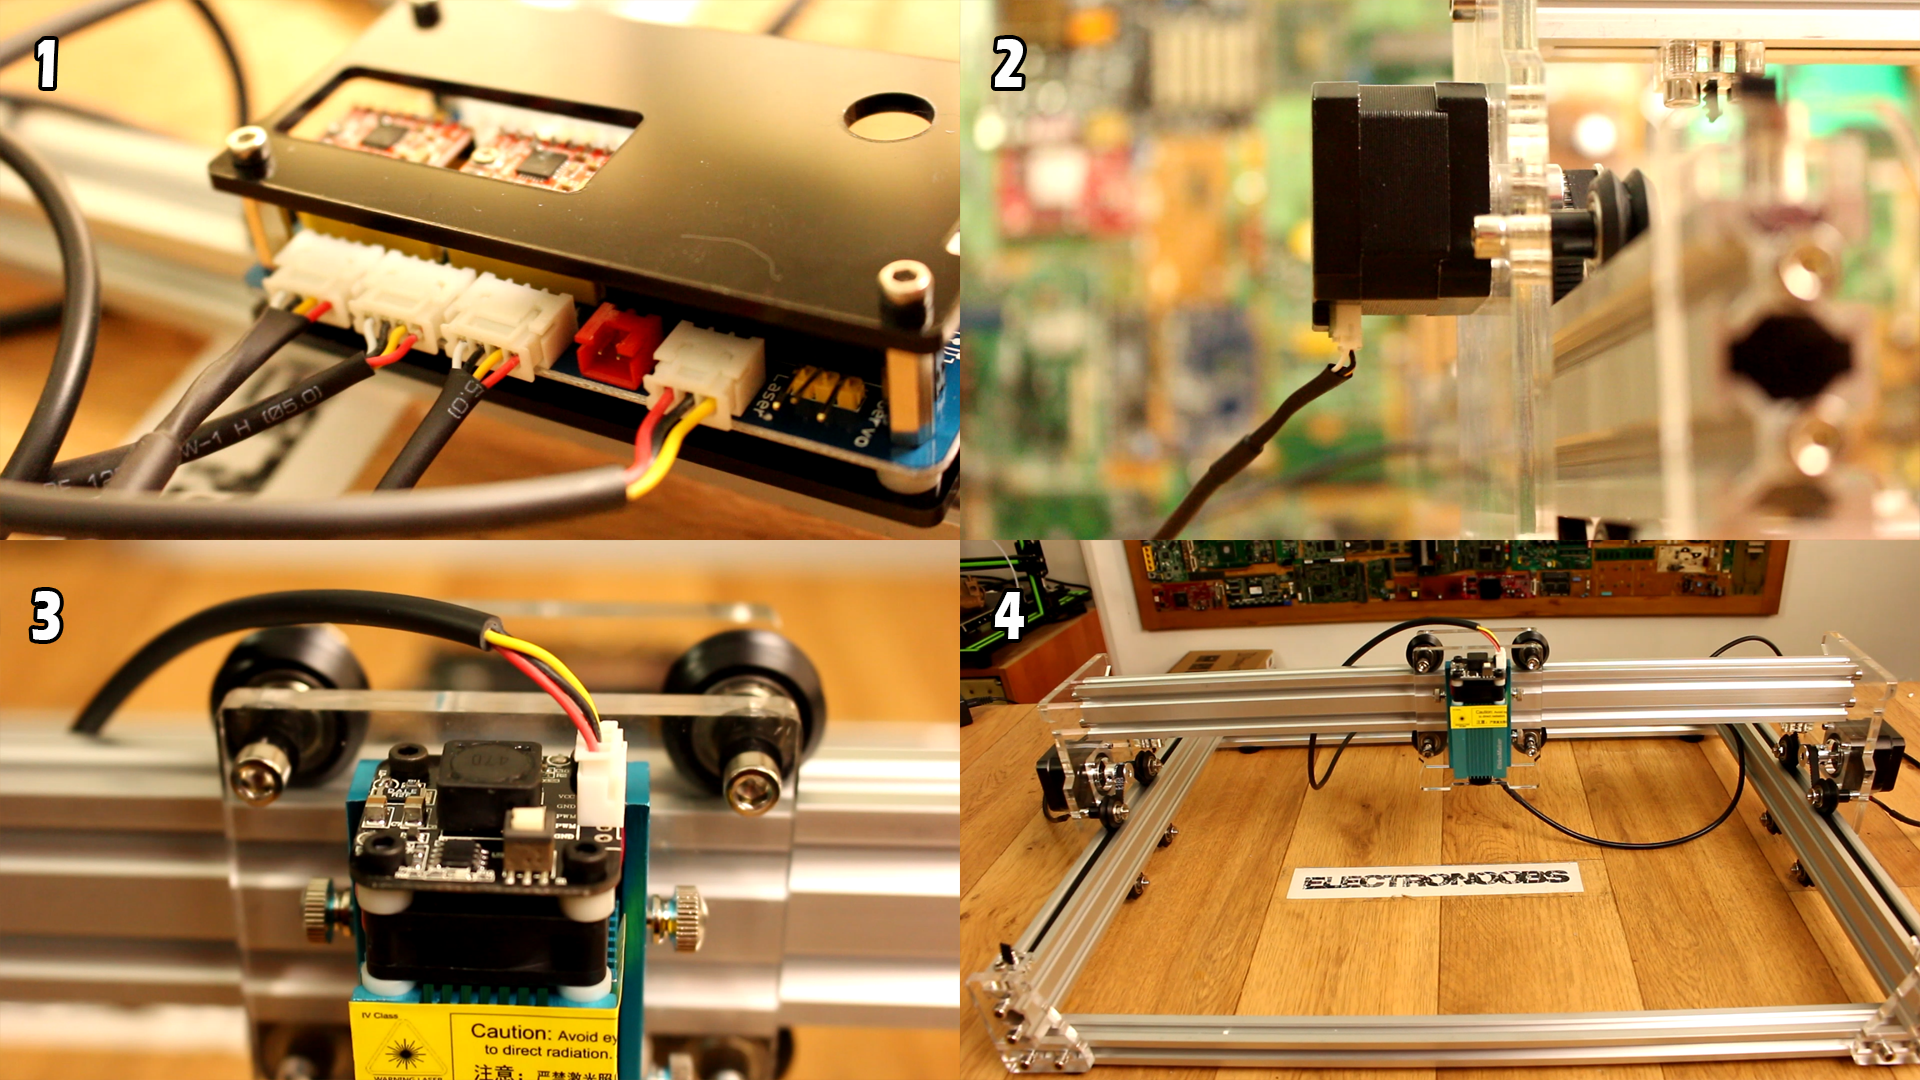
The next thing I did was to add the main board on the black acrylic part with screws and plastic spacers. Once that was done I’ve placed it on the back metal bar of the machine. Now install the laser module on the X axis support and tight the screws.
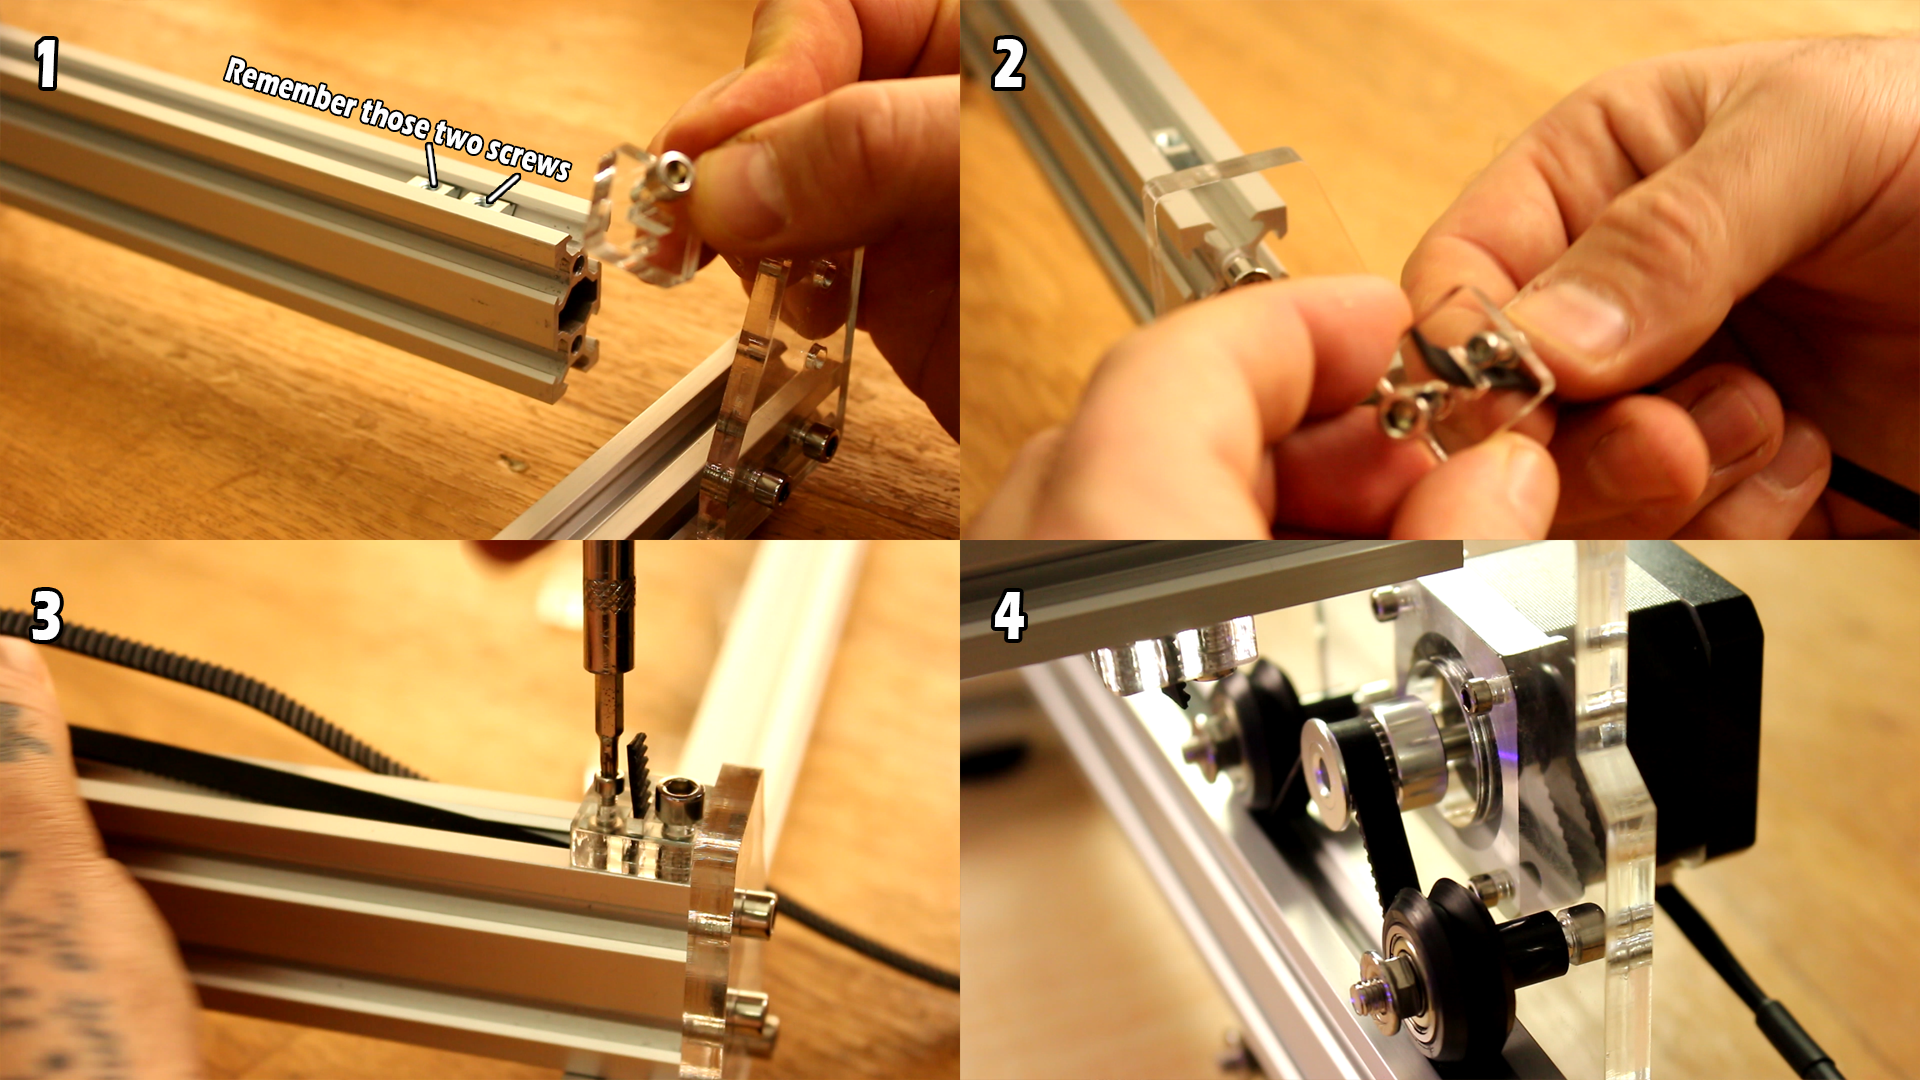
Is time for the belts. Using the belt grippers, add a m3 screw to each like this. Now pass the belt through the hole and tight the screw on to the metal bar like this. Pass the belt below the rollers and above the motor pulley and tight it on the other end of the bar. Cut the excess when all the screws are tight. Do the same for the other side and for the X axis as well.
Now let’s connect all the wires. We have two wires for the Y step motors, one for the X motor and one for the laser. Our CNC machine is ready and looks very good. I plug the adaptor and connect the 12V to the main board. Now everything is powered. Is time to put the safety glasses because this machine is quite dangerous. Connect the USB to the board and to your PC. I order to protect my workshop table I’ve placed a sheet of plywood beneath the machine and now we are ready to start.
The softer that I first tried is EleksCam since this is the one recommended with this machine. You have the software below ready to download. I’ve installed the software following the guide and I’ve successfully connected to the machine. As you can see I can move the axis or activate the laser but when I send the file to be printed the machine won’t move. I’ve tried to solve this problem but with no success.
So, I’ve decided to use another software called BenBox. But for that we have to upload another code to the main board of the machine compatible with this software.