I've used some commercial Sony Headphones that were wireless but based on FM, so there was a lot of hiss sound. So, I've made my own homemade Bluetooth based Headphones with a 3D printed case. Ther don't look as good and the sound quality is not perfect, but they work for me and I have no more hiss sound. See in thius tutorial the part list, the schematic, the 3D files for the headphones and the circuit for this project.
Below you have all the parts needed for the homemade bluetooth headphones project. You could also use other amplifier or speakers if you want but make sure the size is good so they will fit inside the case. Also, you could the case from some other old commercial headphones instead of the 3D printed one. Check the list below and make the circuit.
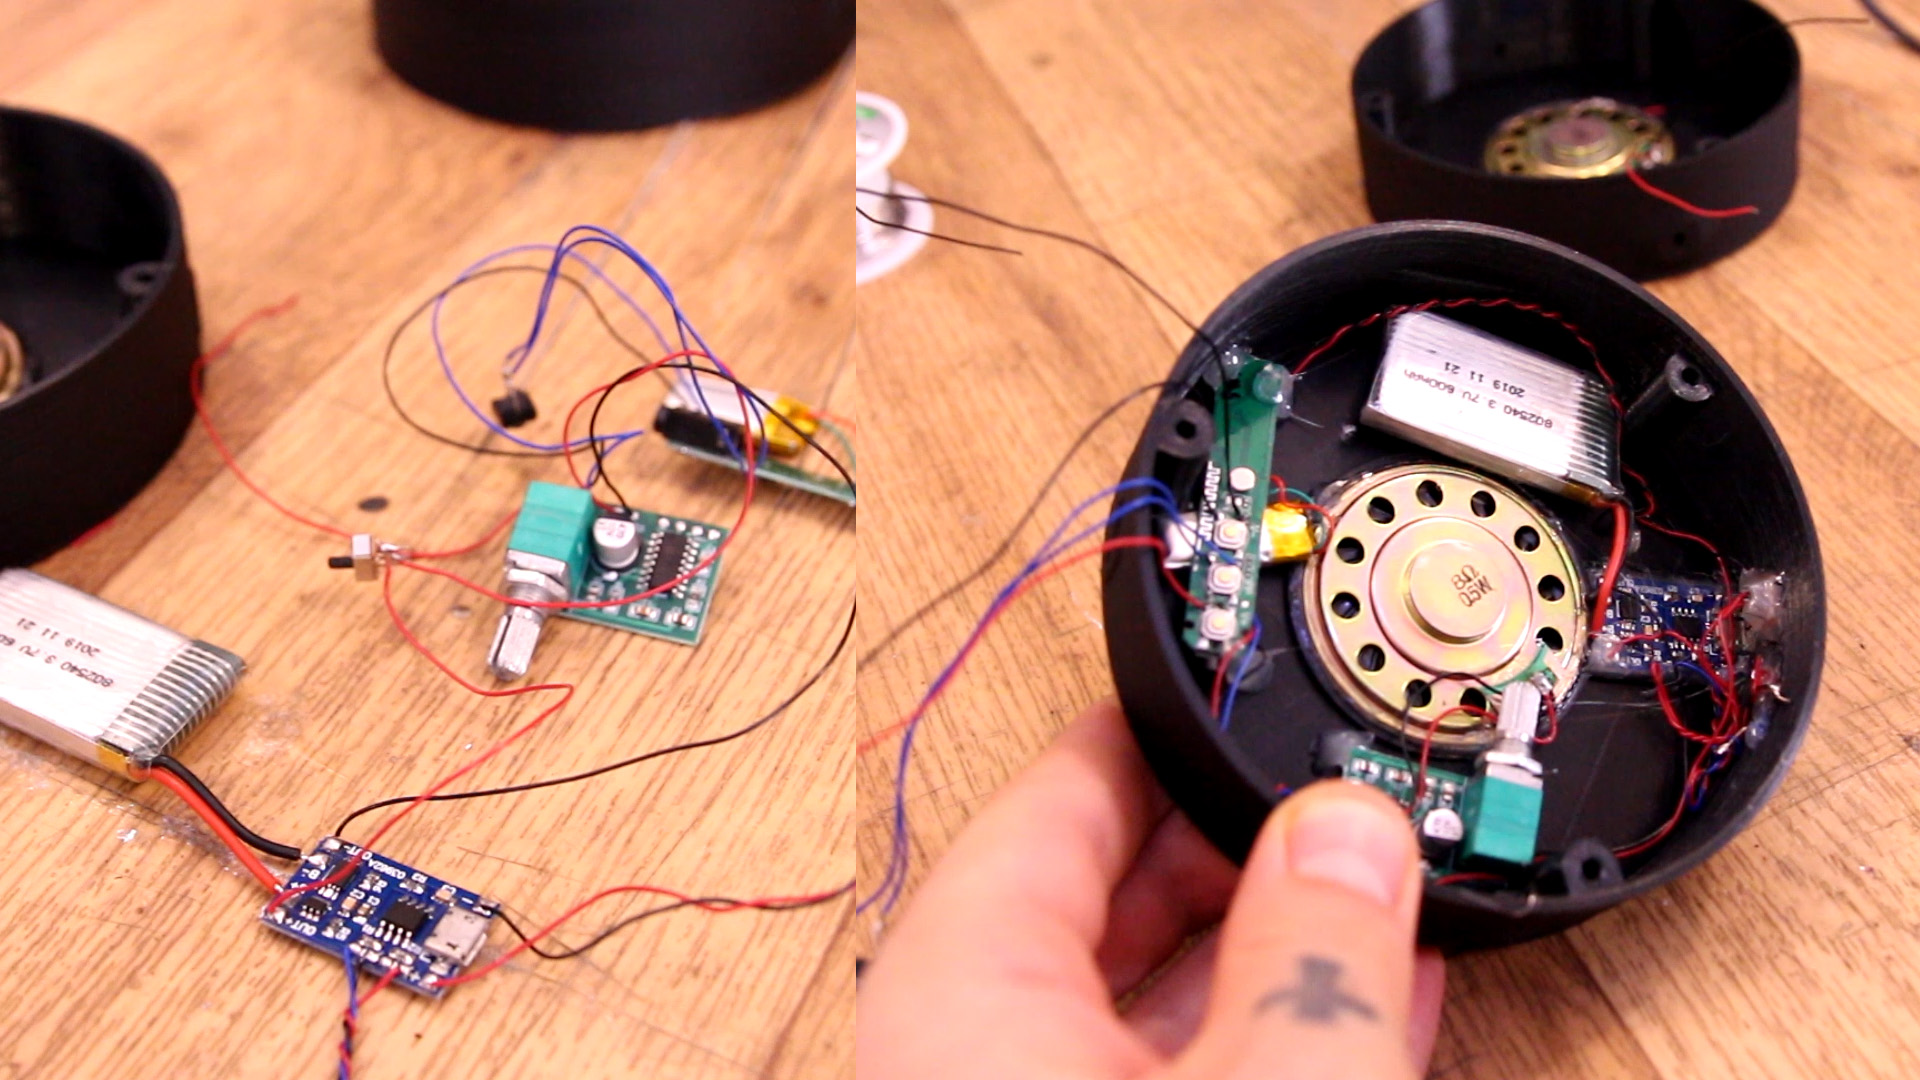
You have the scheamtic below. As you can see the Bluetooth receiver and the amplifier have separated batteries, the Bluetooth reciever will already have its own small battery. That's because during tests, I realized having two batteries is better and we have less noise. But we do connect 5V from the USB input so we can charge both batteries at same time. Connect the audio output from the 3.5mm jack to the audio amplifier and then the speakers to the outputs. We add 3 LEDs that will later be glued on the exterior of the case. Those LEDs are for the charging process and the Bluetooth indicator so we could know when it's connected.
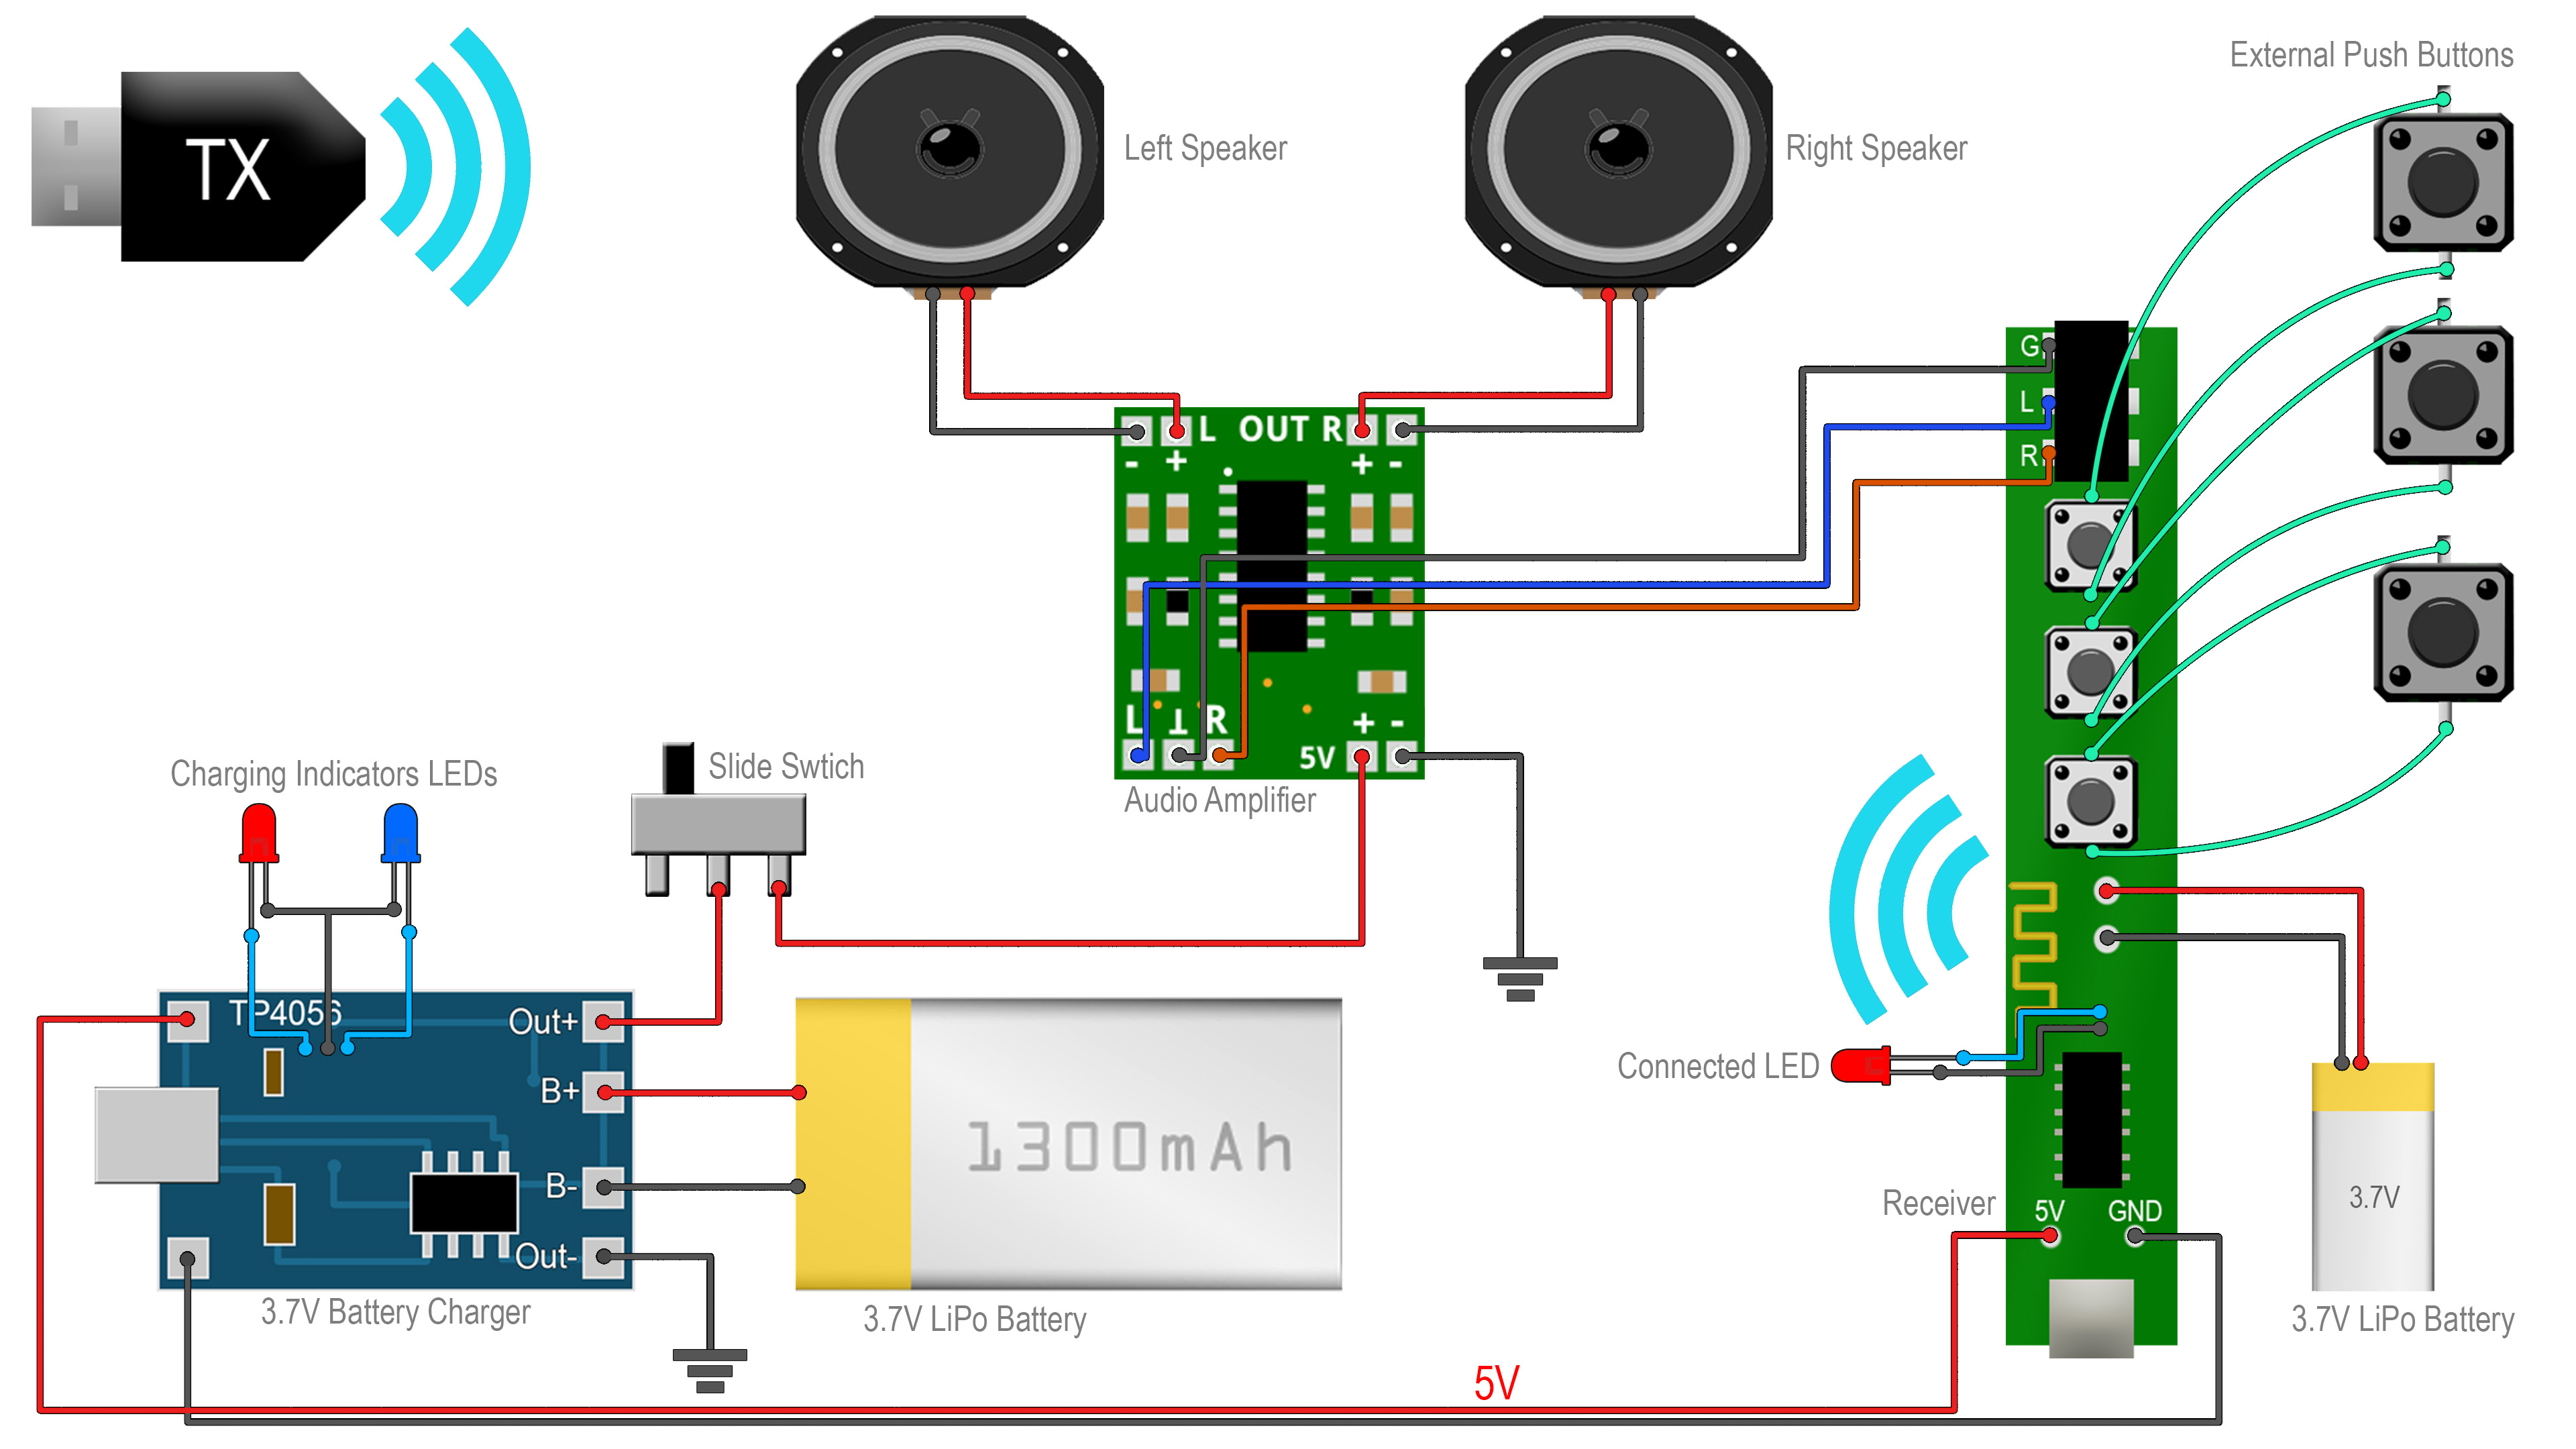
I've made the circuit as above. Put the amplifier potentiometer at around 50% for the test. Connect the transmitter USB to your PC and the 3.5mm jack to the PC audio output. The LDE will blink searching for BT devices. Power on the receiver circuit and long press the middle button of the Bluetooth receiver so it will turn ON. They should pair automatically. Now play sound from the PC and test the connection.
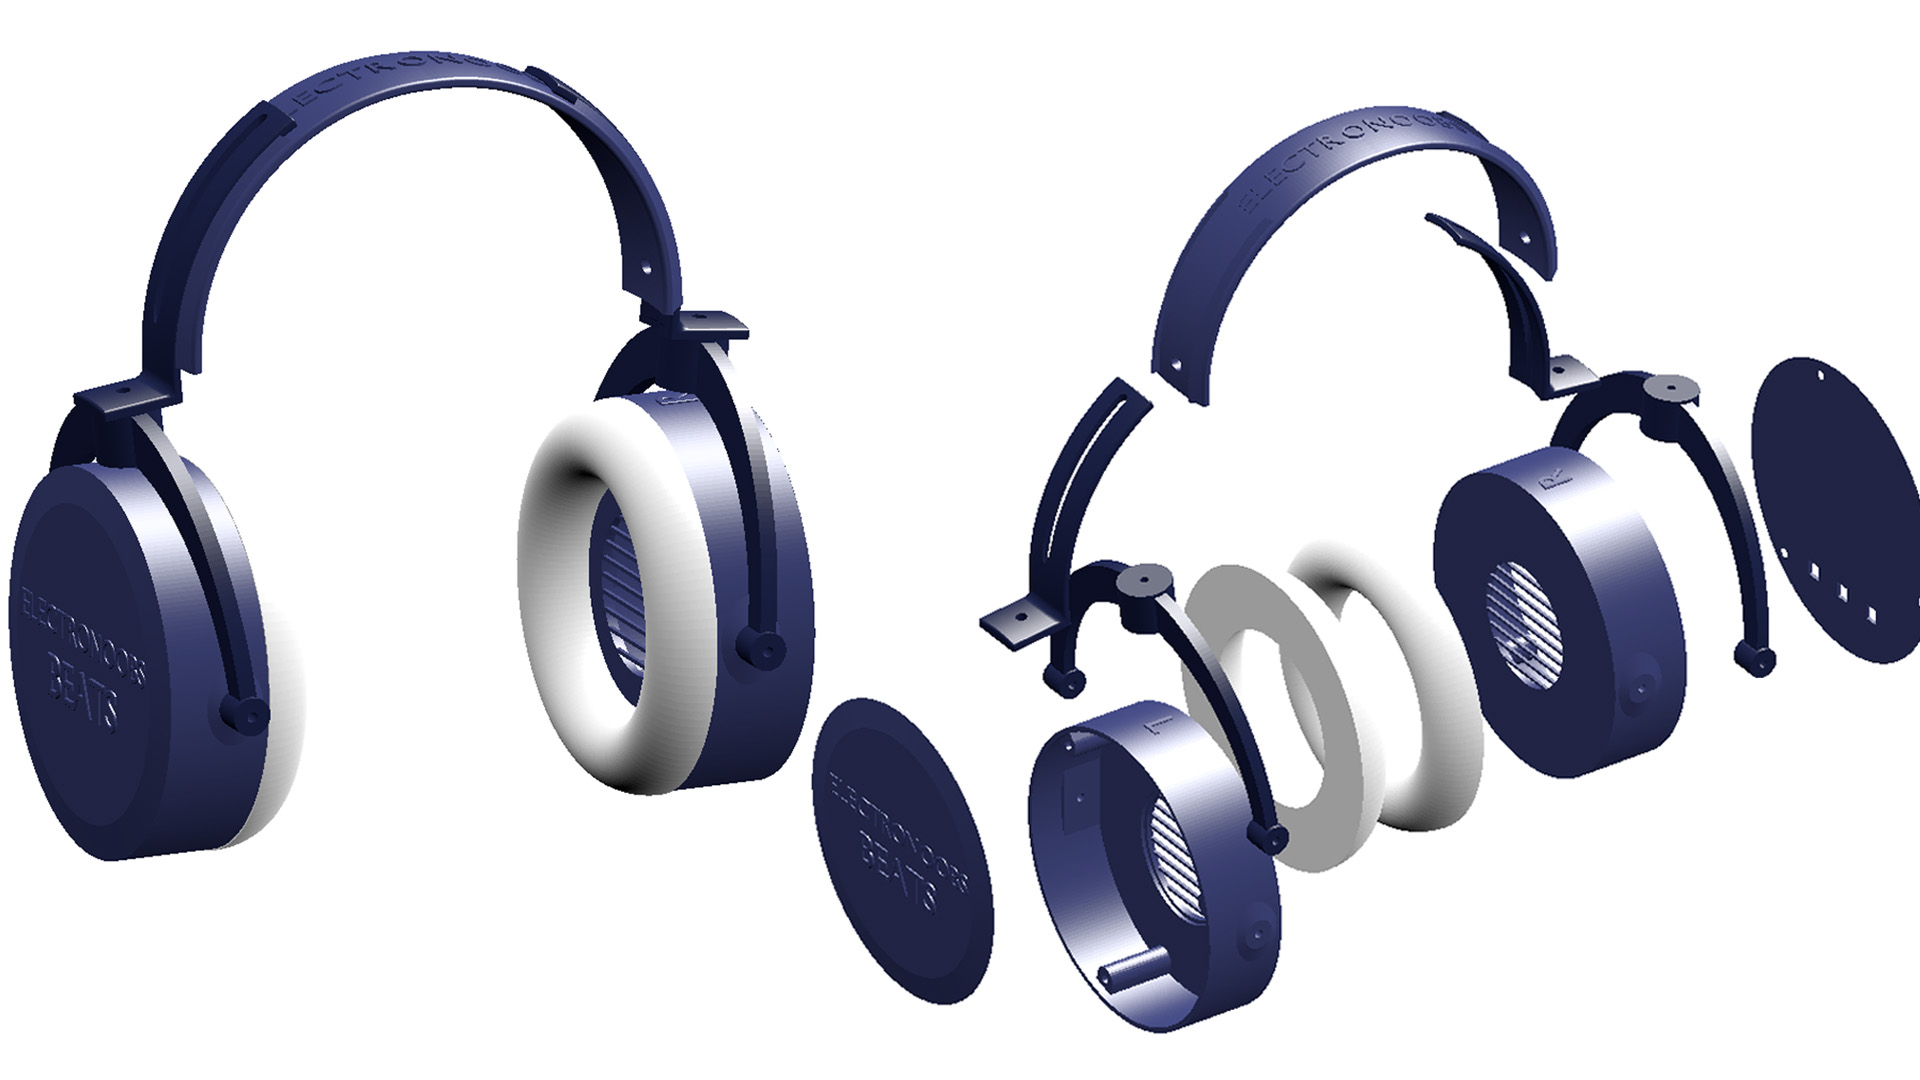
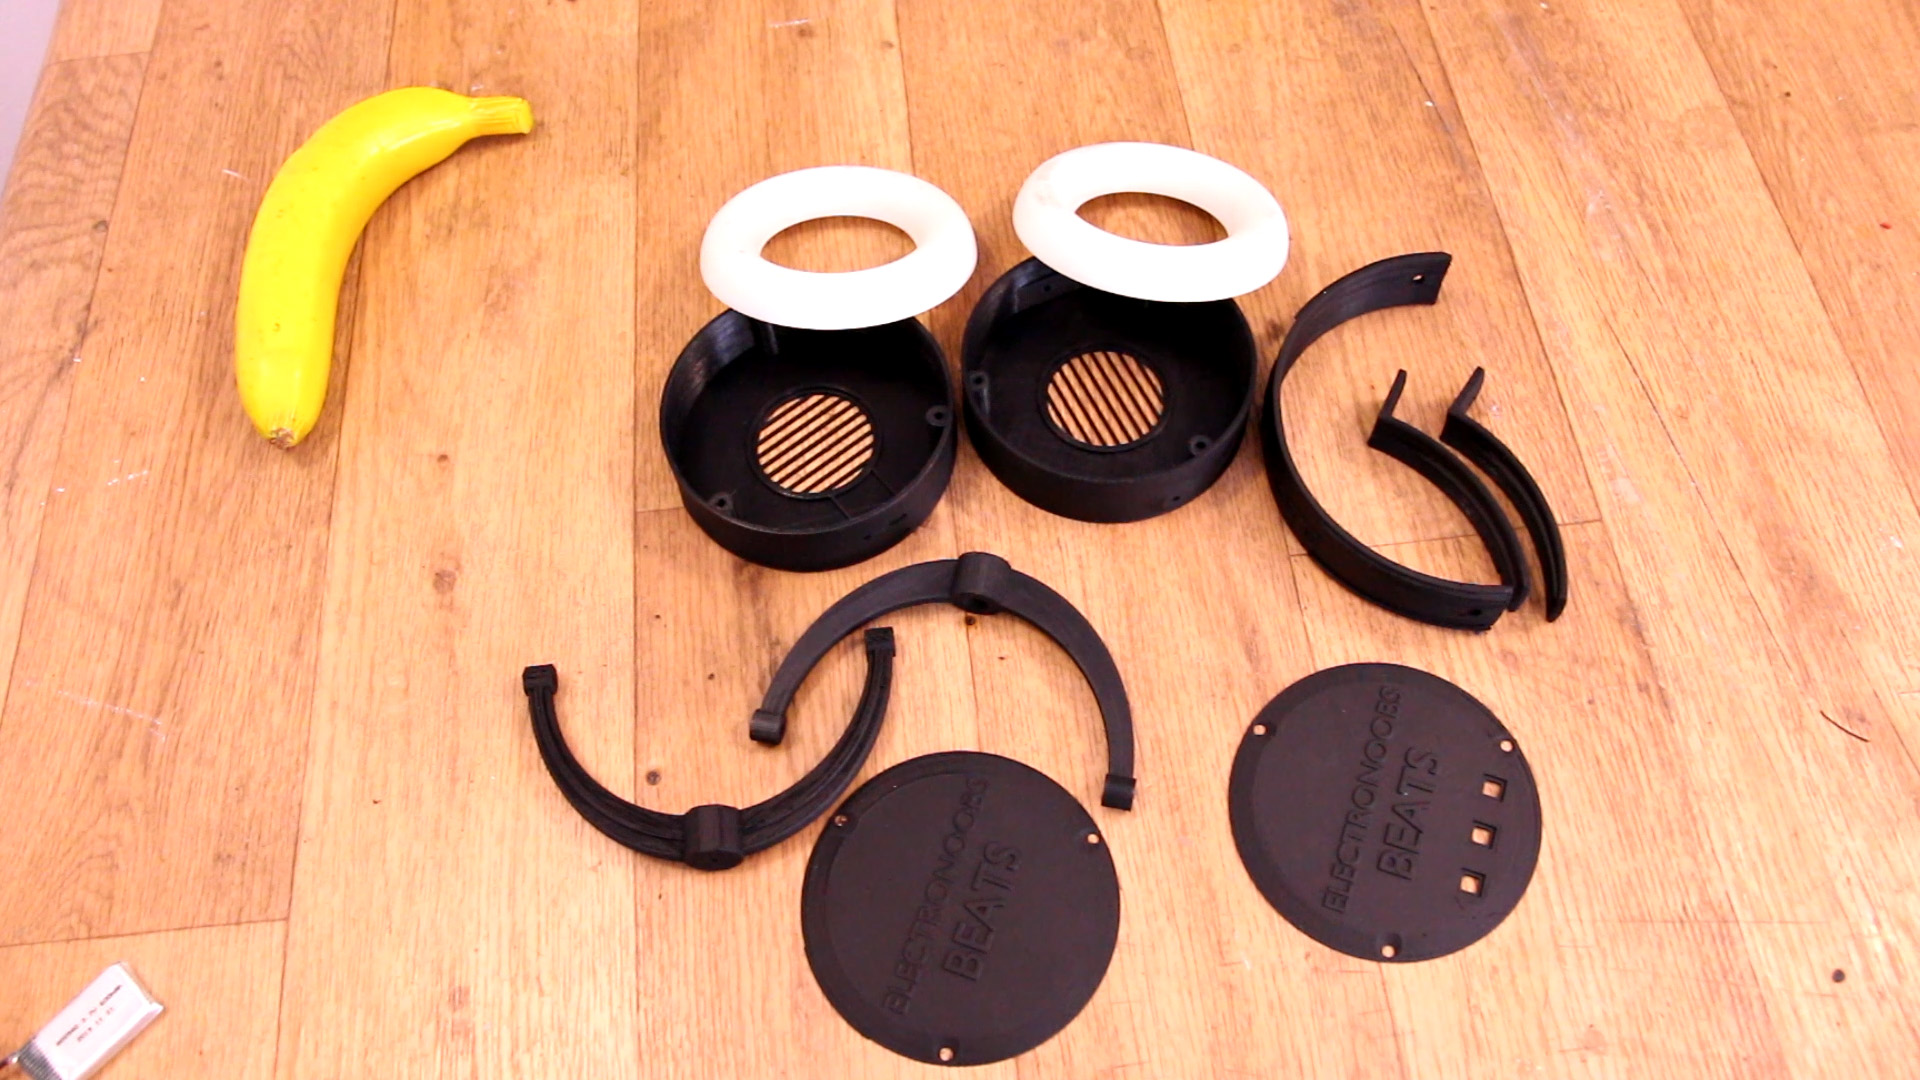
Get the 3D files form below, you have version 1 which is the one from this video and version 2 which is smaller and better look. You will get a zip file. All parts are prepared for pint and you have indications which needs support or not. I've printed all PLA parts with 20% infill, 3 perimeters and 0.25mm layer height. Only the round cushins are printed with flexible, 10% infill and 3 perimeters. The rest are all PLA material. Then you could pass some sand paper and paint the parts if you want.
First, print all the 3D parts as mentioned above. If not, just use an old case from other commercial headphoens. Make sure you print the cushions with flexible material at very low speeds.
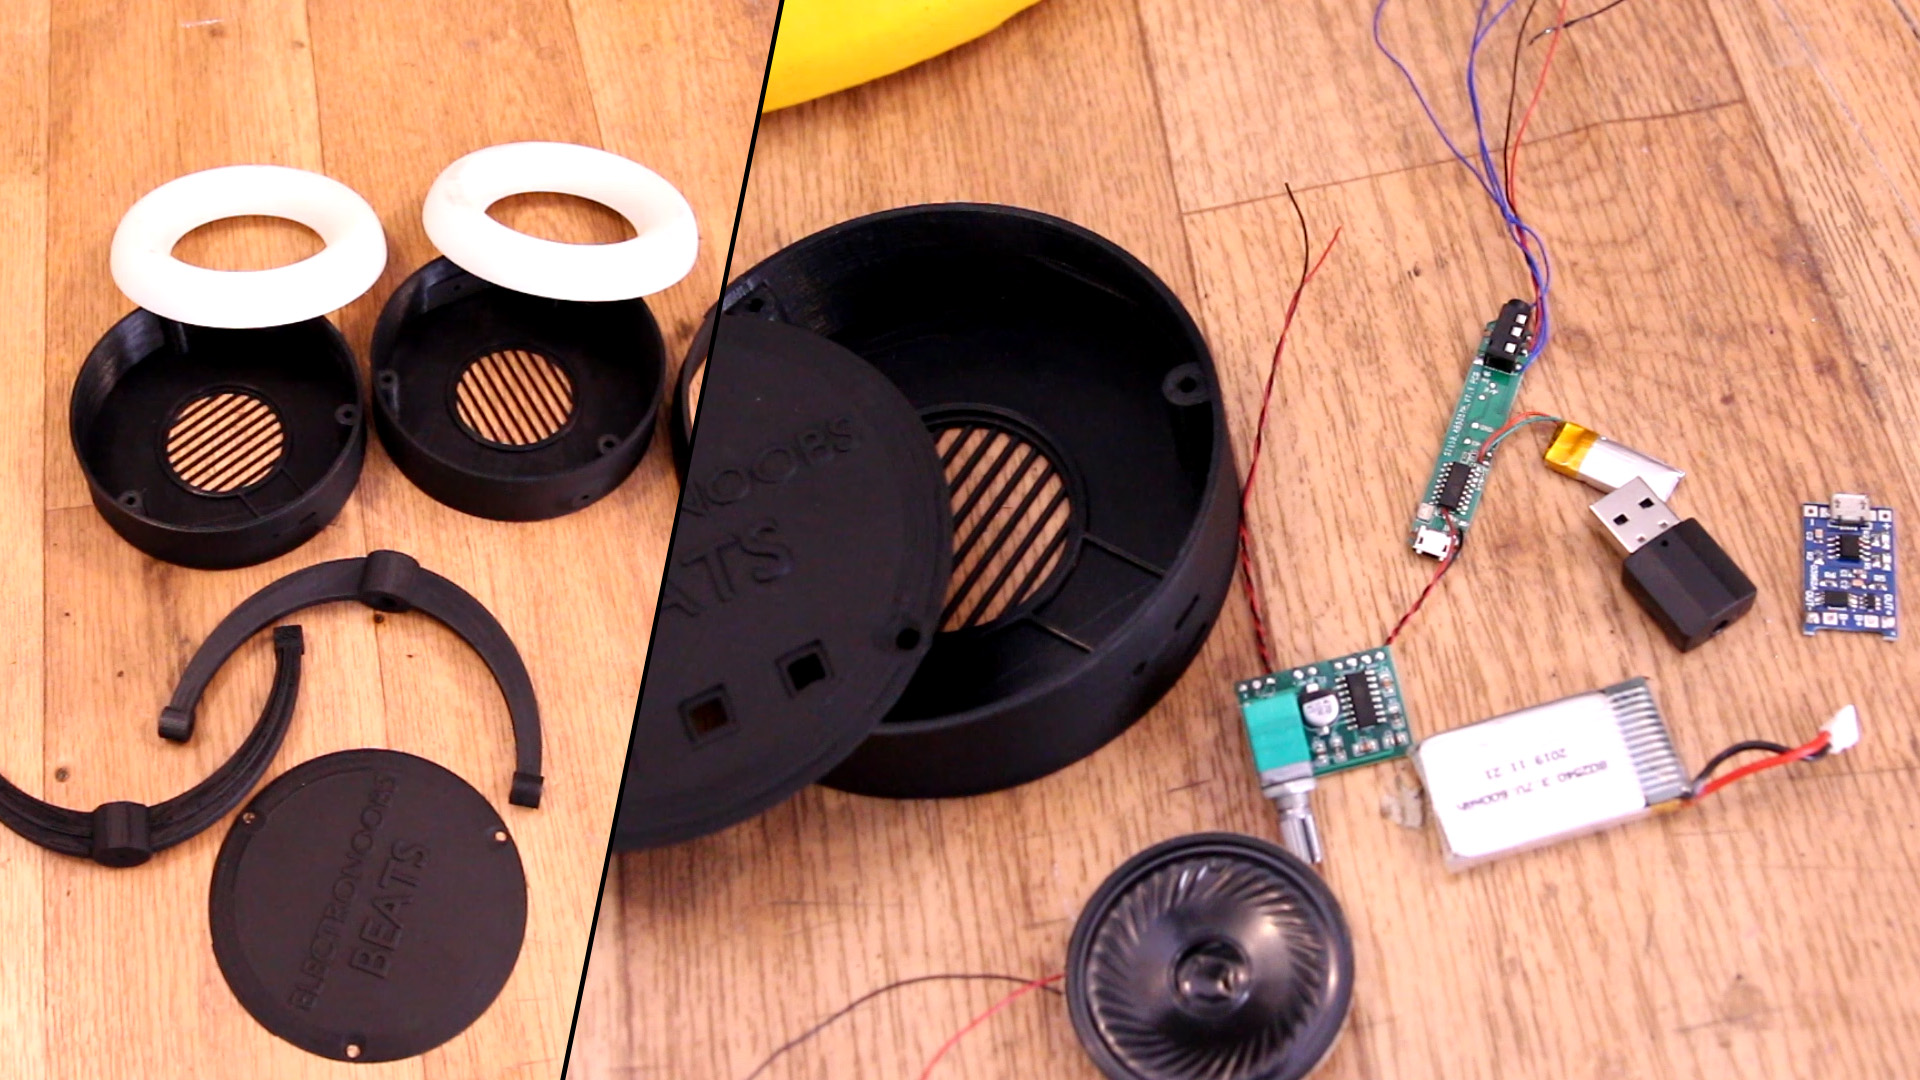
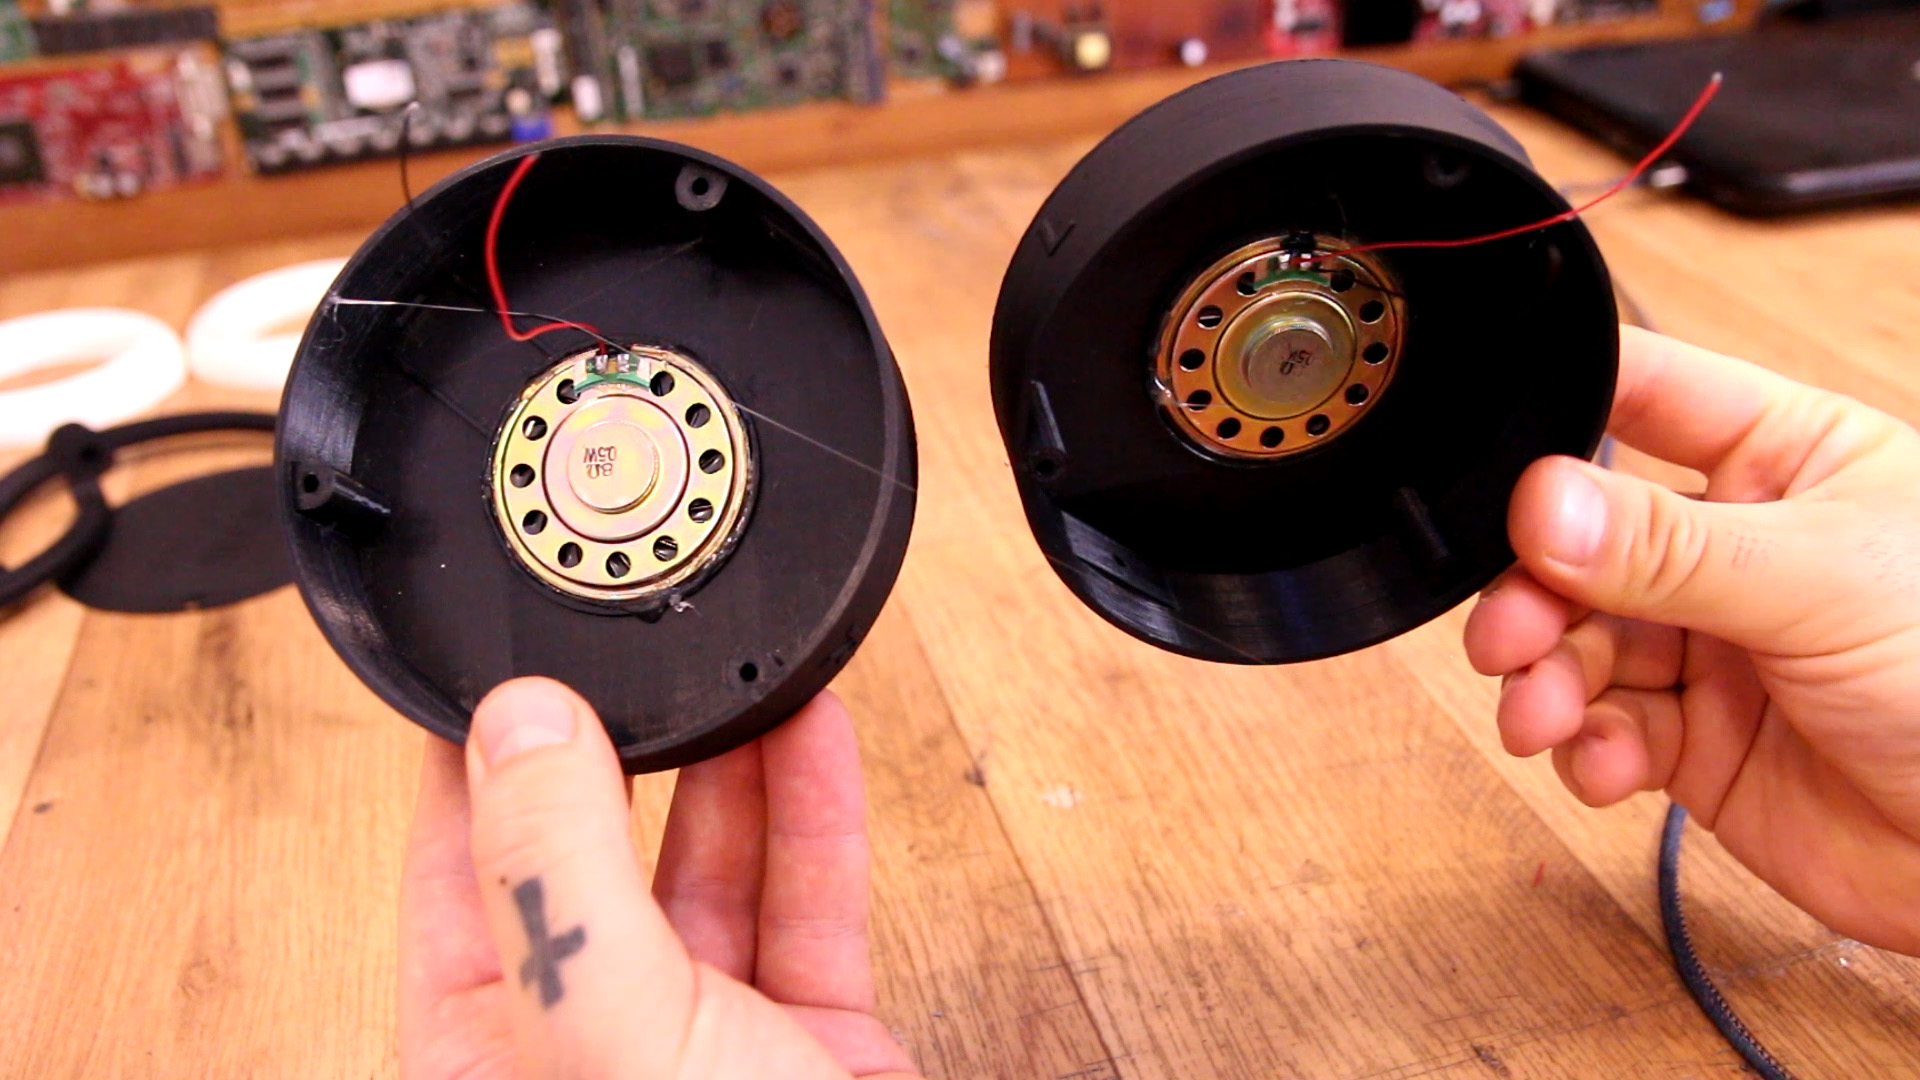
Next step is to glue in place the 8 ohm speakers of 50mm diameter. Make sure you first glue the wires otherwise it might get difficult to solder inside the case. I use some hot glue and place the speakers in the case.
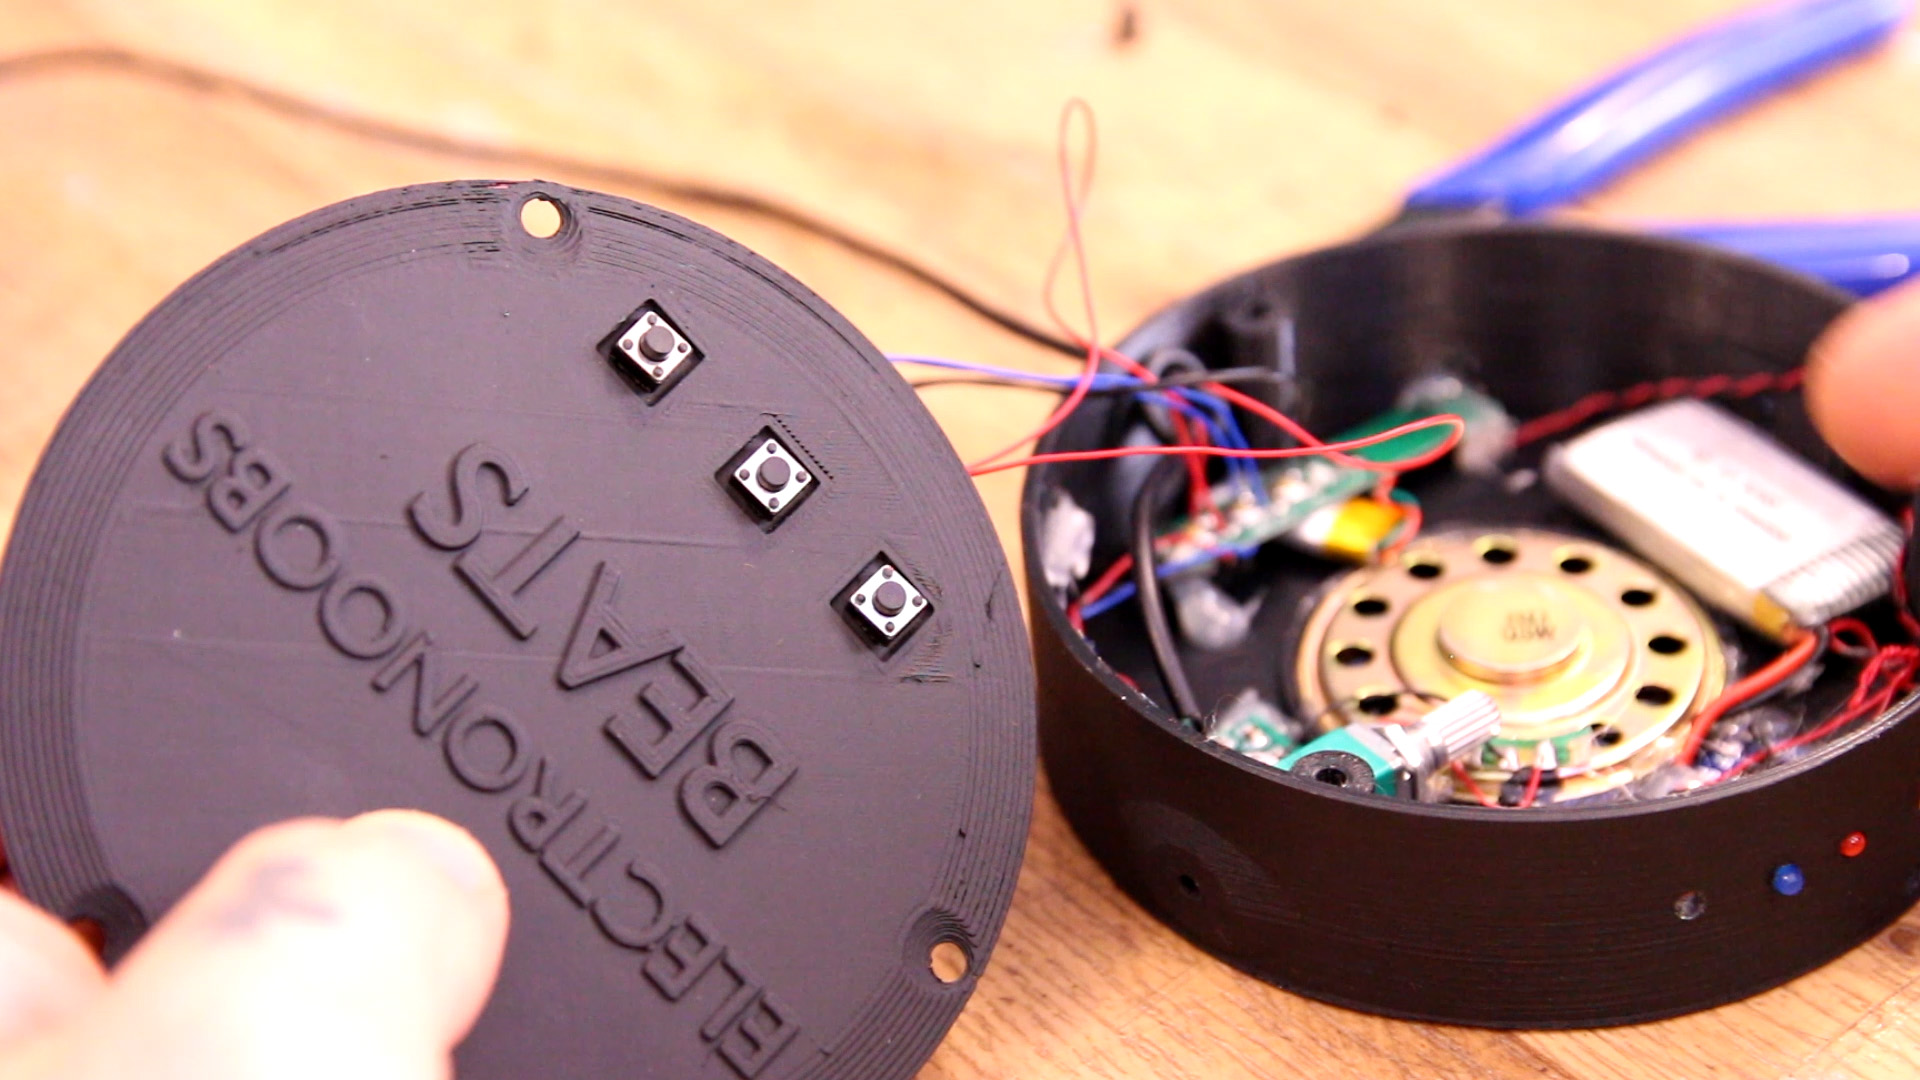
Get the circuit from before and solder everything but the left speaker. For that we will add a different wire and pass that to the other side of the headphones. Glue the LEDs on the exterior of the case the same as the sliding switch. Glue the battery, bluetooth receiver and amplifier inside of the case.
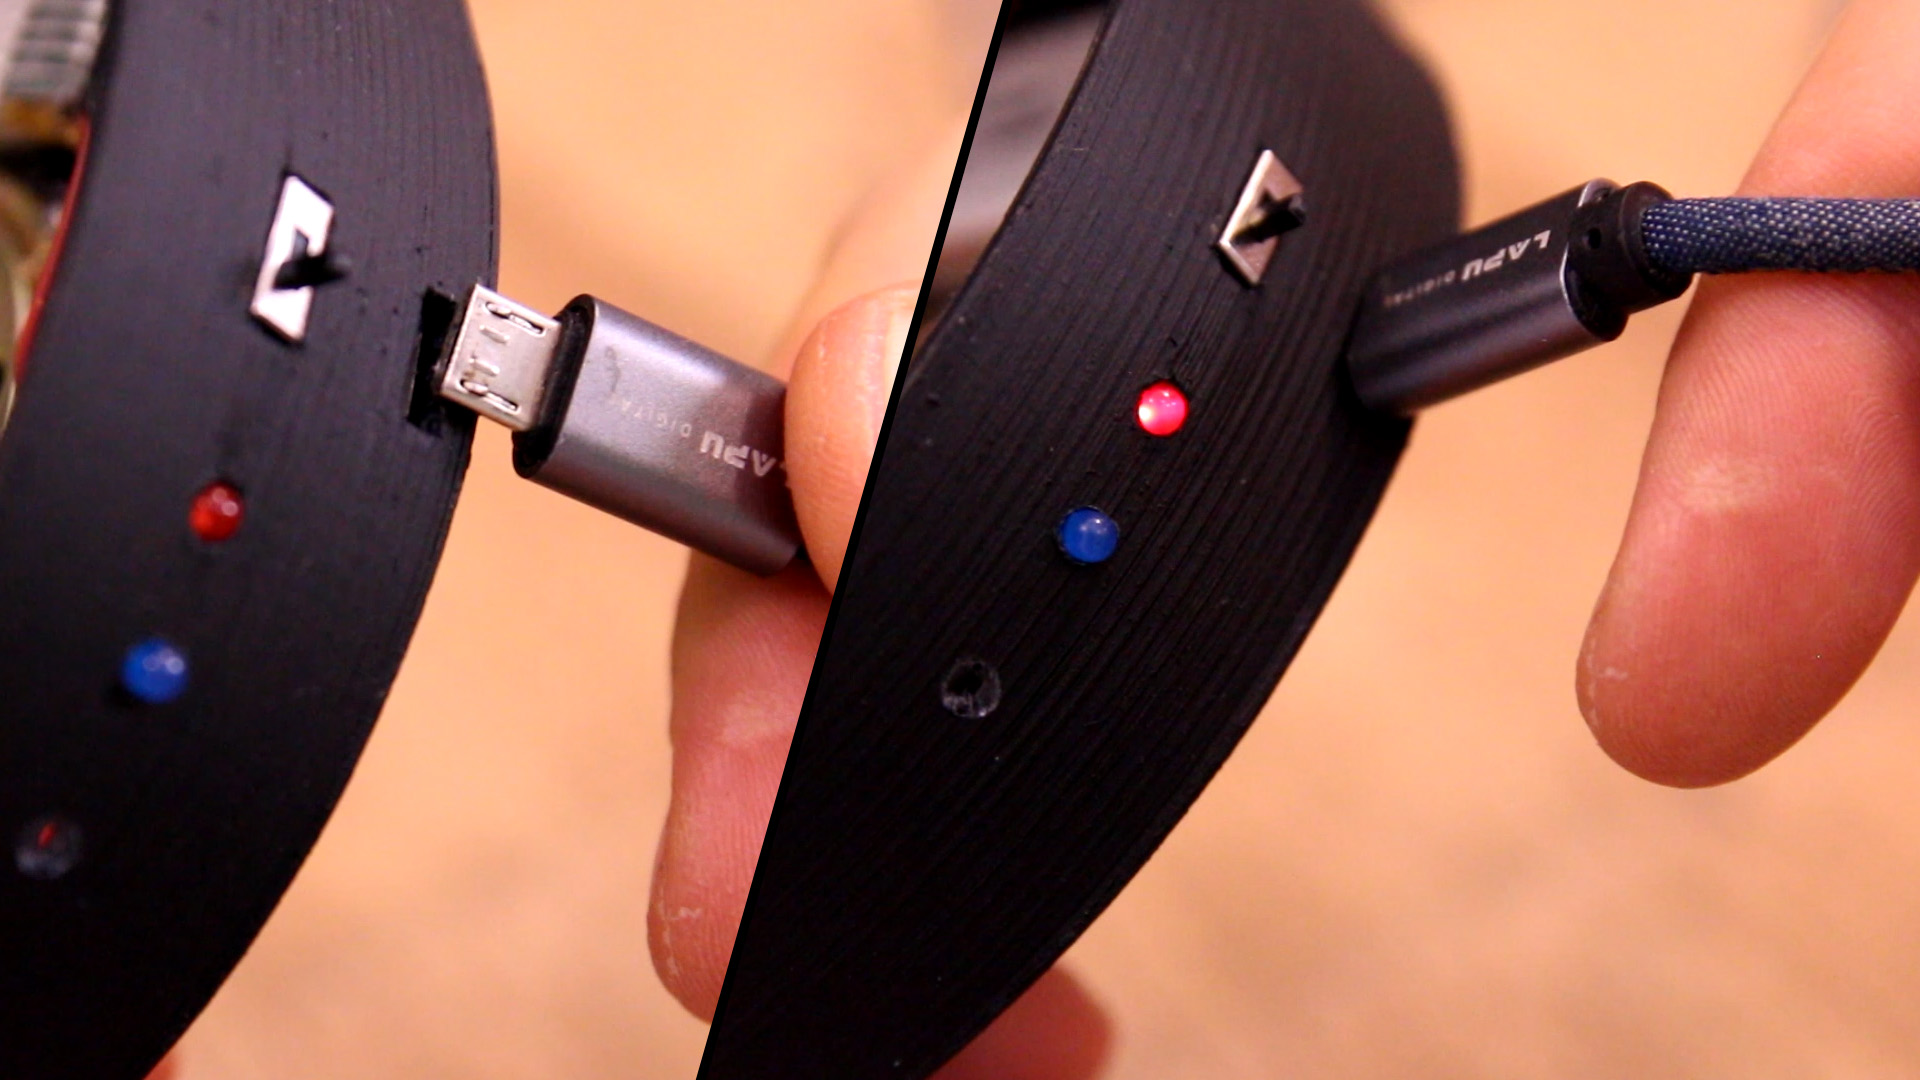
At this point, try inserting the USB connector and see if the battery is charging. When is full the blue LED should turn on. Make sure the USB connector could fit ok isnide the hole. Also test the sliding switch.
To control the Bluetooth module, we solder thin wires from the small push button on the receiver PCB to some bigger push buttons that we glue on the exterior of the 3D printed case. In this way we can control volume and turn on adn off the receiver.
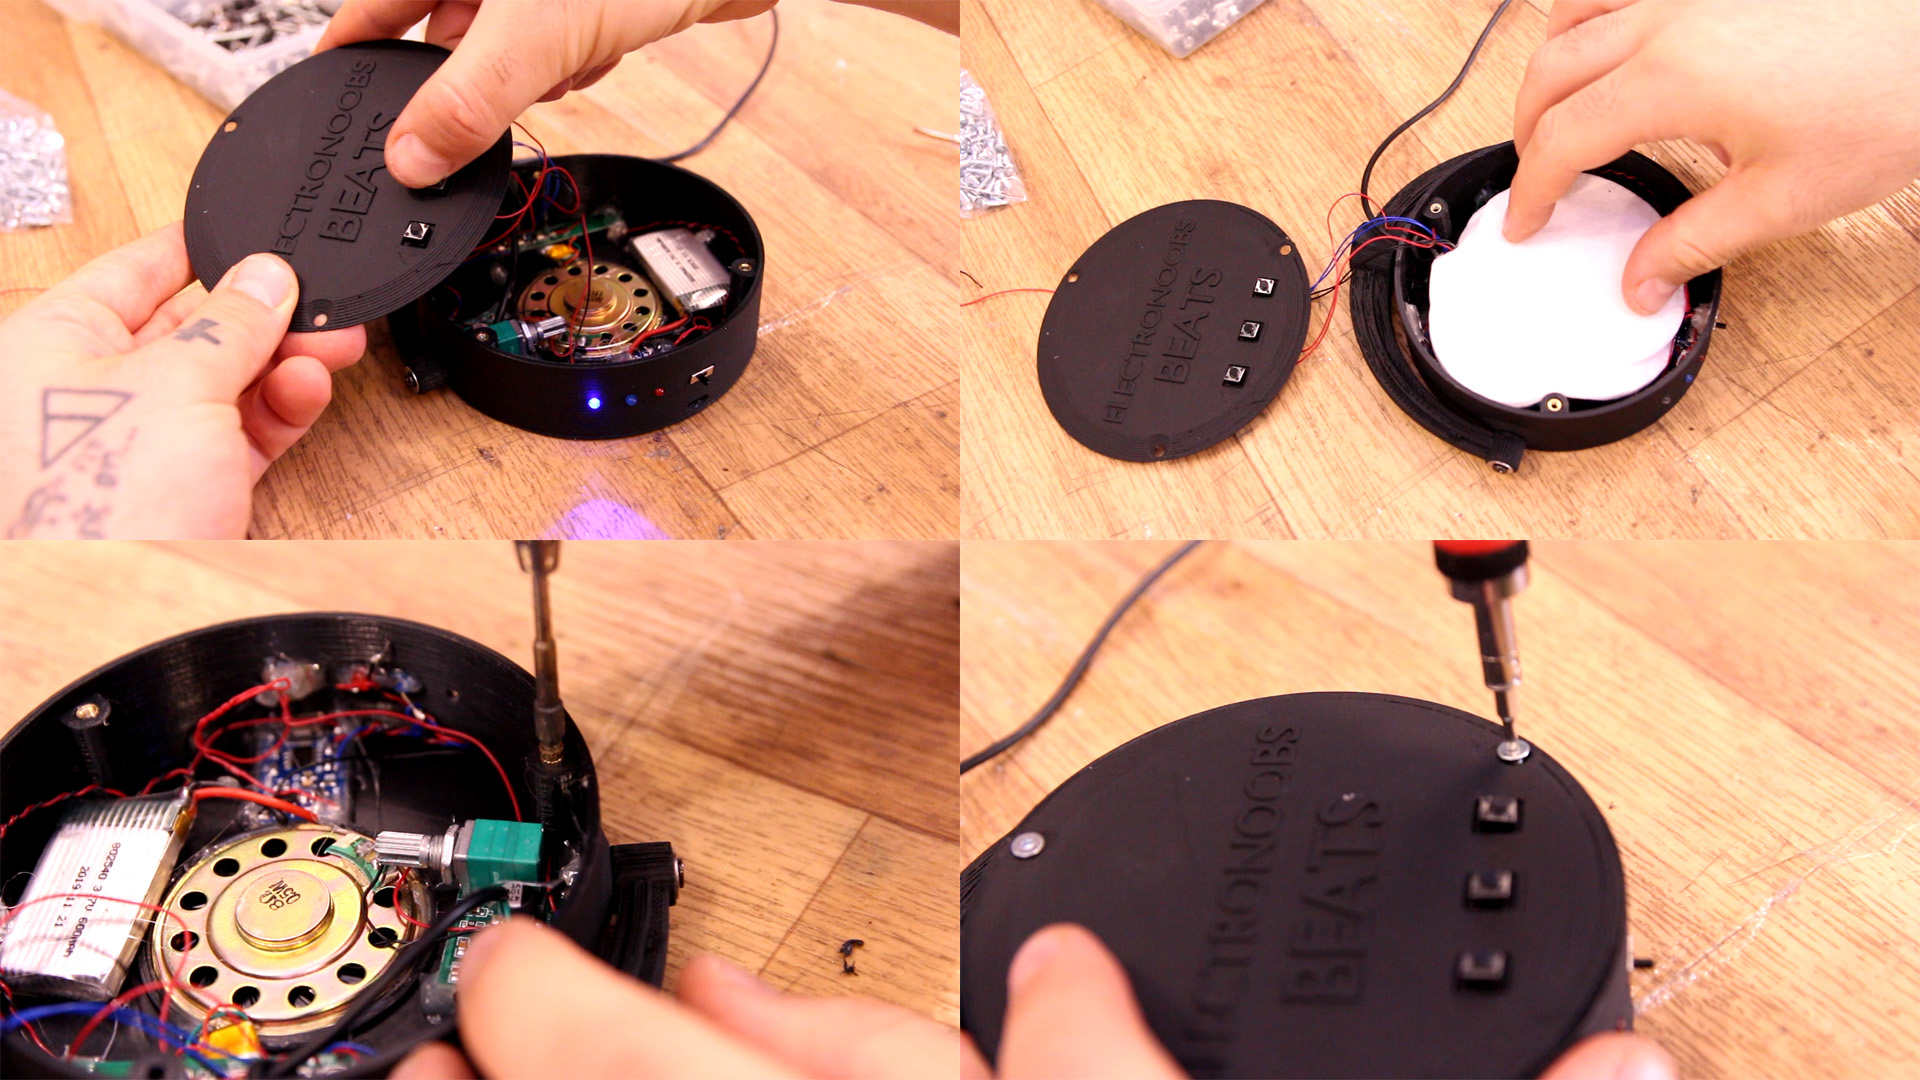
Ok, you could test the circuit. At this point you sould set the amplifier potentiometer at around 20% so we have decent volume. Then we can close the case. I've used some brass thread insertion of M3. With the soldering iron, push thos threads inside the 3D plastic case. Then we add a lot of cotton on top of the speakers for insulation. Now close the case with M3 screws.
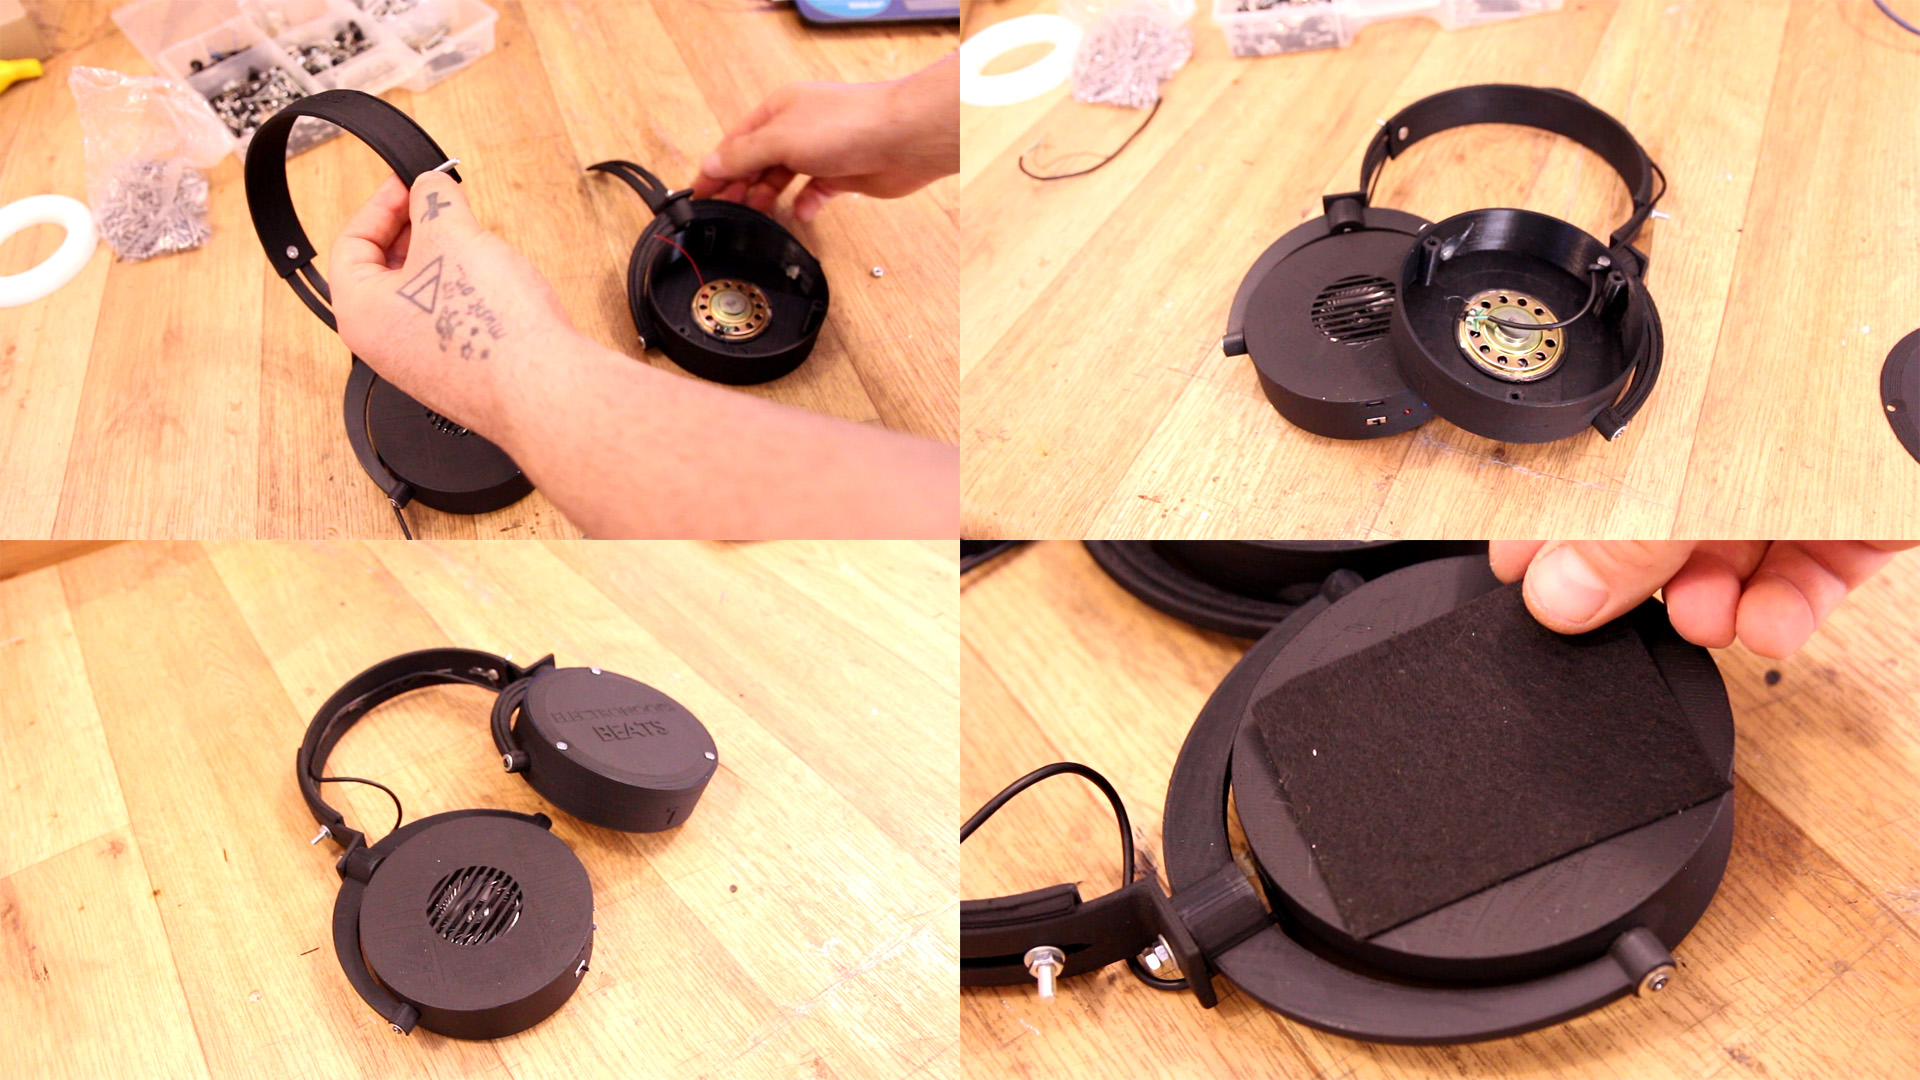
Make a small hole on the top side of the right main case and pass a good dual wire. Tie a nut so it wont get out. Solder those wires to the left channel from the amplifier. Then measure the lenght so it could reach the left side. make a hole in the left case and pass the wire and solder it to the speaker. Again add cotton, the brass insertions and close the case with M3 screws. Finally, I will use some soft material to cover the speaker hole so it will look better.
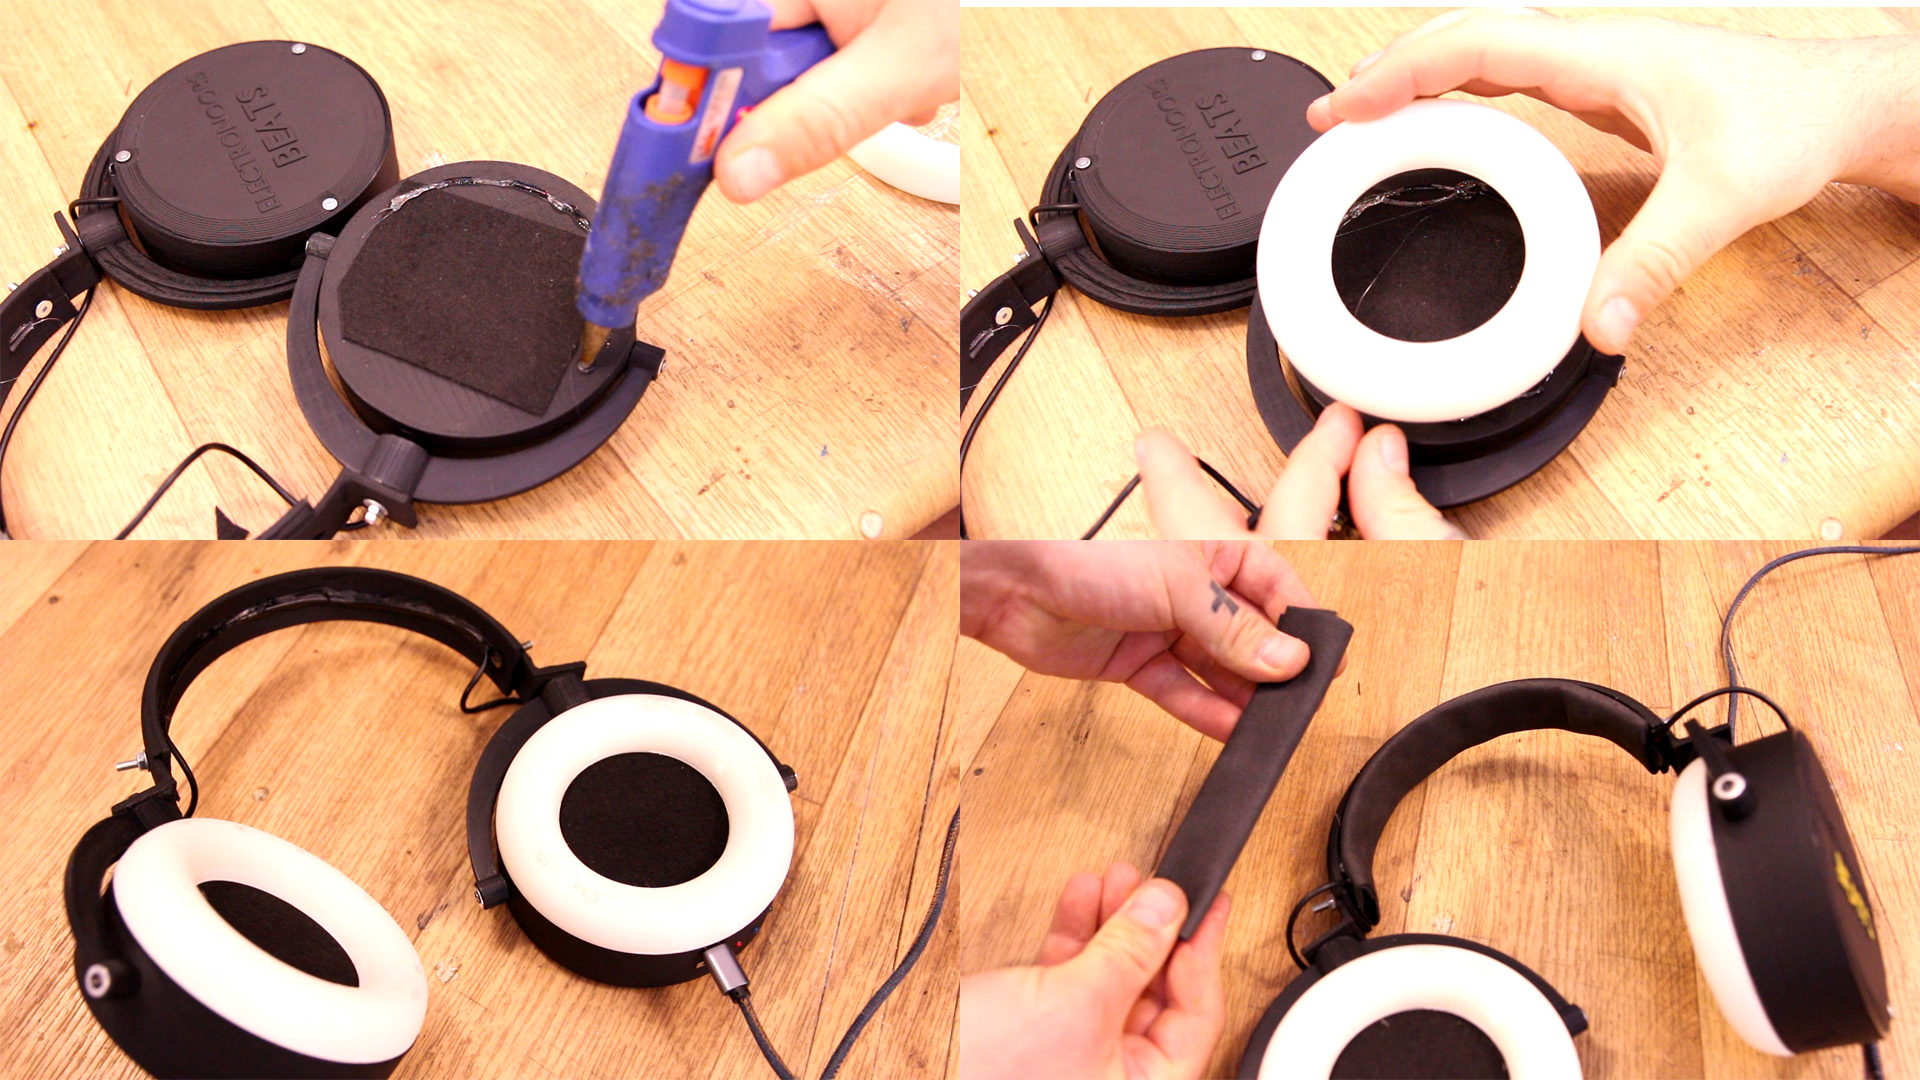
Add some glue and place the flexible cushions on each side. You can also cover the wire from one side to the other with some soft foam so it won't hurt the head. Add final details such as colors, stickers, etc if you want...
So, connect the transmitter to the PC for power and connect the audio jack. Power on the speakers from the sliding switch. Press the middle button for 2 seconds and they should pair automatically. Play sound and there you go!
I hope that you like this tutorial. If you consider supporting my work, buy my PCBs on my shop, or maybe consider supporting me on PATREON or if you want, make a PayPal donation. Thank you very much.