
Some time back we've seen a tutorial on how to control a TRIAC using a Bluetooth app and our smartphone. But we should see in more depth how TRIACs work. First we will see how the Tyristor work adn then TRIACs. I hope this theory will help you and maybe teach you something new. Let's start...
First thing first, the diode... It can be considered as the simplest and most fundamental element in electronics, which is composed of a p-n Junction. It is a two terminal device. The "+" terminal is called Anode and is connected to the p-Region and the "-" terminal is called Cathode and is connected to the n-Region. The Diode operates in three different states: Forward Bias, Reverse Bias and Breakdown. In a few words, its main job is to allow or not the current flow in one direction, from the anode to the cathode. But it can't be controlled as a switch, the "allow" process is made automatically by the internal Junction.
Now, imagine we could control this kind of devices and tell it when to allow or not the current flow. Well, that's not very interesting for DC voltage, right? But, in case of AC signal that will get interesting. Why? well, because when oscillating, the signal could go to positive and negative and when negative, the current flow will stop automatically by the internal configuration of the diode. All we have to do is to activate this device on the positive side. There is a component that could do that and it is called a Thyristor.
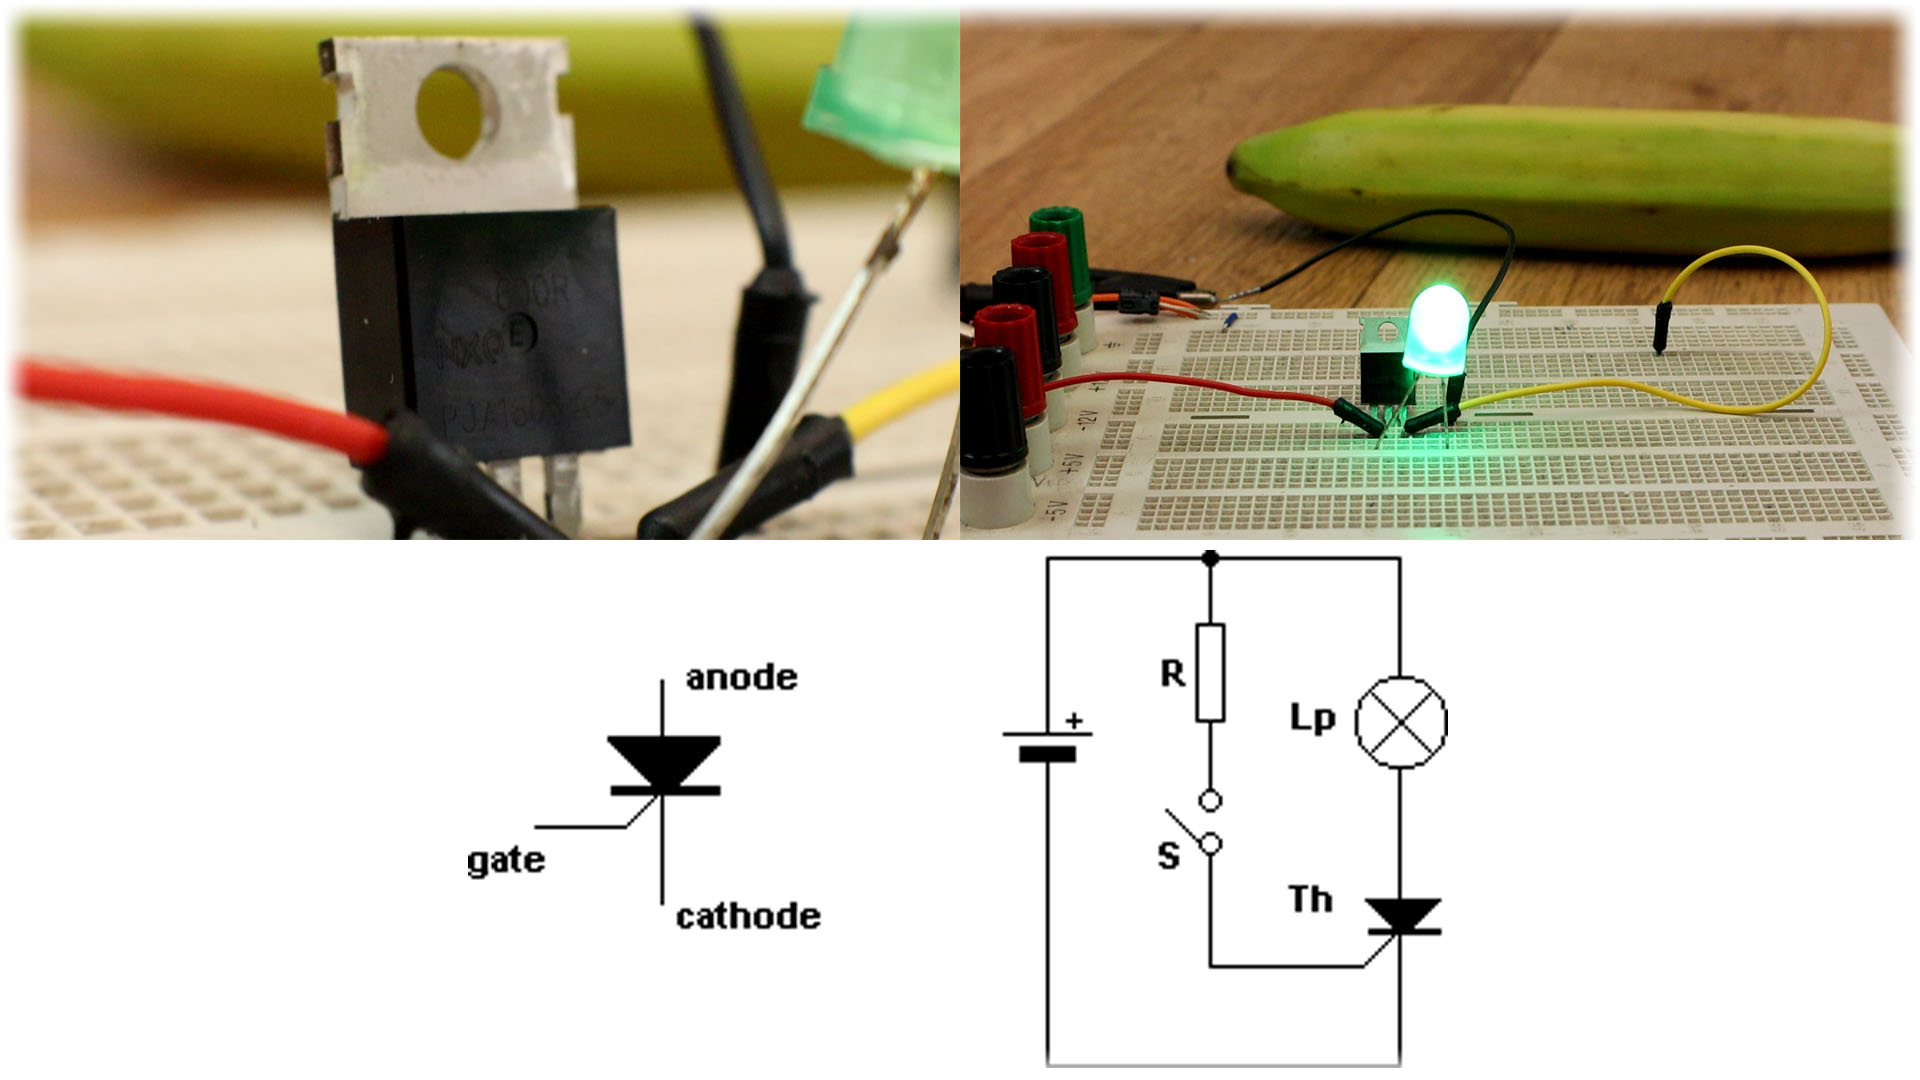
So, we now have the Thyristor. Above you could see its icon, it's as a diode but with a control gate. How dose this work? well, apply a very short pulse at the gate and the Thyristor will be enabeled till the voltage changes its polarity in reverse (from cathode to anode). So if using this with DC voltage taht won't happen because DC voltage will naver change its polarity. So if we enable this Thyristor with with DC voltage, this will be always enabeled till the voltage is switched off. But, with AC voltage is different.
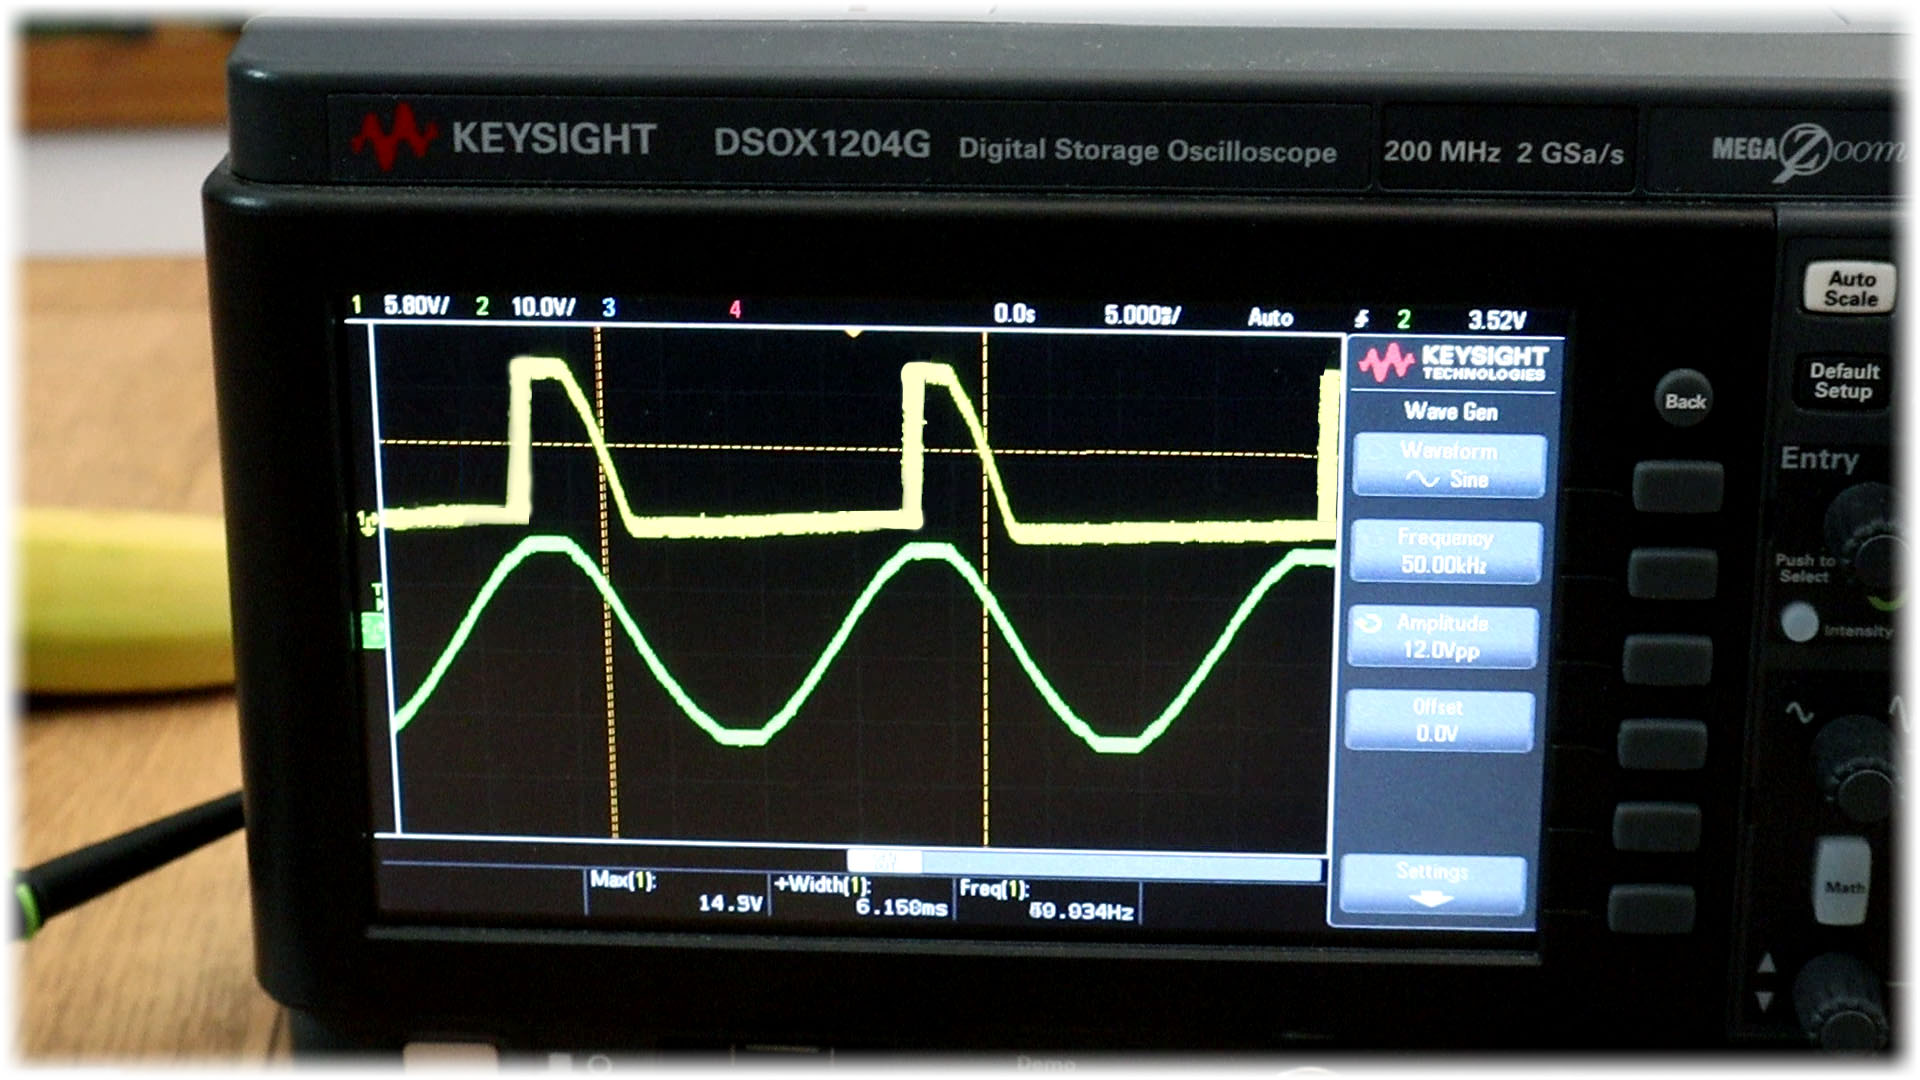
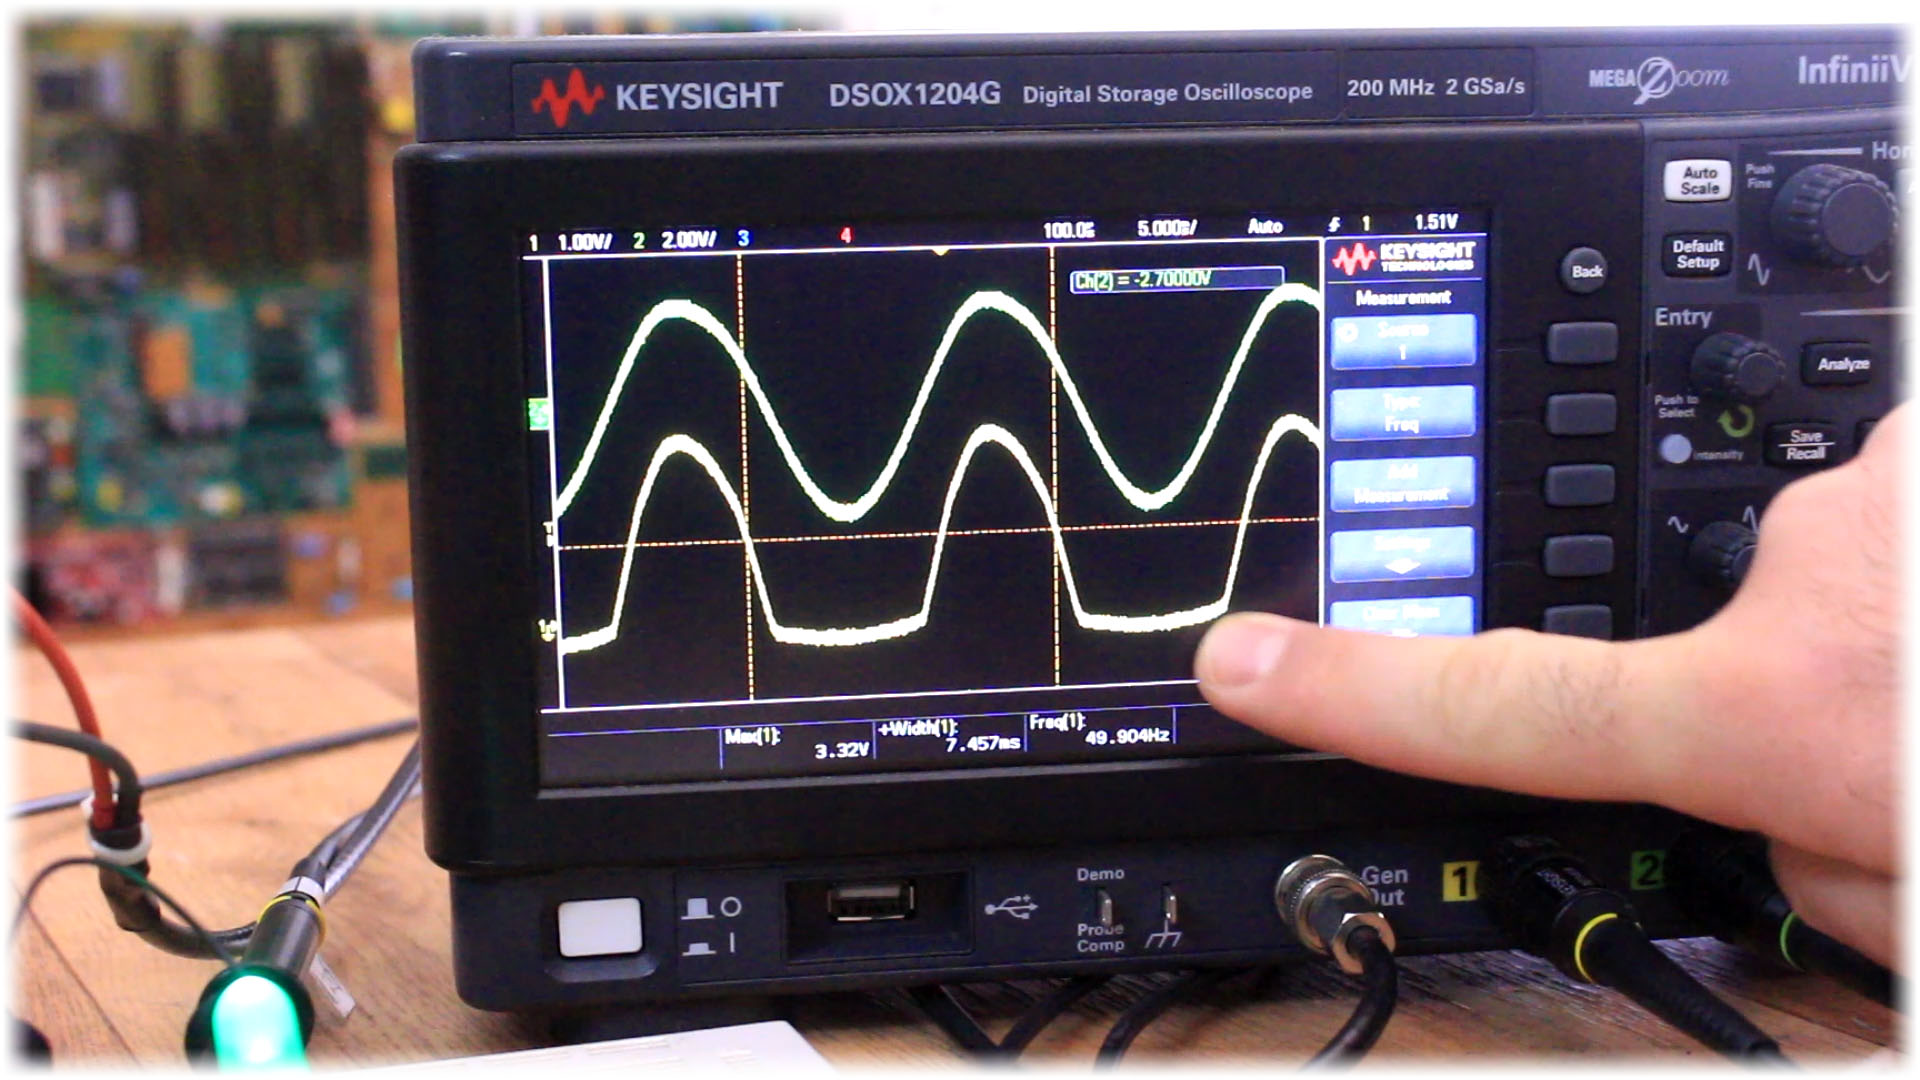
When we have AC signal we could activate the Thyristor and it will disable itself when the voltage will go from positive to engative. Then we send another firing pulse at the gate and it will be active again and so on and by that we could control power. As you can see in the photo above with yellow color, we activate the Thyristor gate and half of the positive side of the wave will pass. When this gets to the "zero-cross" it will turn to 0 again and will get active on the positeive side. So, that's how we could control power but only on the positive side of the wave. What about both positive and negative sides?
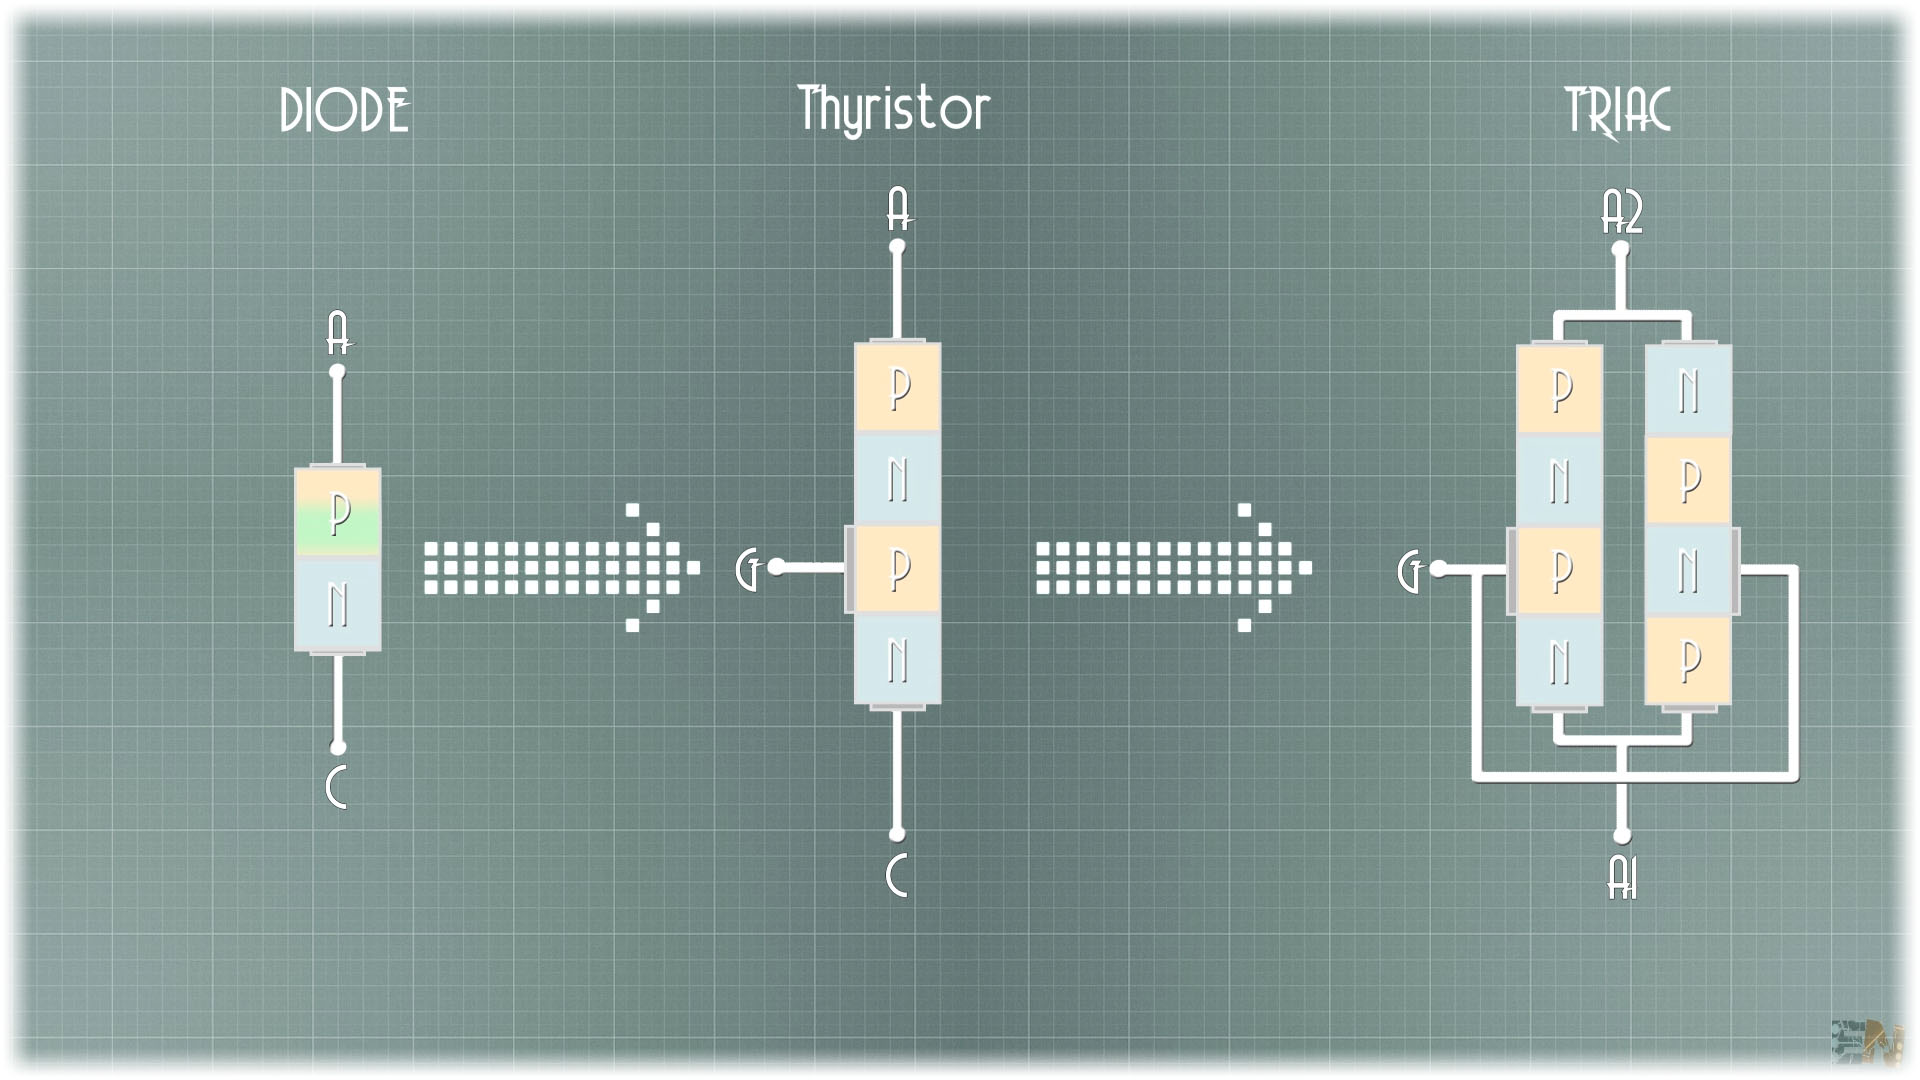
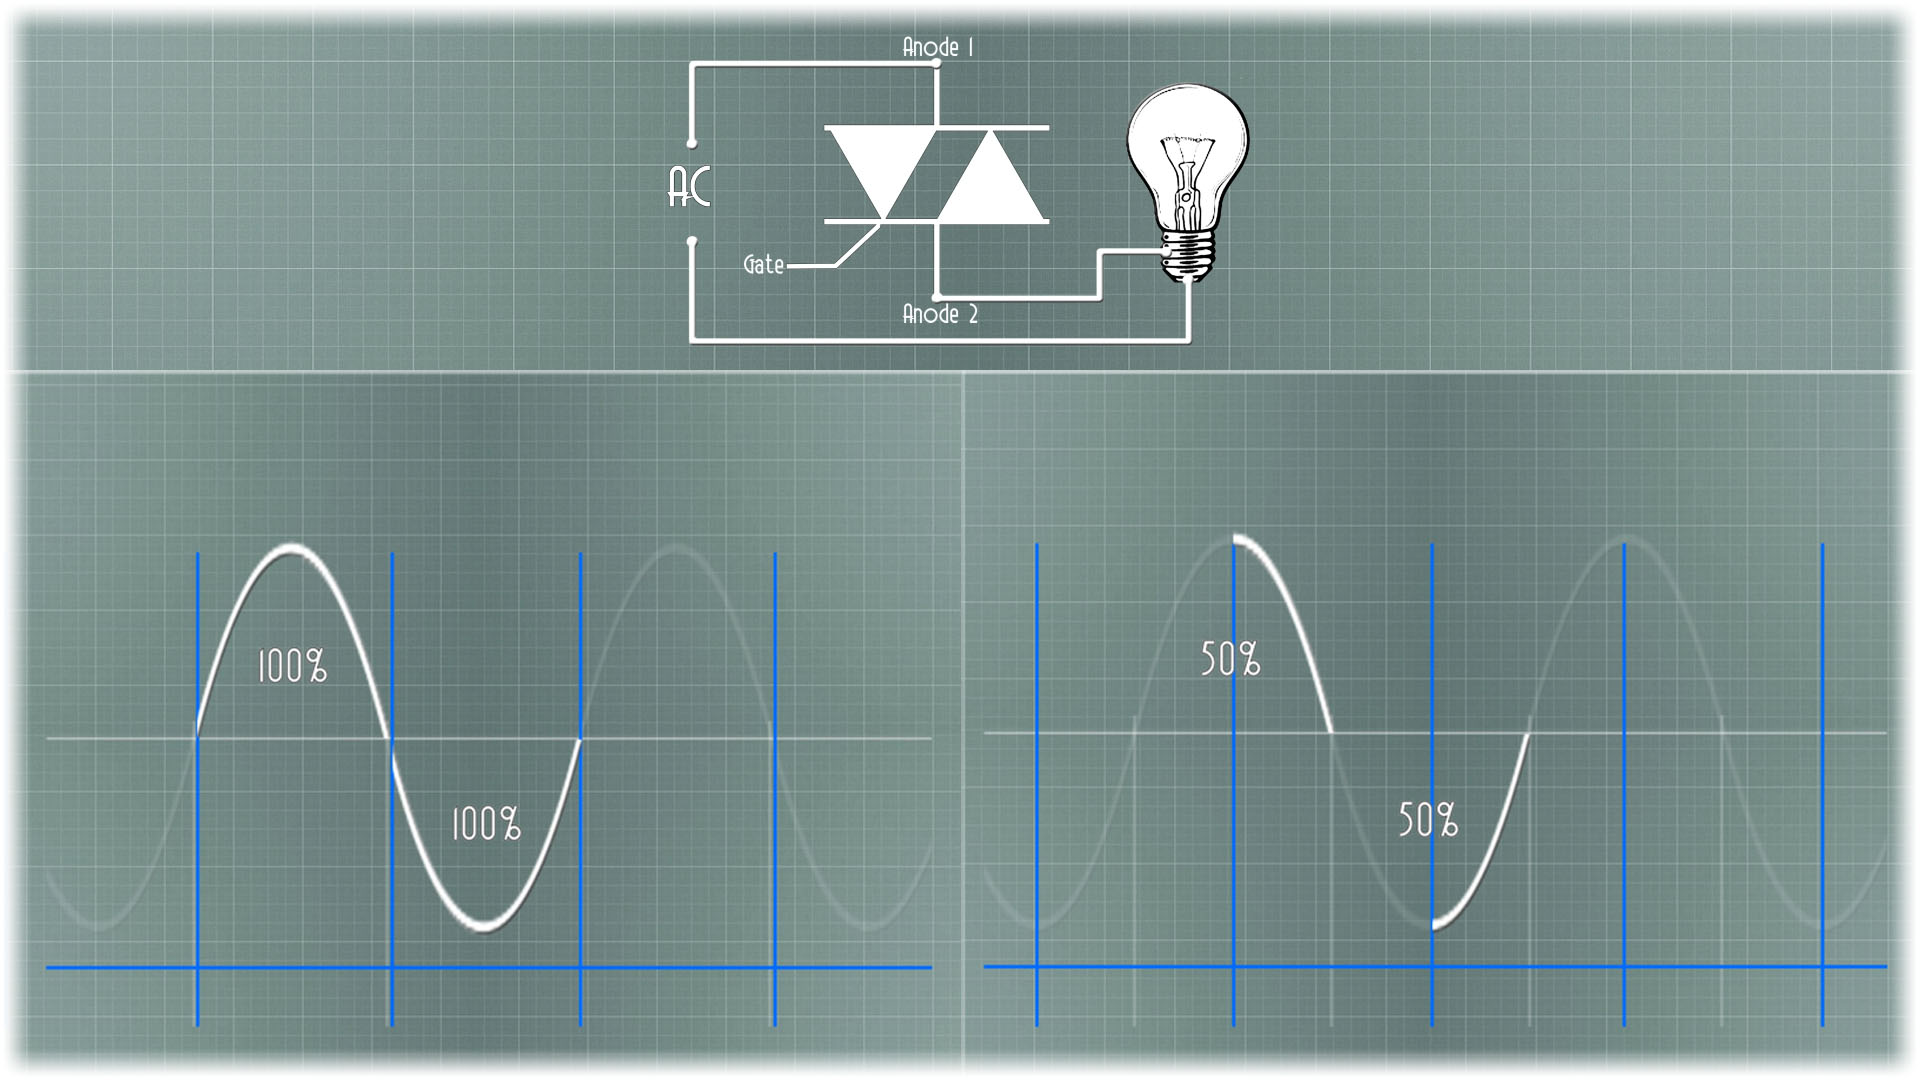
Finally, we get to TRIACs. To understand this better, a TRIAC are basically two Tyristors placed one reversed to the other and sharing the same gate. One will control the positive side of the signal and the other the negative side, in this way we could control 100% of the power. In order to get the picture till now, we have a picture below with the diode as a PN junction, then the Thuristor with the PNPN connection and finally the TRIAC which are two Tyristors with the same gate but one is reversed to the other.
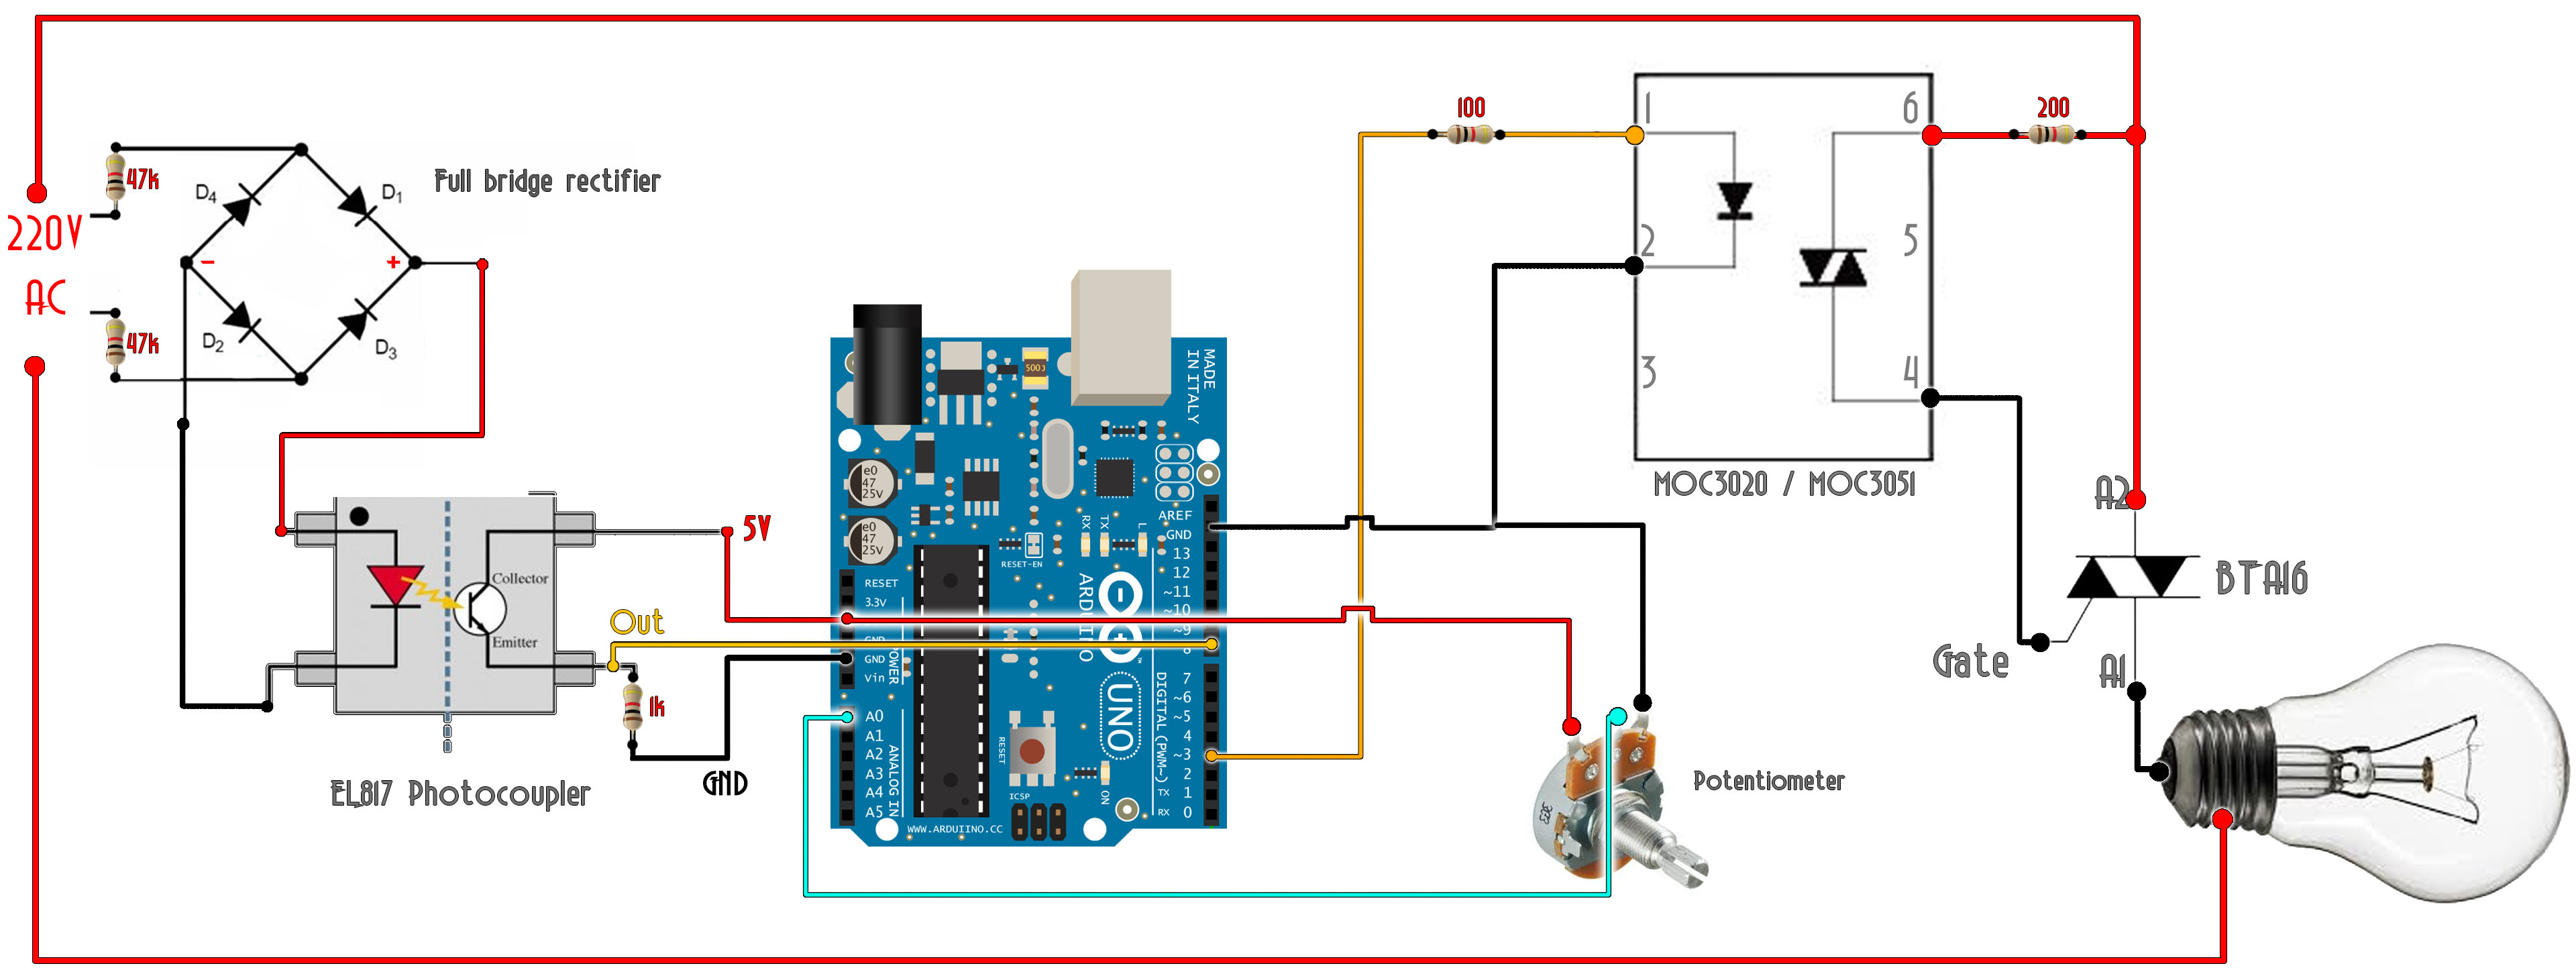
Now that we have this, let's see how to control power. If we apply a pulse to the gate it will activate the current flow till the zero-cross. Then we send another pulse and activate the current flow for the negative side till the other zero-cross. So we have to send short pulses at the gate but in order to control pwoer, we haev to synchronize the pulses. For that I've made the next schematic and here is how this will go.
To control power we haev to change the time between the zero-cross to the firing pulse. If we activate the pulse just after the zero-cross, the entire wave will pass so 100% power. If we activate the pulse in the middle of the wave, well, 50% power and so on. For that we need to first know when the zero-cross is and then change the time from that to the firing pulse. This is called phase control since we control the position where we send the pulse from 0 to 360 degrees. Below you have an example representation where we control 100% of the wave or 50%.
I've made the connections as in the scheamtic before. We use that full bridge rectifier and the EL817 photocoupler and detect the zero-cross. The output from the photocoupler is connected to an Arduino and by that we detect the zero-cross and all we have to do then is to count time till the firing pulse. We apply the pulse to another photocoupler and that will be connected to the TRIAC gate. The code is simple, see that below.
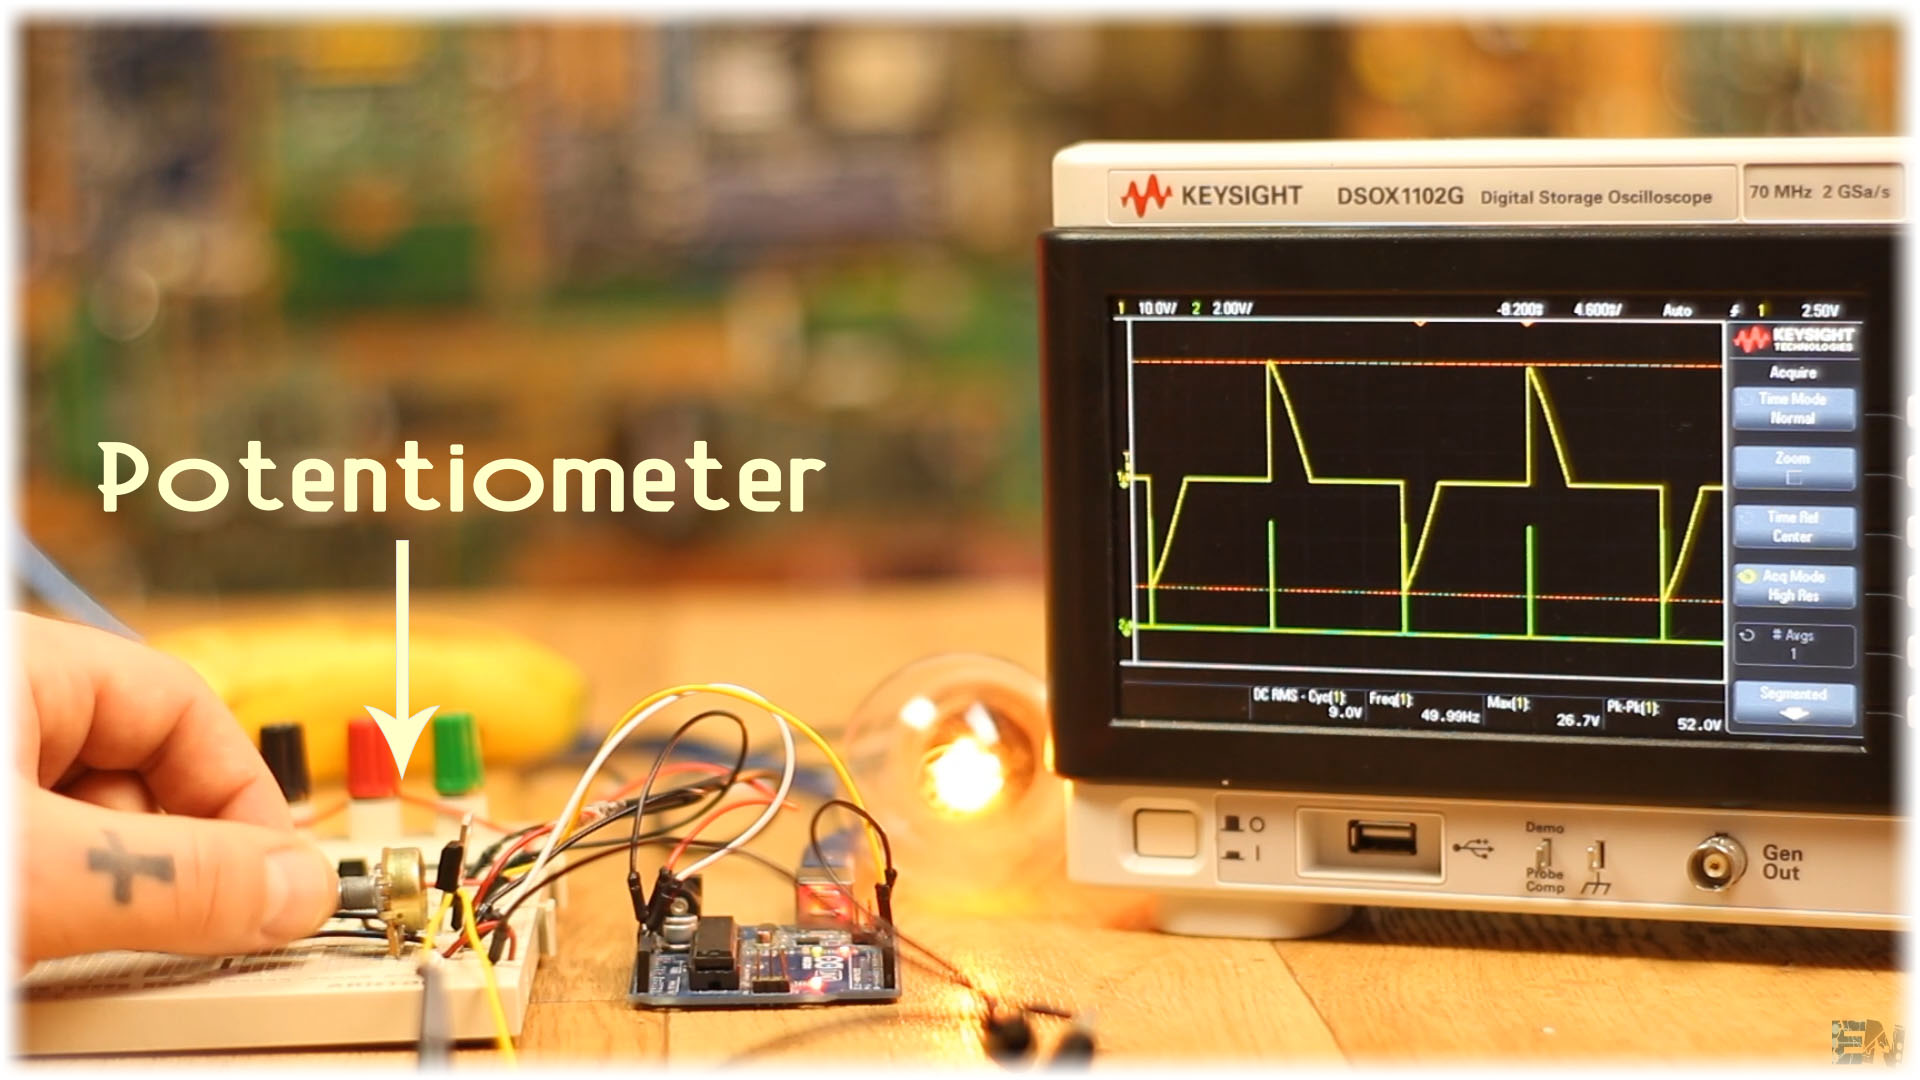
I mount everything on a breadboard. Remember, in order to control power, all we have to do is to control the time between the zero cross and when we fire the pulse at the TRIAC gate. For that, in the Arduino code, I read the value of a potentiometer and map that value to a delay between 1 and 10 milliseconds.
valor = map(analogRead(A0),0,1024,10000,10);
    if (detectado)
    {
      delayMicroseconds(valor); //This delay controls the power
      digitalWrite(3,HIGH);
      delayMicroseconds(100);
      digitalWrite(3,LOW);
      detectado=0;
    }


