
Around 2 years back I've made a huge portable Bluetooth speaker but that had some errors with the circuit. Then, I've made a small portable bluetooth speaker that had a good circuit. Now, I'me making a new version for the big speaker but with all the errors corrected. It will have a 6S battery pack with good capacity. It will have a 320W amplifier, an on/off switch, a paring button, a volume potentiometer and the battery pack will also have a 6S BMS protection and charging circuit. In this way we can charge back the battery. And to know when it's low, the speaker will have a small voltage meter with a 7 segment display. Let's start...
Ok, for this tutorial you have the full part list below. But first, we need our battery pack. I had a few of those 18650 batteries from an old laptop and some new ones as well. I will use 12 of these batteries. I will make pairs of 2 batteries in parallel and then I will put 6 of these packs in series and get 6S battery pack.
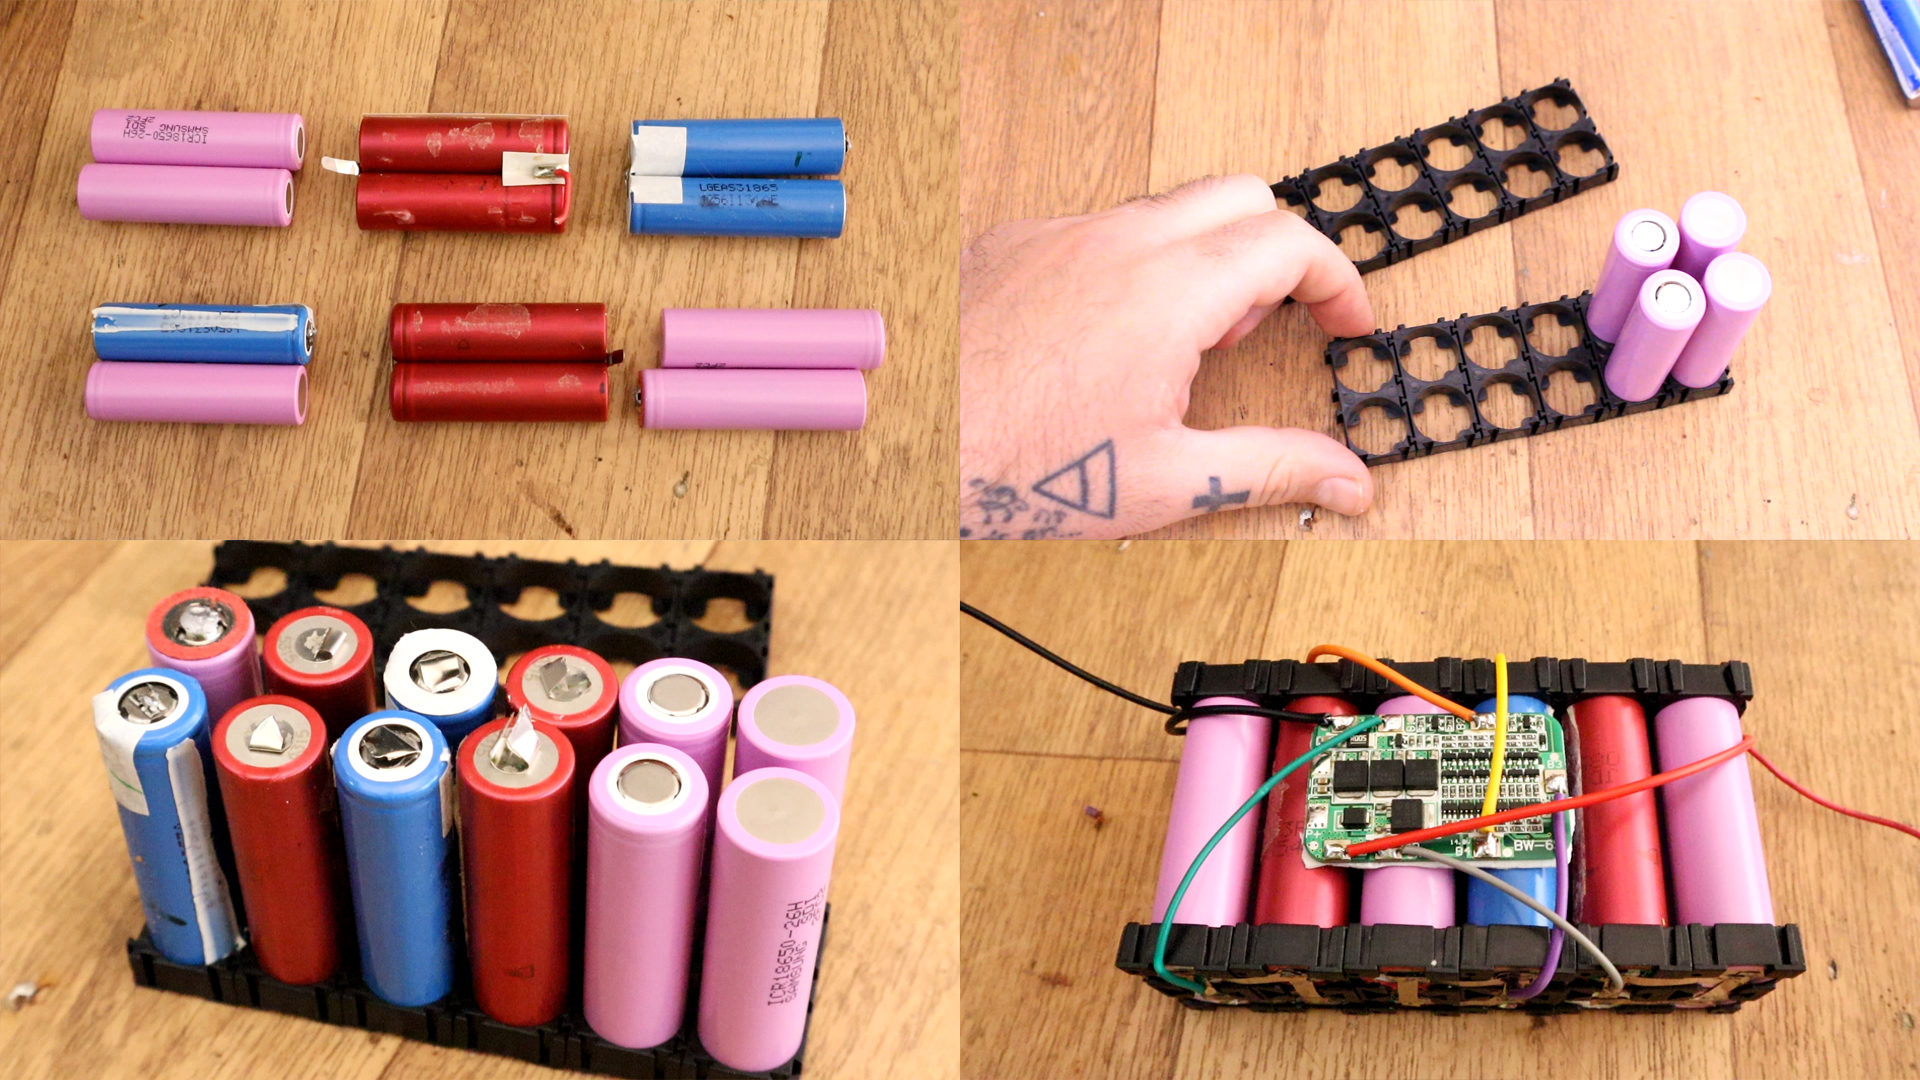
As you can see above, I've used those plastic supports made for this kind of battery pack. Those are very easy to use and you can give them any shape. Just join them together with the amount that you need. In my case I need 6 supports for the bottom part and 6 more for the top part. Then I place a parallel pack with positive side upwards, then the enxt pack with negative upwards and so on. I use my spot welder to join the parts as in the schematic below. Then I solder the 6S BMS module as below in the schematic as well and the battery pack is ready.
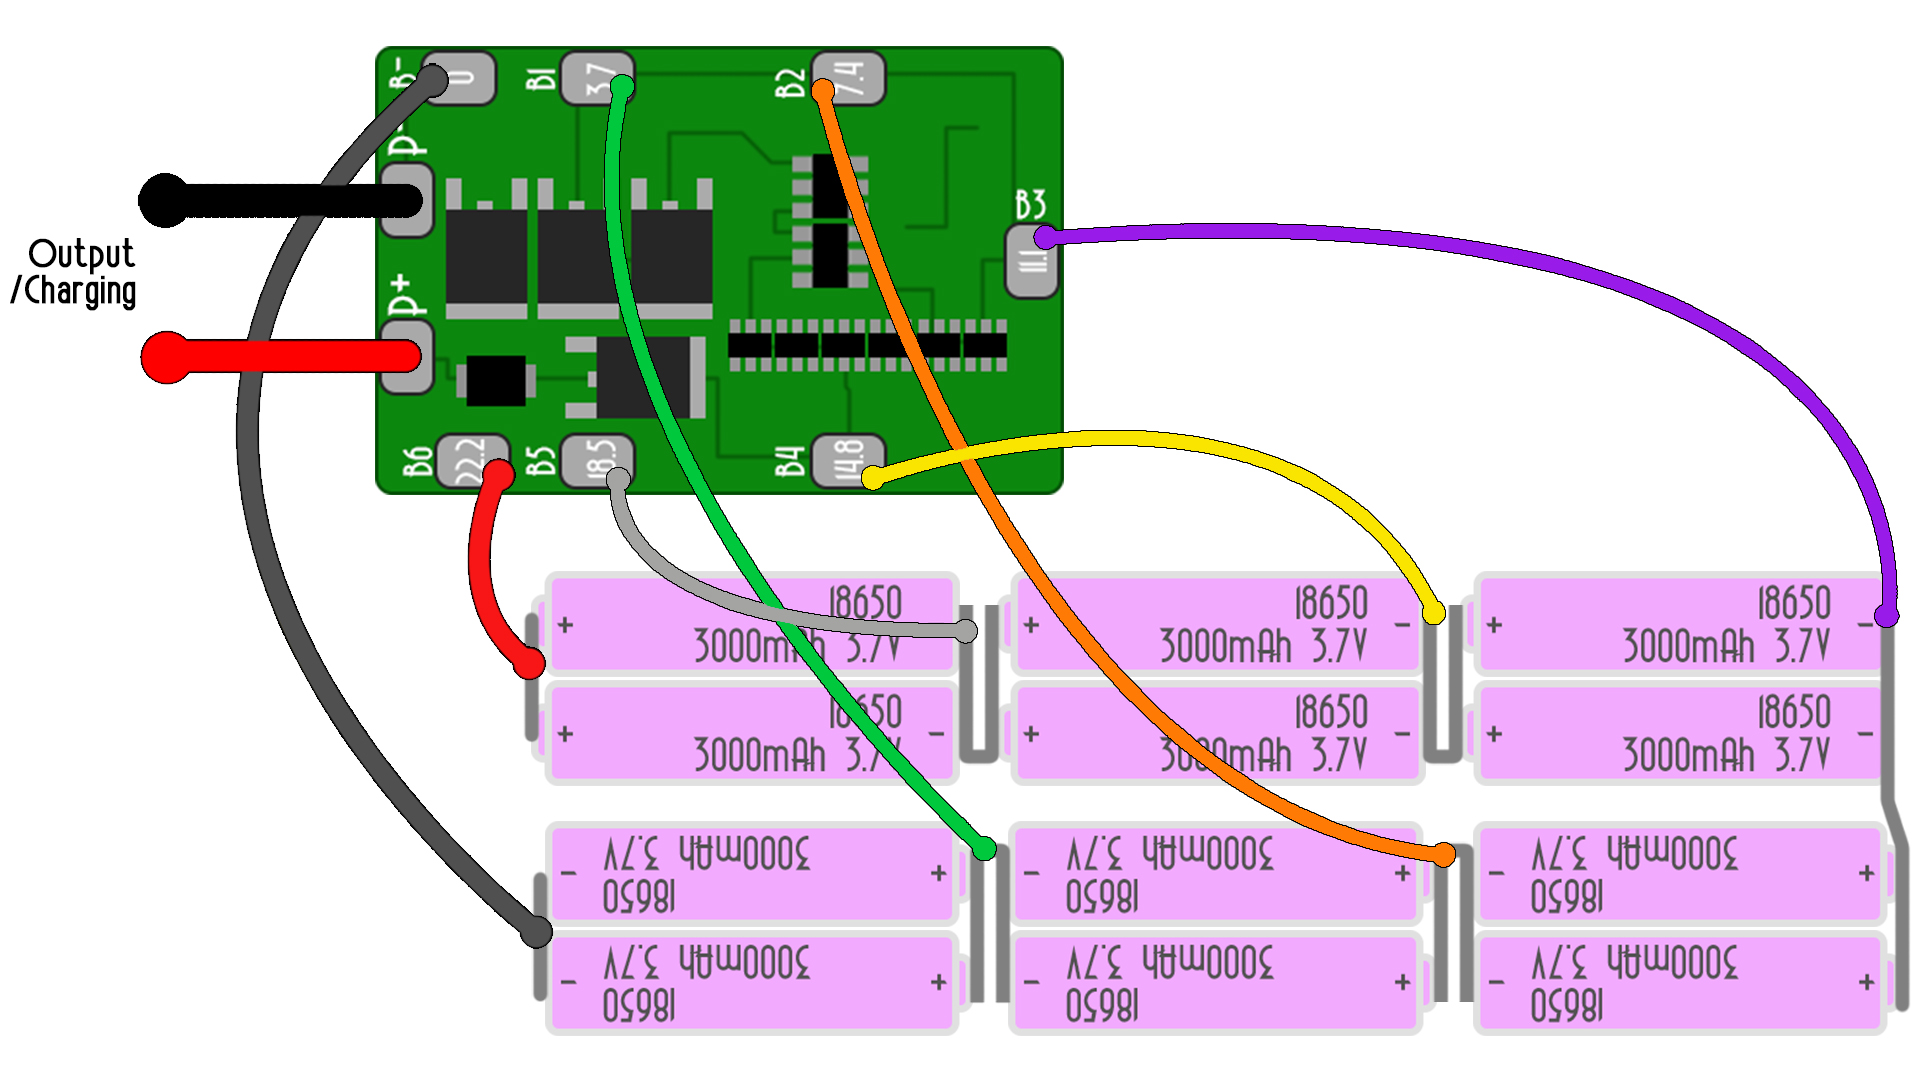
Now we haev out battery pack of 6S of 25.2V and in my case, using 3000mAh battery and 2 in parallel, with a total capcity of 6000mAh. This will be good enough for this project. Is now time to connect this to the rest of the circuit that you will find in the next part. So let's see...
The schematic is quite simple. Between the battery and the rest of the circuit we have a ON/OFF switch. So we connect the positive side of the battery to that switch and the switch is connected to 3 things: to the amplifier positive input, to the positive input of the small buck converter and to the input of the voltage meter. That buck converter is used to lower the voltage from 25V to 4.2V for the Bluetooth module.
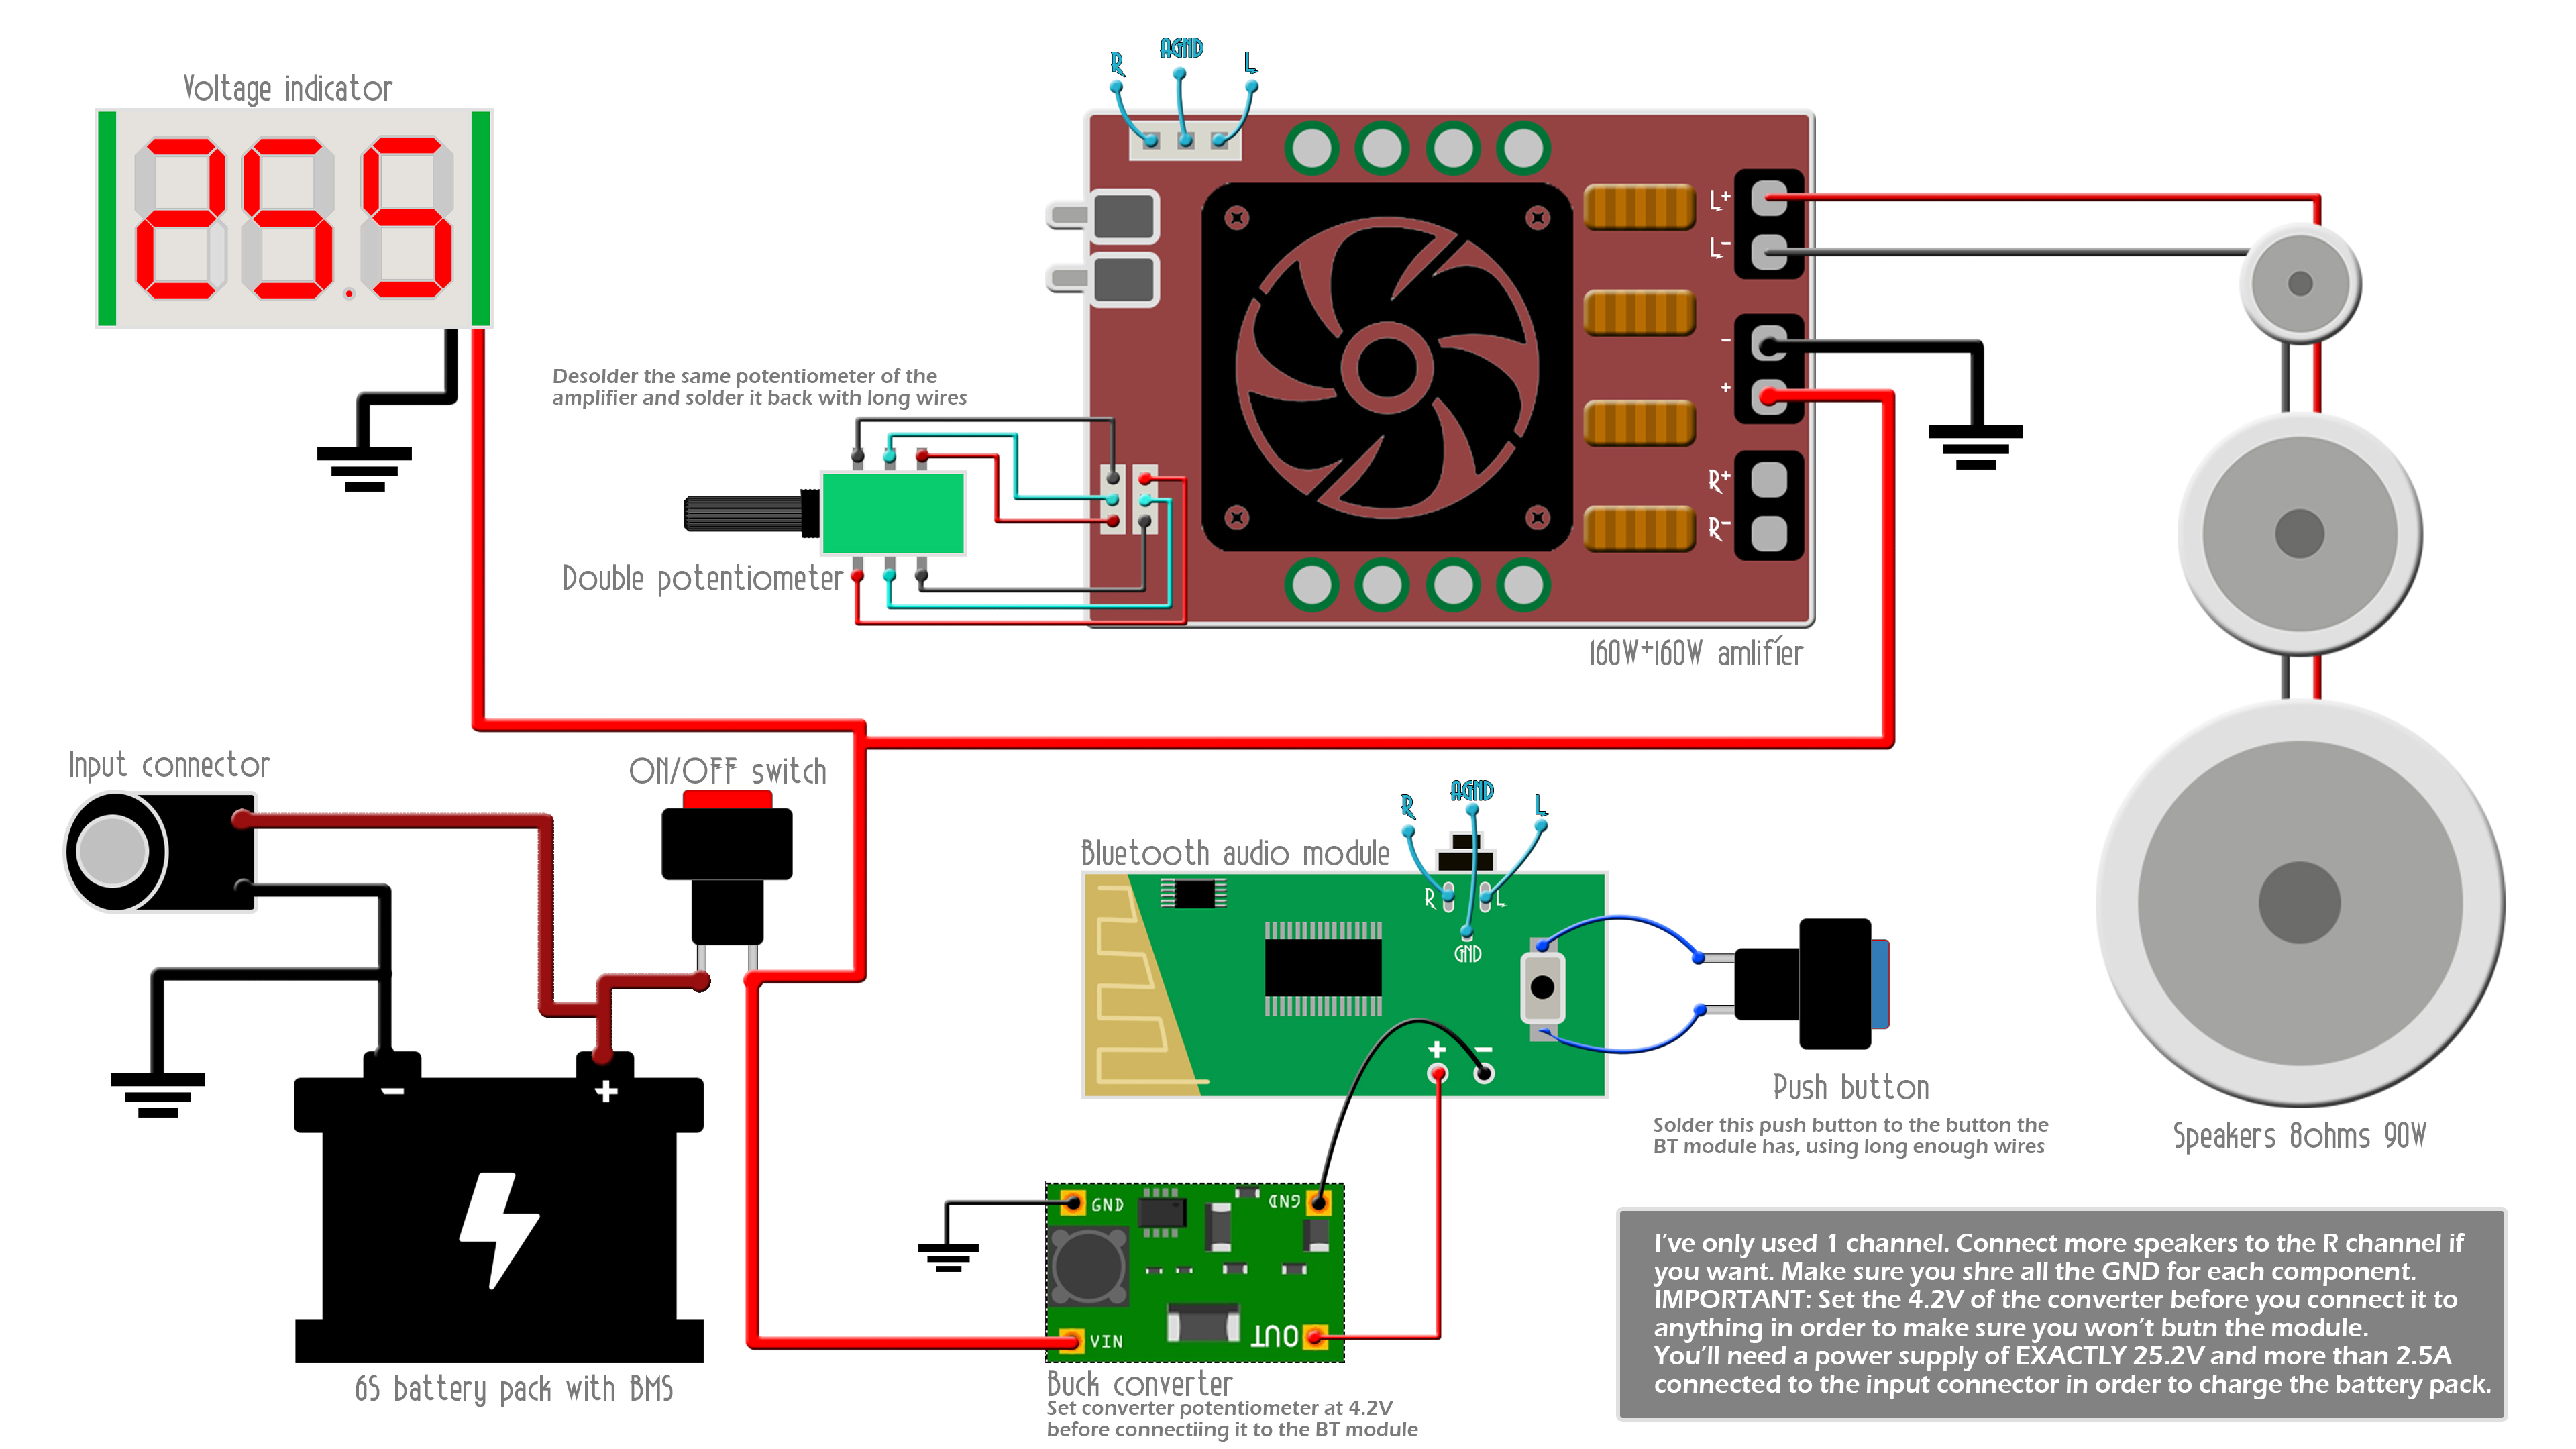
So, as you can see above in the schematic, we don't have much connections. Connect the R, AGND and and L from the Bluetooth audio module to the inputs of the amplifier. Connect one or both outputs of the amplifier to your speakers and make sure the speakers are powerful enough. Solder the input connector to the battery. The battery has a BMS as seen before so it will get charged and balanced if we apply exactly 25.2V to the main input. We can see when to charge the battery on the voltage indicator connected after the ON/OFF switch. For the volume potentiometer I've desoldered the potentiometer the amplifier had and solder it back in the same way but using long thin wires. Also,
Now I first make the connections in the schematic outside the wood case in order to make sure it works. Any way, I make 2 holes on top of the case and place the on/off switch (red one) and the paring switch (blue button). I first solder long wires to those and then connect them to the circuit. Then I make another hole and place the battery indicator and connect that to the switch. I place the battery inside the case with screws.
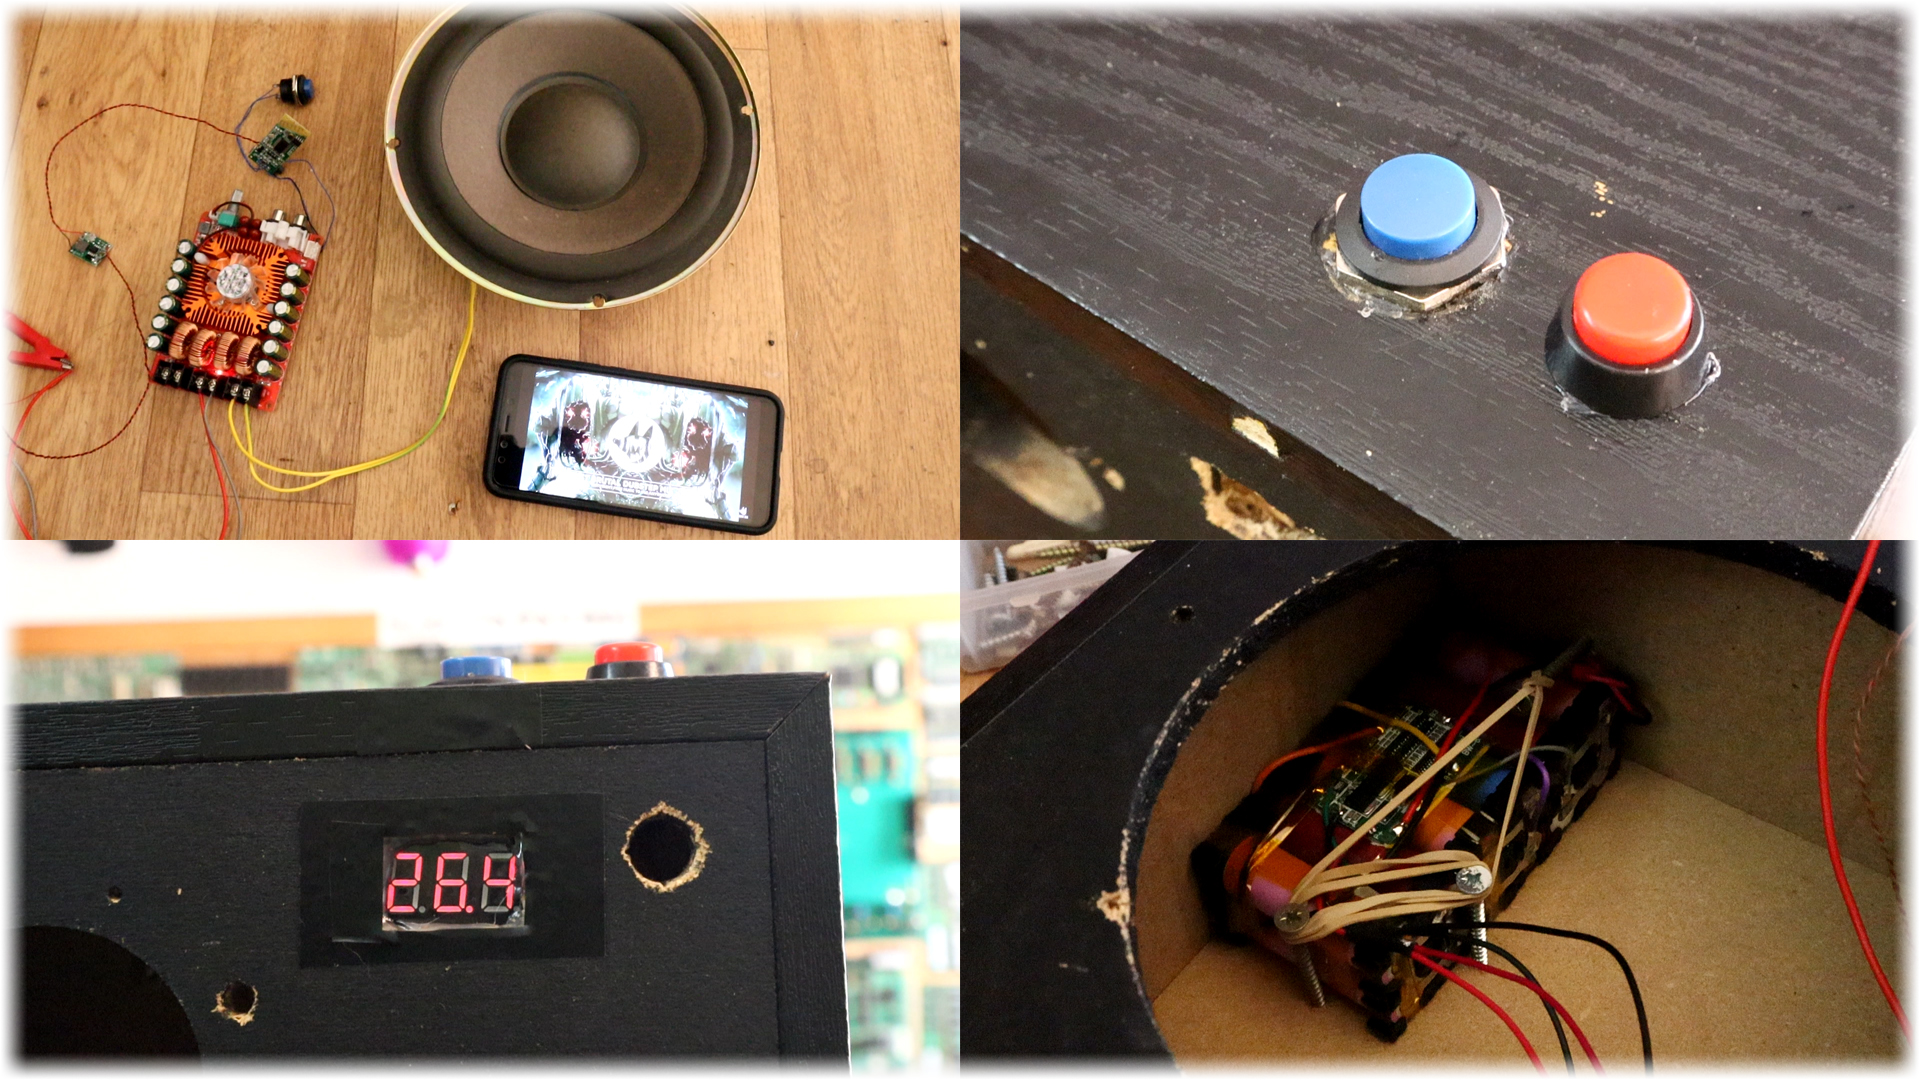
Finally I desolder the volume potentiometer and solder it back using long wires. I make another hole on the side of the other two buttons and place the volume potentiometer with a plastic knob as well. Then I screw the amplifier inside the case and fit all the wires. I connect the speakers and I can now screw back the speakers and add the plastic covers and the project is done...
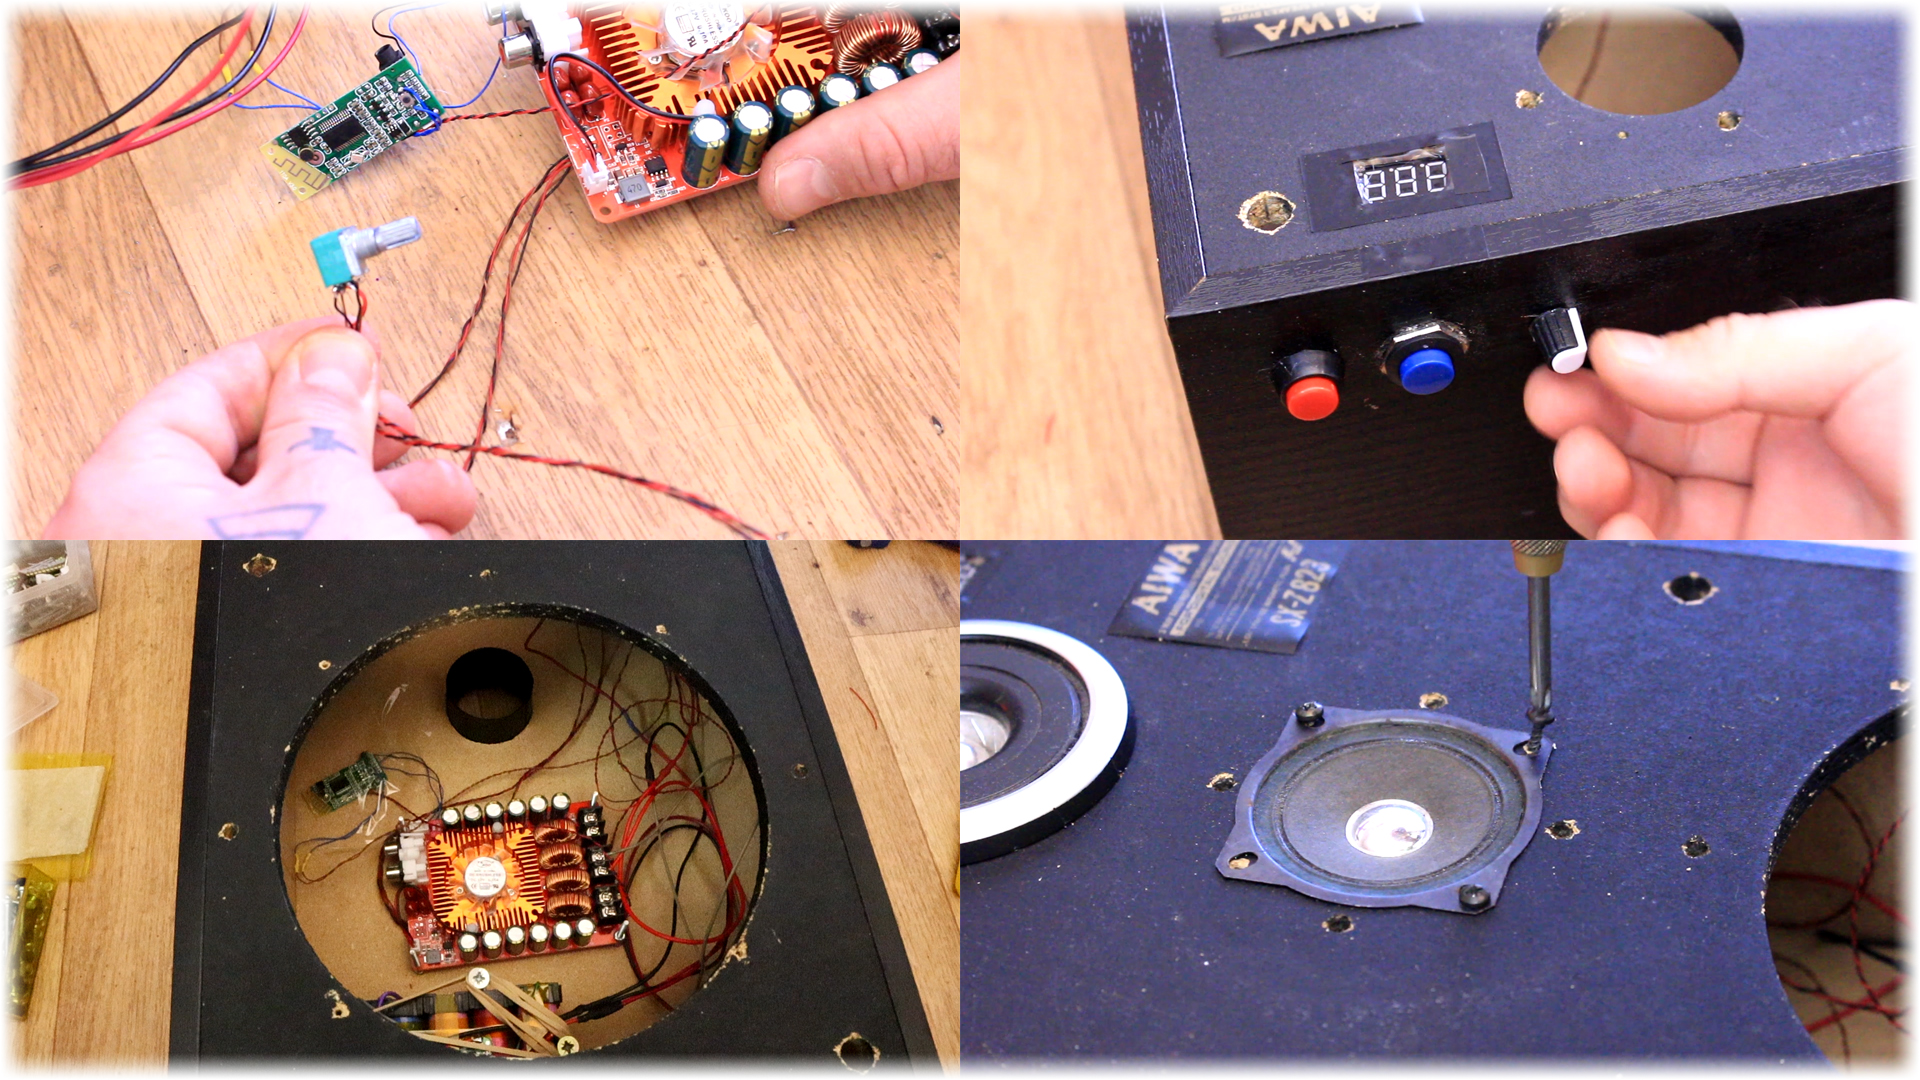
Finally, now that everything is inside I power it on and I can see the battery level. If the battery is low just use your power supply set to 25.2V and chare the battery. I press the paring button and after the beep I turn on Bluetooth on my smartphone and connect to the module and play music. It works great...


