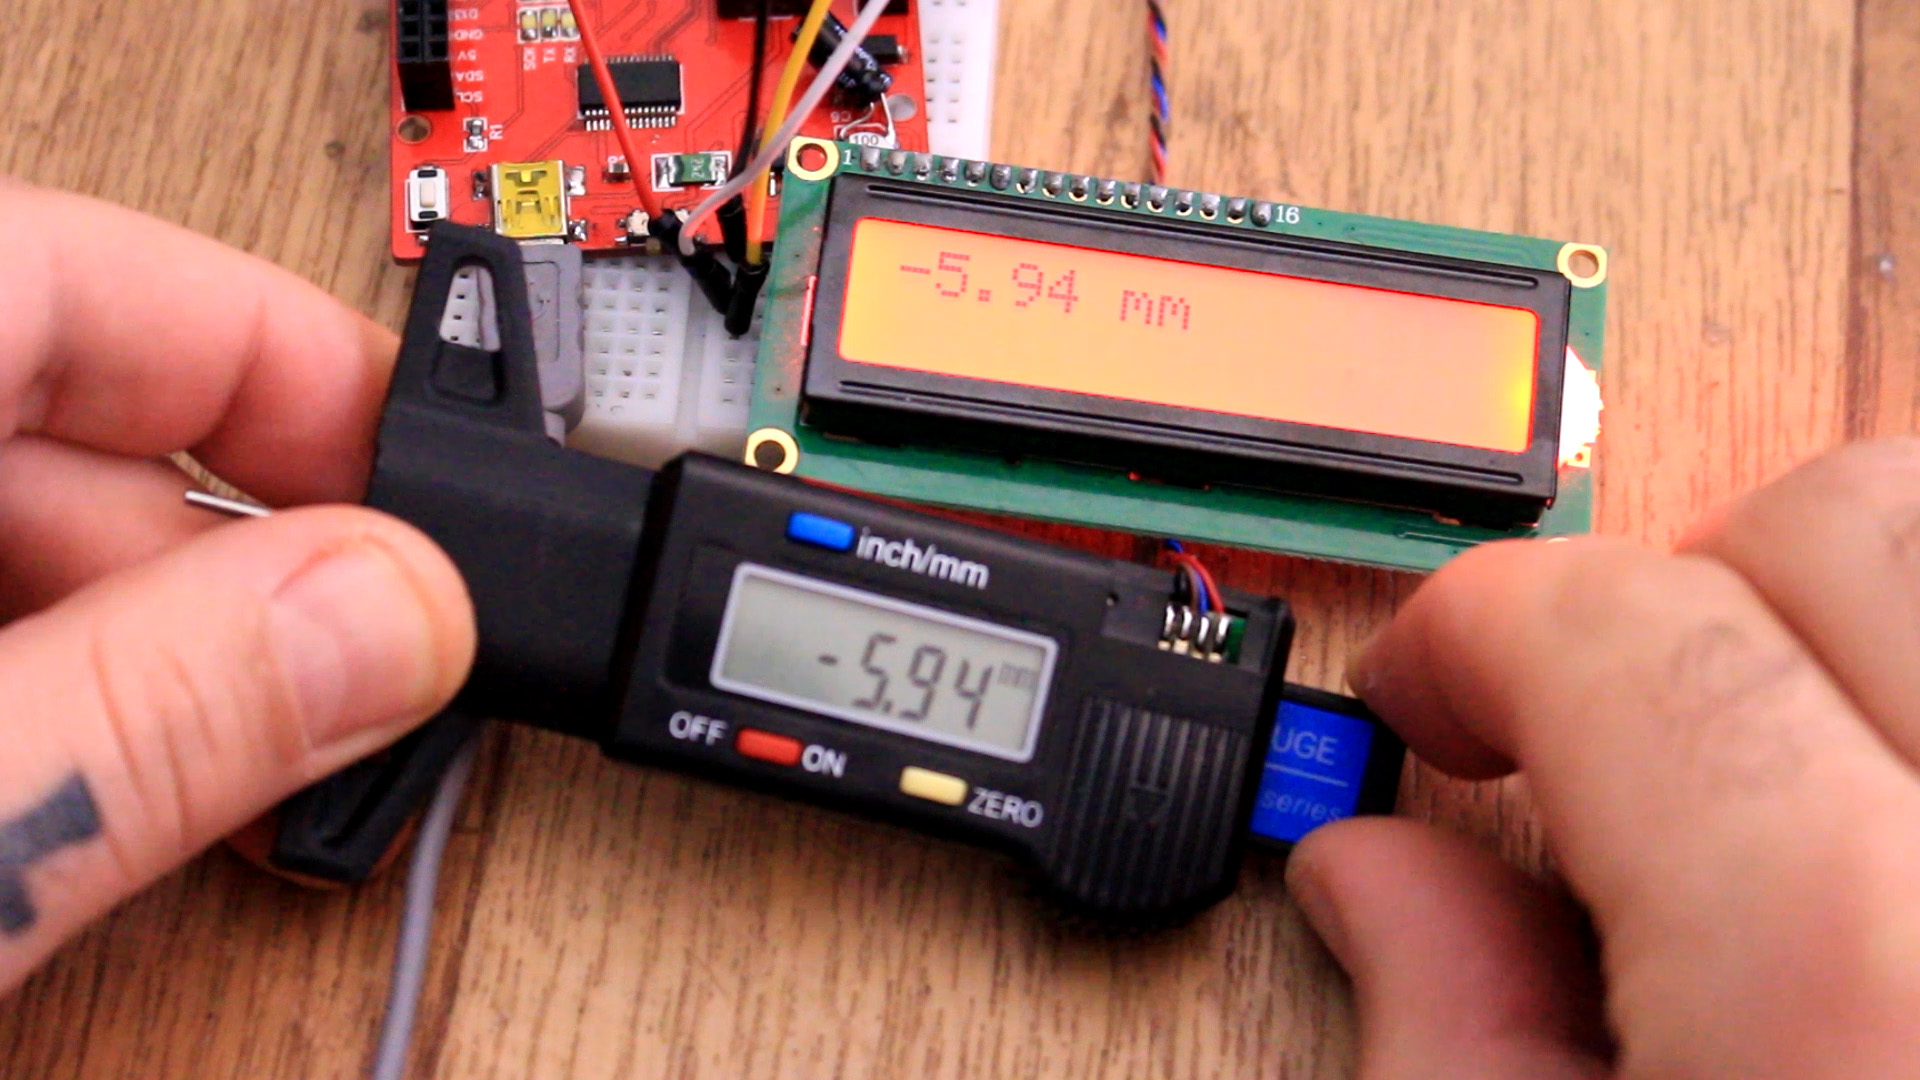
For some time now, maybe more than a year, I wanted to make my own 3D filament extruder in order to recycle old or bad 3D printed parts. But a filament extruder needs a few parts such as the motor, the extruder, the heating block, the PID process but also to mesure the diameter of the output filament in order to adjust itself in the PID loop and have always the same diameter, around 1.75mm in this case. For that I need this device, a caliper based filament meter with good precision. That's why I've used a dept caliper with a resolution of 0.01mm so I could see diameter variations up to that scale. In this tutorial we will see how to read data from this caliper using those i2c serial pins that the caliper has and connect that to an Arduino. Then we make the 3D printed support, add all the parts and we measure the diameter. Let's start.
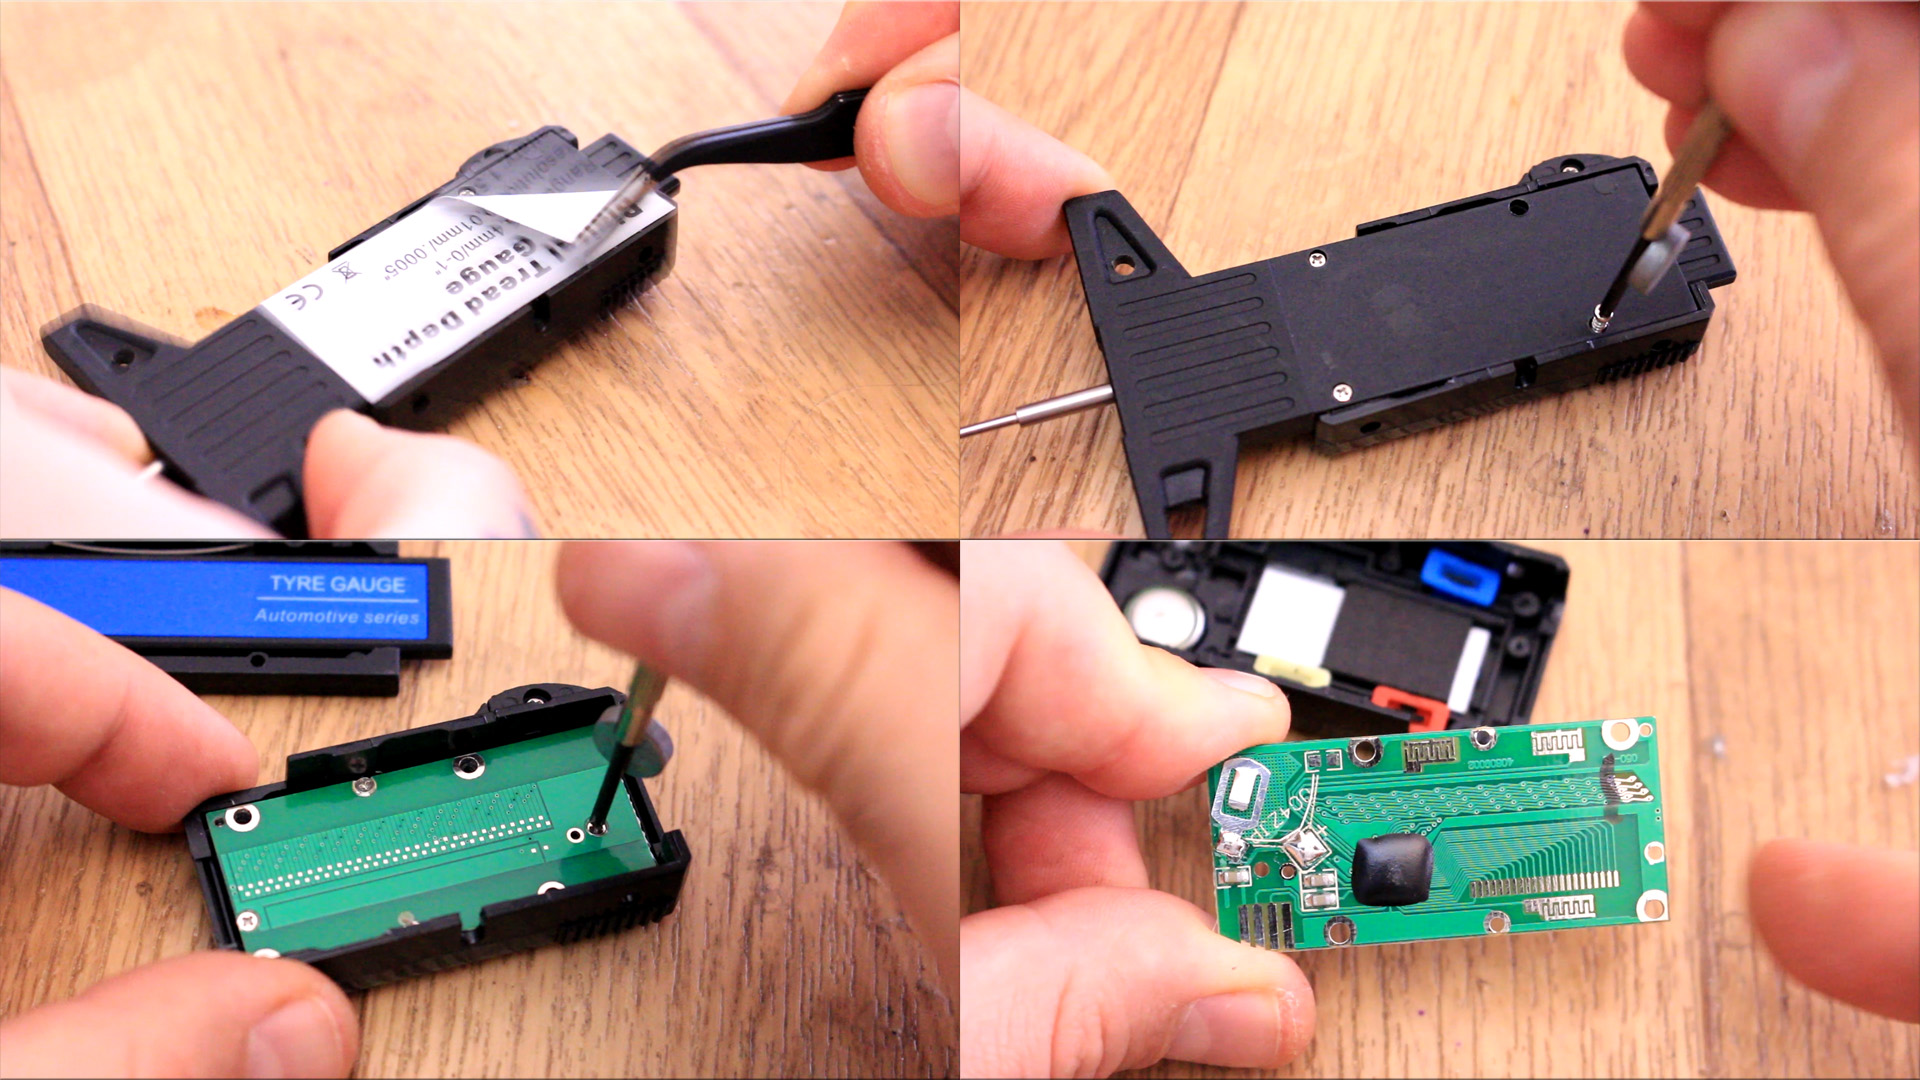
First, let's take the oportunity and see how a digital caliper works. I first remove the label and take out 4 screws from the back of the plastic case. Inside we haev the PCB and we have to take out 4 more small screws. Then we could take out the main PCB. Be careful and not damage the LCD display connections. On the PCB we can see the battery support, the pads for the push buttons, the microcontroller under that black protecting dot, the i2c pins of the left bottom corner and on the other side we have a lot of copper pads. For a better look, let's also see what the other side of the caliper has as well...
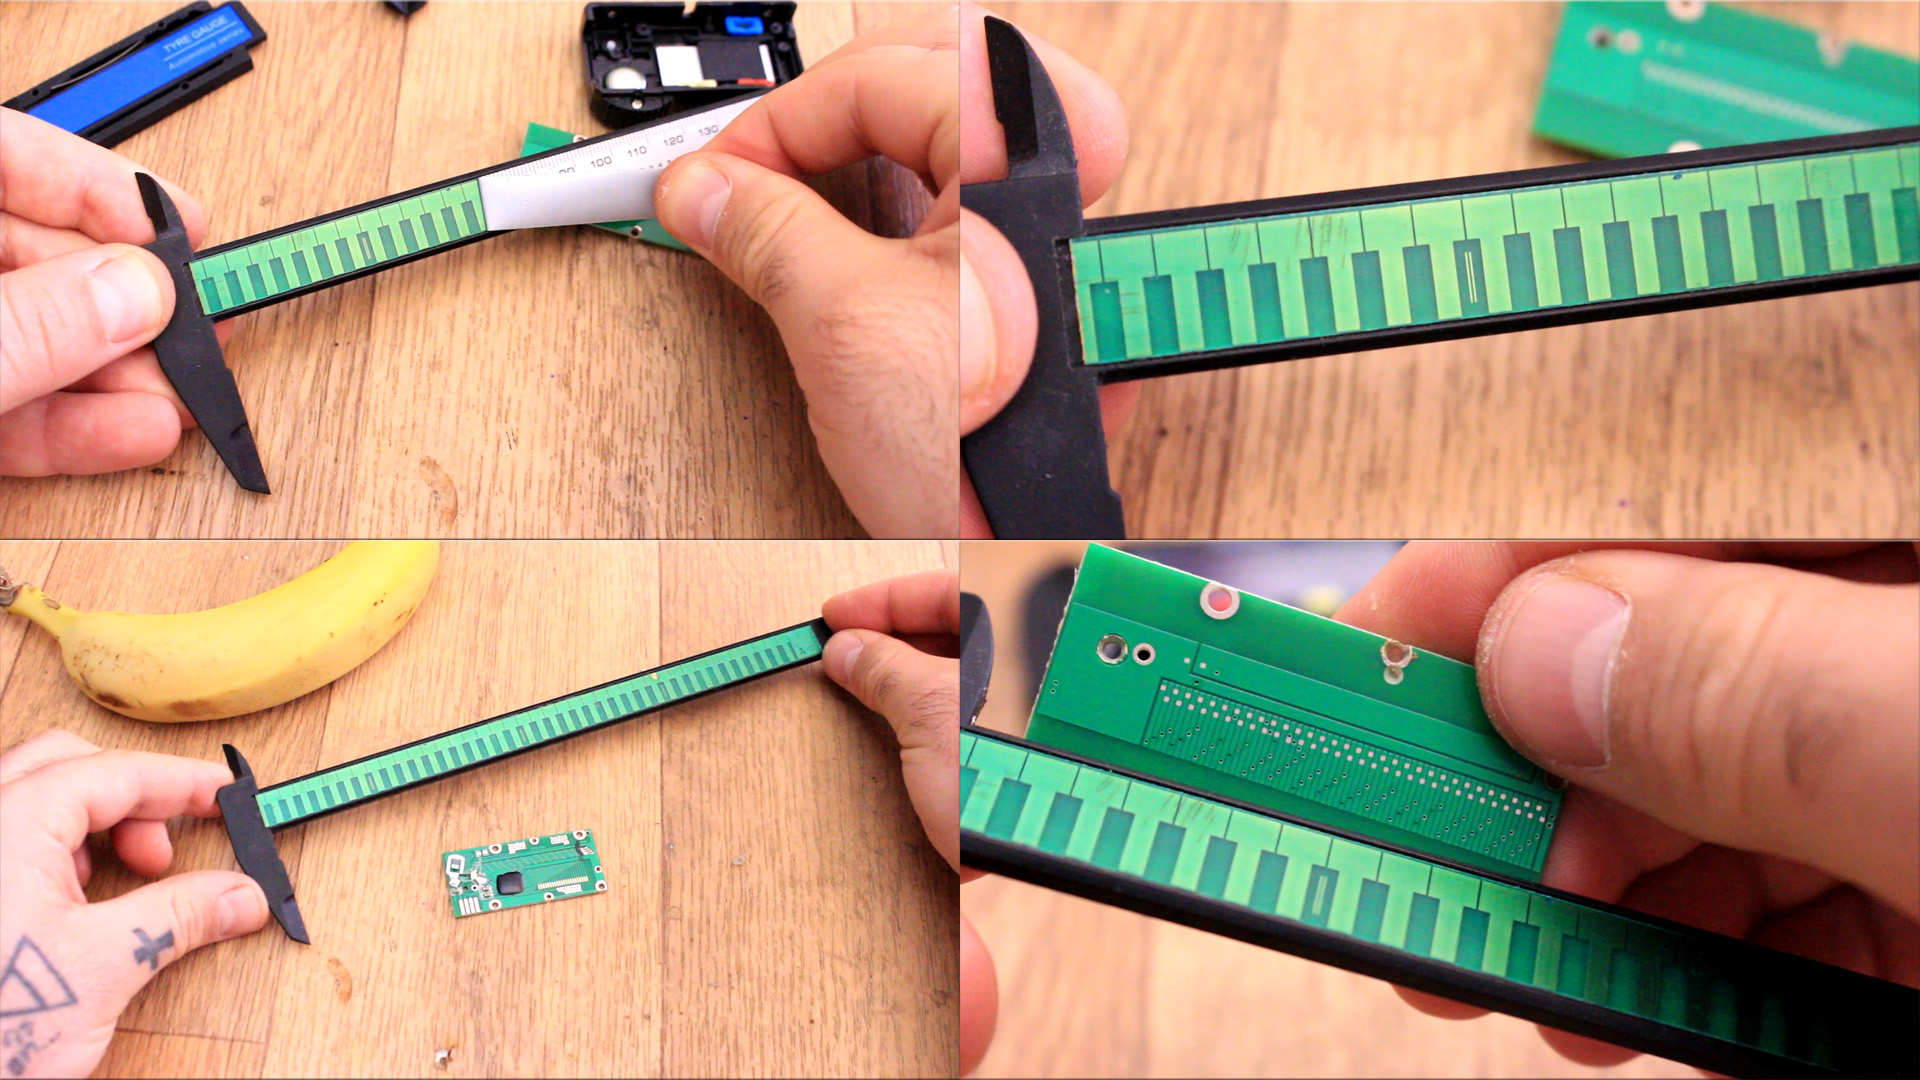
Ok, so I peal the label from the other part of the caliper and once again we have a lot of copper pads here as well. So how dose this work? This goes like this. When the small pads from the small PCB are in front of the other pads, they create some very small capacitors. When the pads are exactly one in front of the other the capacitance will be at its maximum value. But when we are moving the plastic bar back and forth, the position of the pads won’t be perfectly aligned, and the capacitance will get lower or higher depending on the position. So, all the microcontroller has to do is to count the capacitance peaks and by that count steps which are later translated into distance.
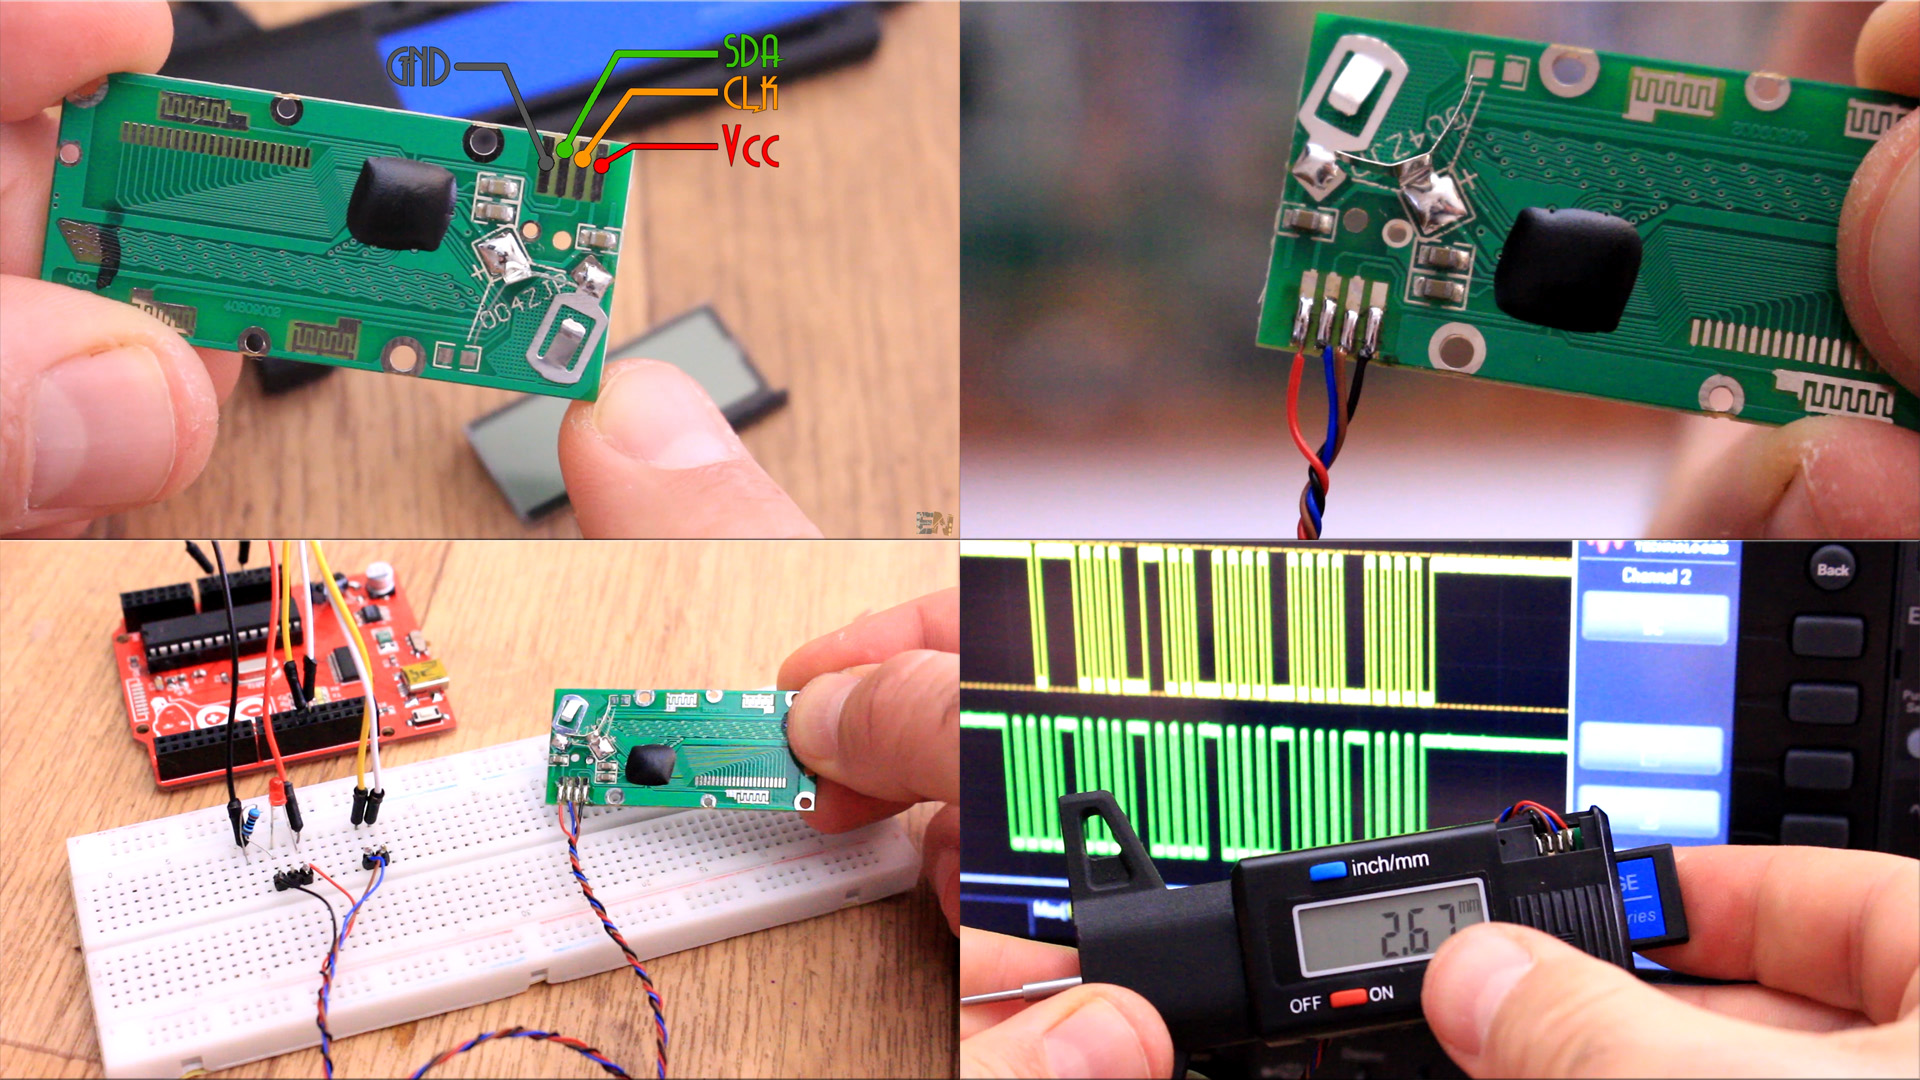
On one corner of the PCB we have the i2c pins with GND, positive input and the serial pins for data and clock. I solder 4 wires to this pins with black, brown, blue and red colours. Then I connec that to my oscilloscope in order to see what I receive. I can see6 bytes in series and those bytes represent each digit on the screen of the caliper. So all we have to do is to read this serial data bytes inside the Arduino and get the final value. For that, first see the scheamtic below because we need to add something more.
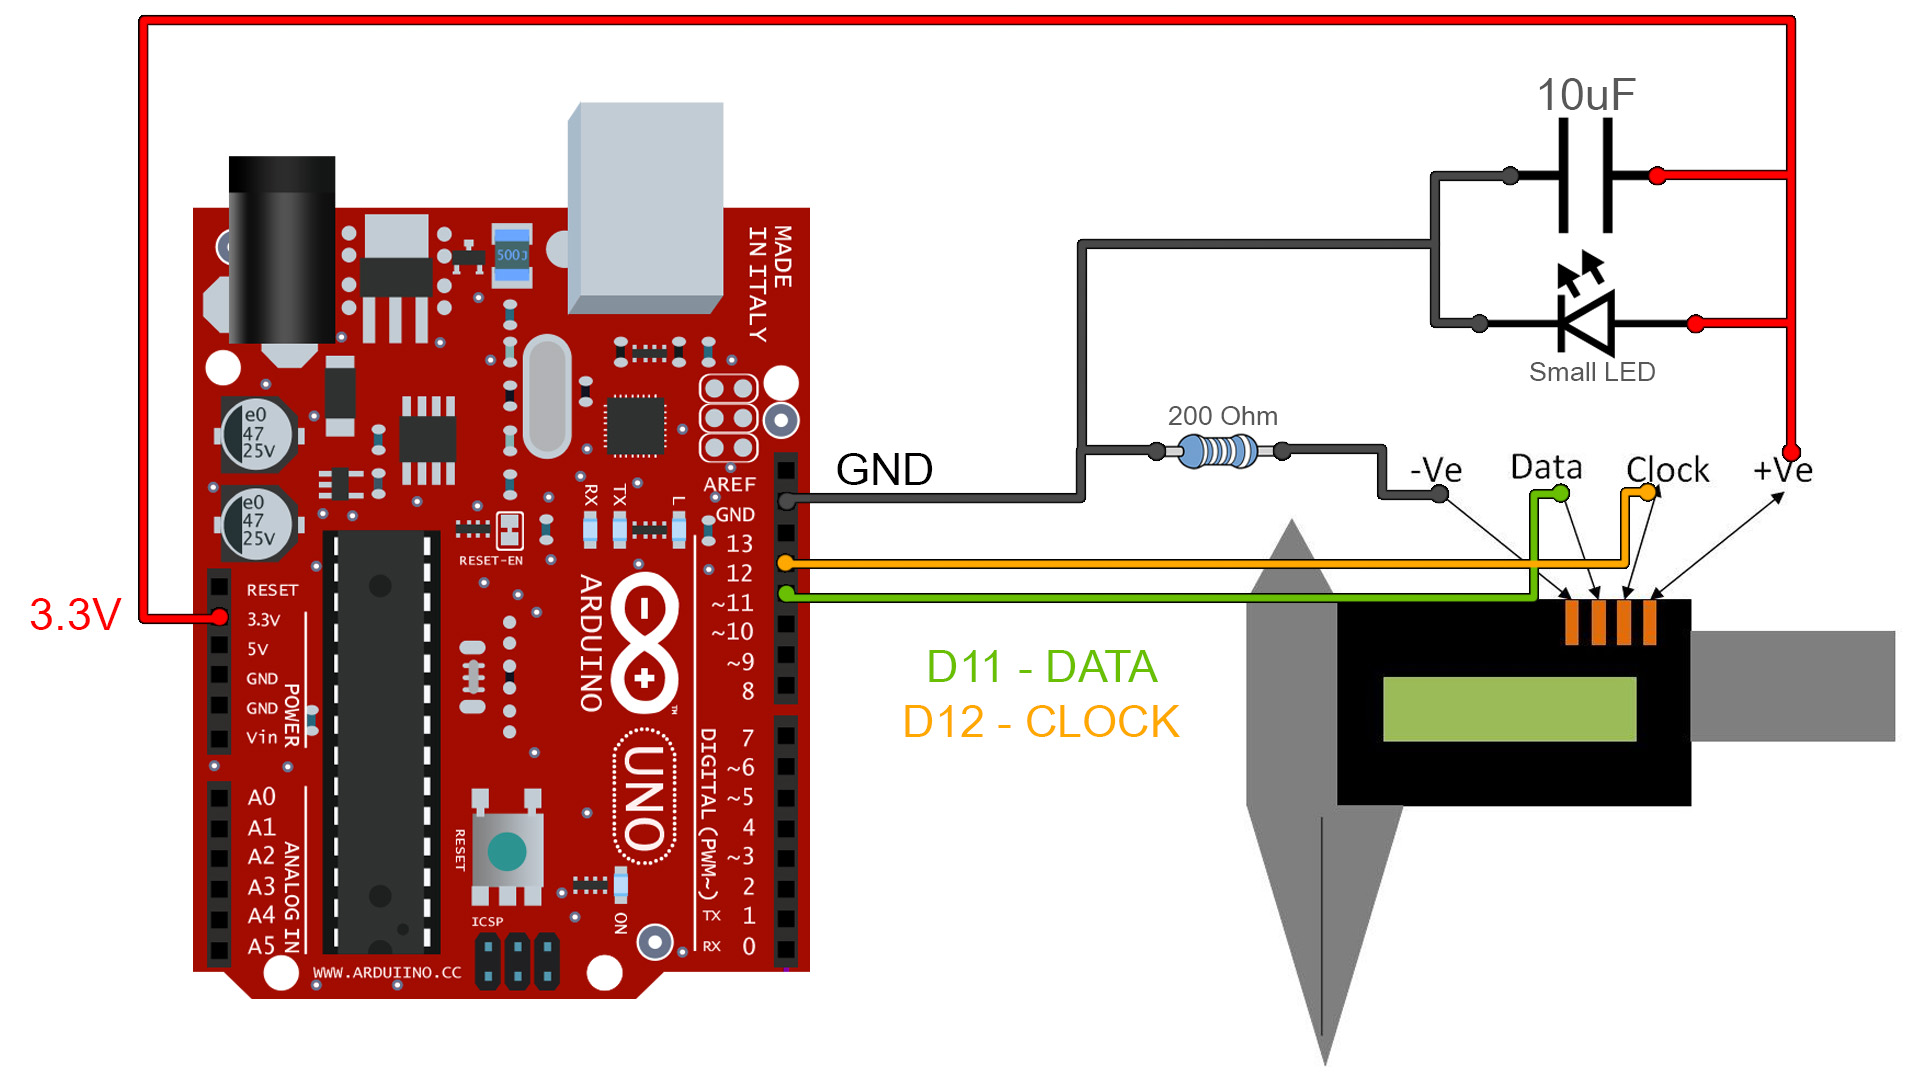
You have the schematic below. Add that 200R current limiting resistor to the GND connection of the caliper. Also add a small cap for the 3.3V and a diode. Connect the clock and data pins to digital pins D12 and D11 for the i2c serial communication. Now you could add an LCD or jsut print the values to the serial monitor. Upload the next code and see the values on the serial monitor.
The code is simple. We define the data and clock pins. In the read caliper loop, all we do is to detect the data pin high orm low at each clock pulse and by taht detect if the bit is a 1 or a 0. When we have all 8 bits, then we have a first byte and we start reading the next. We get the bytes and we get teh value on the screen. We divide that by 100 and get mm and map that for inches as well. We use the serial.print to send the data to the serial monitor and that's it.
for(int i=0;i<24;i++) {
    while(digitalRead(CLOCK_PIN)==LOW) {}
    while(digitalRead(CLOCK_PIN)==HIGH) {}
    if(digitalRead(DATA_PIN)==HIGH) {
      if(i < 20) value|=(1<<i);
      if(i==20) sign=-1;
      if(i==23) inches=1; // doesn't work with my caliper, always returns inches
    }
  }