
In this Arduino Tutorial we will learn how the HC-SR04 Ultrasonic Sensor works and how to use it with the Arduino Board. It emits an ultrasound at 40 000 Hz which travels through the air and if there is an object or obstacle on its path It will bounce back to the module. Considering the travel time and the speed of the sound you can calculate the distance.
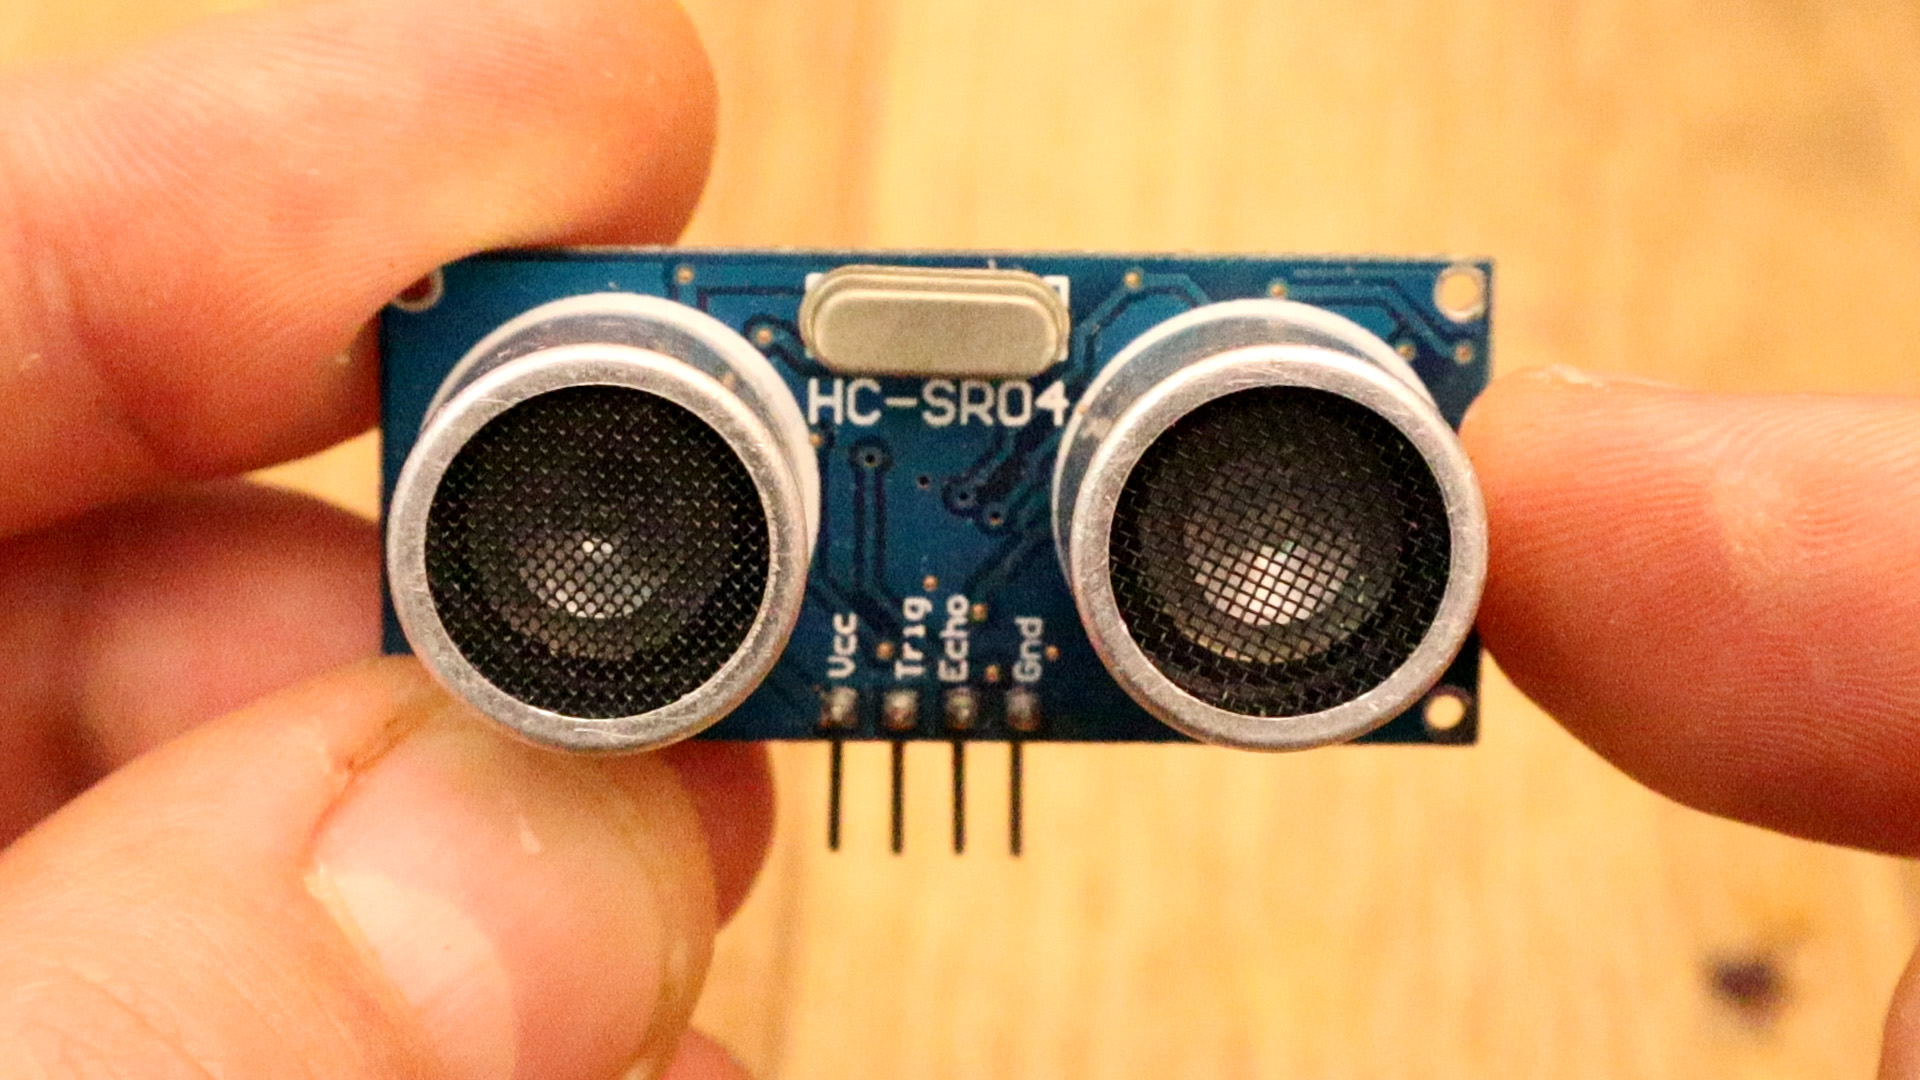
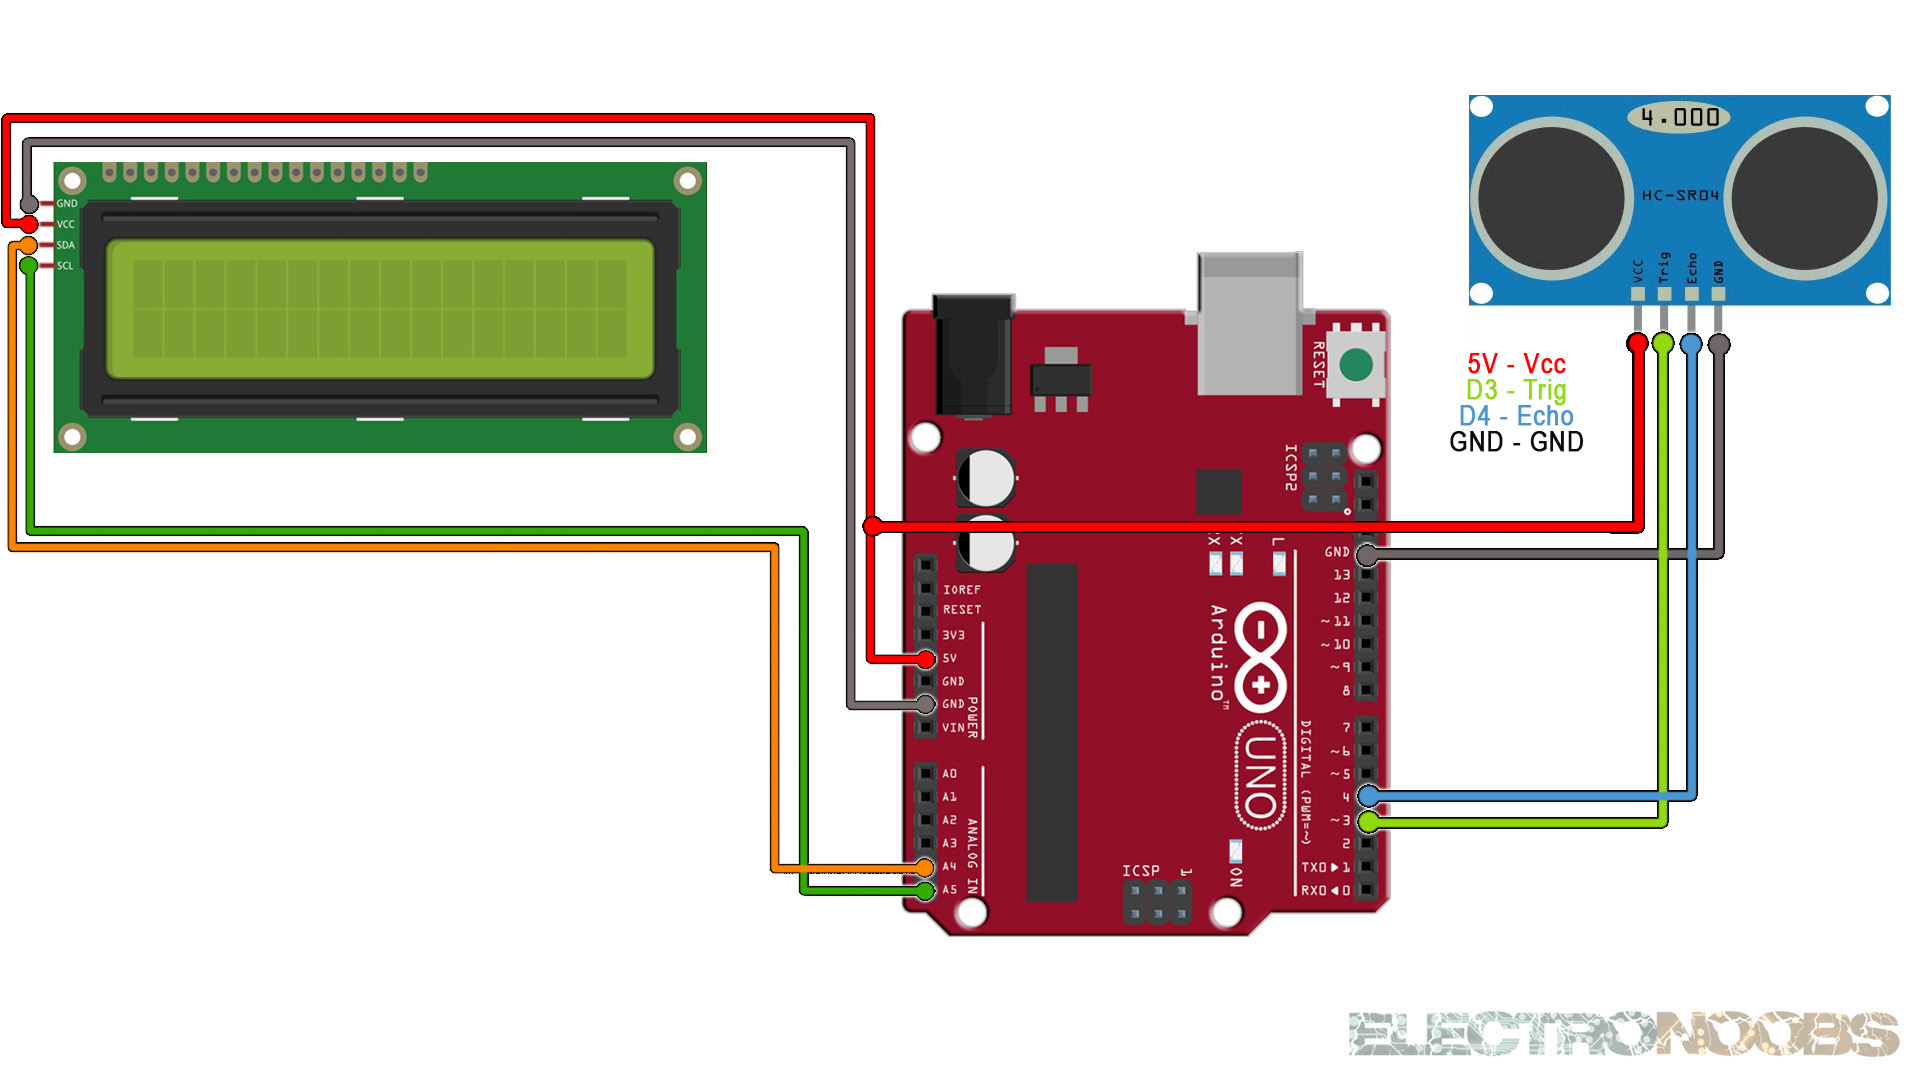
The HC-SR04 Ultrasonic Module has 4 pins, Ground, VCC, Trig and Echo. The Ground and the VCC pins of the module needs to be connected to the Ground and the 5 volts pins on the Arduino Board respectively and the trig and echo pins to any Digital I/O pin on the Arduino Board.
In order to generate the ultrasound you need to set the Trig on a High State for 10 µs. That will send out an 8 cycle sonic burst which will travel at the speed sound and it will be received in the Echo pin. The Echo pin will output the time in microseconds the sound wave traveled. We print the values on the serial monitor or LCD. See codes below.
// defines arduino pins numbers
const int trigPin = 3;
const int echoPin = 4;
// defines variables
long duration;
int distance;
void setup()
{
  pinMode(trigPin, OUTPUT); // Sets the trigPin as an Output
  pinMode(echoPin, INPUT); // Sets the echoPin as an Input
  Serial.begin(9600); // Starts the serial communication
}
void loop() {
  // Clears the trigPin
  digitalWrite(trigPin, LOW);
  delayMicroseconds(2);
  // Sets the trigPin on HIGH state for 10 micro seconds
  digitalWrite(trigPin, HIGH);
  delayMicroseconds(10);
  digitalWrite(trigPin, LOW);
  // Reads the echoPin, returns the sound wave travel time in microseconds
  duration = pulseIn(echoPin, HIGH);
  // Calculating the distance
  distance= duration*0.034/2;
  // Prints the distance on the Serial Monitor
  Serial.print("Distance from the object = ");
  Serial.print(distance);
  Serial.println(" cm");
  delay(150);
}
Upload the code and make the connections. Then open the serial monitor at 9600 bauds and you will have the results printed to the serial monitor. Or go below and download the code with the i2c LCD.
#include <Wire.h>
#include <LiquidCrystal_I2C.h>
// Set the LCD address to 0x27 or 0x3f for a 16 chars and 2 line display
LiquidCrystal_I2C lcd(0x27, 20, 4);

// defines arduino pins numbers
const int trigPin = 3;
const int echoPin = 4;
// defines variables
long duration;
int distance;
void setup()
{
  lcd.init();
  lcd.backlight();
  pinMode(trigPin, OUTPUT); // Sets the trigPin as an Output
  pinMode(echoPin, INPUT); // Sets the echoPin as an Input
  Serial.begin(9600); // Starts the serial communication
}
void loop() {
  // Clears the trigPin
  digitalWrite(trigPin, LOW);
  delayMicroseconds(2);
  // Sets the trigPin on HIGH state for 10 micro seconds
  digitalWrite(trigPin, HIGH);
  delayMicroseconds(10);
  digitalWrite(trigPin, LOW);
  // Reads the echoPin, returns the sound wave travel time in microseconds
  duration = pulseIn(echoPin, HIGH);
  // Calculating the distance
  distance= duration*0.034/2;
  // Prints the distance on the Serial Monitor
  Serial.print("Distance from the object = ");
  Serial.print(distance);
  Serial.println(" cm");
  lcd.clear();
  lcd.setCursor(0,0);
  lcd.print(" Distance in cm ");
  lcd.setCursor(6,1);
  lcd.print(distance);
delay(150);
}
Upload the code and make the connections. Then open the serial monitor at 9600 bauds or just see the results on the LCD screen.


