


Download the .zip file below. Extract it and open the code in Arduino IDE. Make the connections as in the schematic, select the COM and uplaod the code to the Arduino. Open the monitior at 9600 baud rate and send the AT comands. "
/*Code to change the HC-12 baud rate
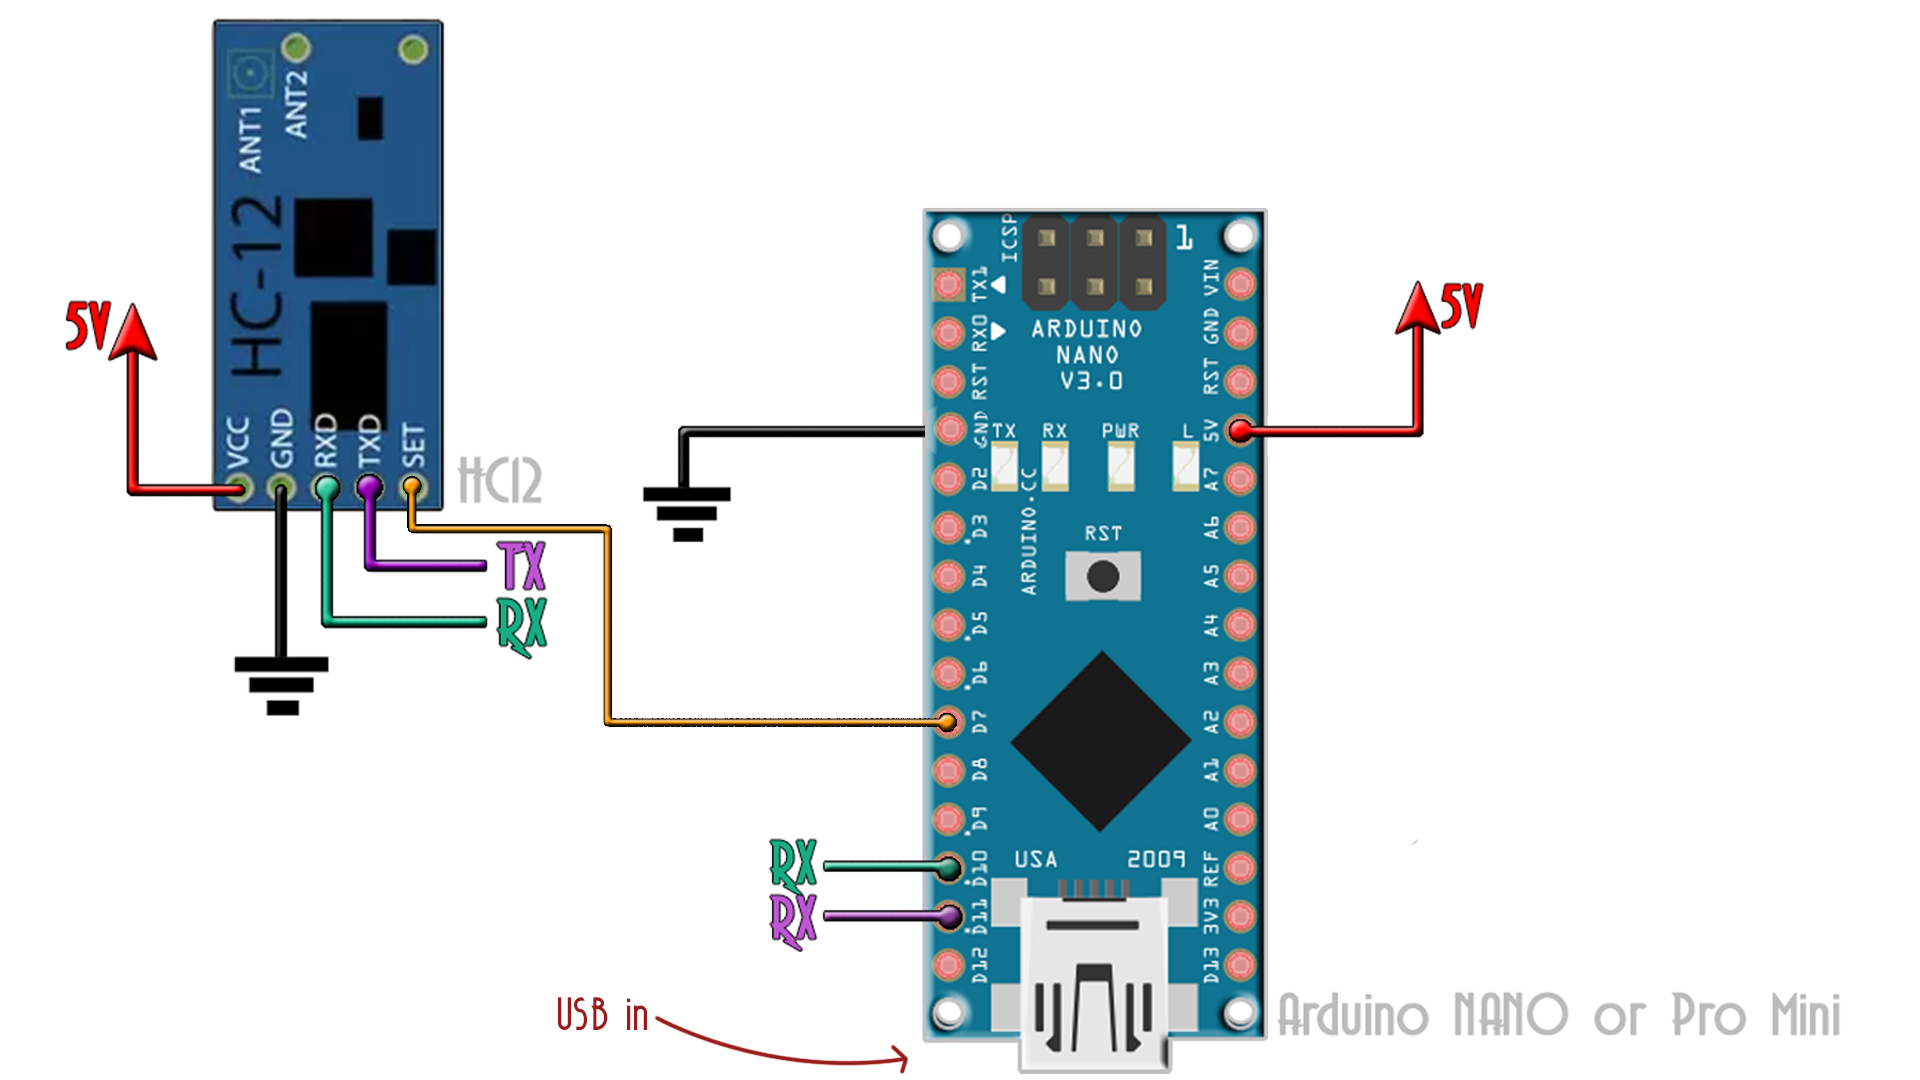
* Arduino | HC-12
D11 TxD
D10 RxD
GND GND
GND SET
5V VCC
*/
#include
SoftwareSerial hc12(11, 10);
void setup()
{
pinMode(7,OUTPUT);
digitalWrite(7,LOW); // enter AT command mode
Serial.begin(9600);
hc12.begin(9600);
hc12.print(F("AT+C001")); // set to channel 1
delay(100);
digitalWrite(7,LOW);// enter transparent mode
}
void loop()
{
if(Serial.available()) hc12.write(Serial.read());
if(hc12.available()) Serial.write(hc12.read());
}
/*
* 1. Change Baud Rate:
Enter “AT+Bxxxx” to change baud rate to xxxx bps.
Example: Enter “AT+B19200” and the module will work at baud rate 19200 bps and return “OK+B19200”.
The available values of xxxx are: 1200, 2400, 4800, 9600, 19200, 38400, 57600, 115200.
The default baud rate is 9600 bps.
* 2. Change Communication Channel:
Enter “AT+Cyyy” to change communication channel to yyy.
Example: Enter “AT+C021” and the module will change to channel 021 and return “OK+C021”.
The available values of yyy are: 001, 002, 003, …, 127.
The default channel is 001.
* 3. Factory Reset:
Enter “AT+DEFAULT” and the module will reset to default settings and return “OK+DEFAULT”.
*/


