
 About me
  History
  Let's learn
  Contact us
  Arduino tutorials
 Circuits tutorials
  Robotics tutorials
 Q&A
Q&A Blog
Blog  Arduino
  Circuits
 Robotics
  Modules
  Gadgets
 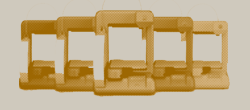 Printers
  Materials
  3D objects
  3D edit
  Donate
  Reviews
  Advertising


Voice controlled 3D printed robot arm
This is a voice recognition module from Geeetech that I’ve just received from Banggood. Once you setup the module, you could say voice commands and it will send a different two byte data for each command using a UART communication. If you connect a microcontroller like for example Arduino to it, and receive those bytes trough the RX and TX pins you could control things like motors, lights or any other modules using just your voice. In this tutorial, I will show you how this module works, how to setup it, save the voice commands and use it with Arduino in this robot arm project. So, let’s get started.
Buy the Geeetech voice module here:
The material for this project is: One arduino UNO, the geeetech voice module, 5 servos, one LED and some wires.
Arduino UNO: LINK eBay
Geeetech voice module: LINK eBay
9g Servo: LINK eBay
LEDs: LINK eBay
PLA material: LINK eBay
See part list here
Prepare the module
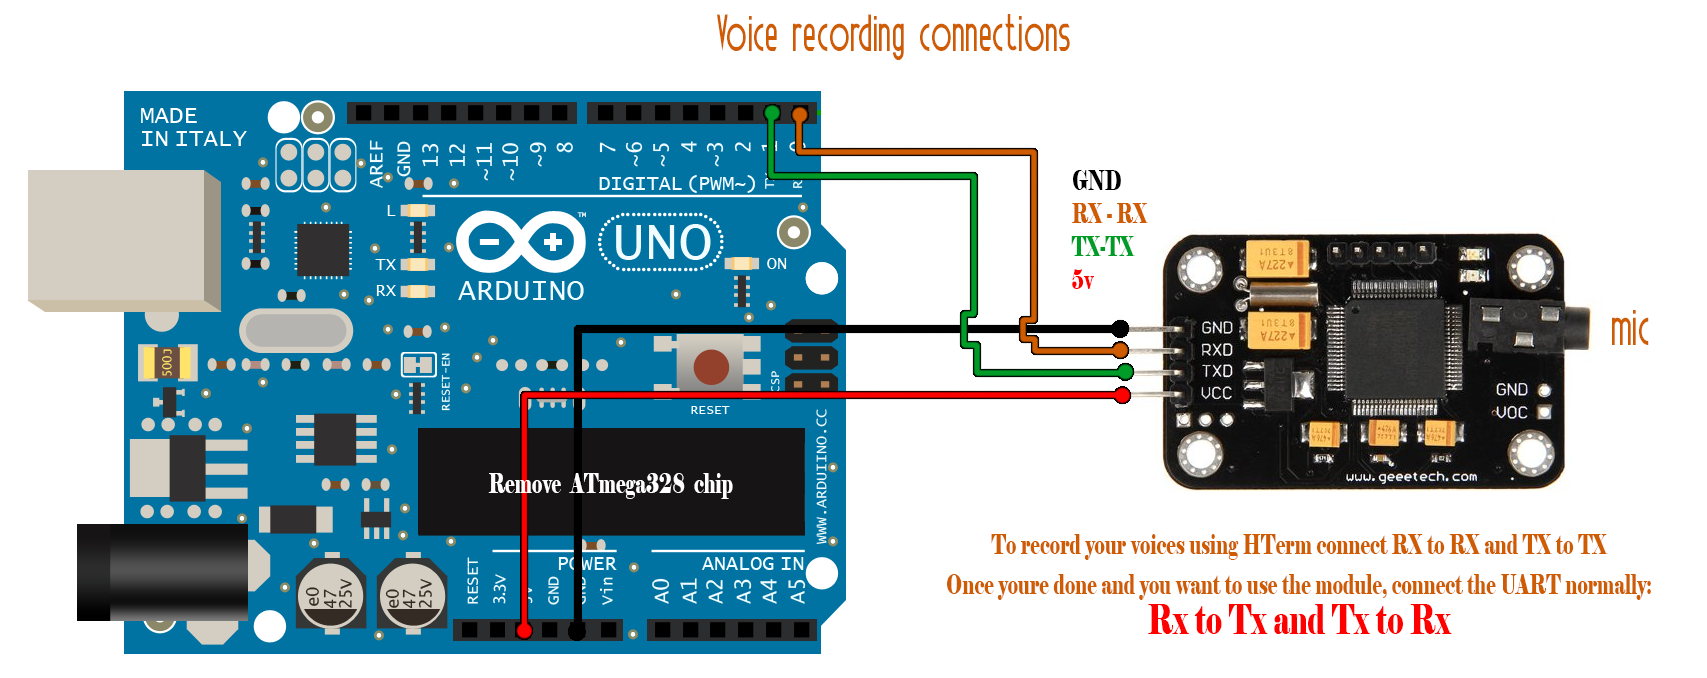
This is the voice recognition module from geeetech bought from banggood. When you receive it in the package you will find the module, a small microphone with a 3.5mm mono jack and some female wires. To communicate with this module, we will use these 4 pins. This are the 5V TTL level UART interface with the RX and TX pins. So, the first thing to do is to check the user manual of this device. You could download the manual from a link below.
Download the USER MANUAL HERE:
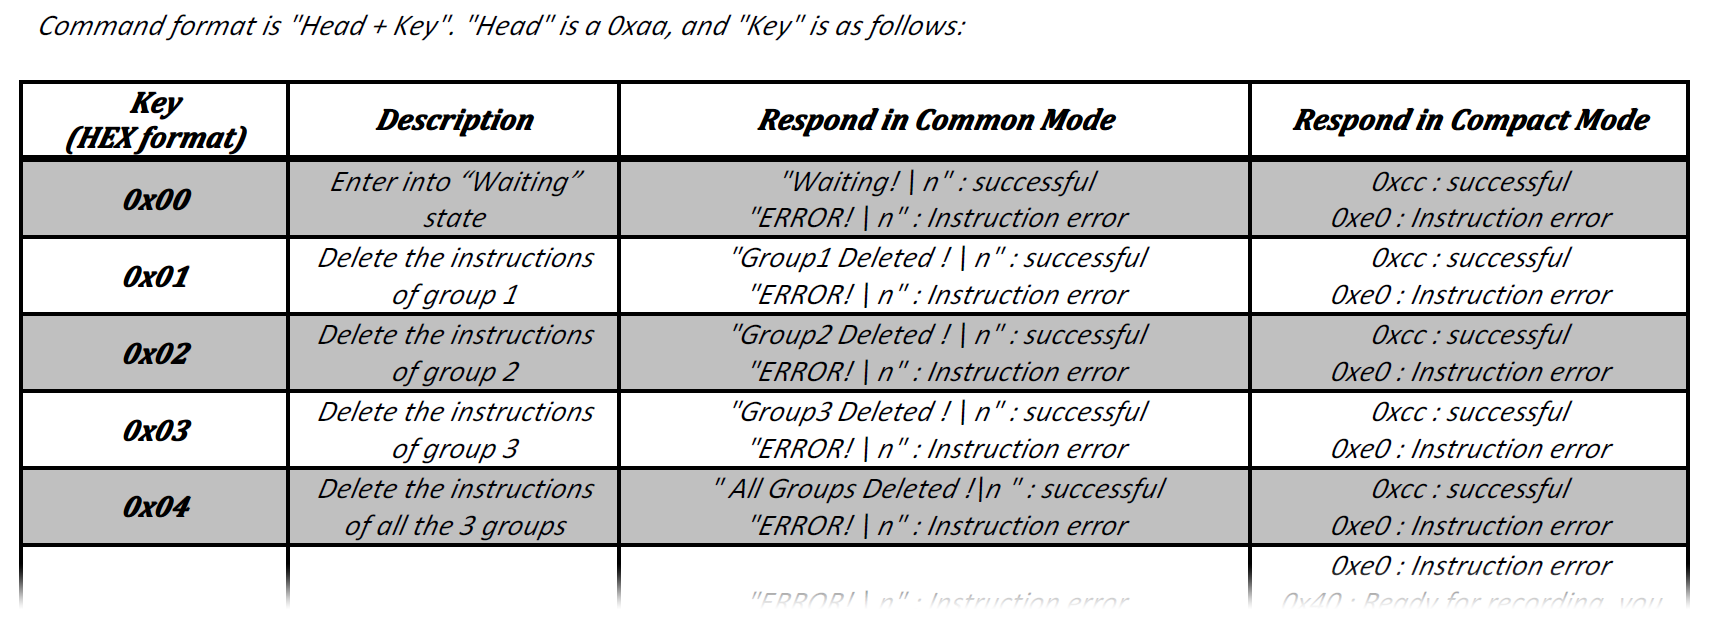
Scroll down to serial commands. This are all the commands that you could send to the module in a hexadecimal format. So, for example if we send 0x00 trough the UART interface, it will enter the waiting state. Read what each of these commands do. I will only explain the main ones.
But before that we should first establish the serial communication between the module and our computer. You have two options. First is to buy an FTDI module like this one.
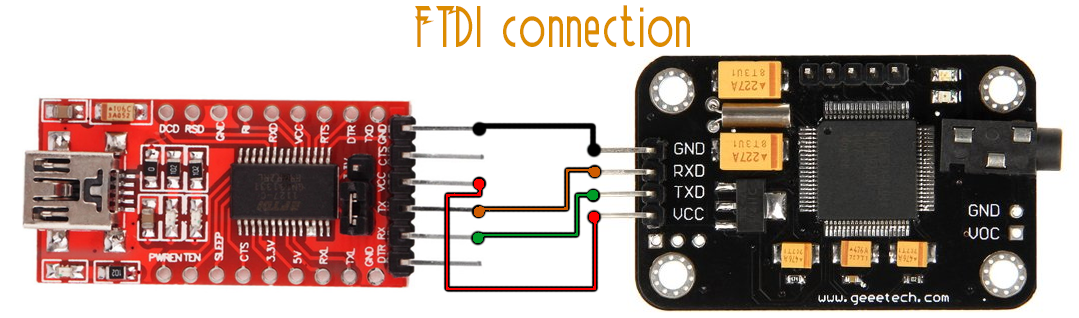
Buy the FTDI module here:
The second option is to use the FTDI chip that the Arduino UNO already has. For that you should carefully remove the ATmega chip and connect the UART pins.
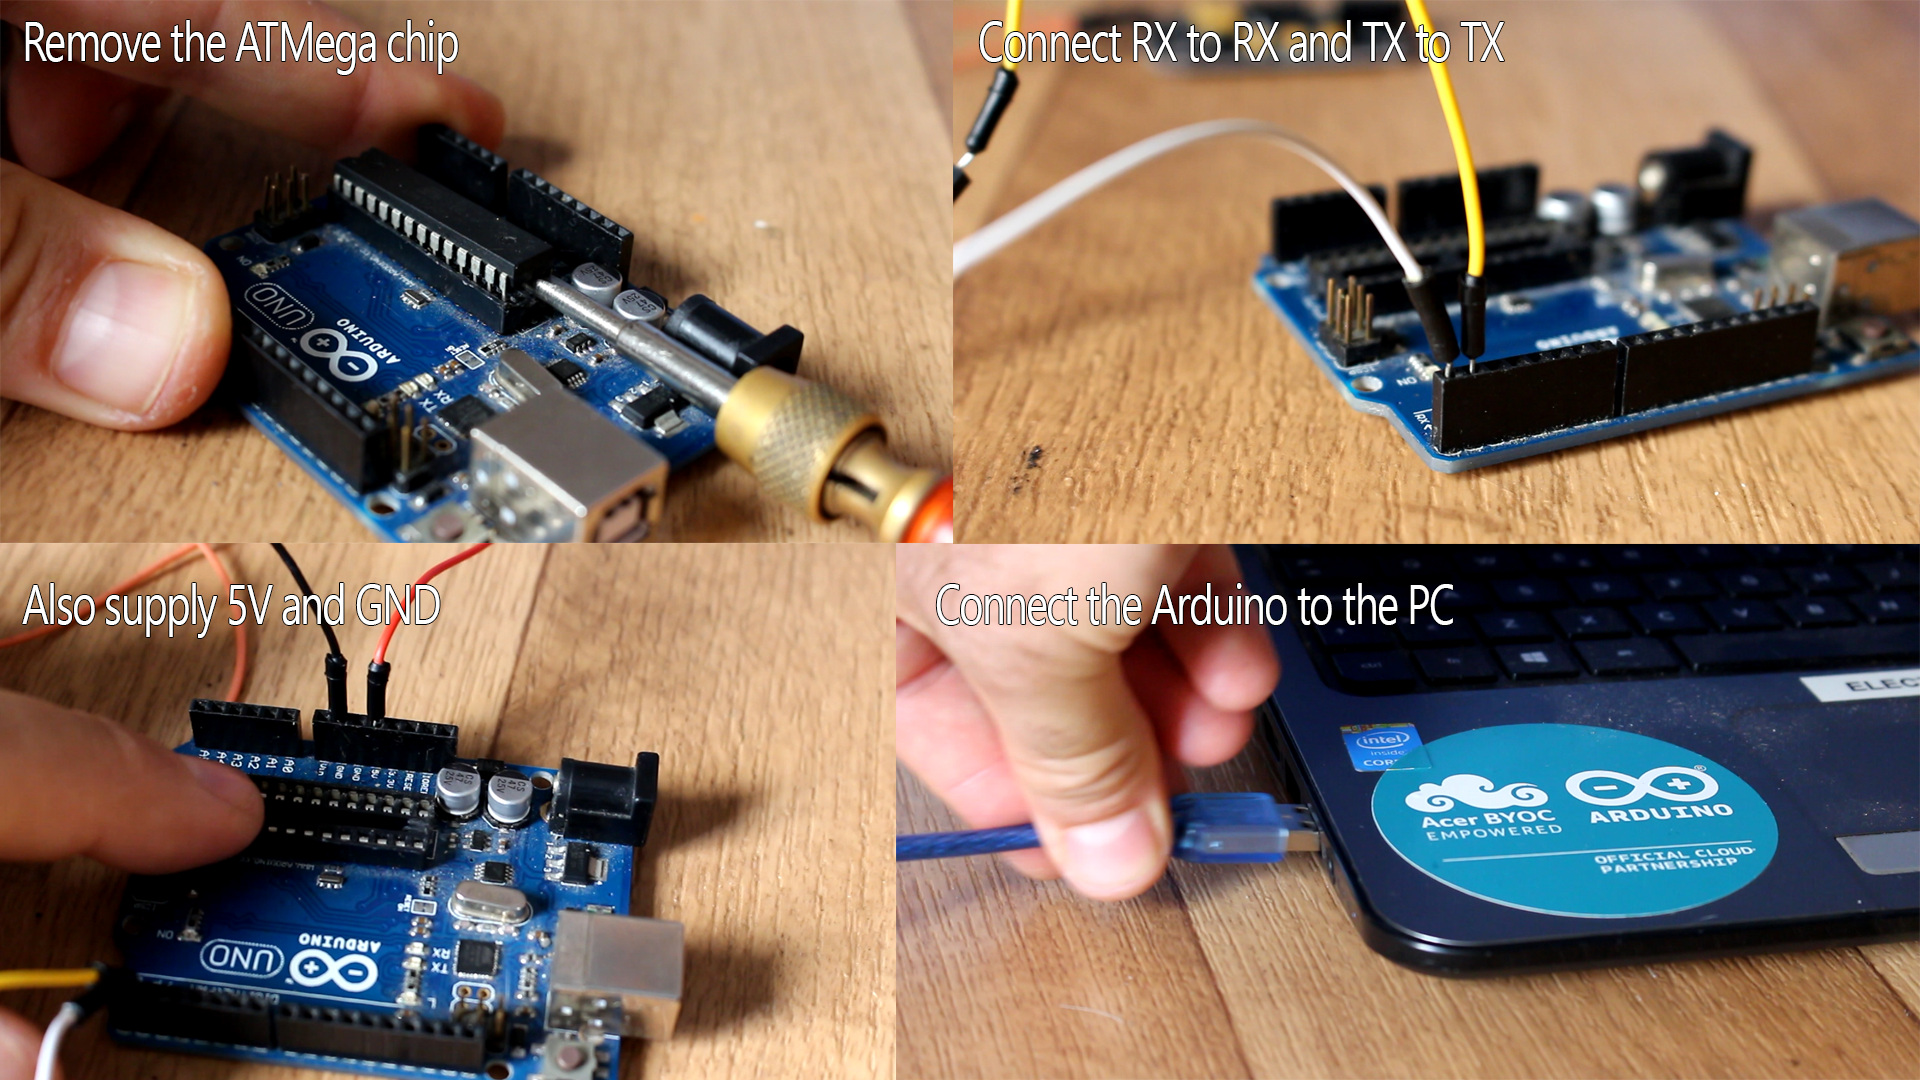
Be careful, in a normal uart communications you would connect Tx to RX and Rx to tx pins. But using the pins from the Arduino UNO you should connect Tx with TX and Rx with RX for this part. Later we will connect them normally. If you use the FTDI module just make the normal connection. Also supply 5 volts and ground.
Ok, we have our connection. Now we should send bytes to the module. Using the Arduino monitor that would be impossible because it works in ASCII format. So, you should download the Hterm platform from a link below.

Record youe own voice commands
HTerm, this program is able to send direct bytes to the Arduino. Open the program. Select the used com of the Arduino, in my case is COM3. Select the baud rate of 9600 because that’s the speed that the user manual gives us for stock configuration of this module. Next select ASCII format for the received data in order to understand it, and a newline at CR plus LF in order to have line jump. Also unselect the show newline characters. Down, on the input control select hexadecimal format because that’s the format that we want to send. Now we could send commands.
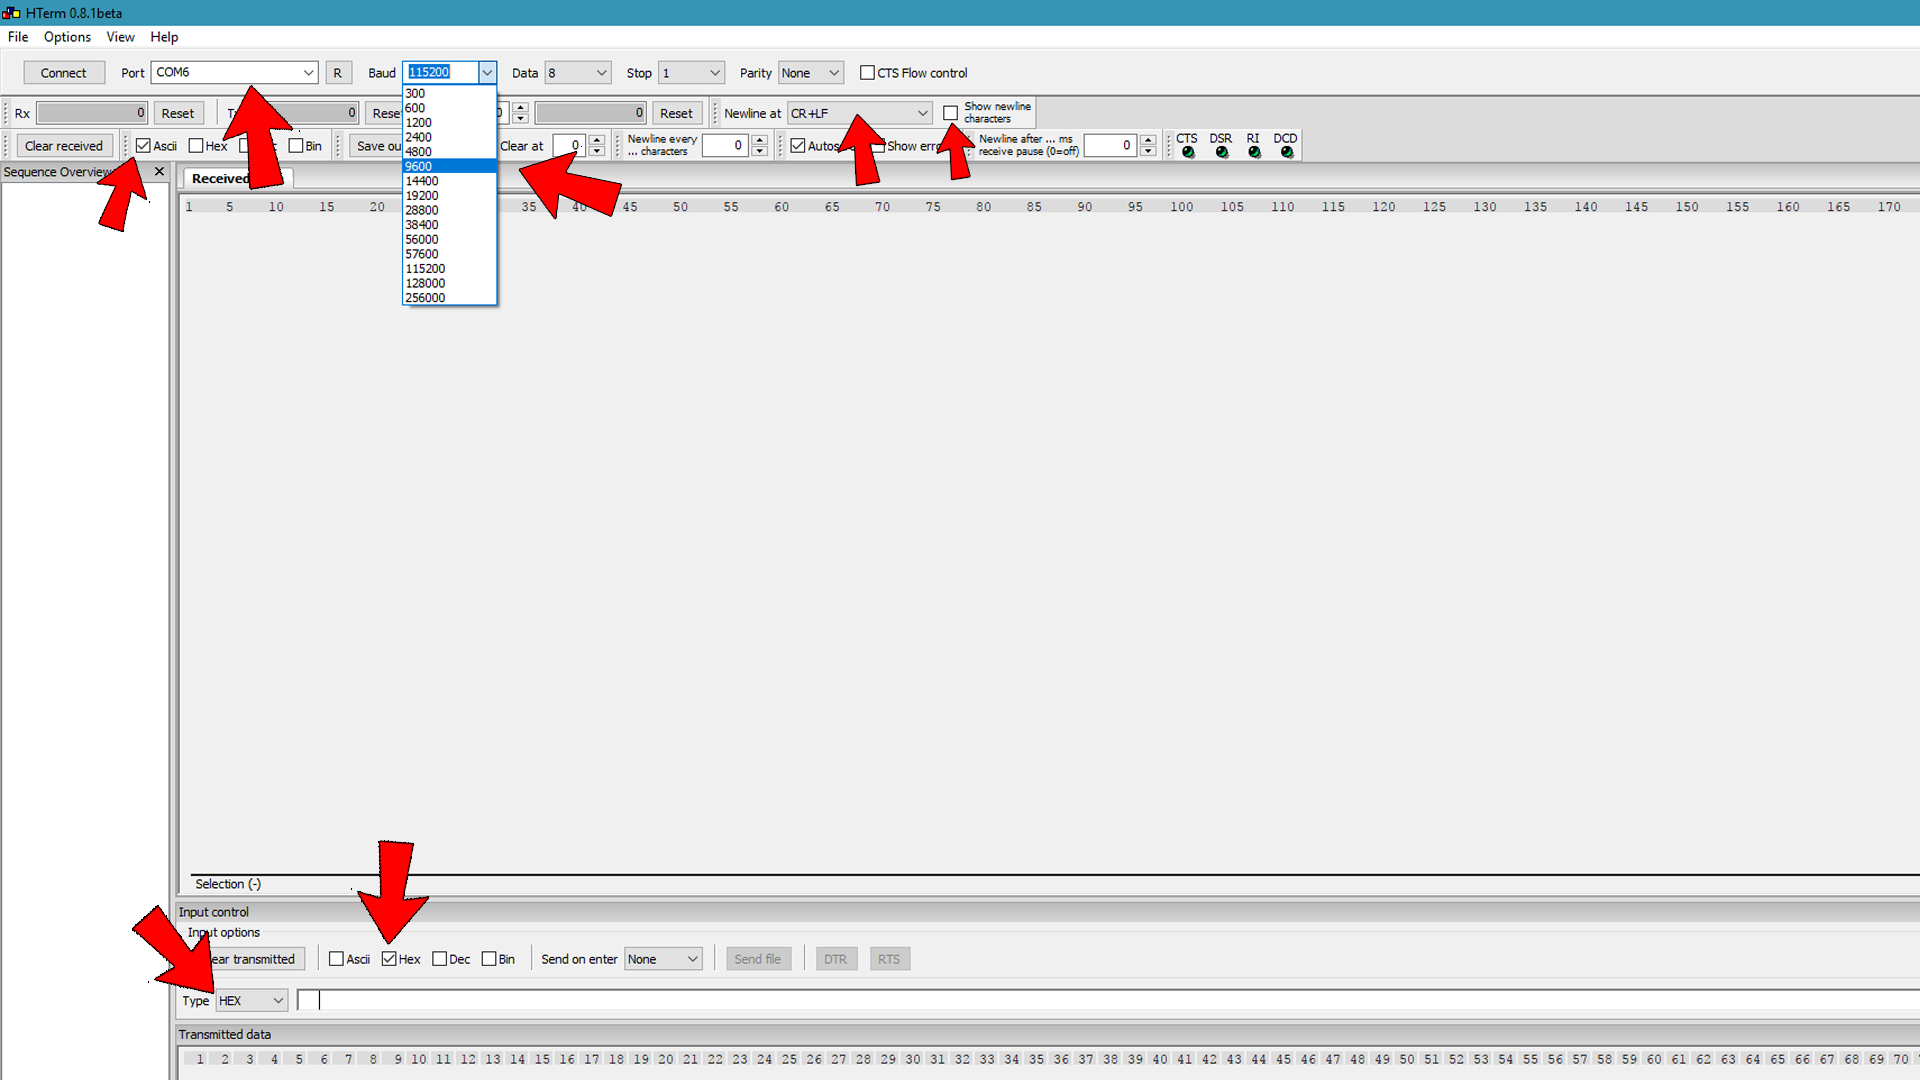
Before any two bytes command, you should first add the AA characters as the manual tells us. The first command that I will send is AA00 that will put the module in waiting state.