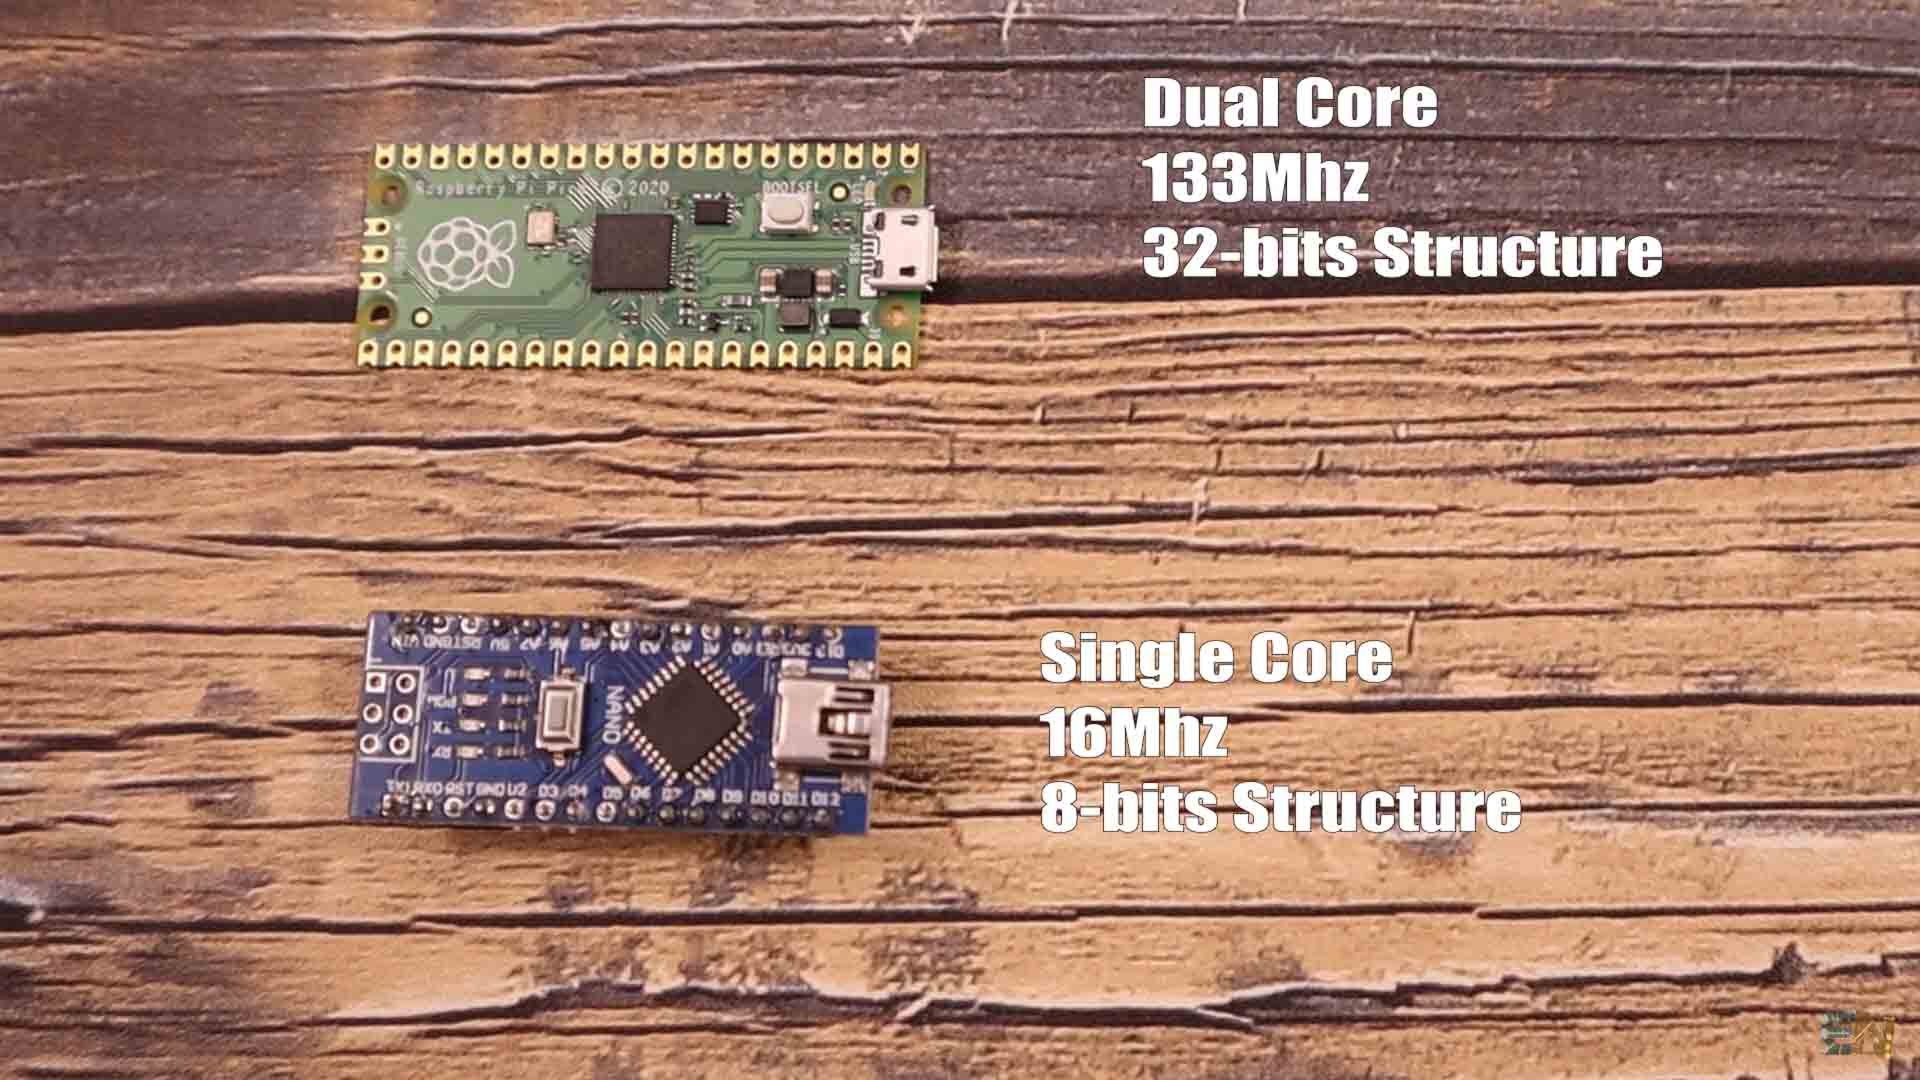
There’s a new microcontroller on the market and this time it comes from raspberry pi. This is the new 2020 raspberry pi PICO. Now we all know raspberry pi being more of a computer than a microcontroller. But now with this new product we have a programable microcontroller just as an Arduino NANO, but the PICO has a lot more speed, more memory, it is a dual core microcontroller and best of all, it is a 32 bits ARM controller compared with 8 bits of the Arduino NANO. So, imagine the power. In this tutorial we start programming this microcontroller in micropython and in future episodes we start working with it in C++. I’ll show you everything about this new board, compare it with the Arduino, install the coding software and show you some examples from simple ones of LED blink, to ADC read and i2c communications just as we do on an Arduino. So guys, let’s get started.
So this is the new Raspberry pi PICO. Let’s start with some specs. The board is using the RP2040 microcontroller designed by Raspberry Pi. This is an ARM Cortex M0 dual core processor with flexible clock speed up to 133Mhz. 133Mhz, compared with the NANO for example, that works at only 16Mhz, imagine the speed difference. On side of that, this is a 32 bits microcontroller, so data flow would be 4 times ort more even faster compared with the Arduino which is based on an 8 bit controller. The chip has 264Kb of SRAM memory and 2MB of flash memory and has ultra-low power sleep modes.
The board has 40 pins and from these, 26 are multi-function GPIO ports. It has 2 SPI ports, 2 I2C ports and as you can see, these could be programmed to be connected at any pin. It also has 2 UART ports and 3 ADC. These ADC are of 12bits, which is 4 times better than the 10 bits ADC of the Arduino. It also has 16 controllable PWM channels which we will test in a moment. As an extra, the IC has an on-board temperature sensor which we will also test later, accelerated float libraries and 8 Programable P IO which I never used.
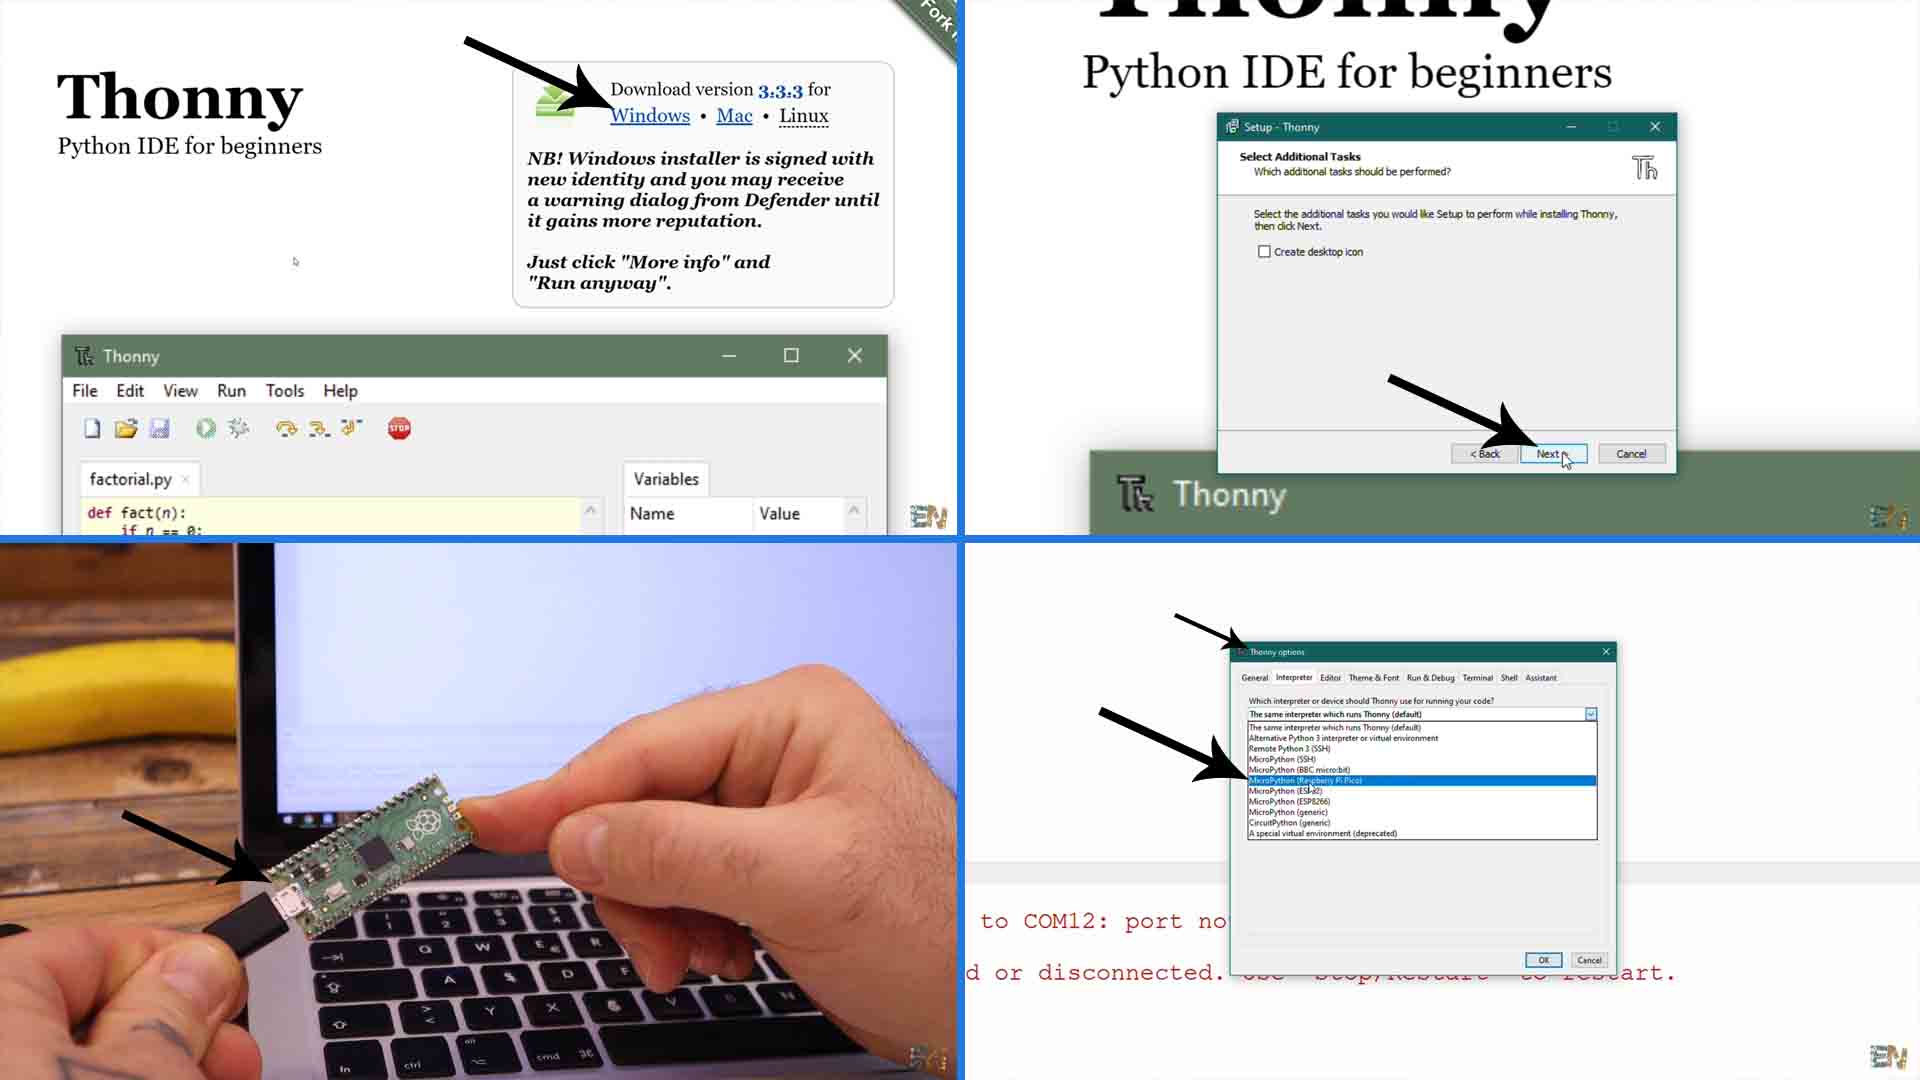
Ok, so let’s start. This microcontroller could be programmed in C++ which is pretty close to what the Arduino is using but it could also be programmed in micropython which is a compact version of Python made for small microcontrollers. Today we will work in micropython and on future episodes we will start with C++. To start with micropython we have 3 steps. 1. First we Install Thonny, which is the programming environment I will use, 2. add micropyton to the board and see how to 3. upload codes.
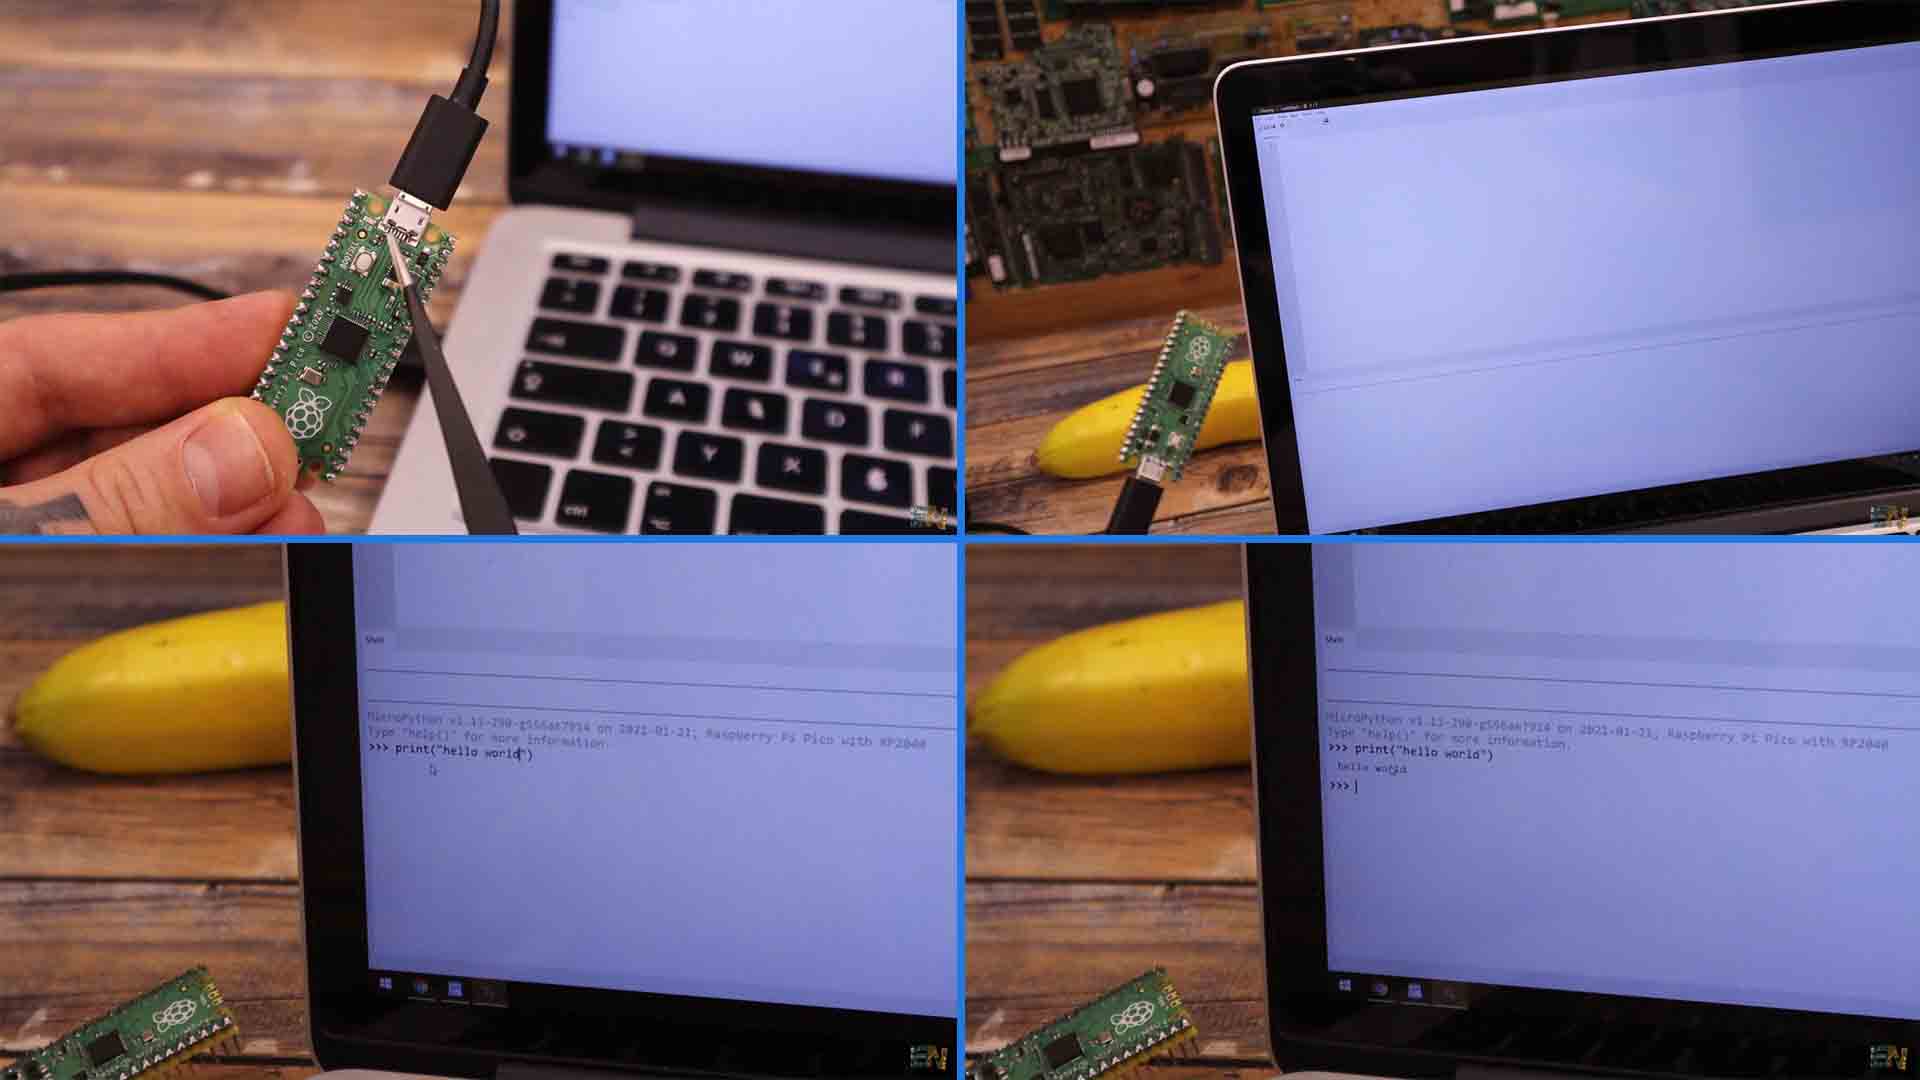
Go to thonny.org and download the software. In my case I’m using windows so I will download this one. Install the software, this will take just a couple of minutes. Run the program. At this moment, connect your PICO board to the PC using the USB cable. First thing first go to tools and select options. Here in the interpreter tab select the MicroPython Raspberry Pi Pico. Also select the COM of your PICO board and click ok.
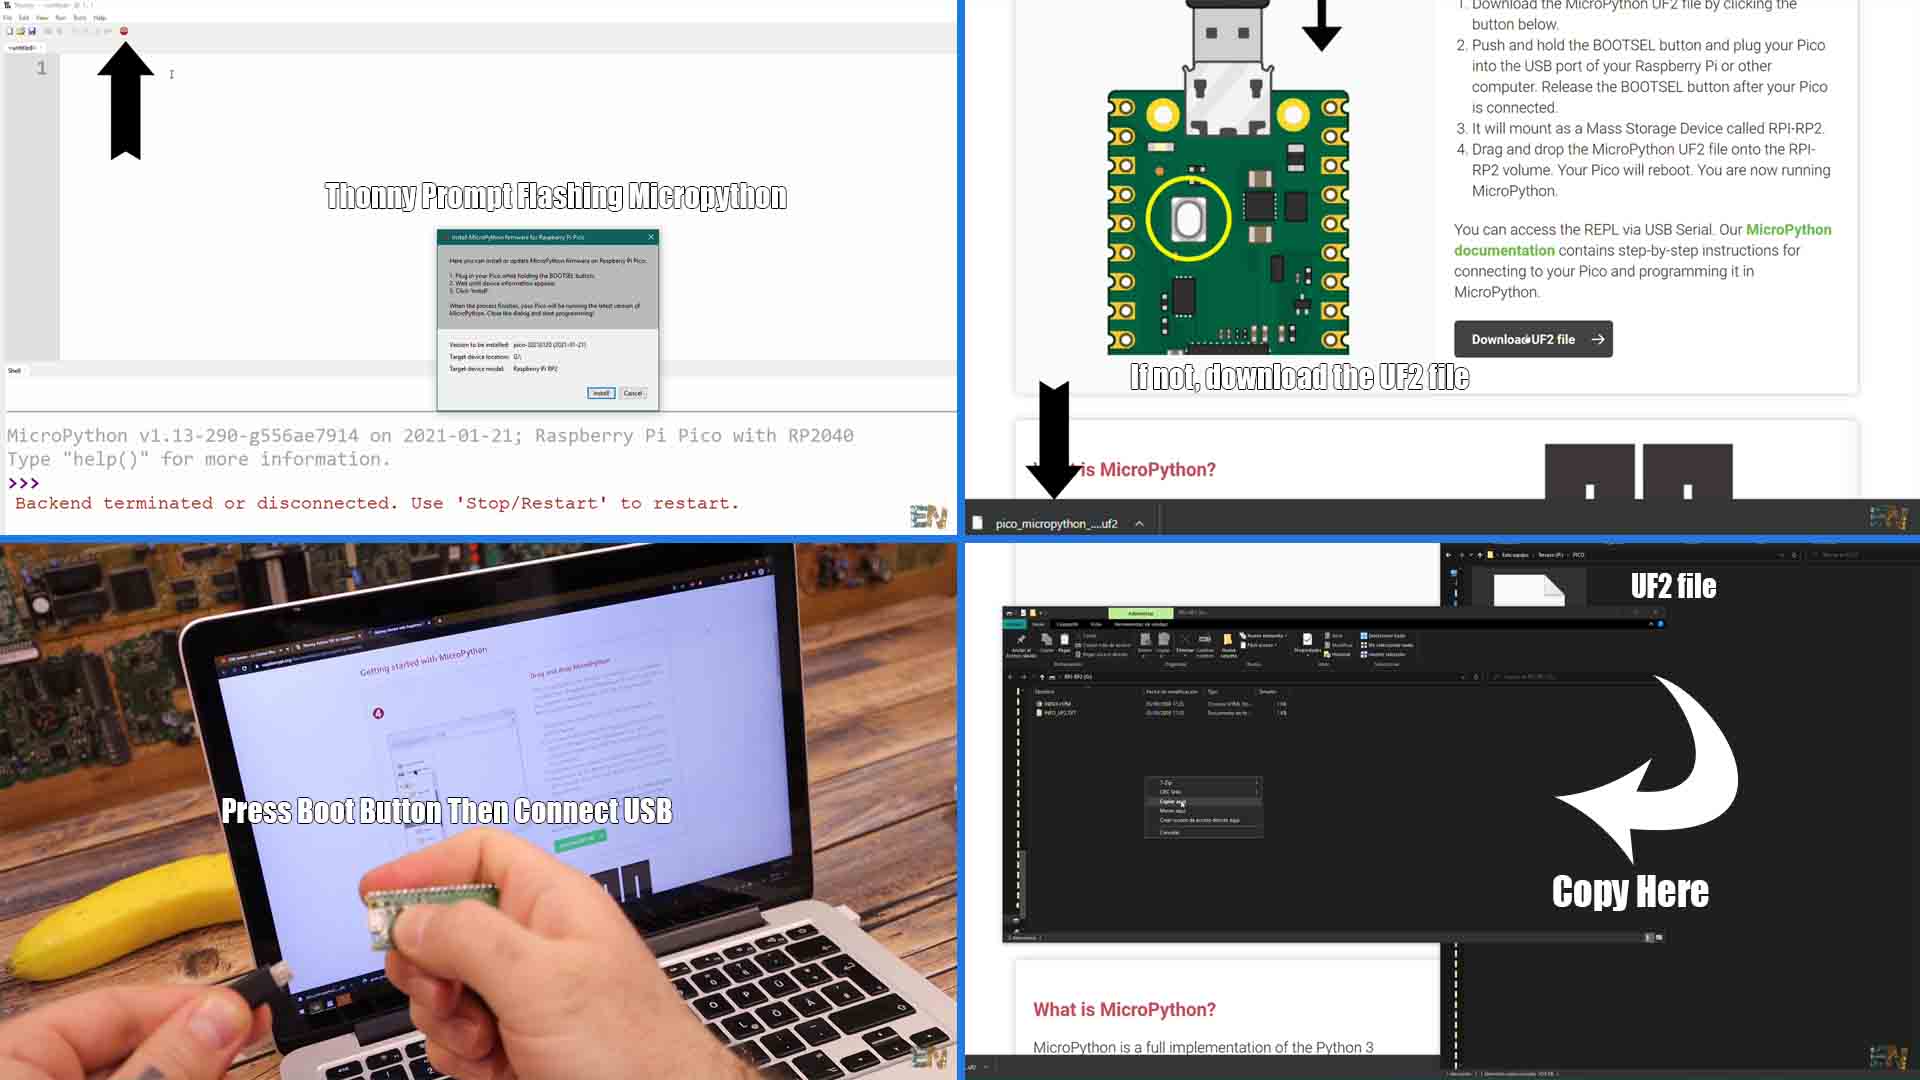
If you don’t already have MicroPython running on your PICO, when you click the stop or play buttons, a prompt will automatically flash MicroPython on to the PICO. If that doesn’t work, we go to this website. Click getting started, and download the MicroPython UF2 file. Once you have this file downloaded, disconnect the PICO from the PC and now press the boot button. While pressing the button, connect back the PICO to the USB cable. You will see that now it will appear on the PC as a new drive. All you have to do is to copy the UF2 file you have downloaded to this drive and you will see that it will automatically disconnect and reboot. Now MicroPython is installed.
Connect back the PICO and run thonny. Now click the stop button and as you can see we are connectd. To test if the connection work, in the shell tab,you can type something like: print hello world, and press enter. If hello world is printed, than we are good to go. So lets’ start with a code example. See the next tutorial.