In this tutorial we go step by step on how I've made the frame of the mirror, how to prepare the one way type of mirror using a special film, thenw e see the scheamtic and all the electroncis we need, we mount the mirror and we upload the software on the raspberry pi. Finally we make our configuration for the agenda, calendar, local time zone and weather. I hope you will like the tutorial. Consider supporting my work on PATREON or if you want, support me on PayPal. Thank you very much!
First you need the 3D parts for this design. For now I'm sharing the design for free on my shop since the plane was not tested yet. But, if you consider supporting my work, there is the same version for 5$ so thank you. So, go below and see all the parts. Download the .zip file with the STL files from my shop. Get the rods, servos, battery, glue and all you need, and then, in a few hours, you can assemble this plane once you have the 3D parts. Printing the parts will take some days. Having multiple printers will reduce time.
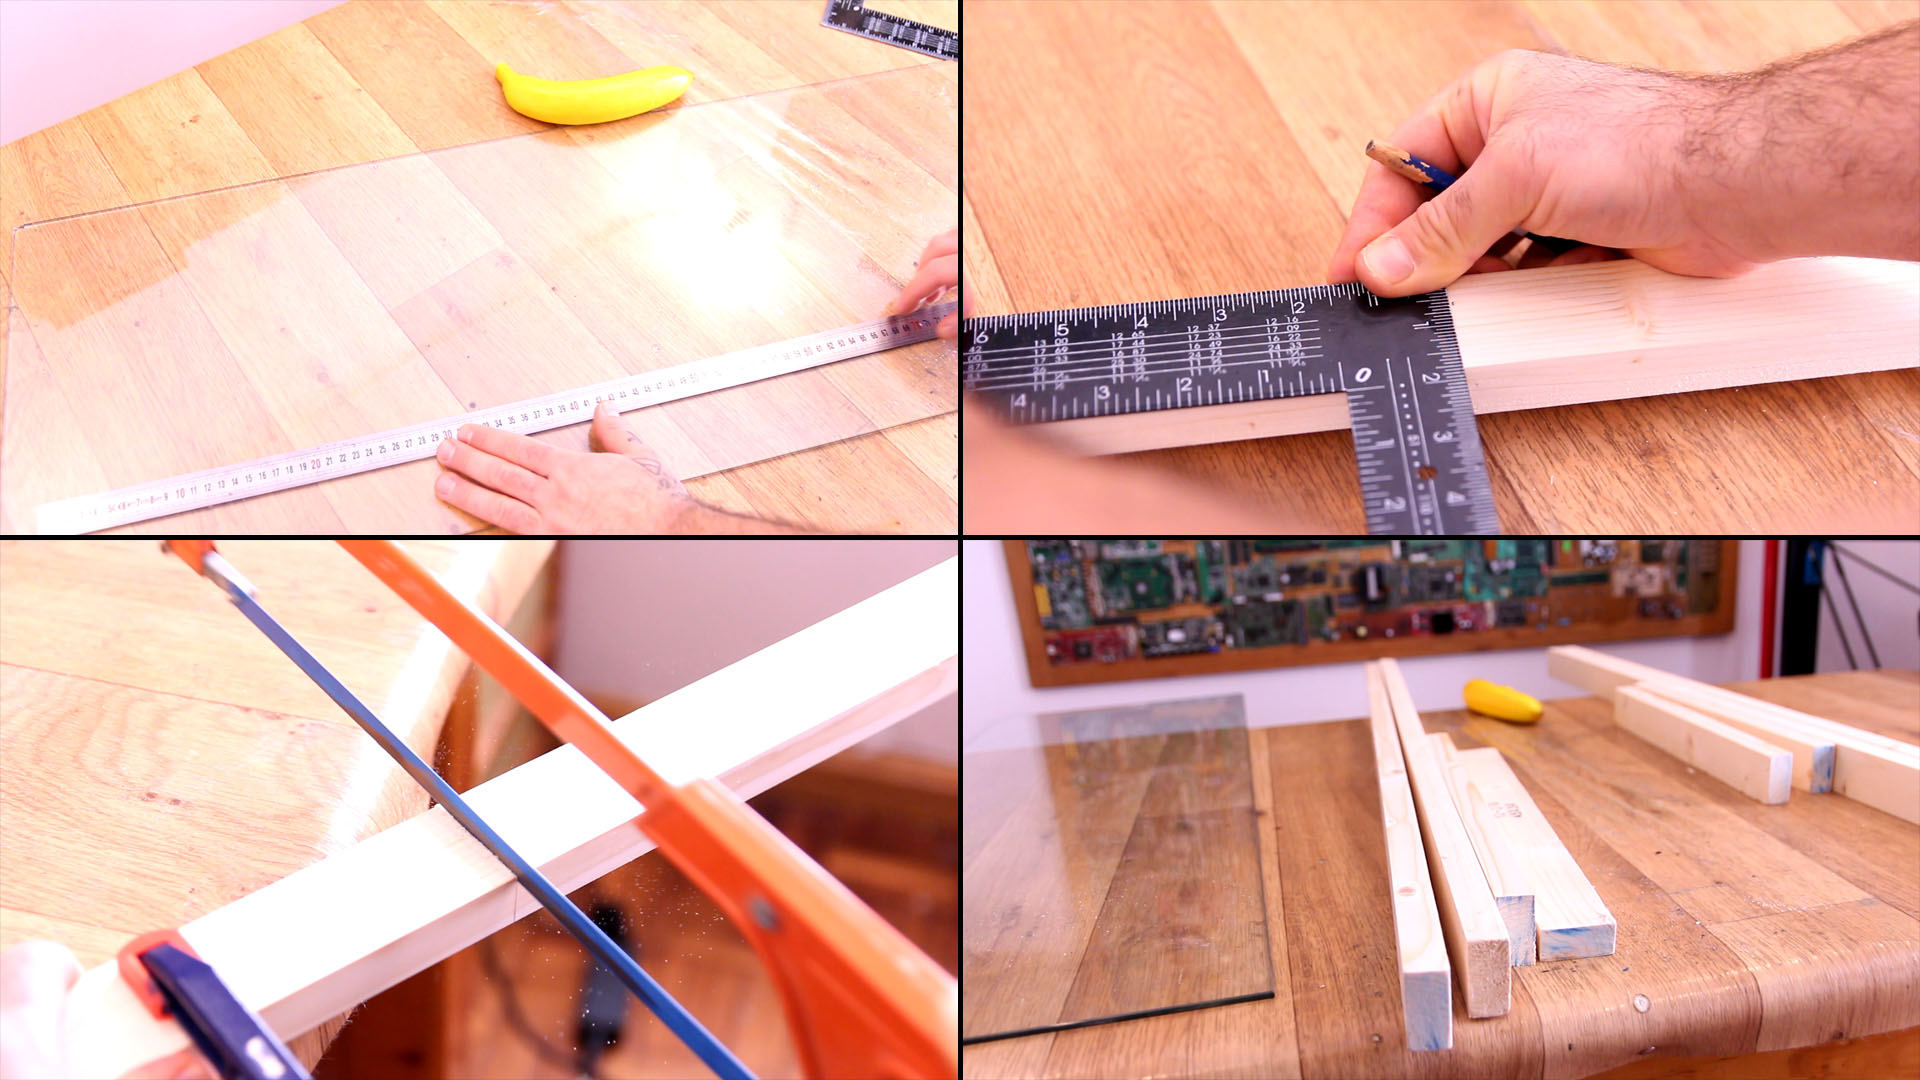
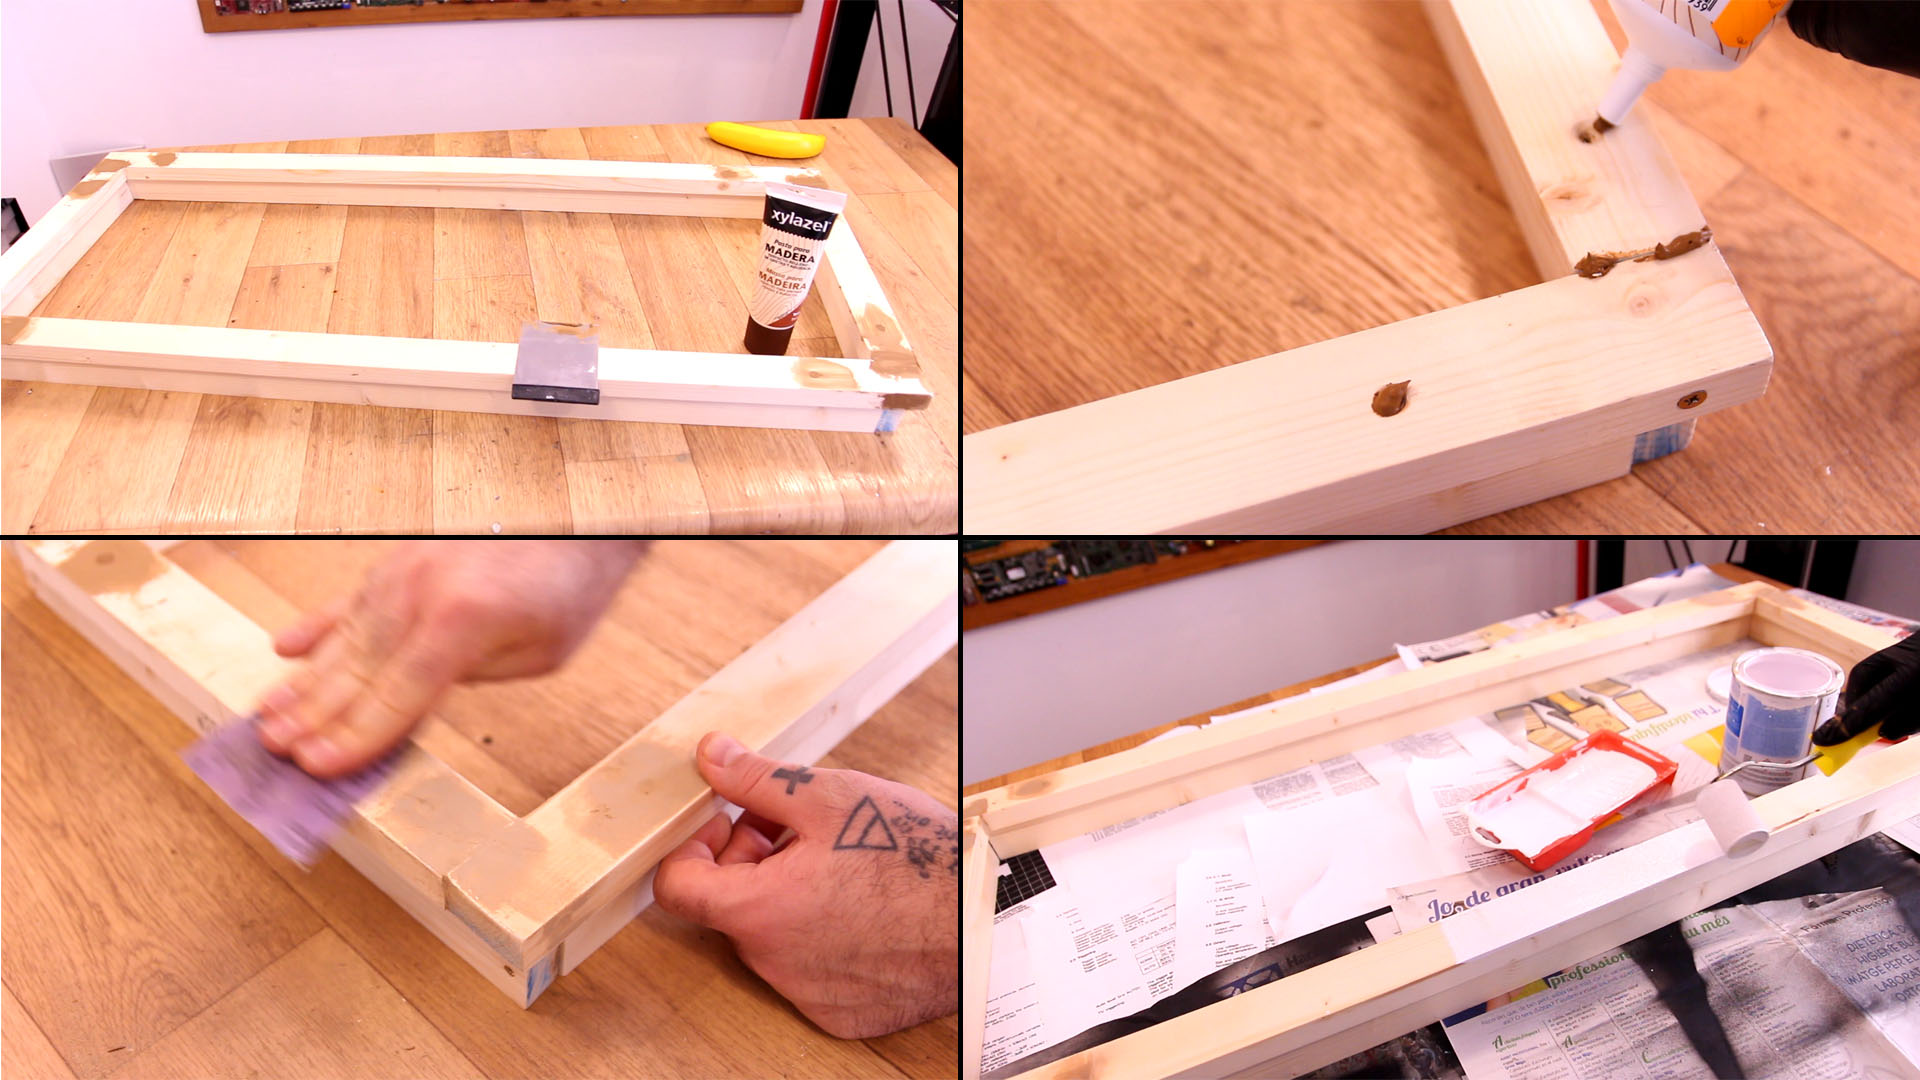
First step I make is to measure the glass I have. In my case, this glass is from some old furniture I don't have anymore but I kept the glass. My glass is of 97 by 35 cm. I cut the 40x35mm wood to size in such a way that once I have the frame, it will cover 1cm of the glass all around. I cut two pieces of 104xm and two of 94cm for the front frame. For the back part of the frame I cut two of 101cm and 35cm to go around the glass. Pass some sand paper on the edges and smooth the wood.
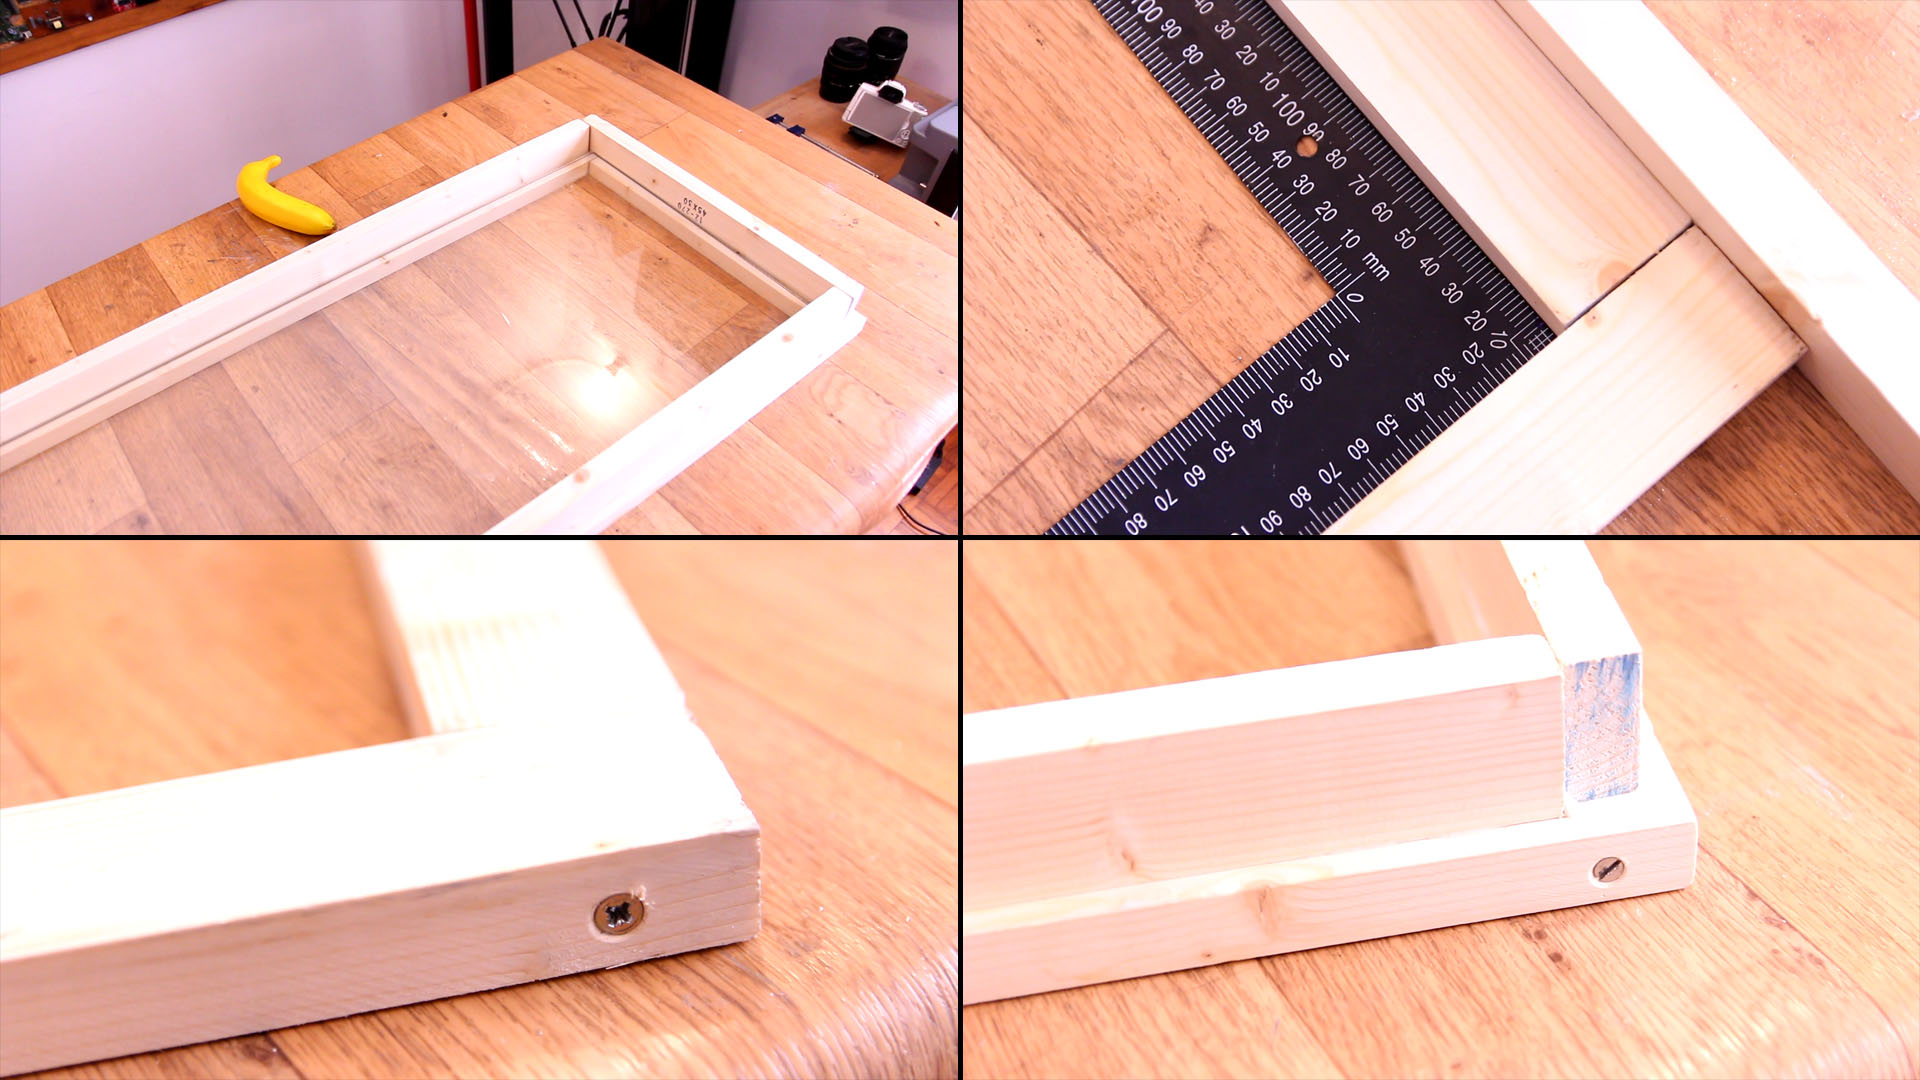
Nowe we make holes so the screws won't crack the wood. Make the holes smaller than the screw diameter. I aslo enlarge the hole at the end so the screw will fit flat inside the wood and we can fill it with wood putty. Screw the main frame and use tools to make sure it ahs 90 degrees corners. Then, place the glass on top adn screw the back part of the frame, the aprt that will keep the glass in position.
Once you ahve the frame pass anothar time some sanding paper. Then we add wood putty all over the screw holes, cracks, parts where the wood are joined together and so on. Once the putty is dry, pass the sandpaper again. When the frame is smooth and ready, we can paint it. I will sue white paint. I add two layers of paint and the frame is ready!
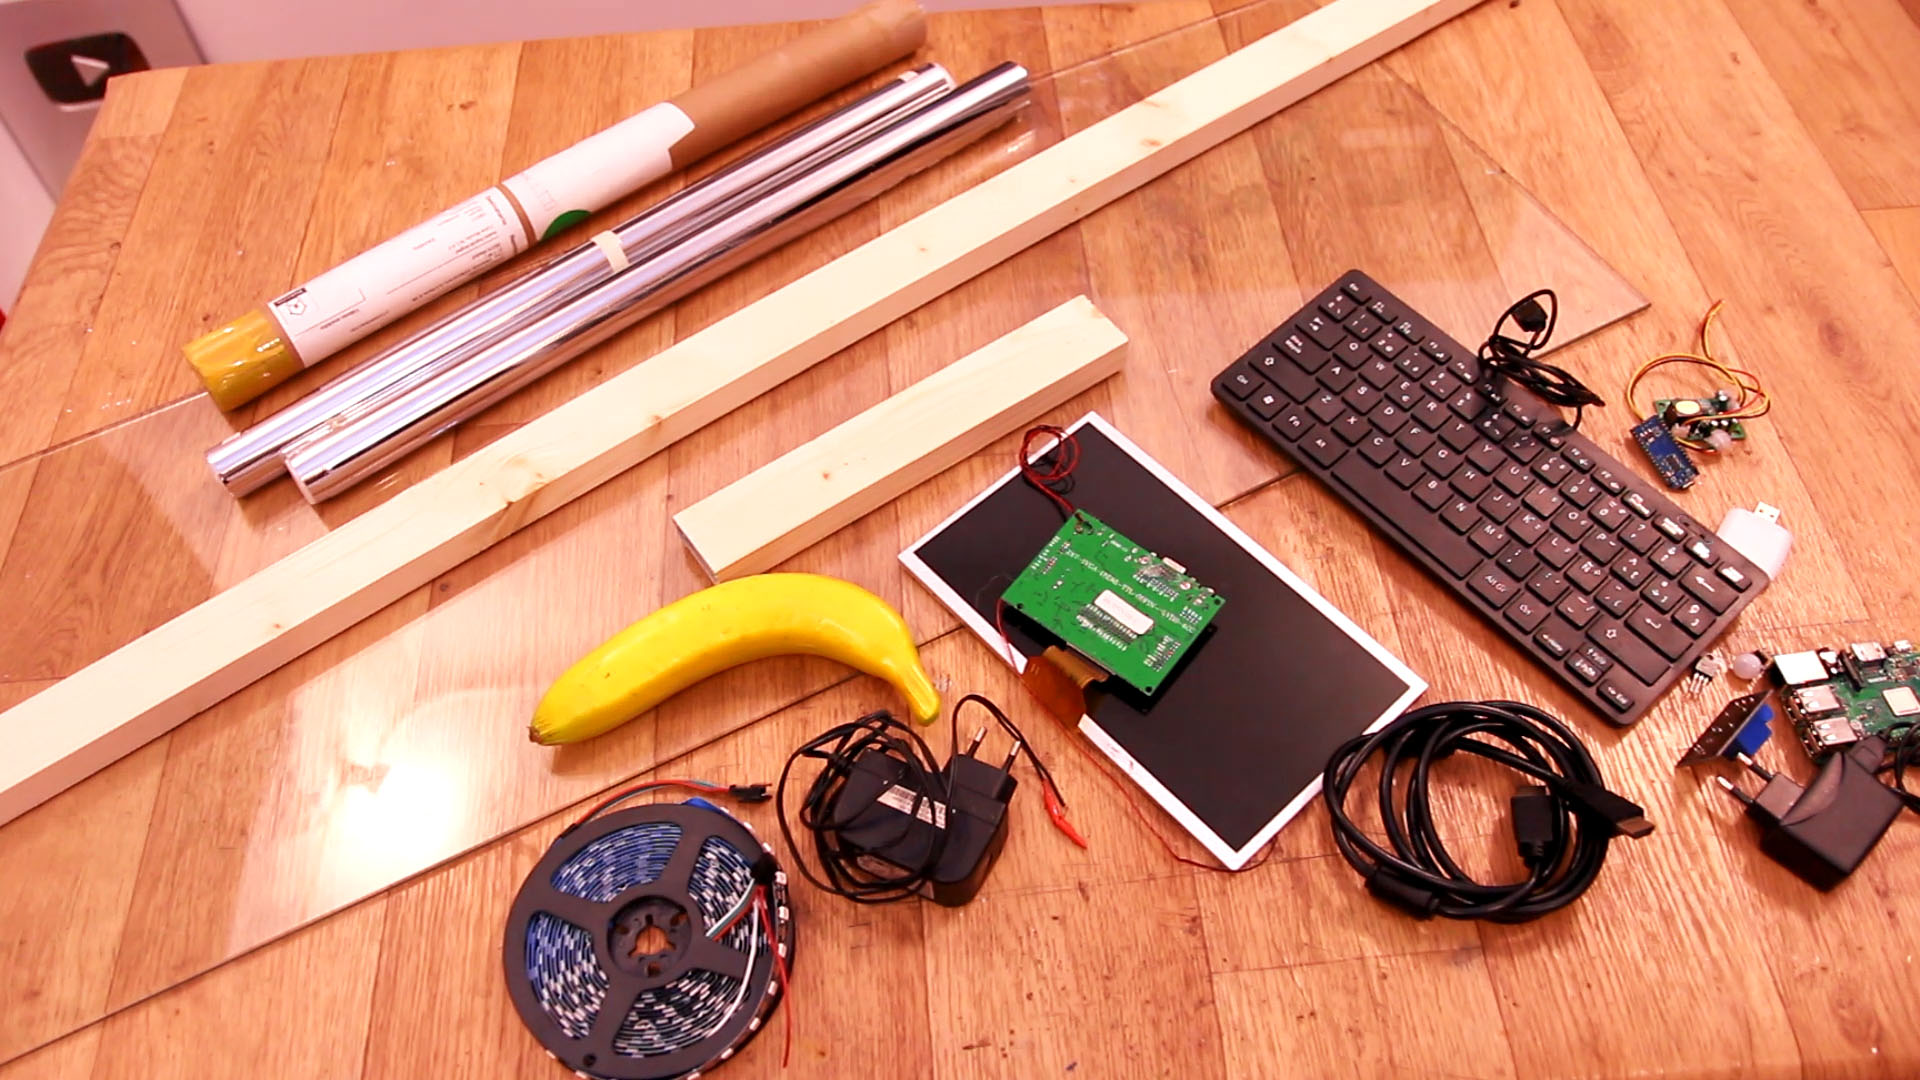
Get all the electronics and let's make the connections. We don't need the keyboard and mouse for the final project, but we do need those for the software configuration. Also, you could add a PID relay to the final circuit in order to turn on the backlight of the display only when somebody is in front of the mirror. But that's just extra. Ok, get the partsm see the schematic and make the connections and then we upload the software.
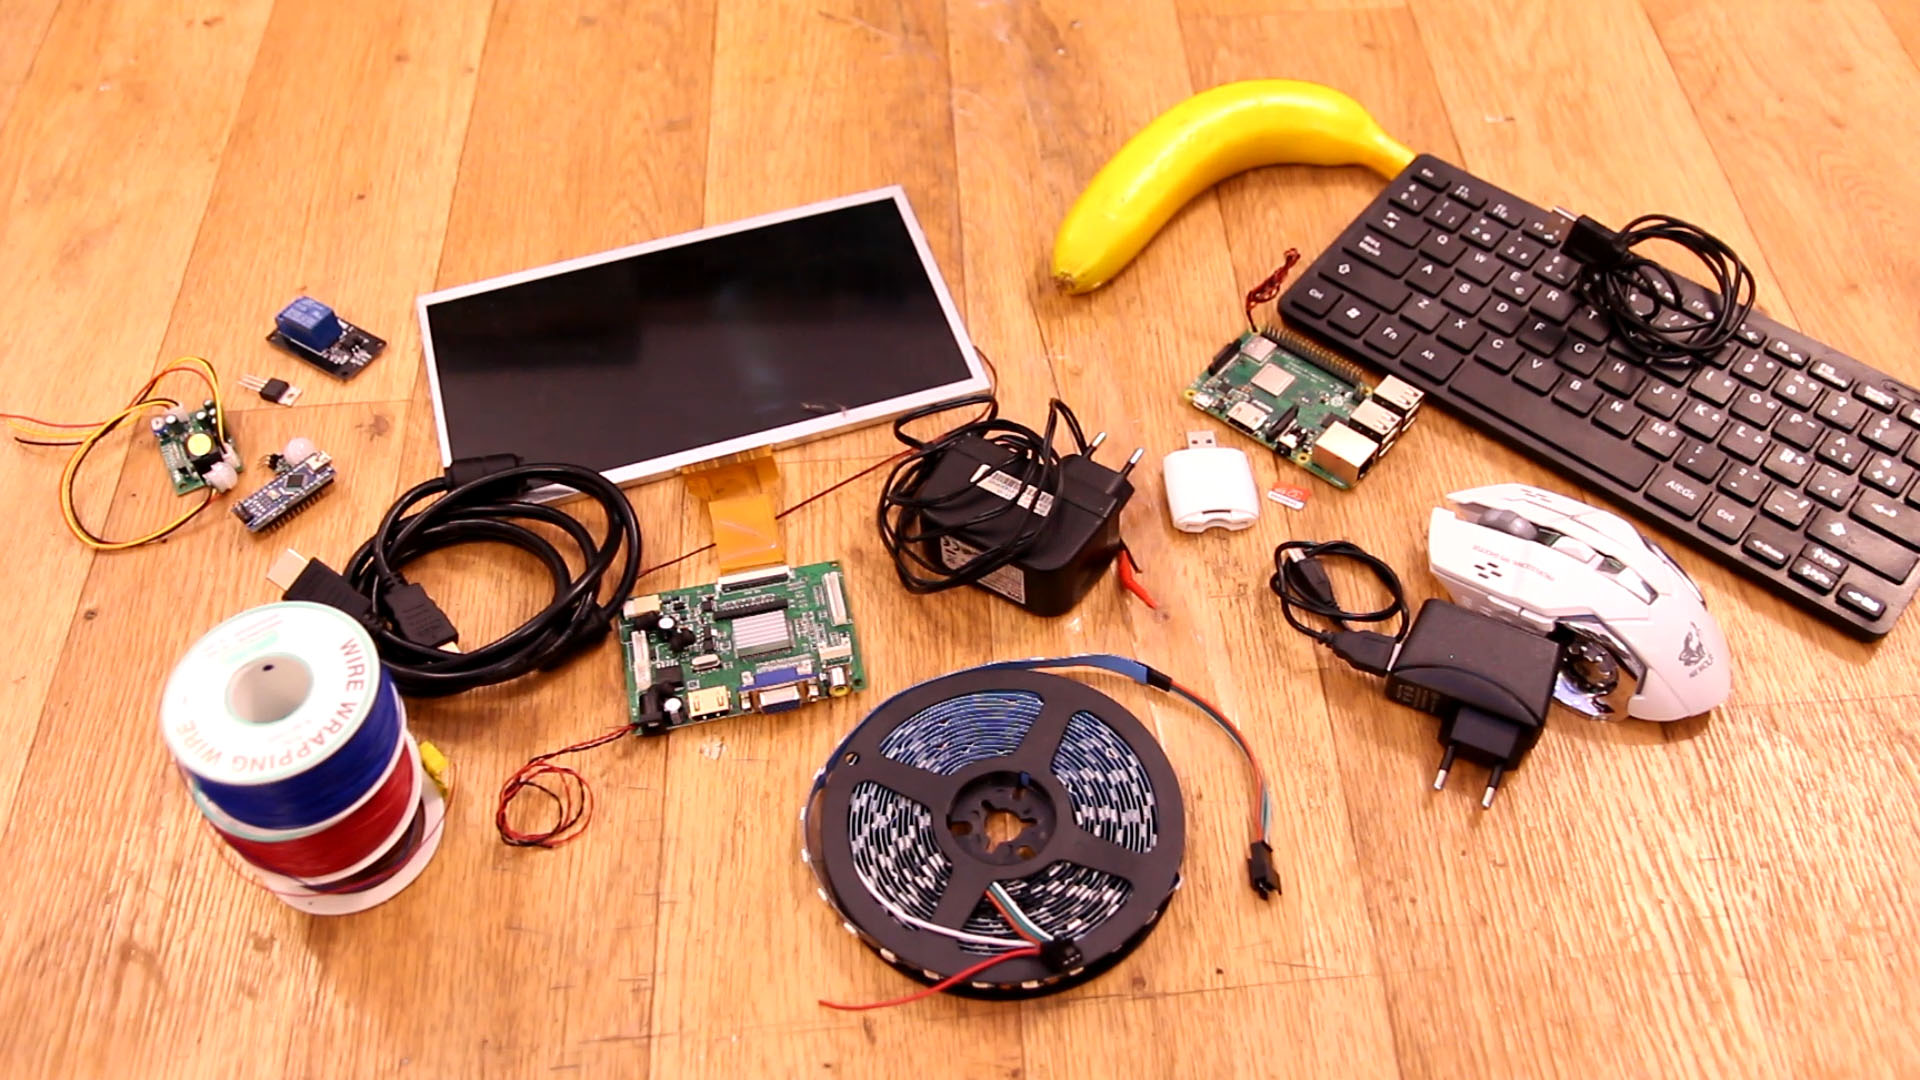
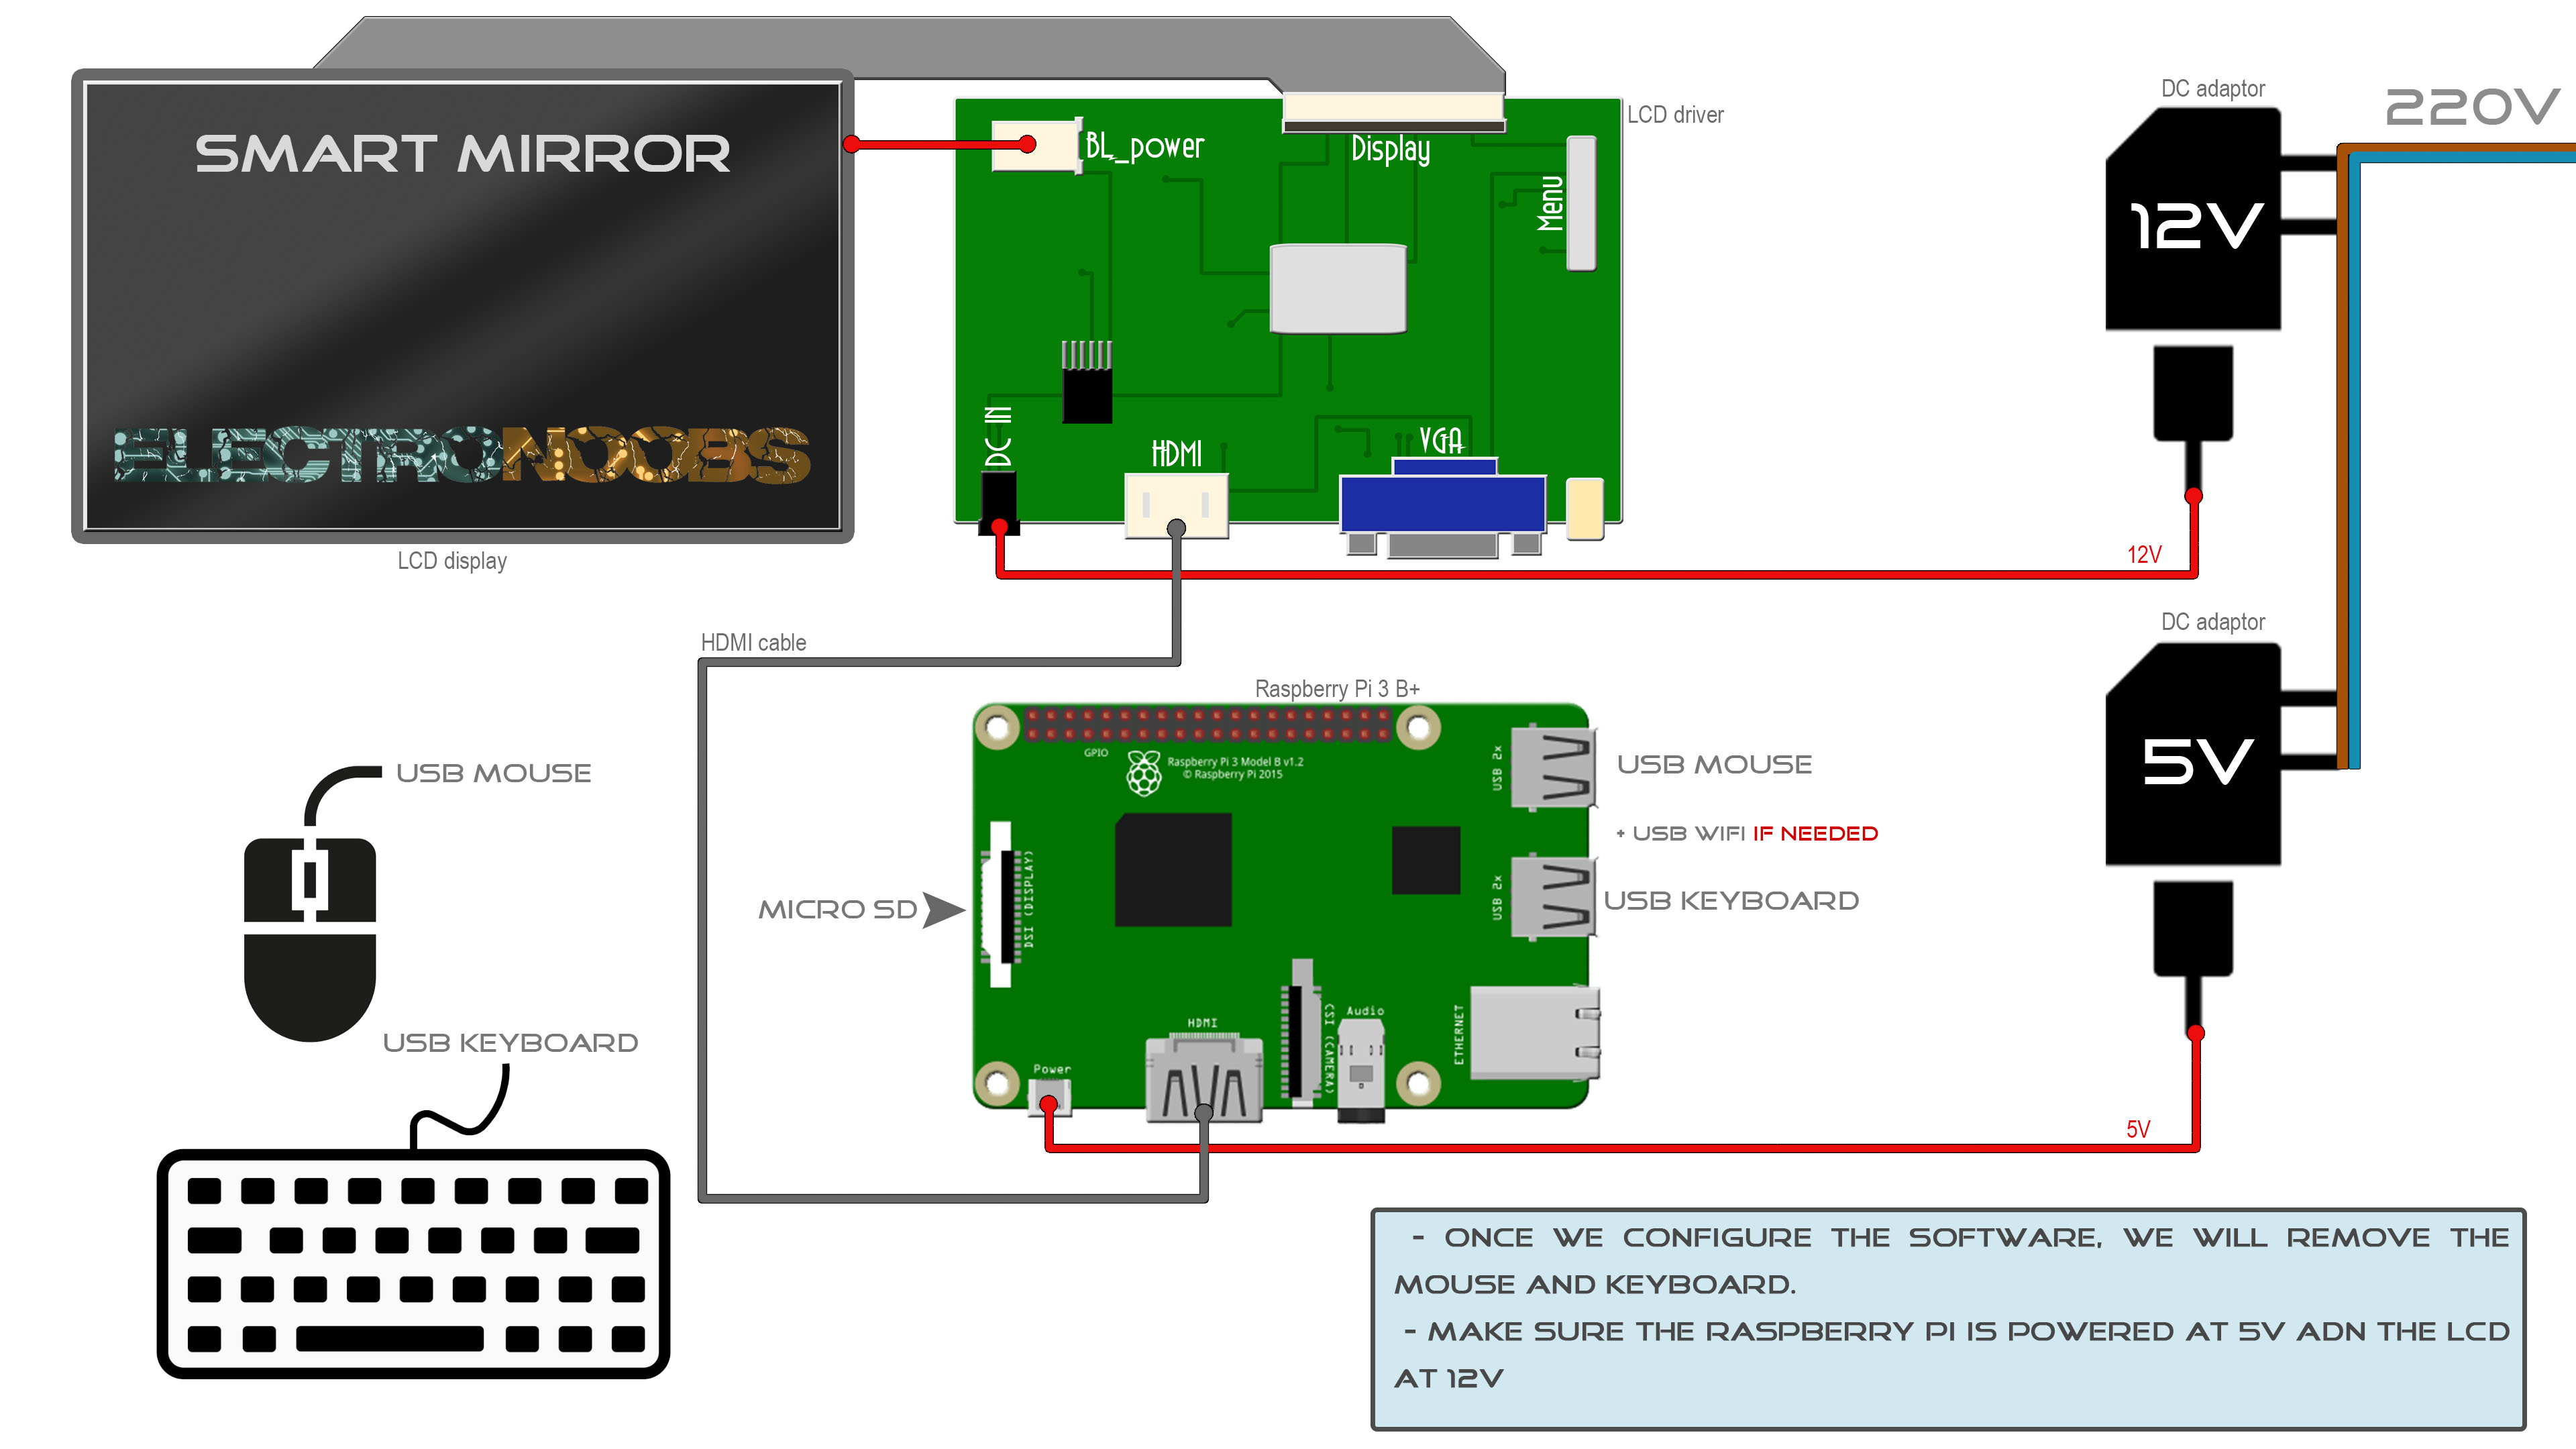
Ok, the connections are very easy. Below you have the scheamtic for this project. Remember that we need the keyboard and mouse just for the configuration and then we romove those so we need to set the raspbery pi to enable smart mirror automatically when it is turned on since the mirror won't have controls. Ok, connect the LCD to the HDMI driver. Power that driver at 12V from the DC adaptor. Connect the Raspberry Pi HDMI to the display driver with the HDMI cable. Power the Pi with the 5V adaptor. Power both adaptors from 220V AC from main outlet. Connect all the USB pheriferials for now, the mouse, keybaord and WiFi antenna if your Pi dosn't have WiFi integrated.
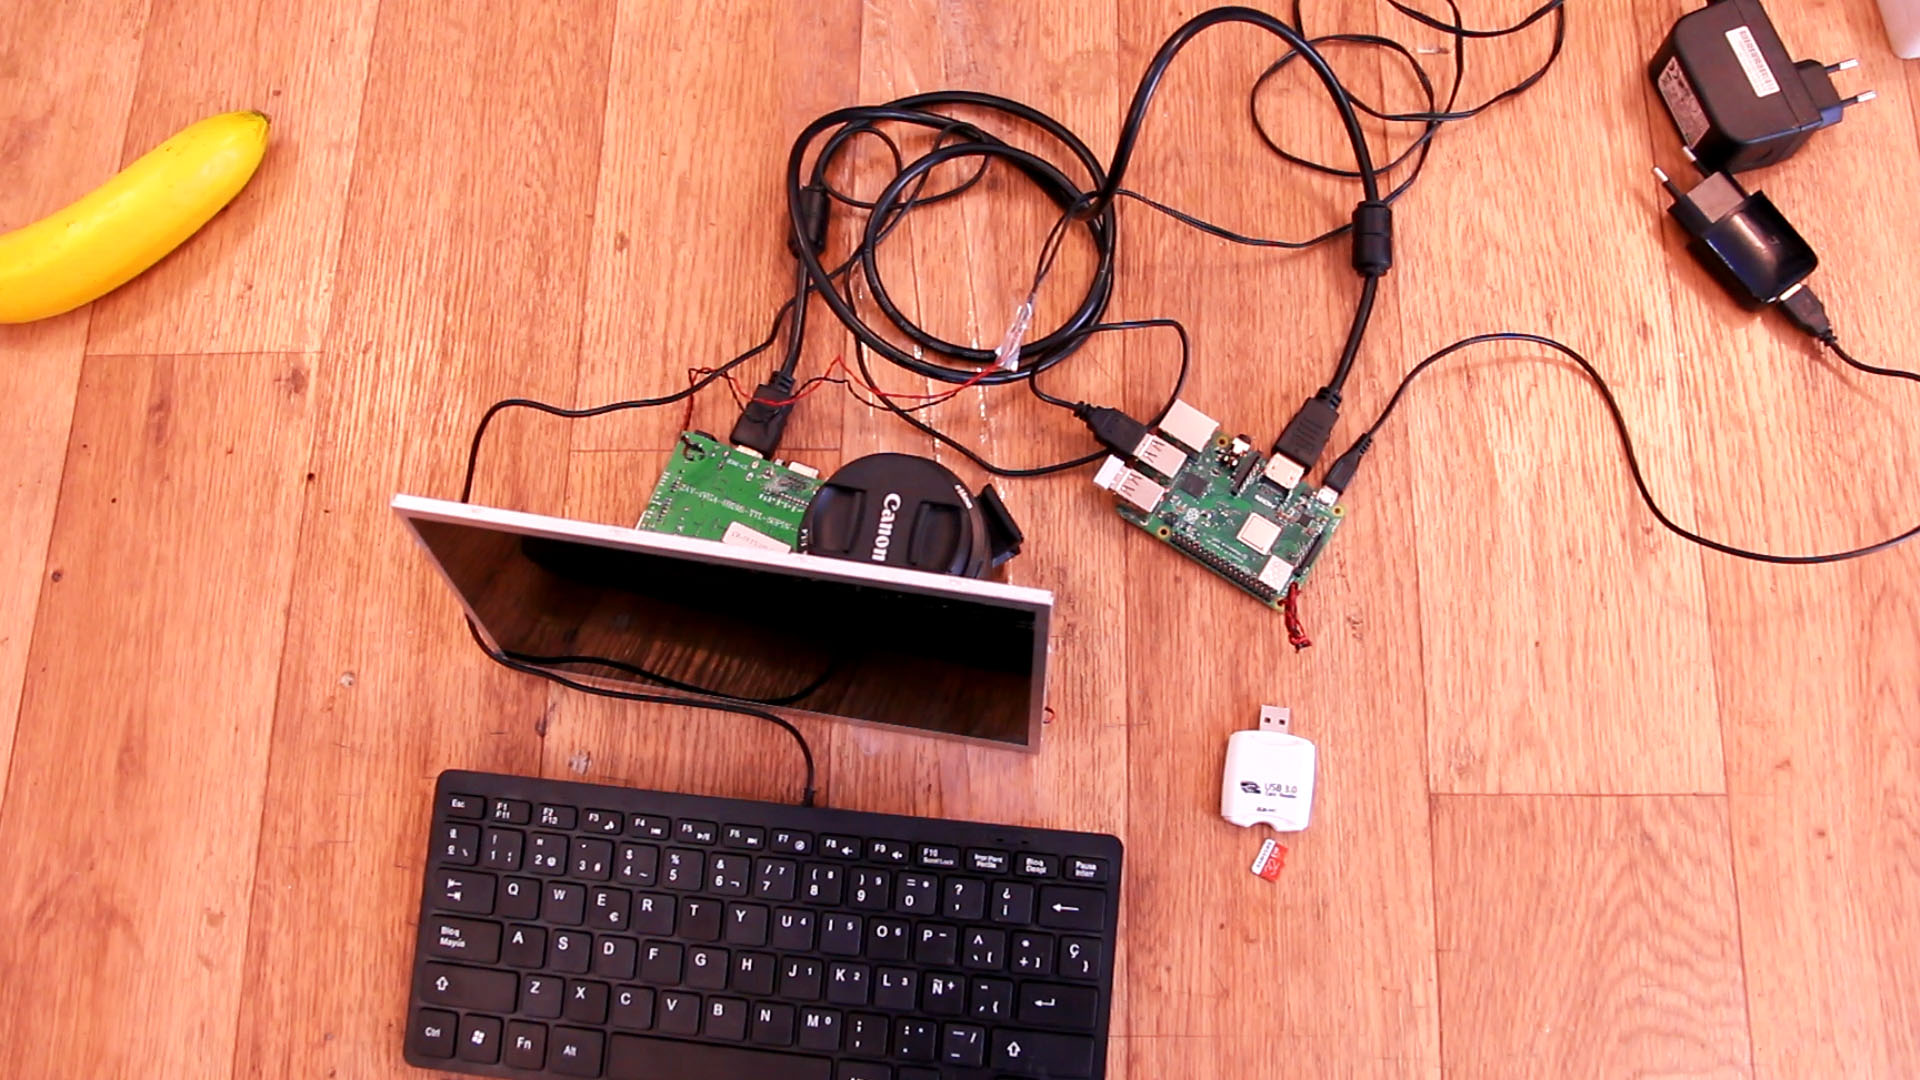
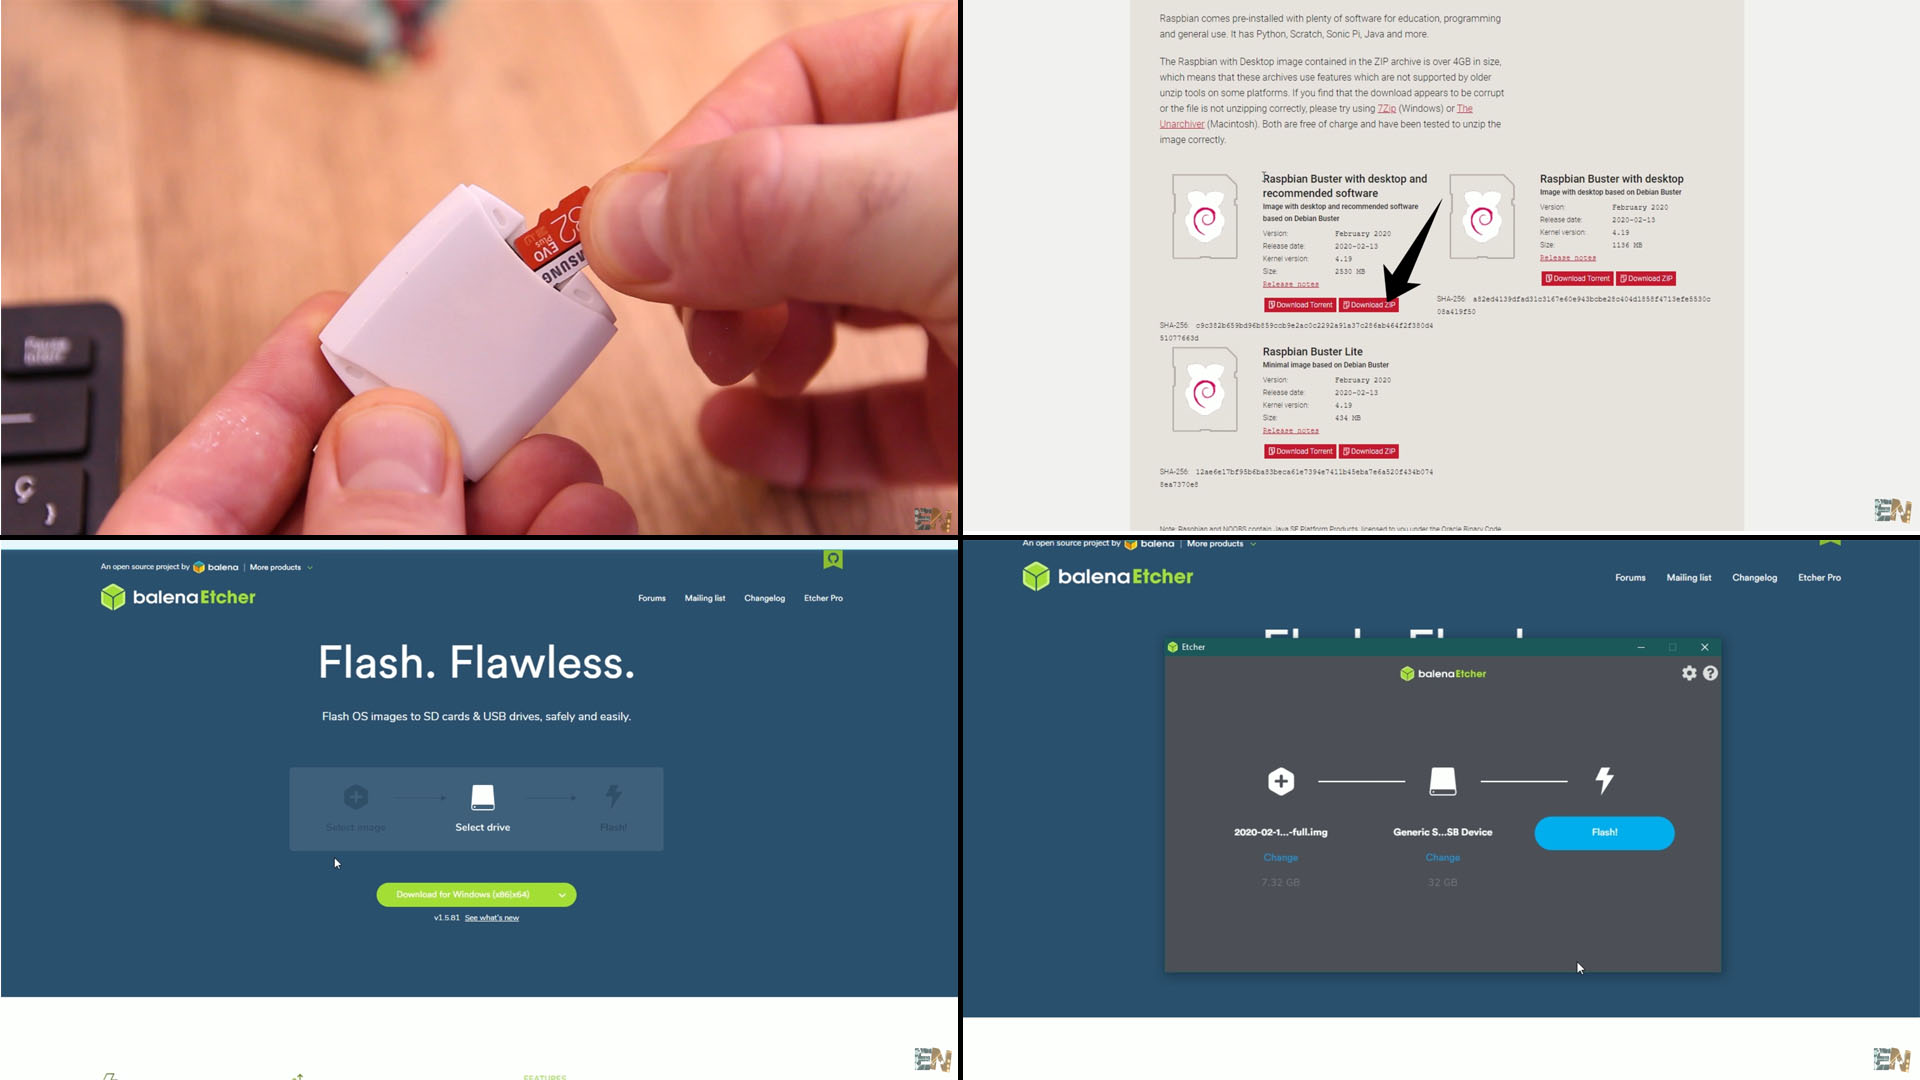
Ok, now we have everythign connected. Get the micro SD card and format it. Make sure it has high speed, with low speed SD card we might have problems. Put the SD card into the card reader for the PC and format it and not let's start with the software part.
Connect the SD card to the PC and format the SD card. Then go to the link below on raspberrypi.org and downlaod the Debian Buster version for the raspberry pi OS. That will download a ZIP file. Save this ZIP file for later.
1. Raspberry Pi OS: https://www.raspberrypi.org/downloads/raspberry-pi-os/
Next go to the link below and downlaod a software called Etcher that will burn the OS image to the SD card. This will download an .EXE file. So install taht software and run it.
2. Balena Etcher: https://www.balena.io/etcher/
Run Balena Etcher. Click the plus button and here, select the ZIP file for the Raspberri PI OS we haev just downloaded before. Then, on the drive button select the SD card drive. Then click flash. This will burn the OS to the SD card. This will take some time so be patient. When is ready, remove the SD card reader from the PCB adn get the micro SD card. We can now pu the card into the raspberry Pi.
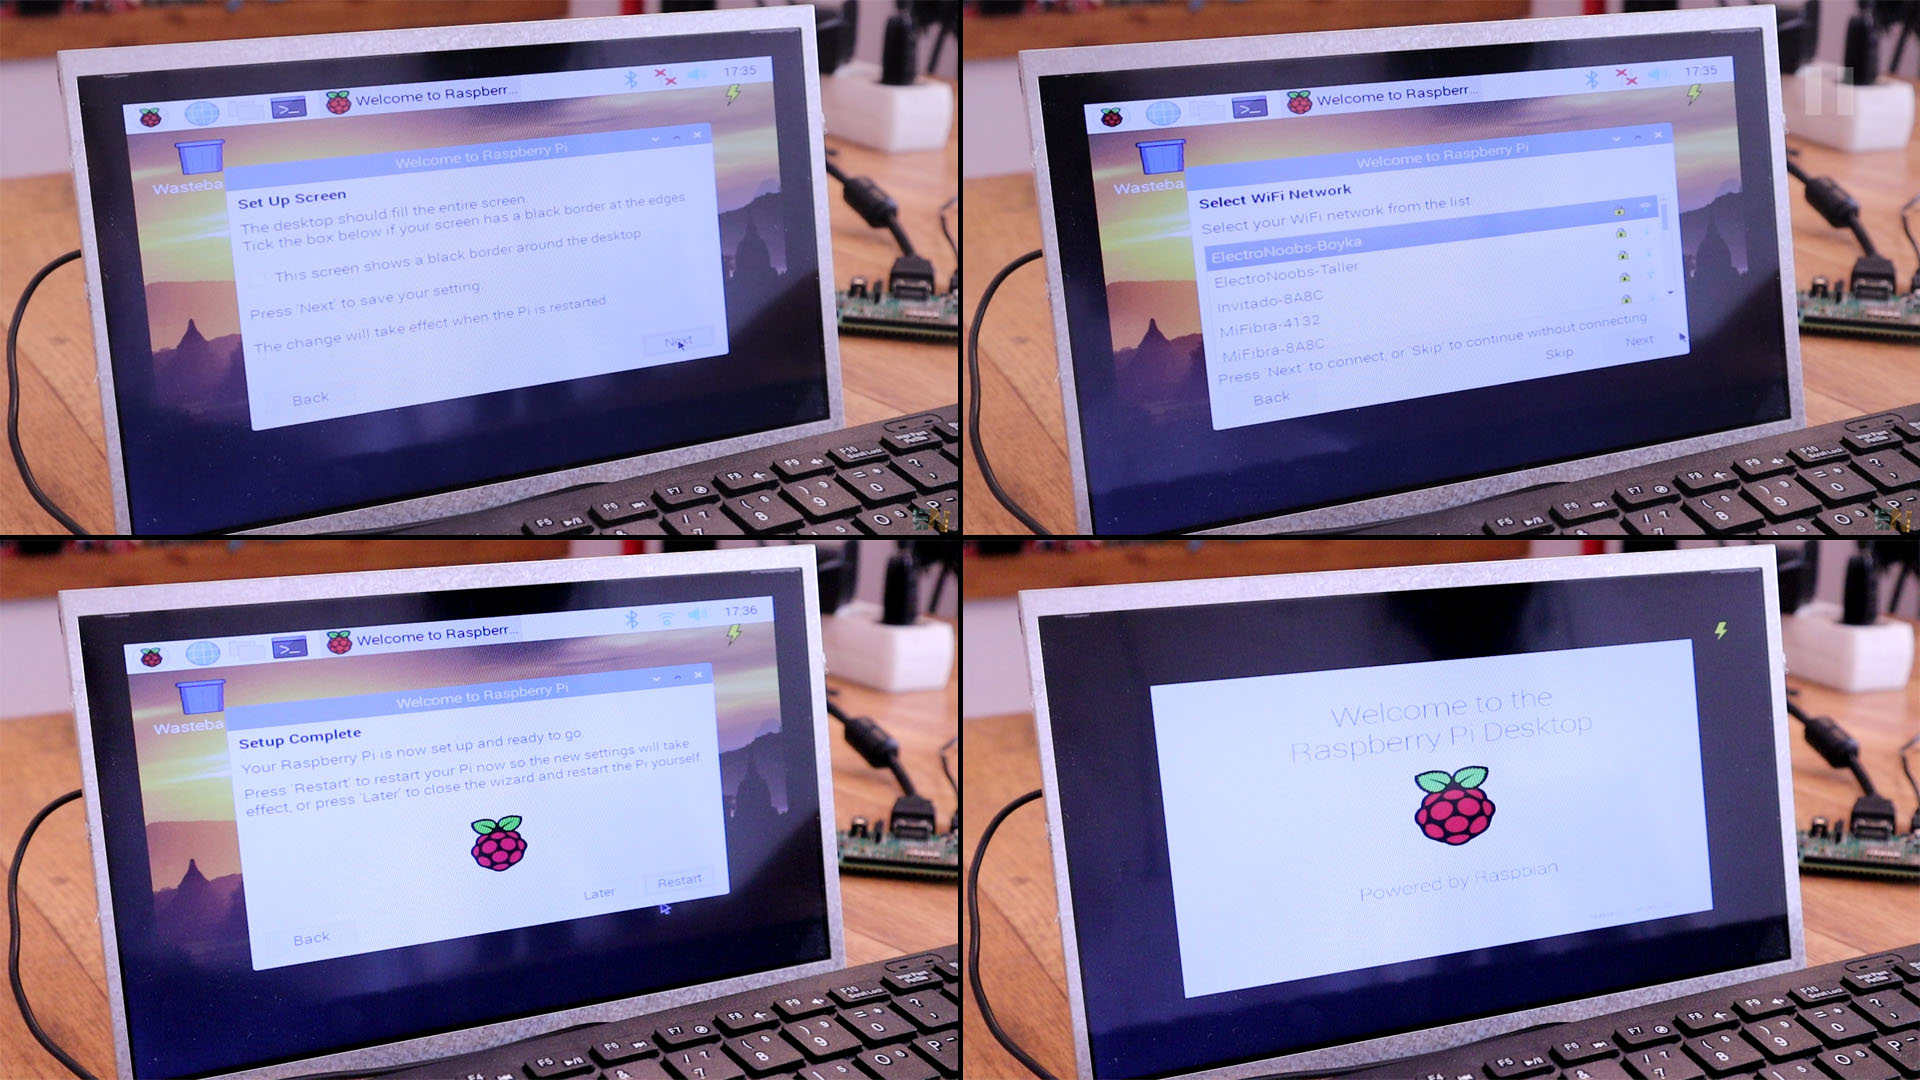
Make sure the Pi is not pwoered on and then insert the card. Now connect power to the screen and Pi. This will boot the raspberry Pi OS and you will get the welcome messages and the first configuration. On page 1 of this config, select tge countr, language and timezone. Click next and create a password for your OS.
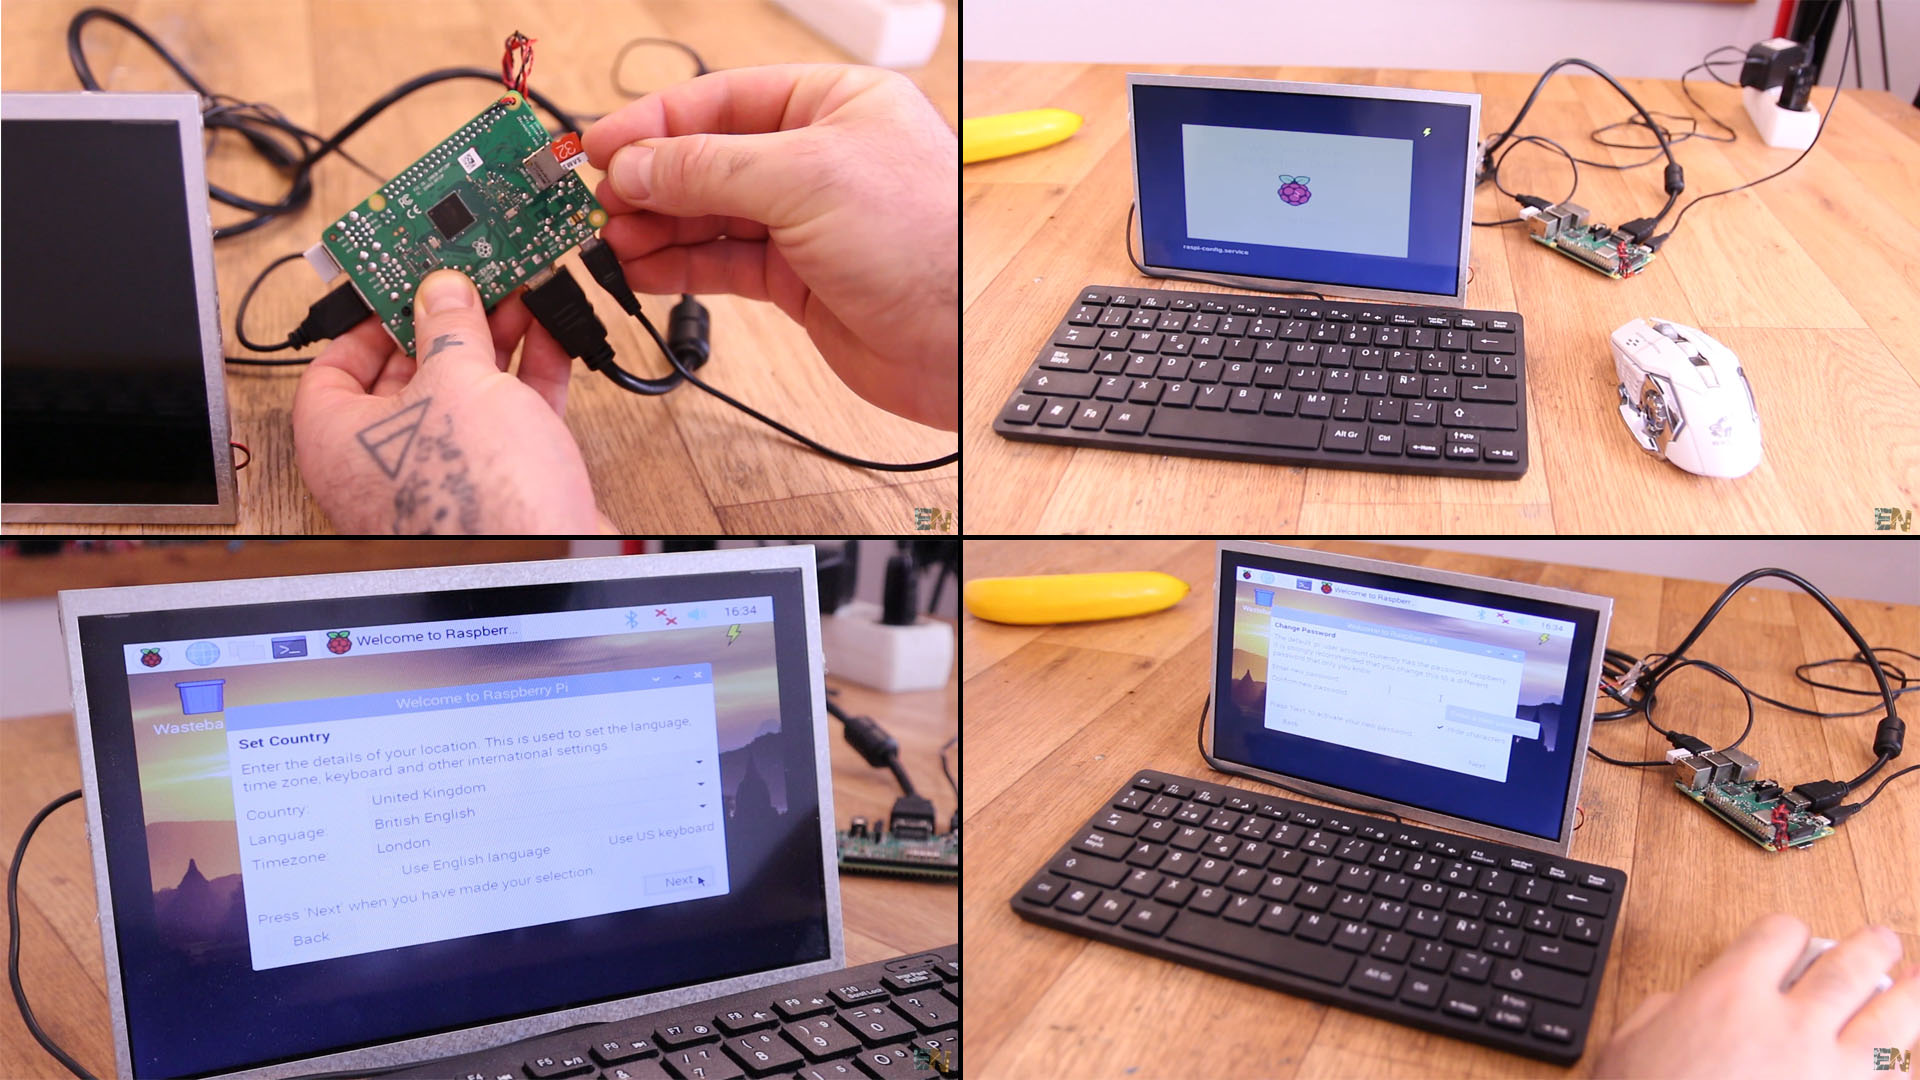
If you can see a black border around the screen, check that checkbox and click next. Then connect to your WiFi router using your internet WiFi password and click next. On the next page, if you want you can, you can update the OS. I sckipped that. Then click the reboot button and the OS will starta gain and we are ready.