I don't consider this homemade because I'm using only off the shelf parts. I bought all the parts from ebay for a decent price. I was looking for the lowest price parts. THe body I've used is 3D printed but for a few more dollars you could buy that from eBay as well. The total price is around 150 euros and you have the full part list in this tutorial and the prices. You have the scheamtic for both PPM or PWM connections, the guide on how to setup them flight controller board and more...
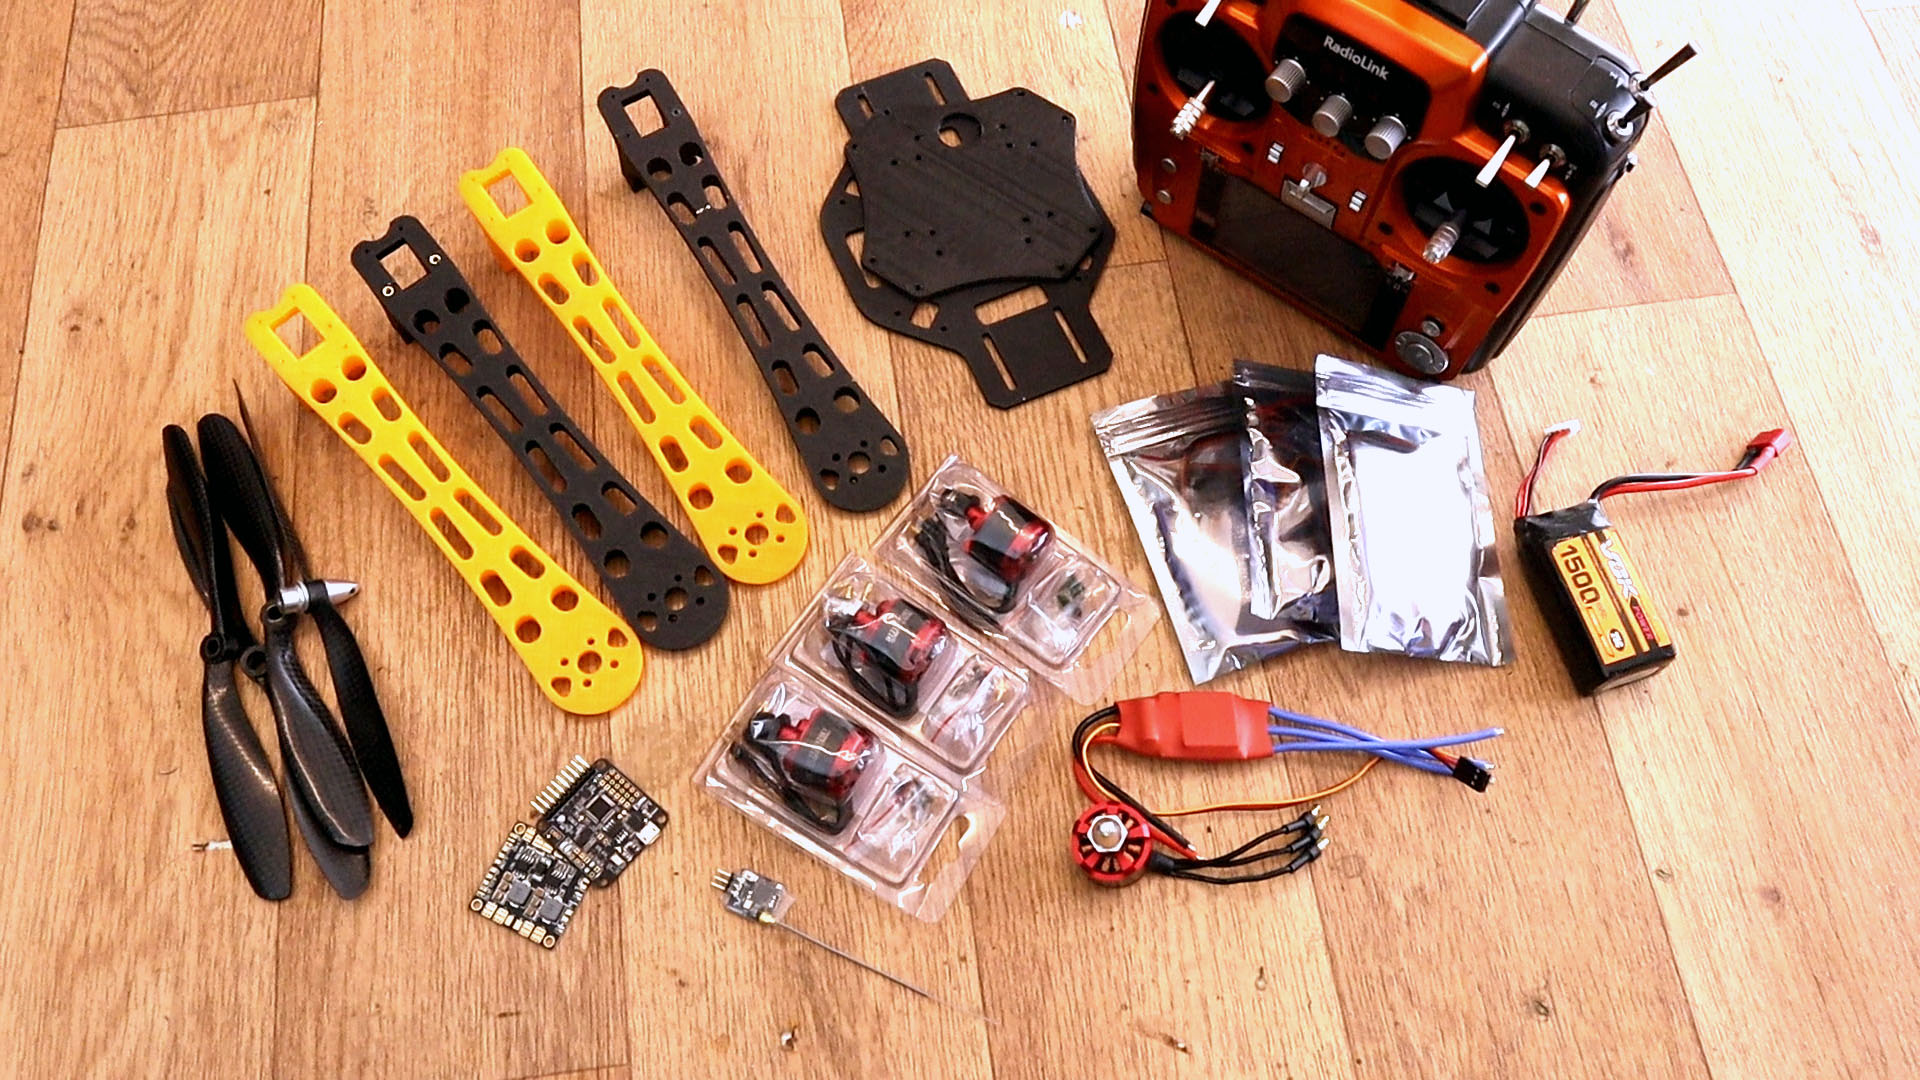
Ok so we need a few parts to build our drone and this is the part list. First of all we need a drone body. I wanted a big drone so I went with the F450 drone shape from DJI. You could buy that body from a link below or just 3D print it with the files from this link here. Then, we need 4 brushless motors and 4 ESCs. The motors must be 2 CW and 2 CCW for the screw. I'm using big motors of 2212 and 920KV. We need a 3S or 4S Li-Po battery and a flight controller. For taht I wanted to have a barometric sensor in order to use altitude control for my drone. So I went with the NAZE32 or Afroflight board in this case. This is compatible with baseflight so we could later configure the settings of our drone. You also need a power distribution board in case that you're using the 3D printed drone. The commercial drone body usually has the power distribution integrated. Finally, you need a radio controller of at least 5 channels and a radio receiver with PPM or PWM signal output for those channels. Of course, you also need propellers.
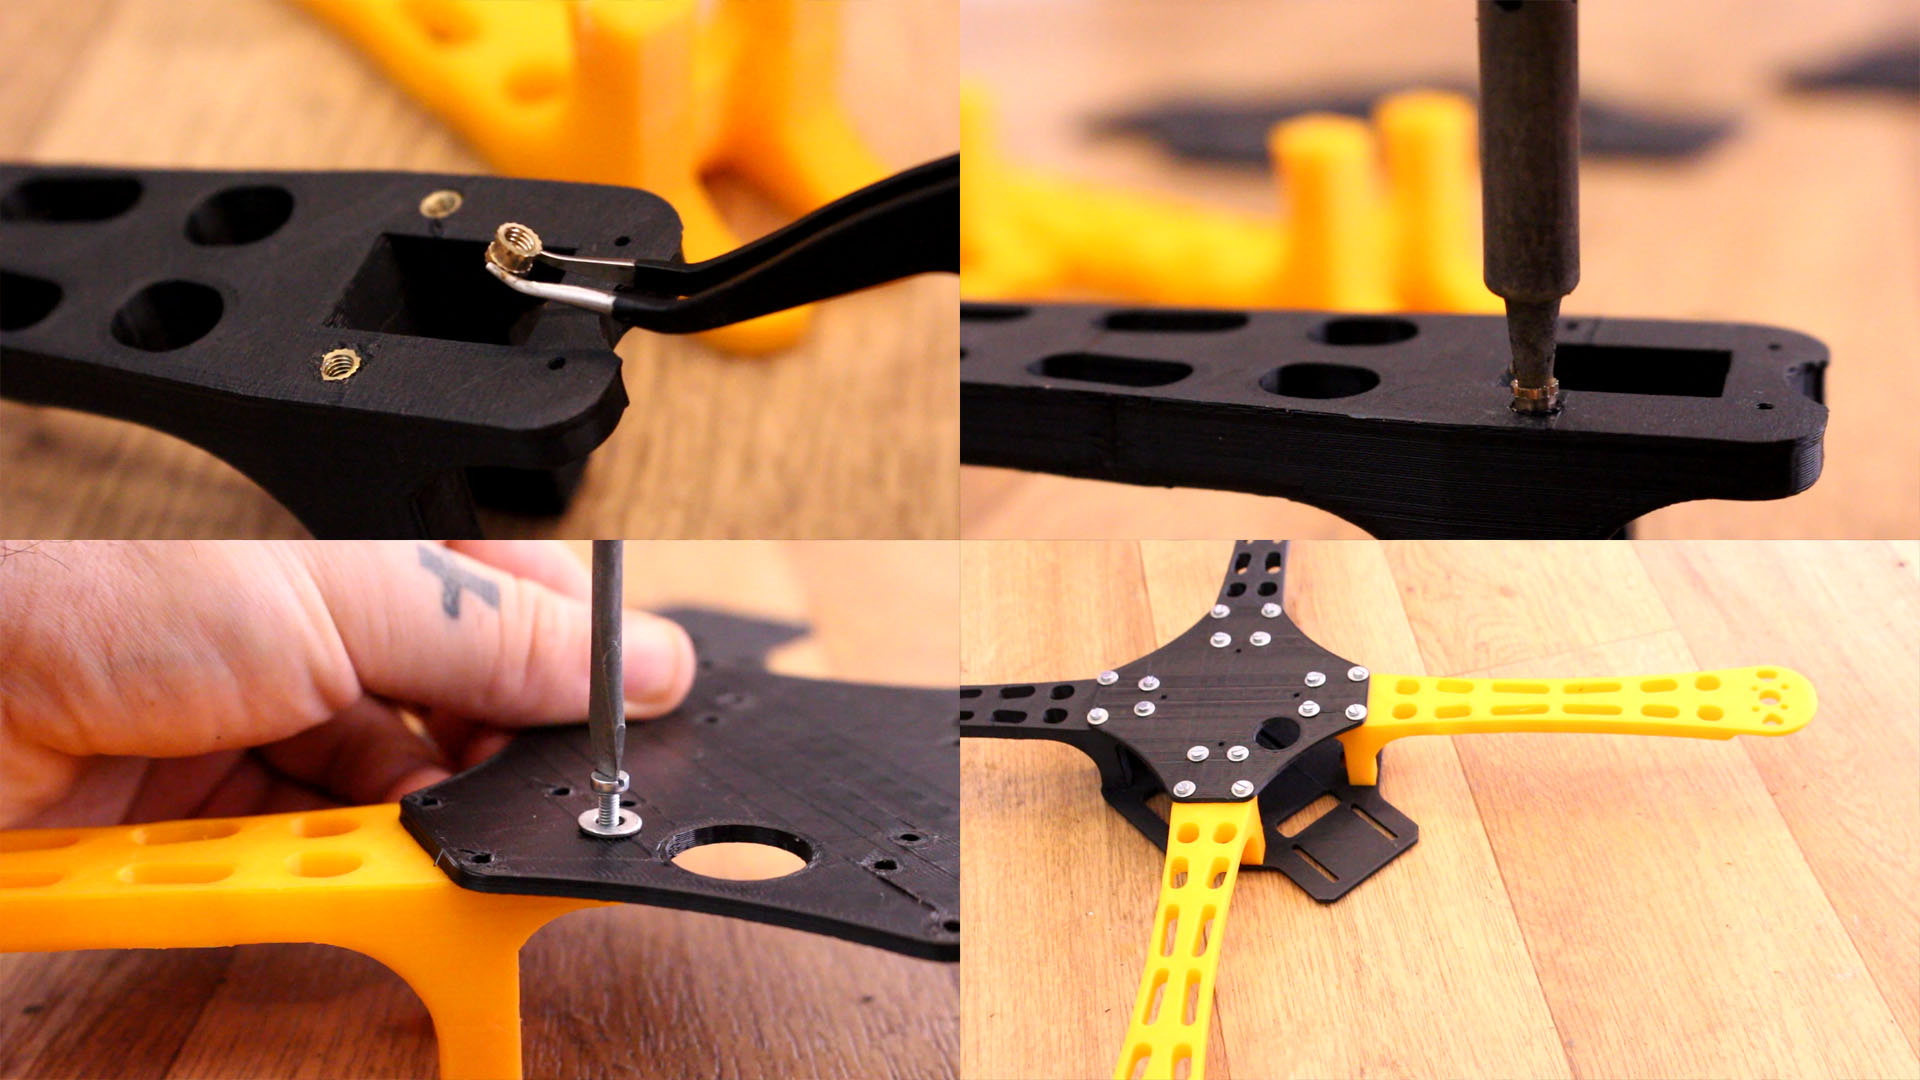
Now we will see how to connect everything to the flight controller board and also how to make the 3D printed body for the drone. For taht you will need some special nuts for the 3D parts to make it better. See those M3 Brass Threaded Heat here on this link.
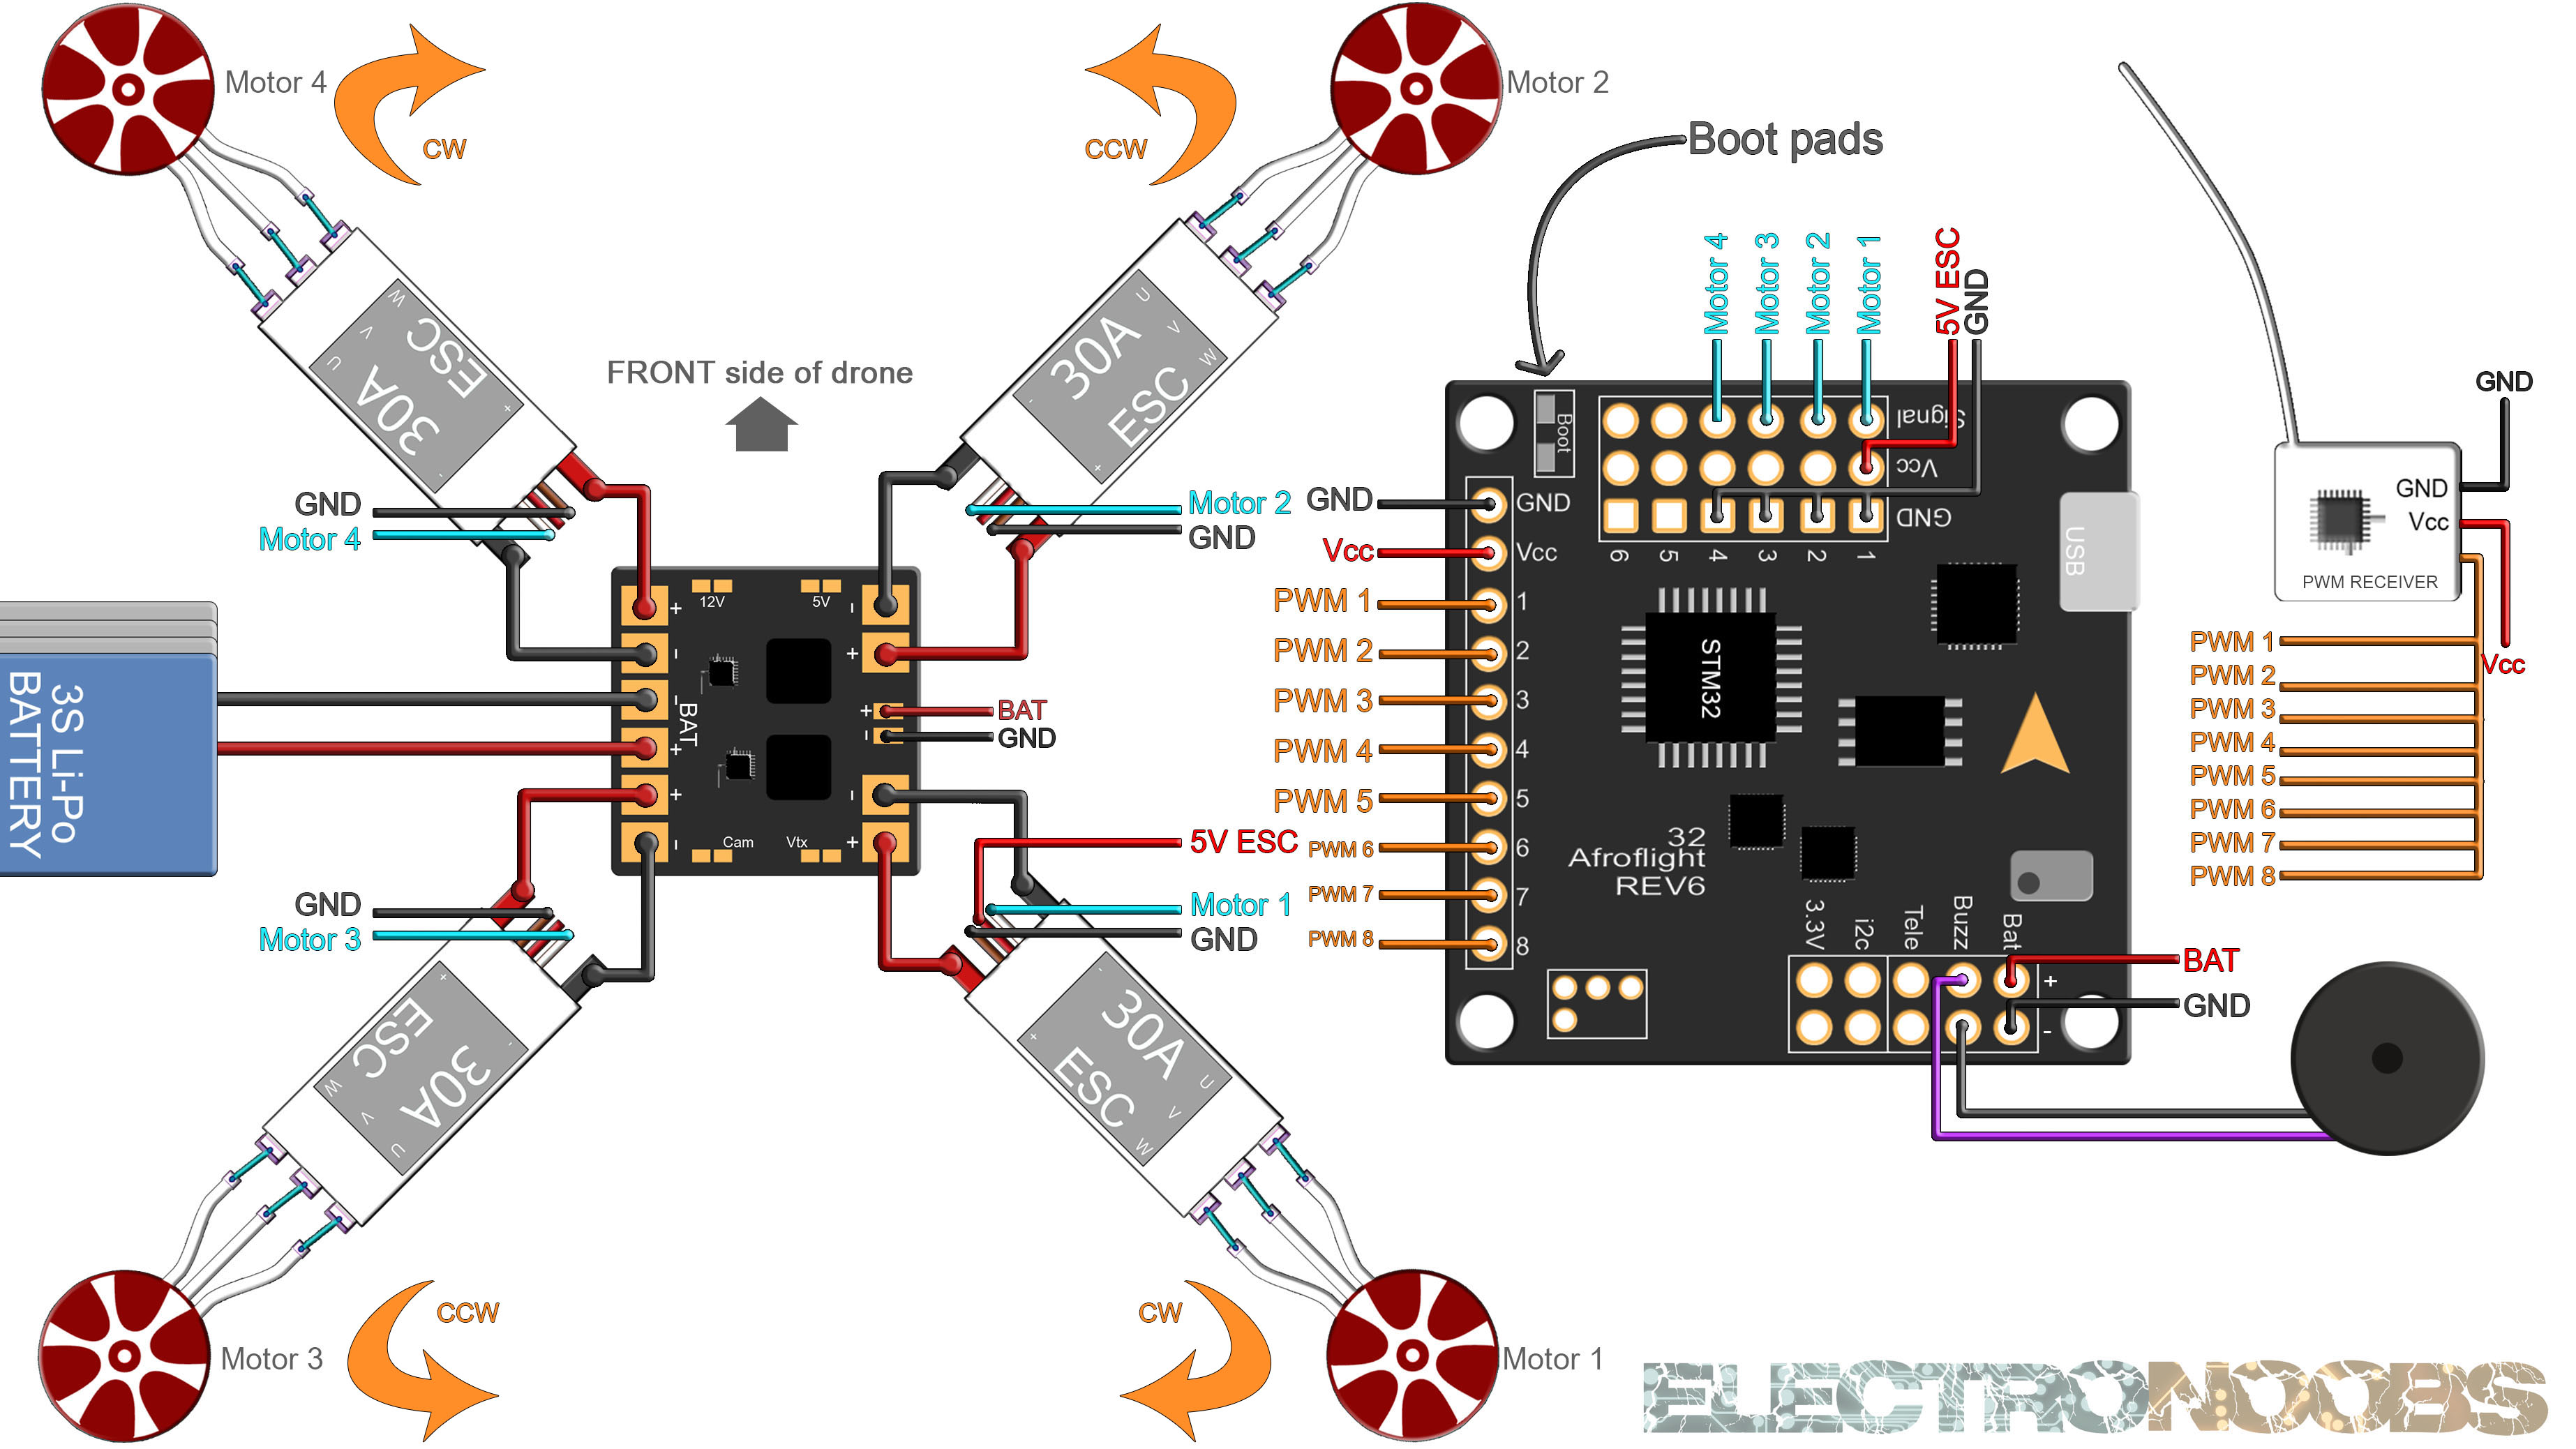
Ok, so the schematic is very simple. Just connect each ESC to the motors.
Connect each ESC pwm pin to the outputs from the controller 1, 2, 3 and 4. Connect just one 5V pin fron the ESCs to the flight controller Vcc pins. If you are using PPM receiver, connect that to GND, Vcc and the PPM pin to pin 1 of the flight controller. Also connect the battery wires and the buzzer and that's it.
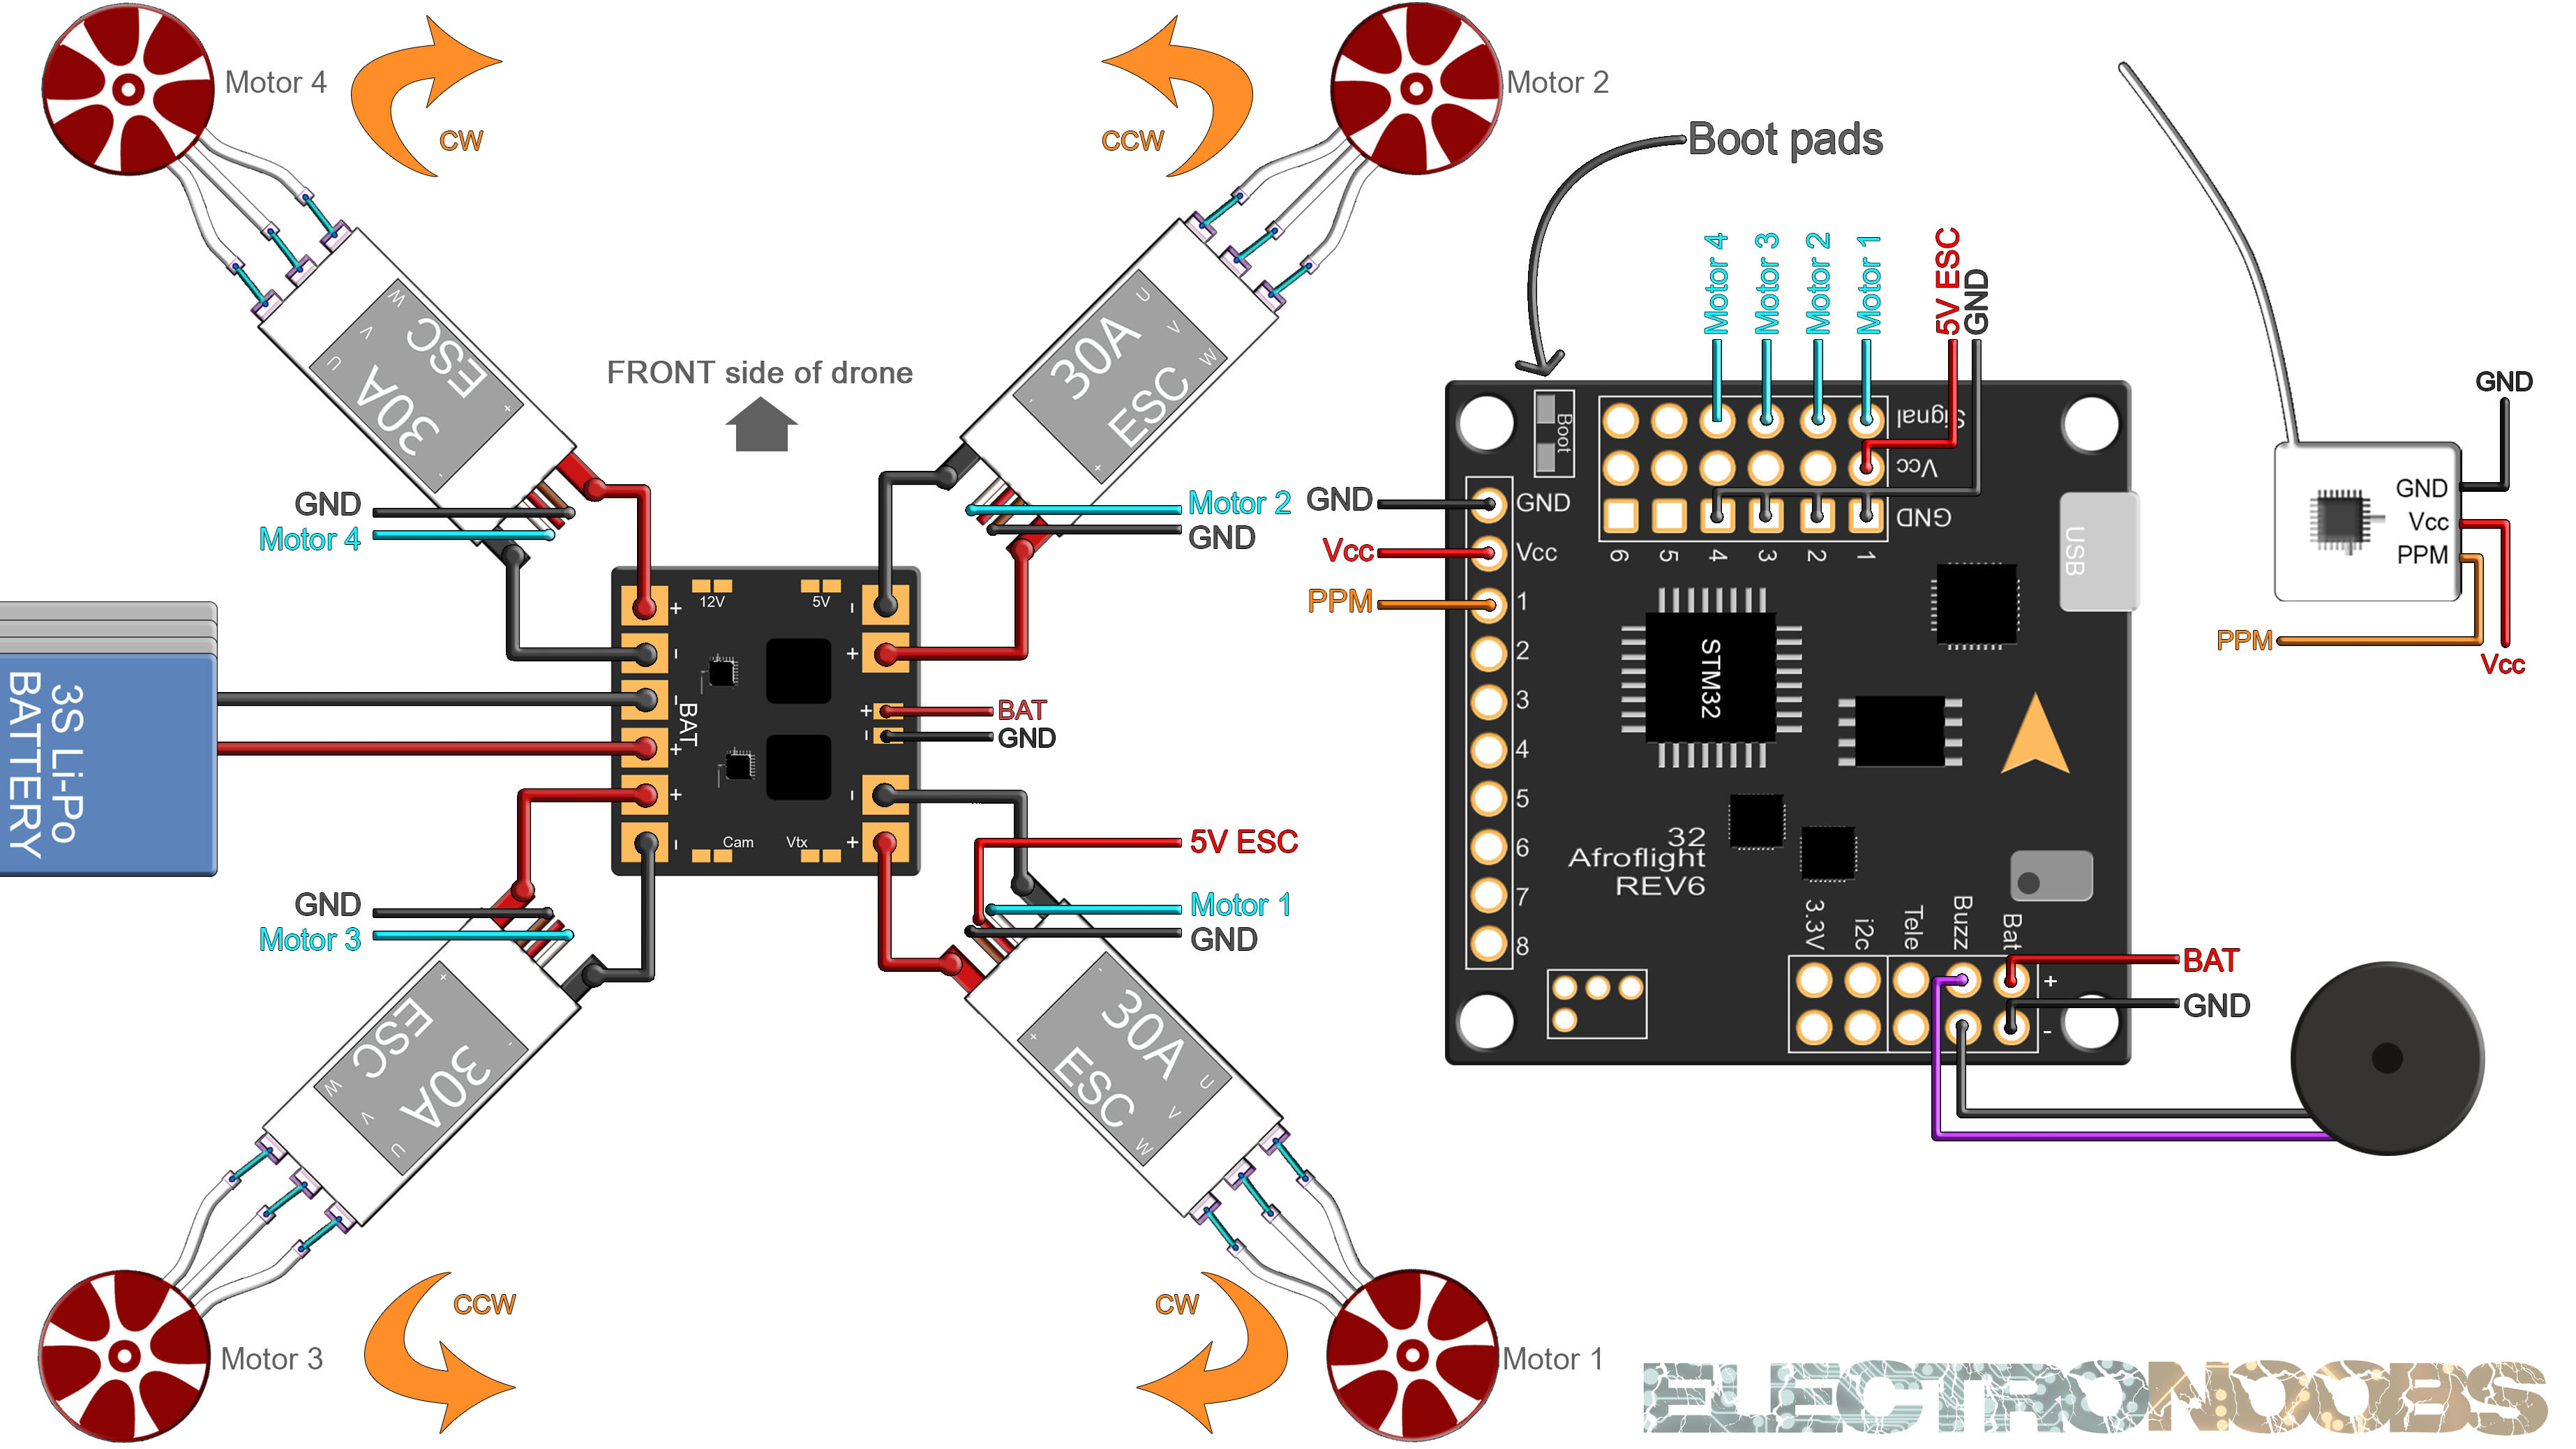
Now this is the same schematic but using a PWM receiver. For that we need a PWM signal connected for each channel. So, connect each signal from the receiver to the flight controller and we will make the setup later in the baseflight platform. The rest of the connections are the same.
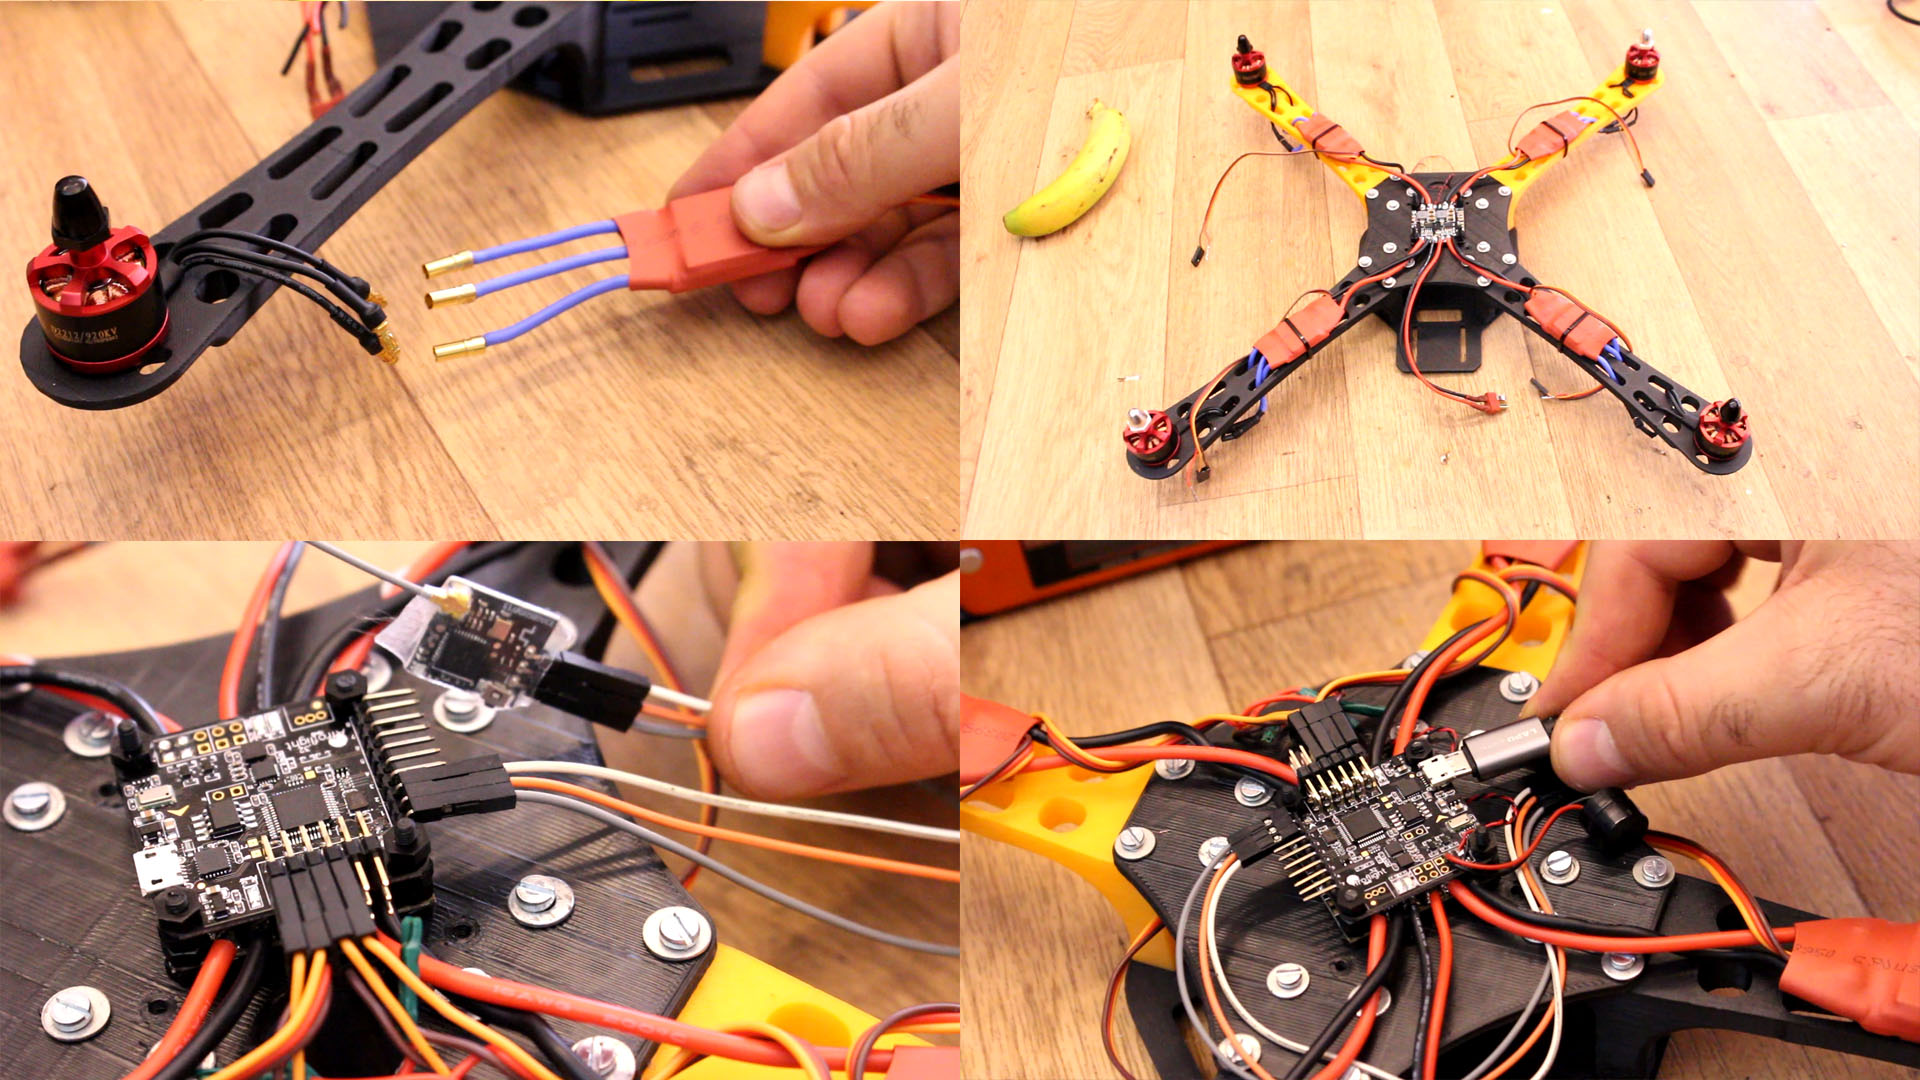
Now we can mount the drone. First, if you are using the 3D printed drone, we need to add better nuts. Just buy some 3mm nuts like in the link before, heat your soldering iron, enlarge a bit the hole and press the nut inside. That will create a way better screw thread. Then you can add all the screws. We have 4 arms, one top plate and one bottom plate and a total of 40 screws and washers. Now the body is ready, we can add the rest.
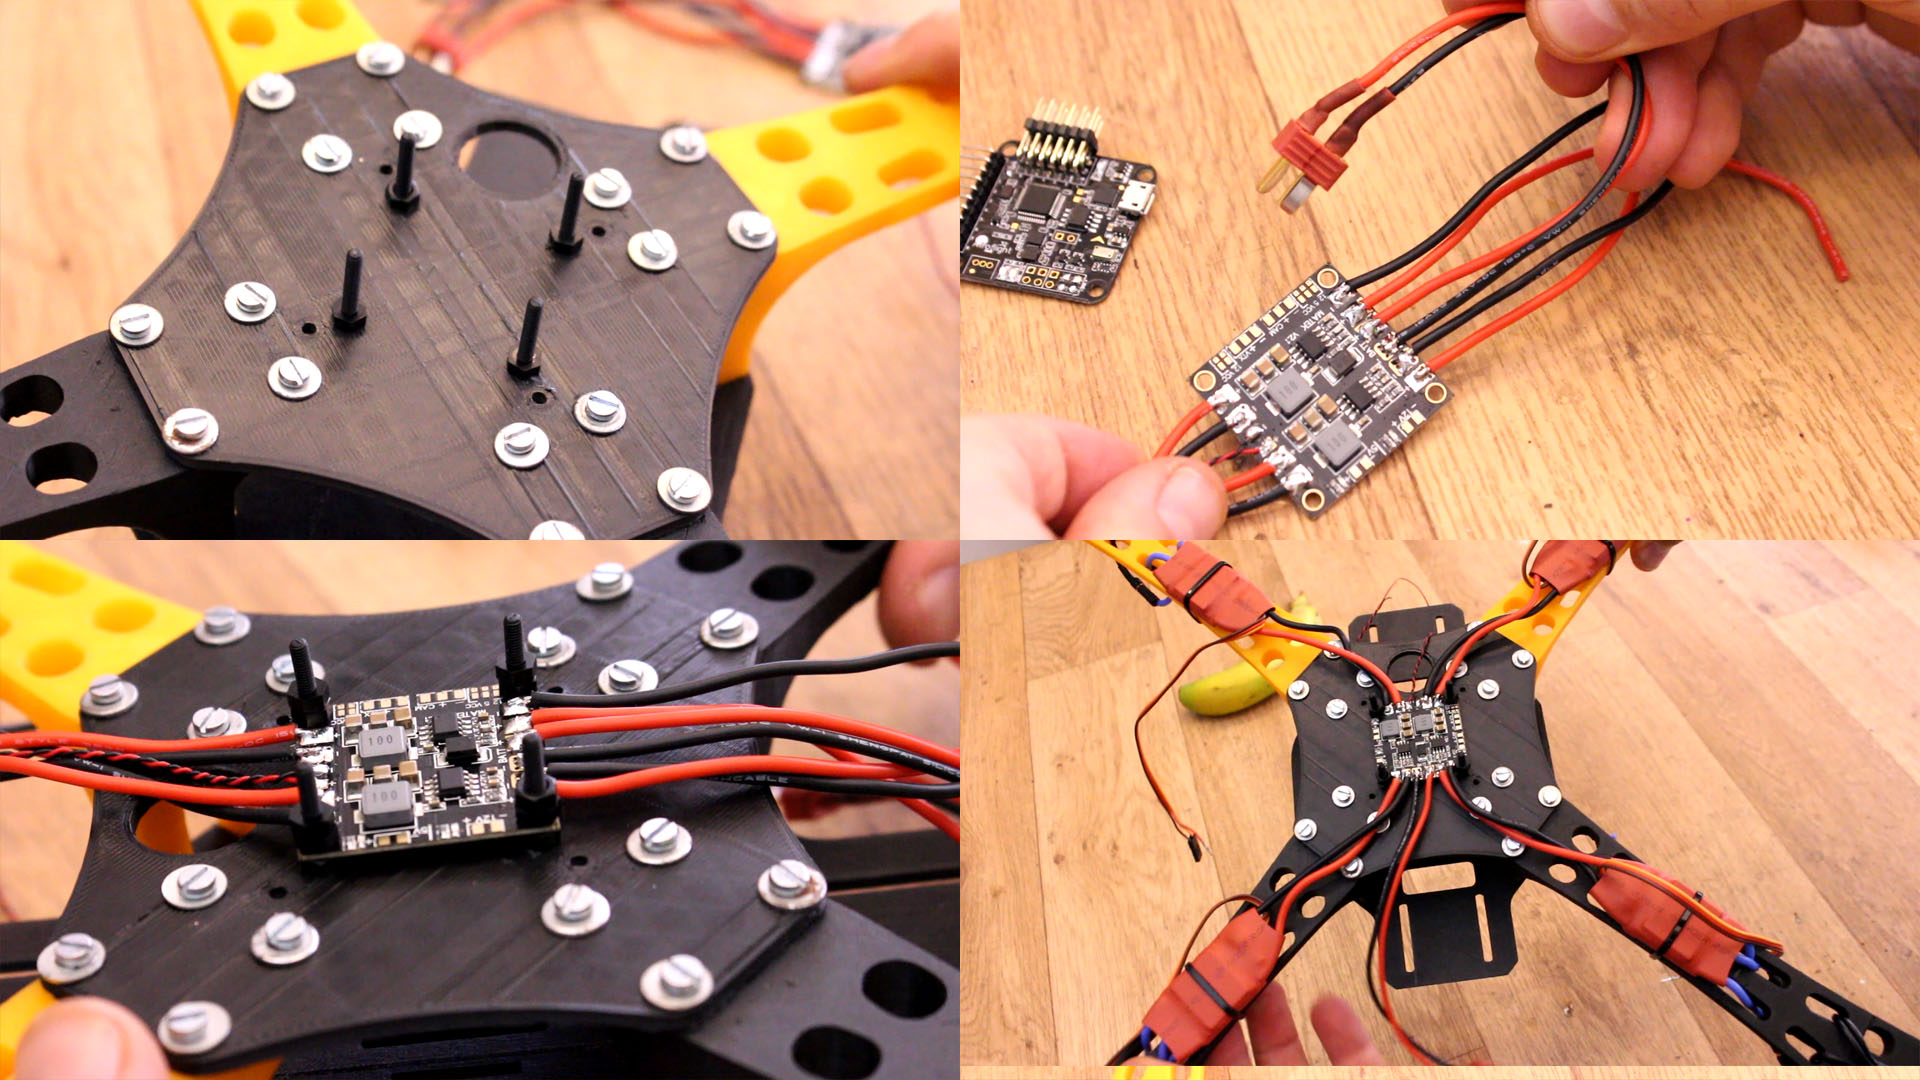
Now, the top plate has some holes but these are not compatible with my flight contrtoller and power distribution board. So, I make measurements and drill 4 holes form that. Now I will use plastic screws in order to avoid shorts and noise. Add 4 screws to the top plate. Then solder red and black wires to all pads of the power distribution. To the BAT pads I aslo add a T connector for the LiPo battery as you can see below. Then you can screw the power distribution board in place. I also add 2 nuts for each screw in order to get clearance for the next board.
Now is time to decide the front part of the drone.
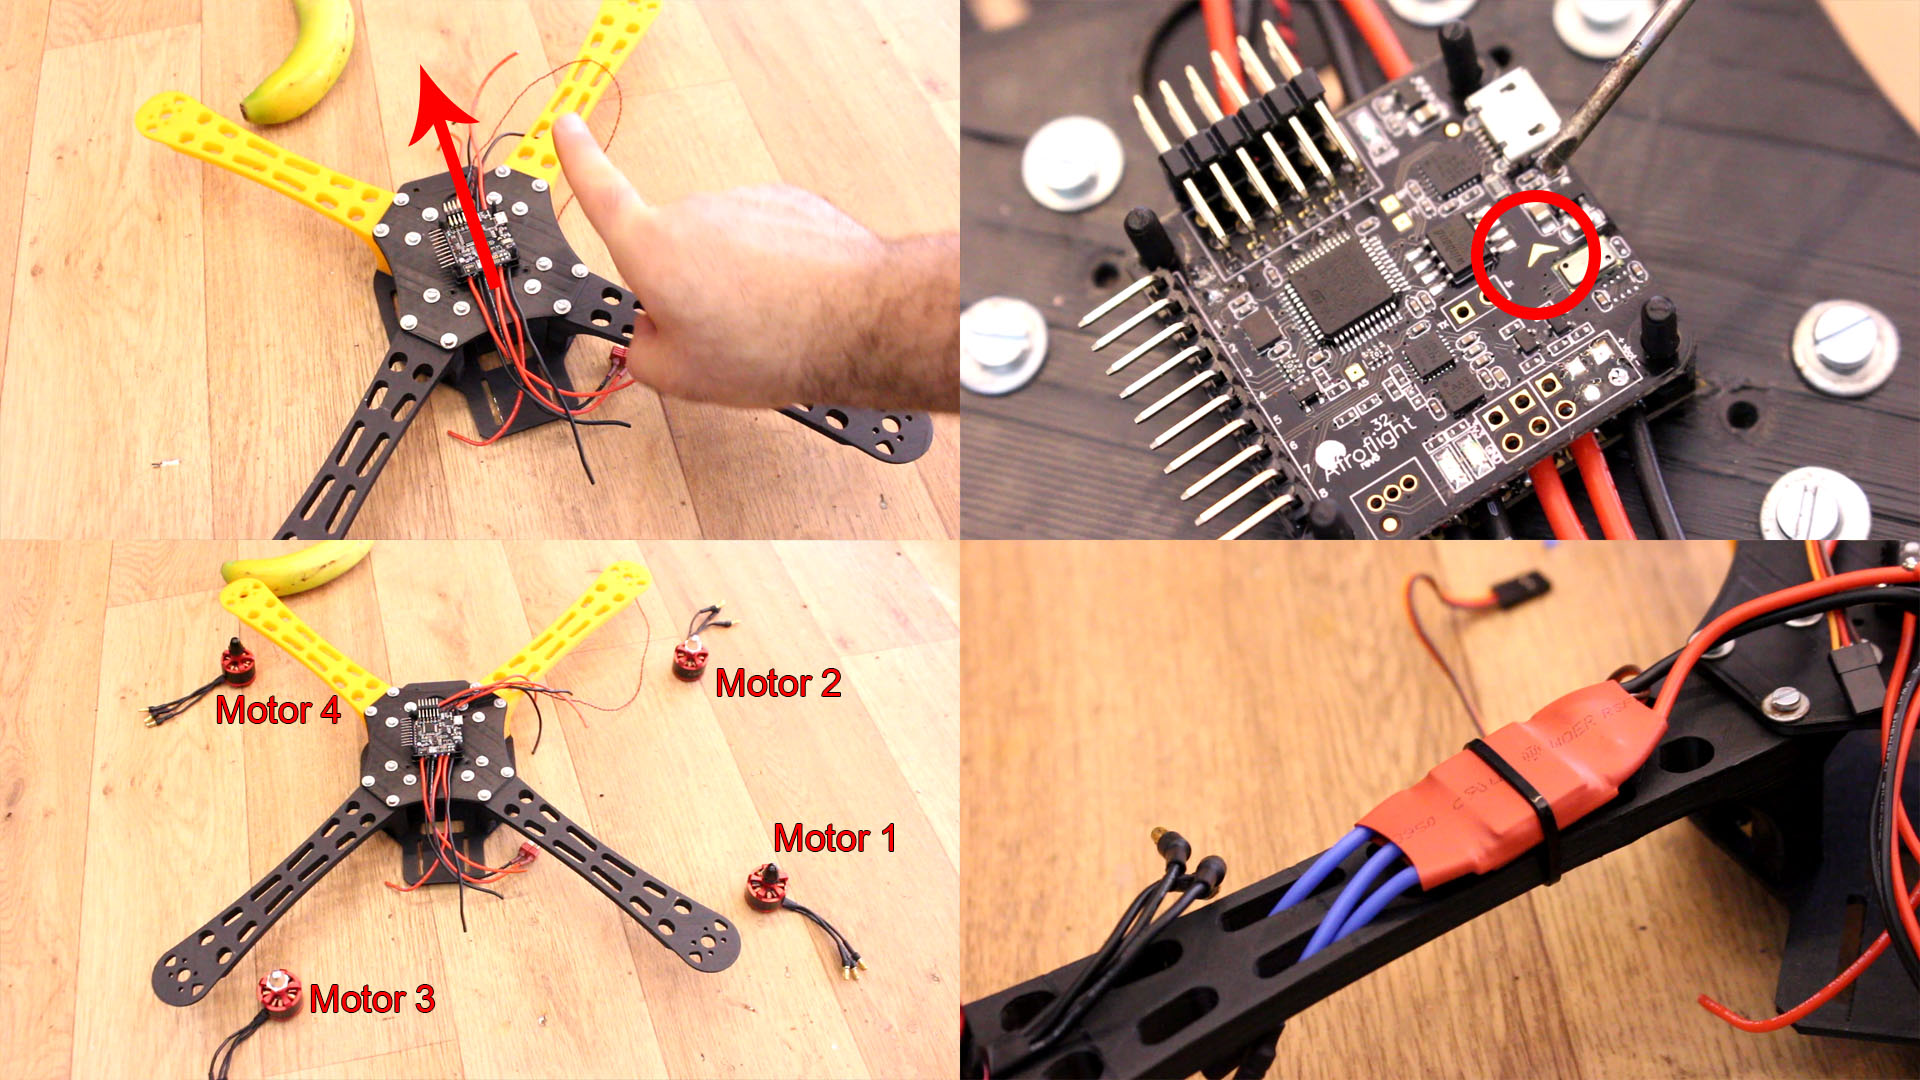
Ok, now add bullet connectors to the ESCs if you want. Then add the motrs with 4 screws each. Connect the ESCs to the motors and then the ESCs PWM cable and GND to the flight controller. Also connect one 5V from the ESCs to the board. Then add the buzzer and the BAT connection to the board. Not you have to solder the boot pins together and connect the USB because is time to make the setup.