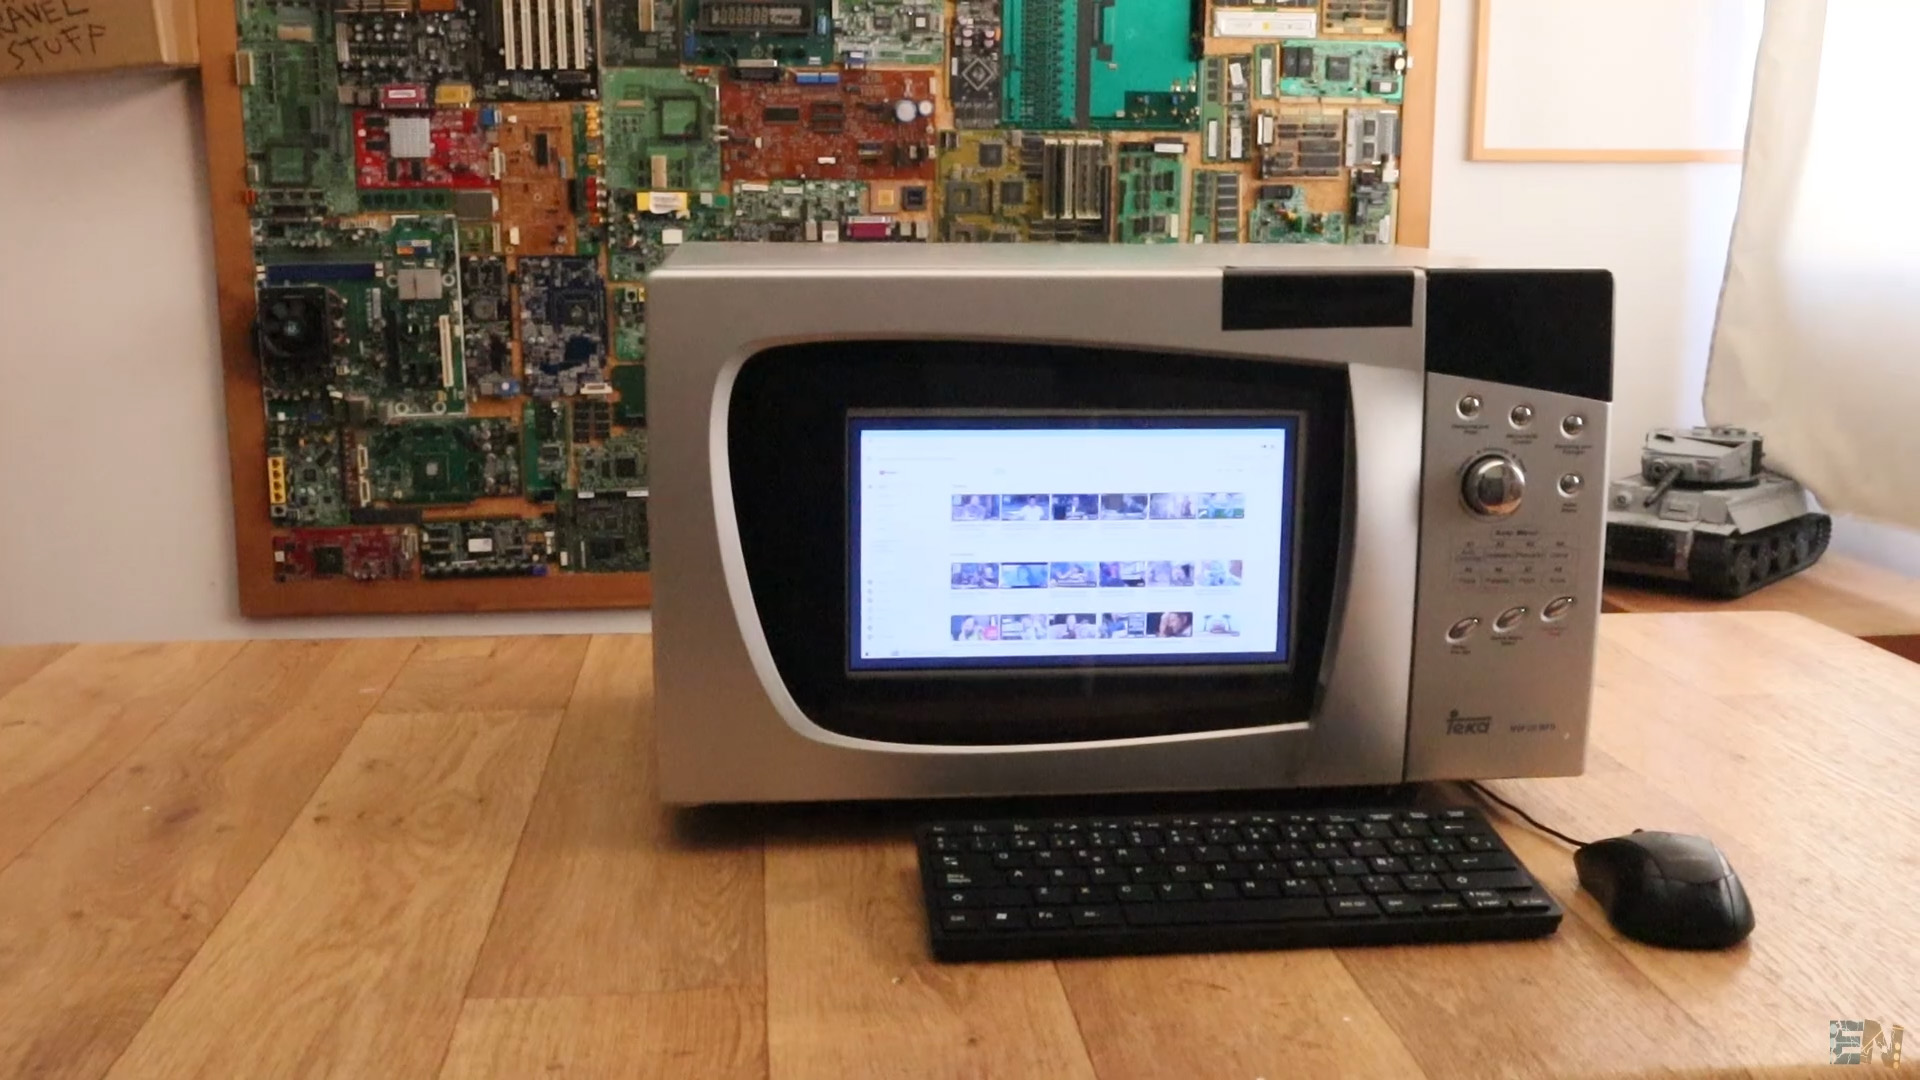
I always enjoyed playing all these old games. I love quake, MK4 and all SEGA games. Having a console that has all these games would be great. And having this console made by myself is even better. Having this inside of a microwave, well that's a lot better. We will sue an raspberri pi 3, an SD card, a keyboard and a joystick, a power supply and an LCD module with HDMI input.
Ok, so first thing first lets see what we need and how to connect everything. You have a full part list on the link below so you could order all that you need. You also have the scheamtic so you know how to connect each module. Make sure you buy a fast SD card so we won't have any problems...
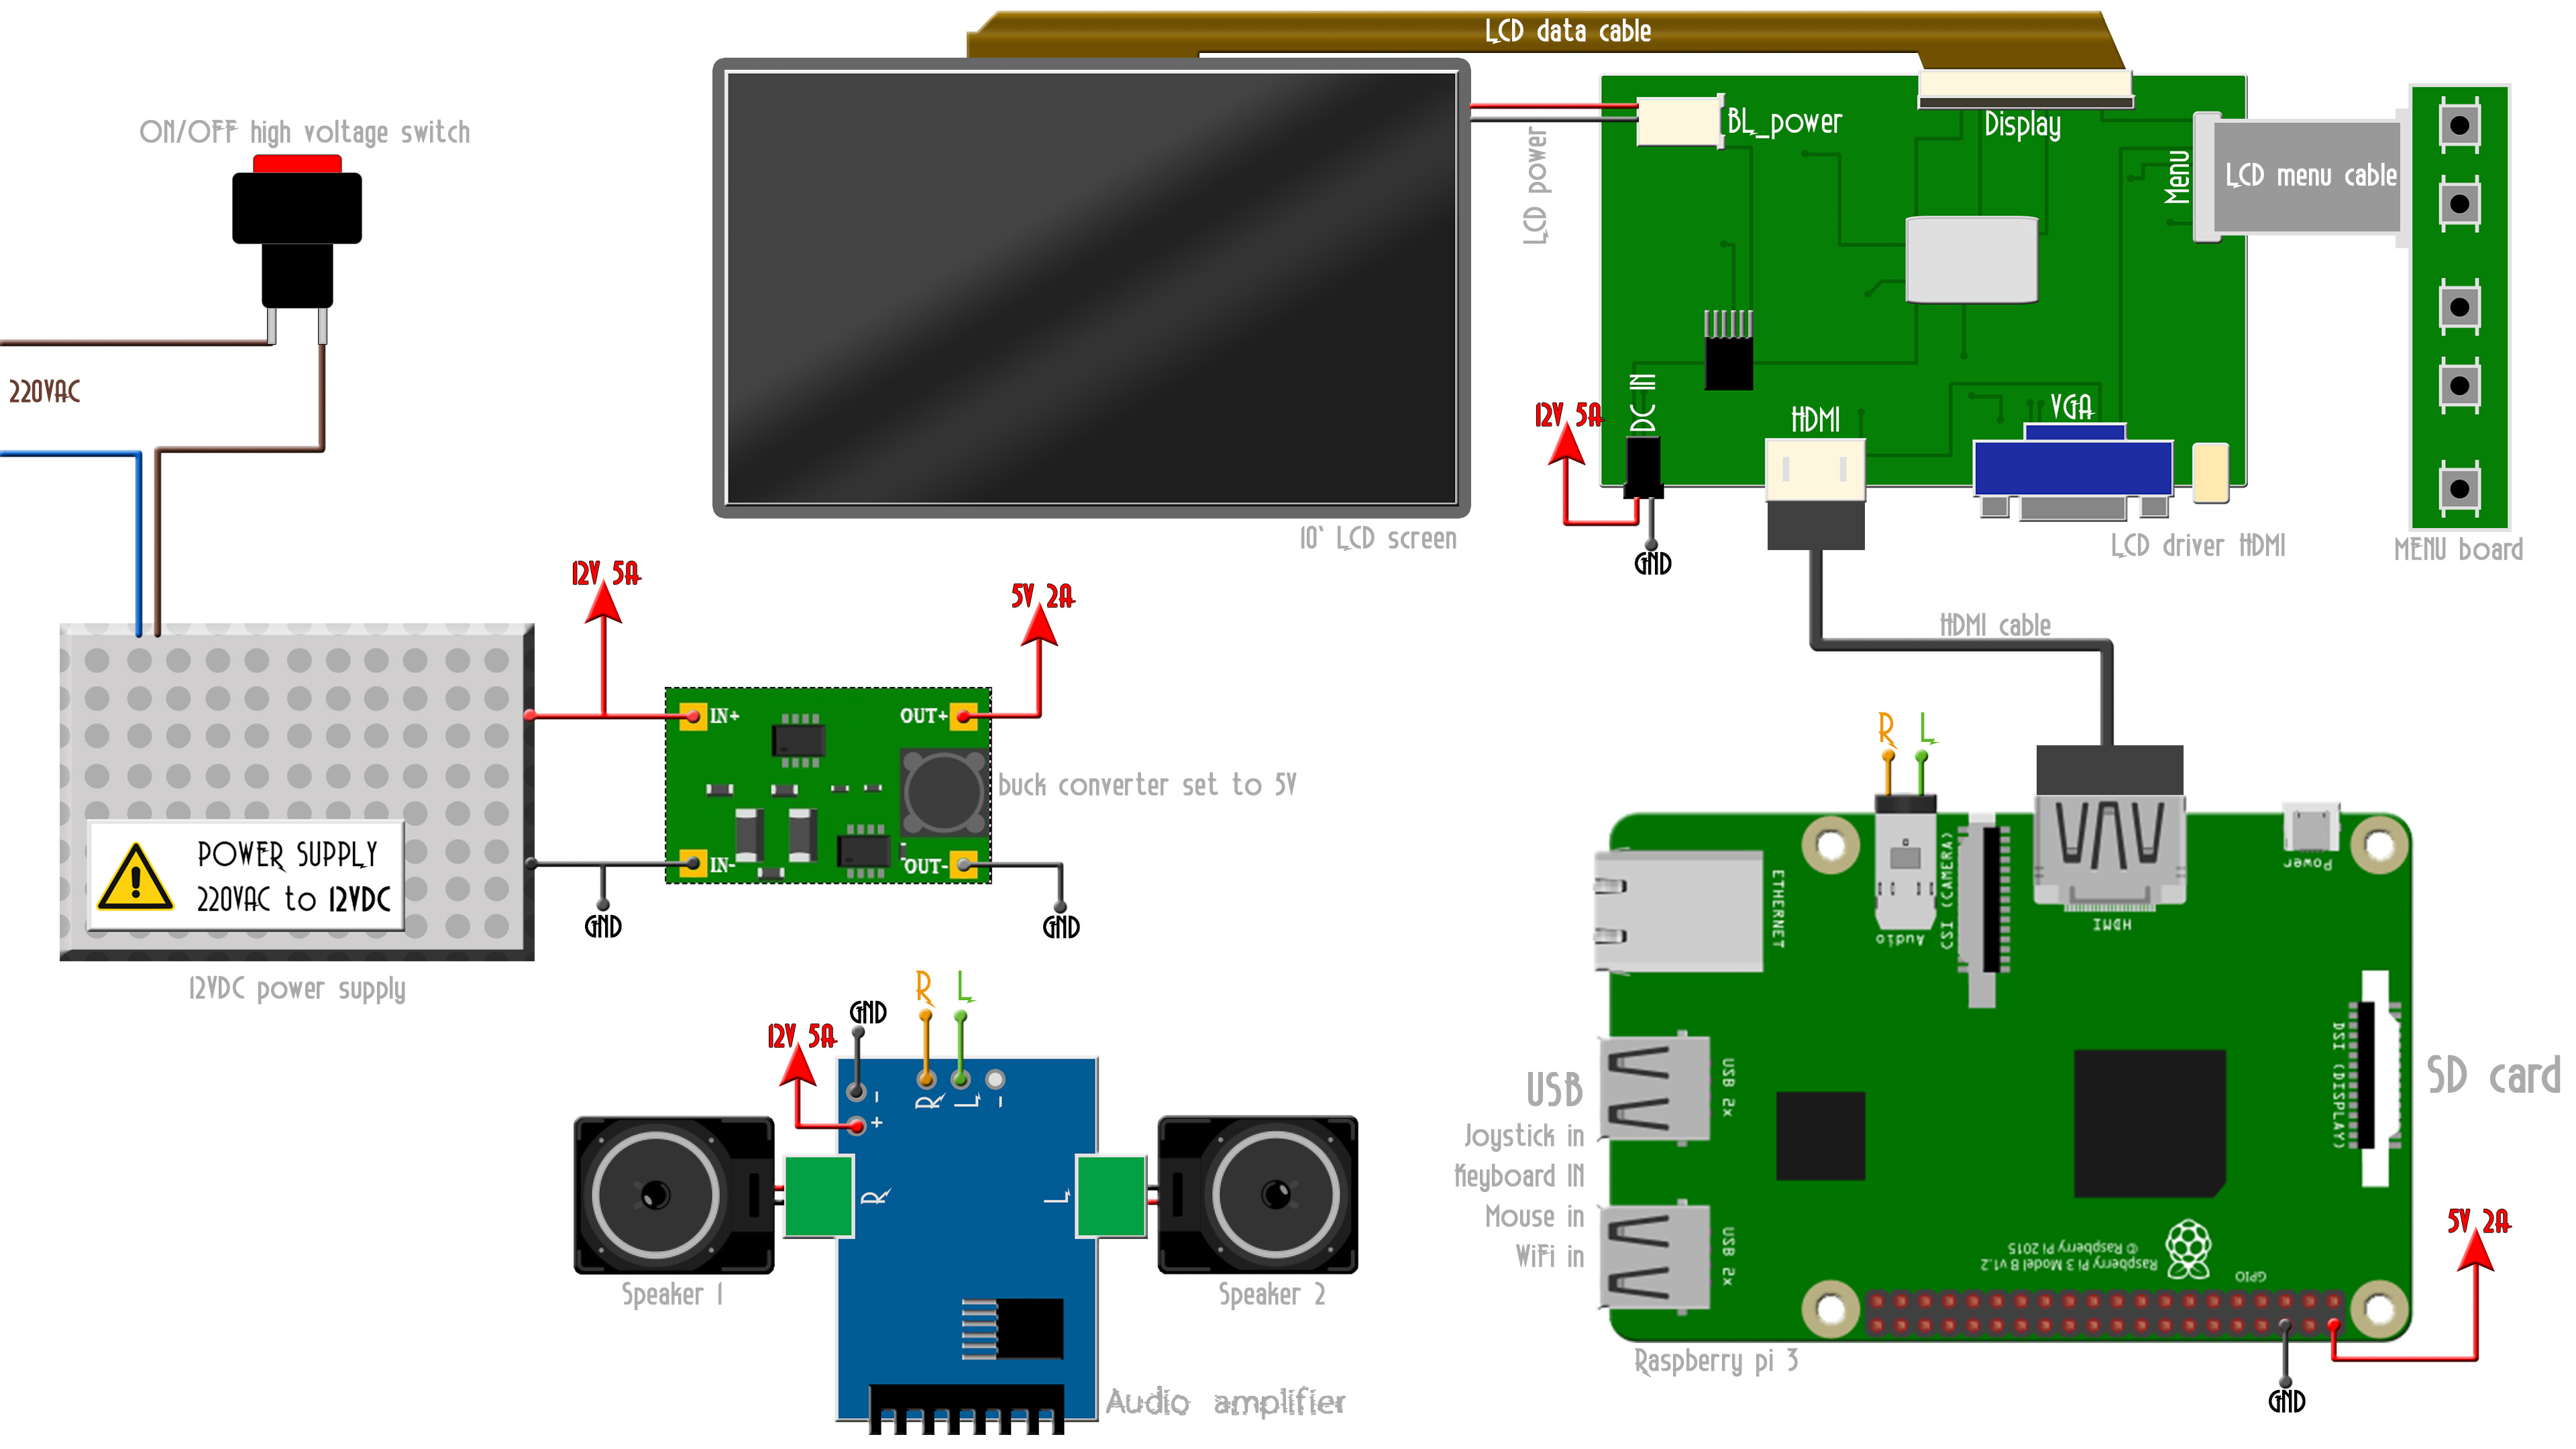
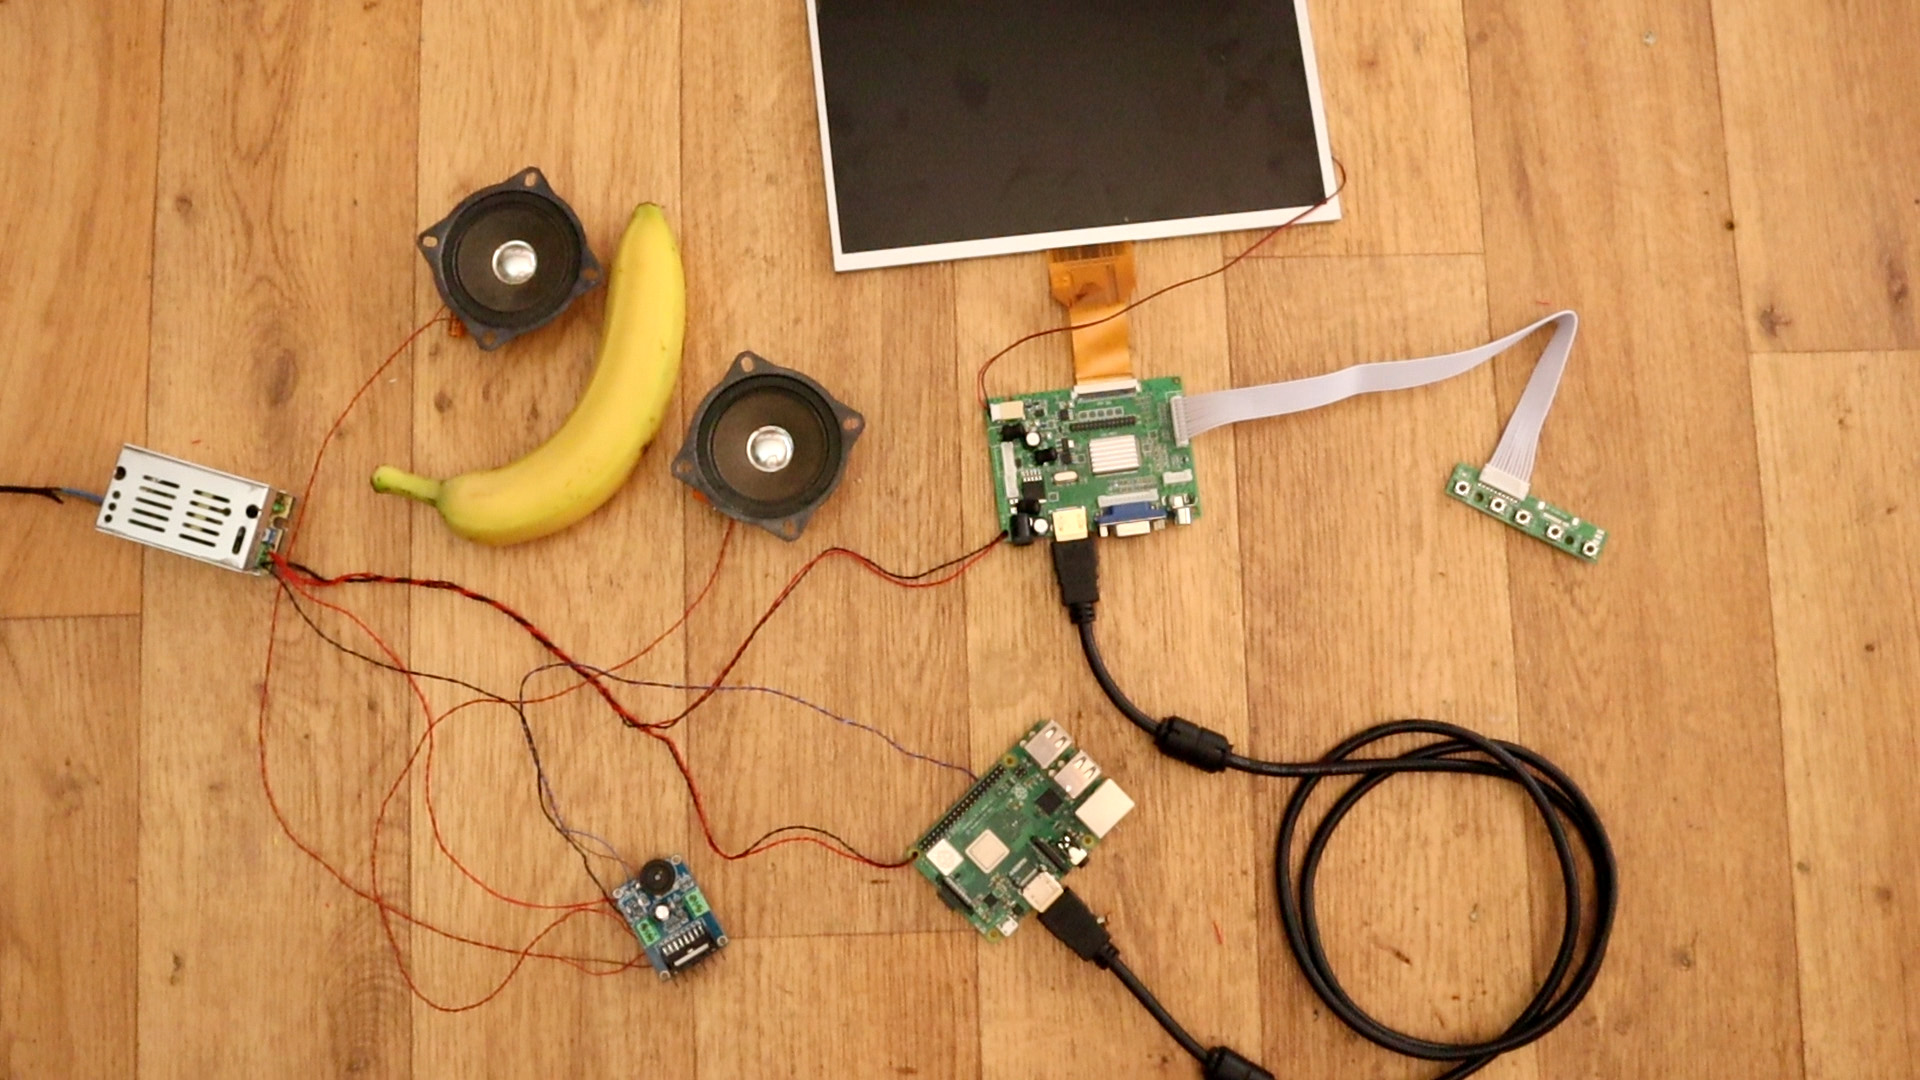
As you can see we need a raspberry pi, in this case a pi 3. We also need an HDMI driver that could be conencted to the LCD screen. To supply everything we need a 12V power supply since the LCD works at that voltage. But the raspberry pi at 5V so for taht we need a buck converter module with at least 2A. We also need a joystick, in this case a copy of the XBox controller. To amplify sound we need some sort of amplifier. In the part list you will find a few examples.
Banana just for scale. But the rest are all the connections. I'm using a very small amplifier but for now is good enough. We haev to make the connections to make sure that it works and then put everything inside the microwave. Connect the HDMI cable from the pi to the LCD driver and the driver to the screen. Connect the audio amplifier to the oudio pins on the bottom of the raspberry pi.
Ok, now make sure your SD card is formated and empty. Download from below the etcher software and the RETROPIE.zip file with the RETROPIE image file. Extract that zip file and get the image. Then, install etcher and run it. In ethcer select the image file of RETROPIE you ahev just extracted. Then select your SD card and click flash. Ina couple of minutes the image will be flashed.
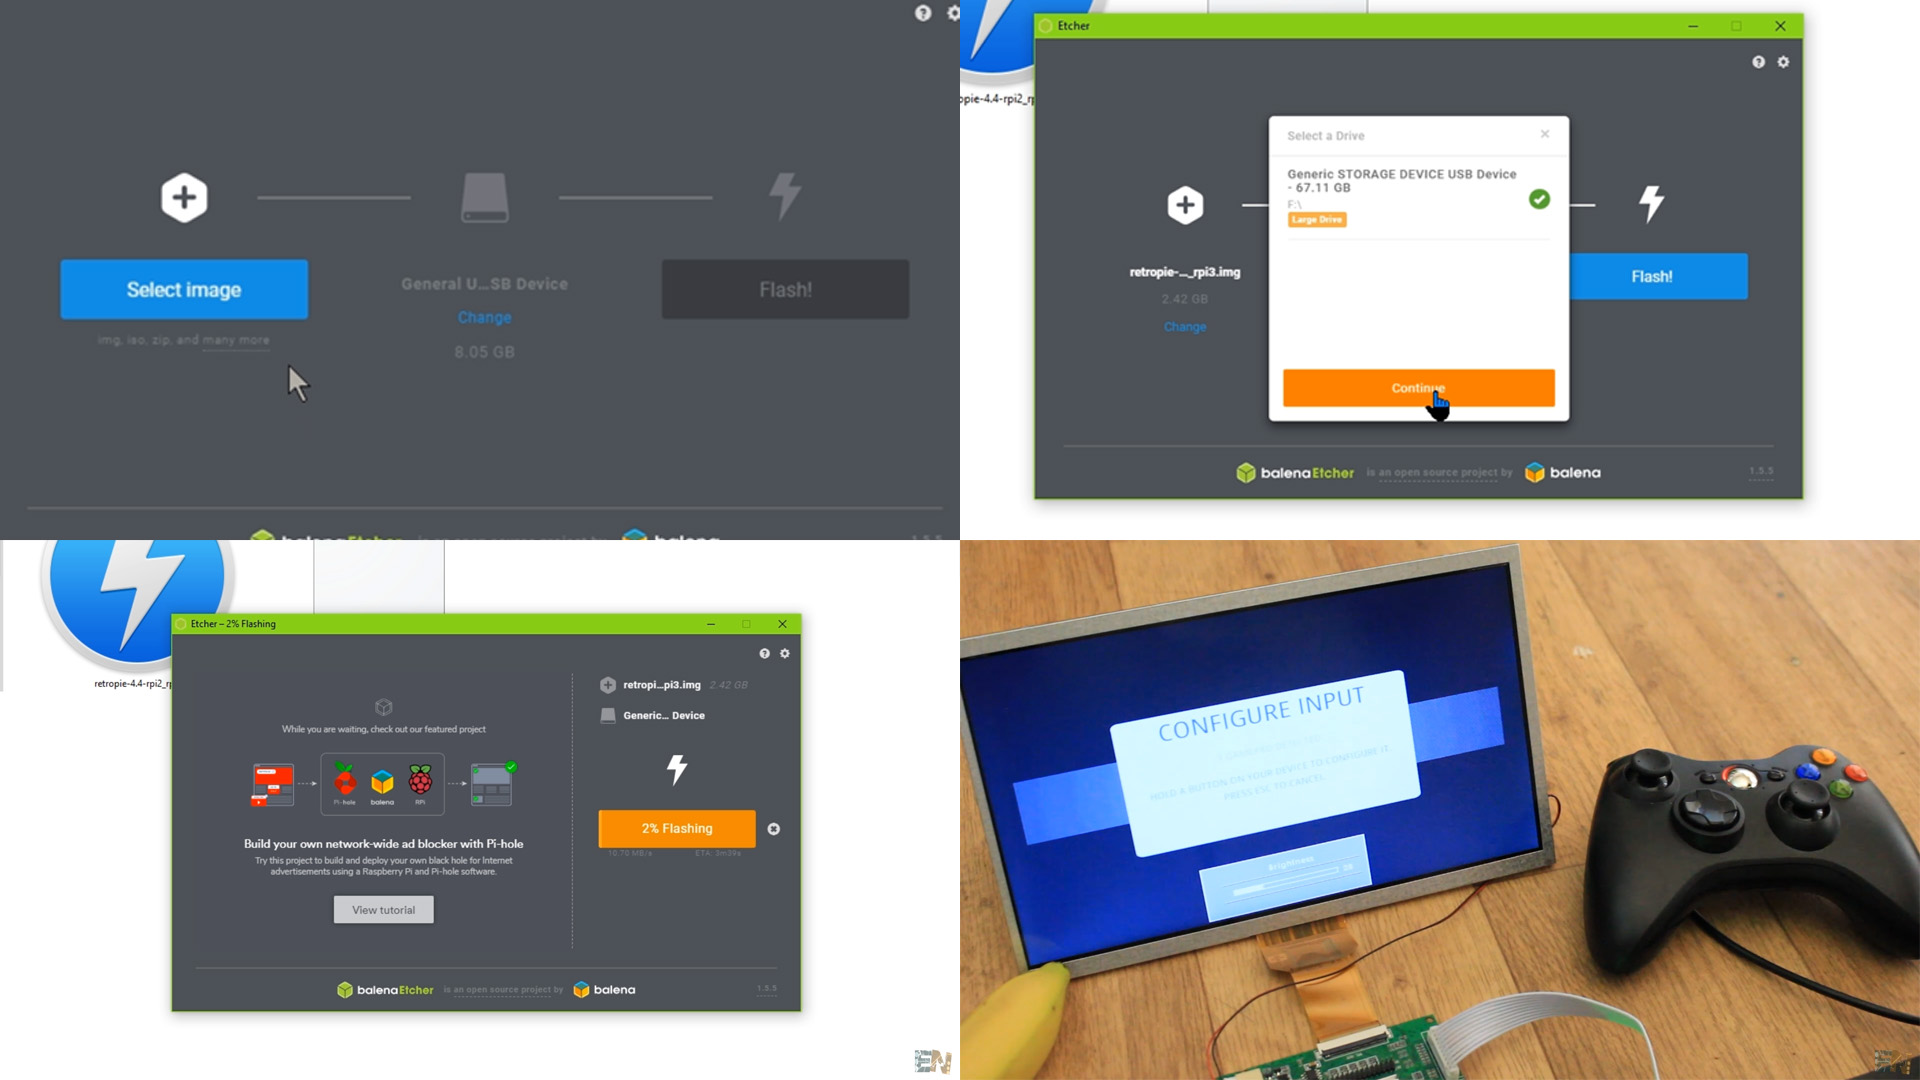
Once the image is flashed to the SD card remove it from your PC. Now make sure your raspberry pi is NOT powered on. Insert the SD card to the pi. Then power it on adn you will see the RETROPIE running. The first step it will ask you to define the buttons of your controller such as start button, left, right etc. Once you fisnish this setup you're good to go. But there are no games.
To have games we need ROMS. I use this page here, ROM HSUTLER, to dwonload the games. Search for any game. Downlaod the zip file and extract it. Now pay attention. Each game must be copied to a specific location on the RETROPIE.
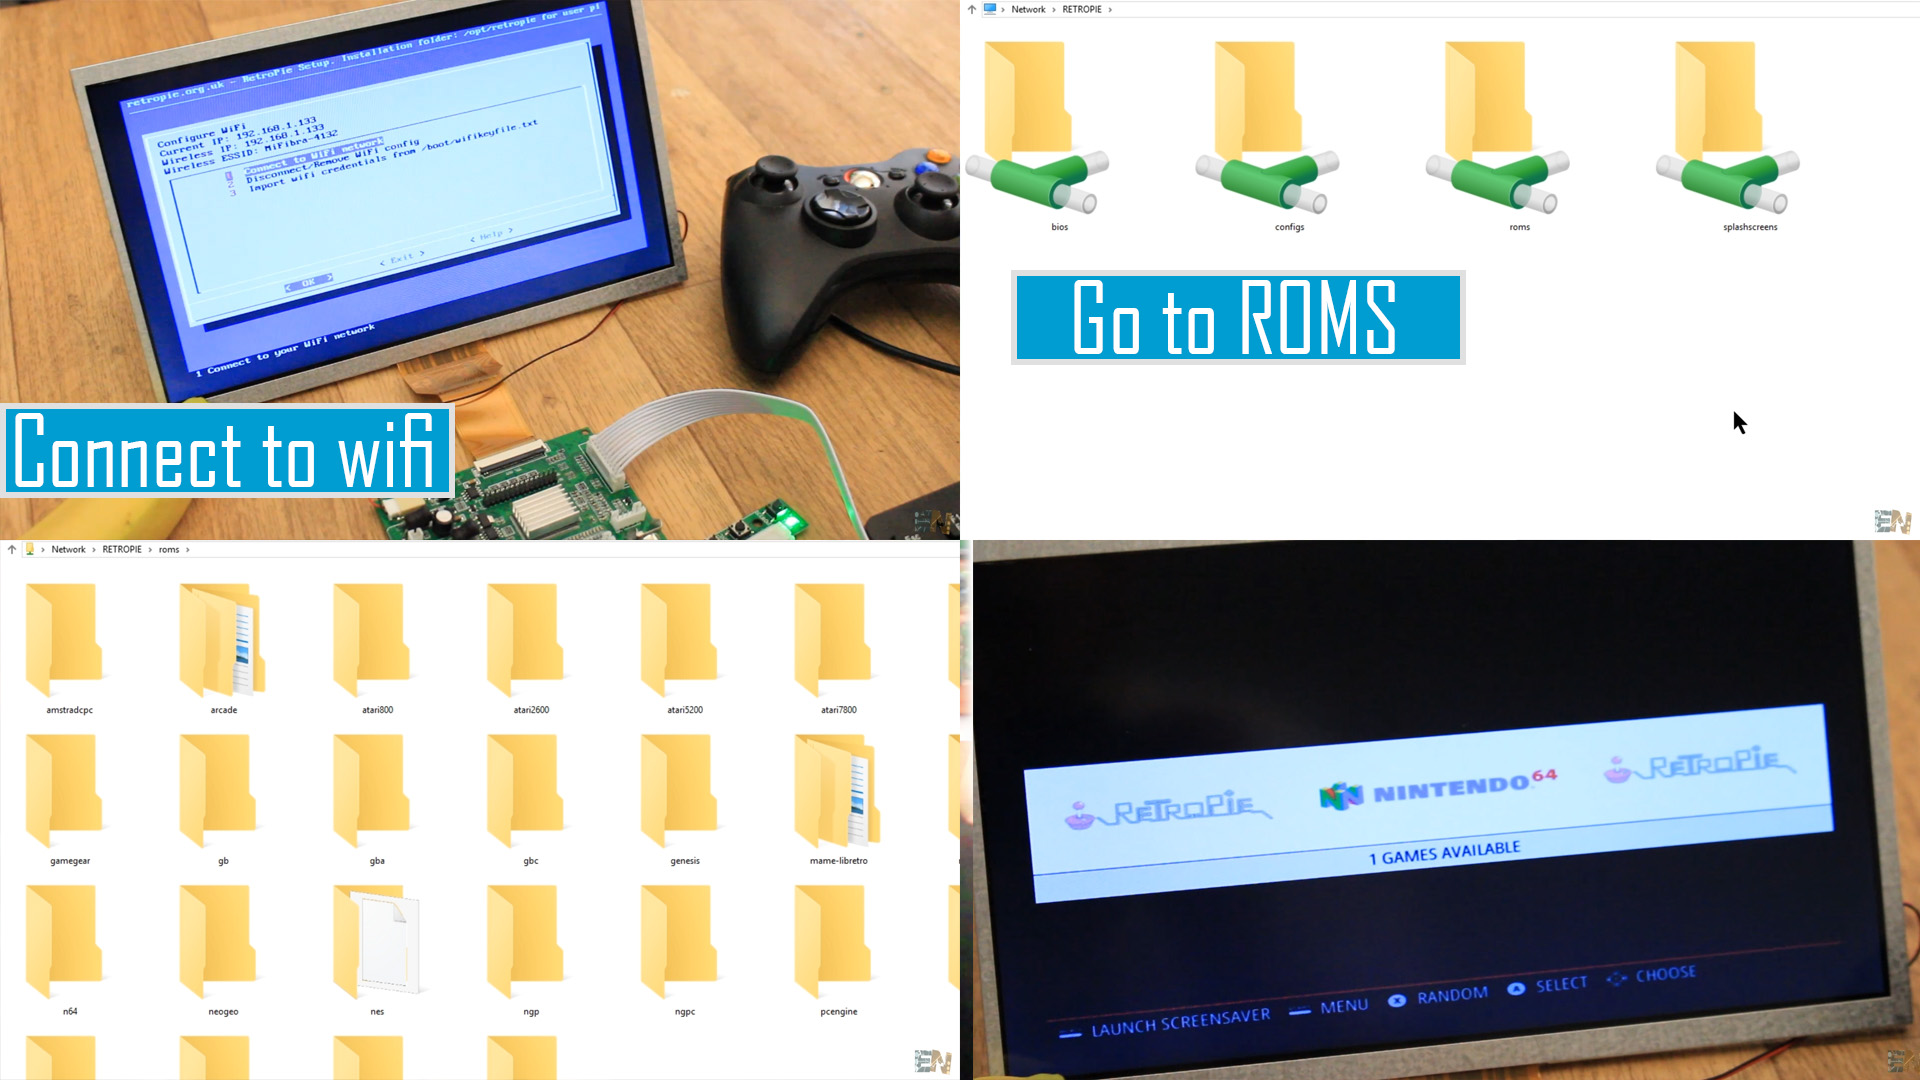
But first let's connect the RETROPIE to our PC. Go in the RETROPIE settings and select WIFI. Connect to the same LAN that your PC has. Then go to your PC, in my computer and type \\RETROPIE. Here go into the roms folder. Here you have all the consoles. In my case I haev MK4 which is from nintendo 64. So I copy that file to the n64 folder. Now restart the RETEROPIE and play.
Final part, now that everything is working, we put the entire system inside the case. In my case, thas is a metal case of a microwave. I first install the speakers and the amplifier. Then I place the power supply, the pi and everything inside. I isntall the screen to the door of the microwave. After that I connect all the cables and that's it. Let's play...