Panel Cookies
DIY RGB Tube Lights
3 years ago | Blogs | by: Mukesh Sankhla


RGB Tube Lights made using Arduino Nano and WS2812B LEDs. DIY RGB Tube light is a multi functional tube light which can be used in photography, light painting photography, film making, gaming, as a VU meter and more. The tube light can be controlled by Prismatik  software or by a push button. These tub lights are made using a Arduino Nano and WS2812B LED strip.

Step 1:

  • Disassemble the tube light by removing end caps, separating diffuser and removing whites LED strip from the tube.


Step 2: Make all the connections as shown in circuit diagram.

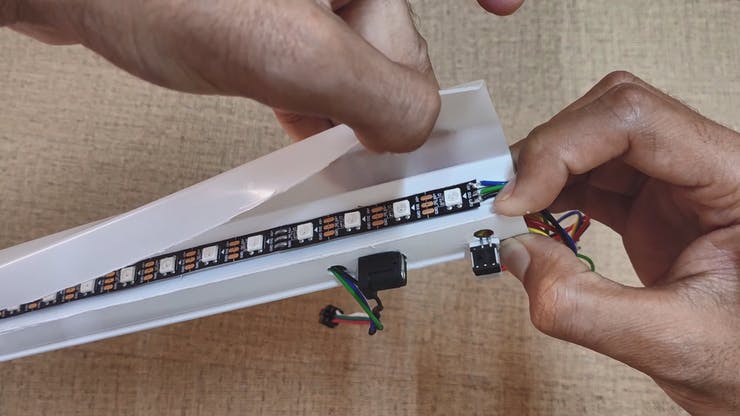
Step 3: Put all the electronics in the tube, put back the end caps and seal the diffuser using clear tape.

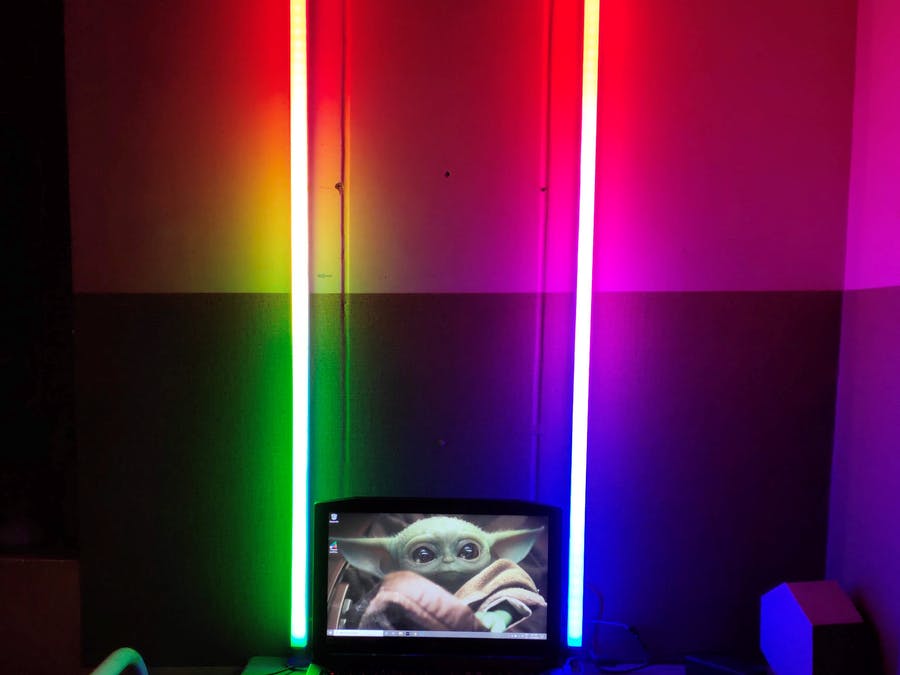
Step 4: Similarly make the second tube but this time use only WS2812b LED strip, connector, wires and connect the tube lights.

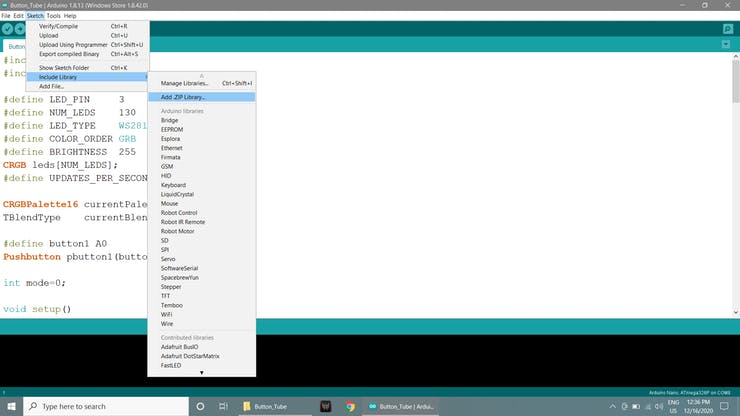
Step 5: Download the given zip files and extract them. LINK
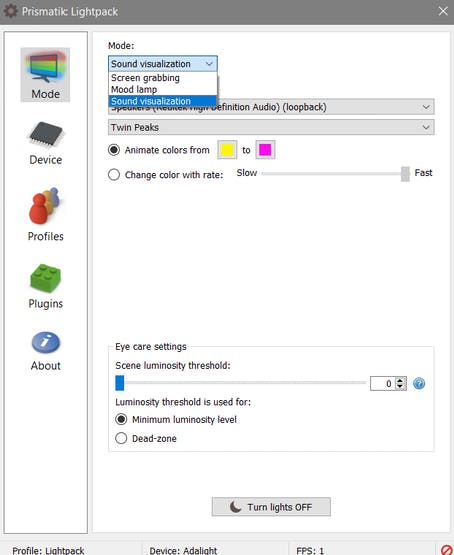
  • Open the RGB Tube code & software file, open the code given in Arduino IDE.
  • Install the FastLED library in Arduino IDE.
  • You can enter the number of LEDs you used in your tube lights, I used 65 LEDs in each tube lights, i.e. 130 LEDs in both tube lights.


Step 6:

  • Install the prismatik software in your PC.
  • Open the software and click on device.
  • Click on Run configuration wizard and simply click on Next -> Next.
  • Enter the Serial Port number and click Next -> Next
  • Enter the number of LEDs at sides (i.e. in my case top=0, side=65, bottom=0) and click on custom -> Next
  • Adjust the sliders to get white color on the tube lights and click on finish.
  • Now you can choose different mode in the software and display on tube lights.
  • NOTE: The Arduino should be connected to the PC.


Step 7:

  • Open the Button_Tube code in Arduino IDE.
  • With this code you can change the color of the Tube Lights with the push of button.
  • Install the Pushbutton library by clicking on sketch ->Include library -> Add zip library and select the Pushbutton-2.0 zip file in Button_Tube file.
  • Enter the number of LEDs
  • Connect the Arduino to your PC, select the board type, select the port and upload the code.
  • You can make this lights portable by using a power bank or some batteries.
  • By using any Wi-Fi board like ESP8266 or ESP32 you can change the colors of the tube lights with a mobile app.


3 years ago | Blogs | by: Mukesh Sankhla


Last tutorials

All about Arduino PWM frequencies
RLC Transistor Tester PCB with Arduino
Ferrofluid 3D printed Bluetooth Speaker
10A Bharger/Protection Module
TMC silent driver comparison A4988 stepper driver

ADVERTISERS


Affiliate Disclosure

ADVERTISERS


PCBWAY PCB service


Curso Arduino Online nivel Intermedio