MQ gas sensors are a family of devices designed to detect the presence of different chemical components in the air. We can connect these devices to an automaton or processor like Arduino.
There is a wide variety of MQ sensors. Each model is designed to detect one or more substances, designed for a specific use, such as detection of flammable gases, air quality or detection of alcohol in breathed air.
MQ gas sensors are usually provided with a standard measuring plate with the comparator LMC662 or similar, which allows the reading to be obtained both as an analog value and as a digital value when a certain regulated threshold is exceeded through a potentiometer located in the license plate.
The gas sensors must be calibrated before obtaining an accurate measurement. Even calibrated these sensors do not have the necessary guarantee to be part of a security system.
The electrical scheme is simple. We supply the module by connecting GND and 5V to the corresponding Arduino pins. Now if we want to use digital reading, we connect the DO output to one of the Arduino digital inputs. Optionally, we can calibrate the trigger threshold of the digital output with the potentiometer installed in the module.
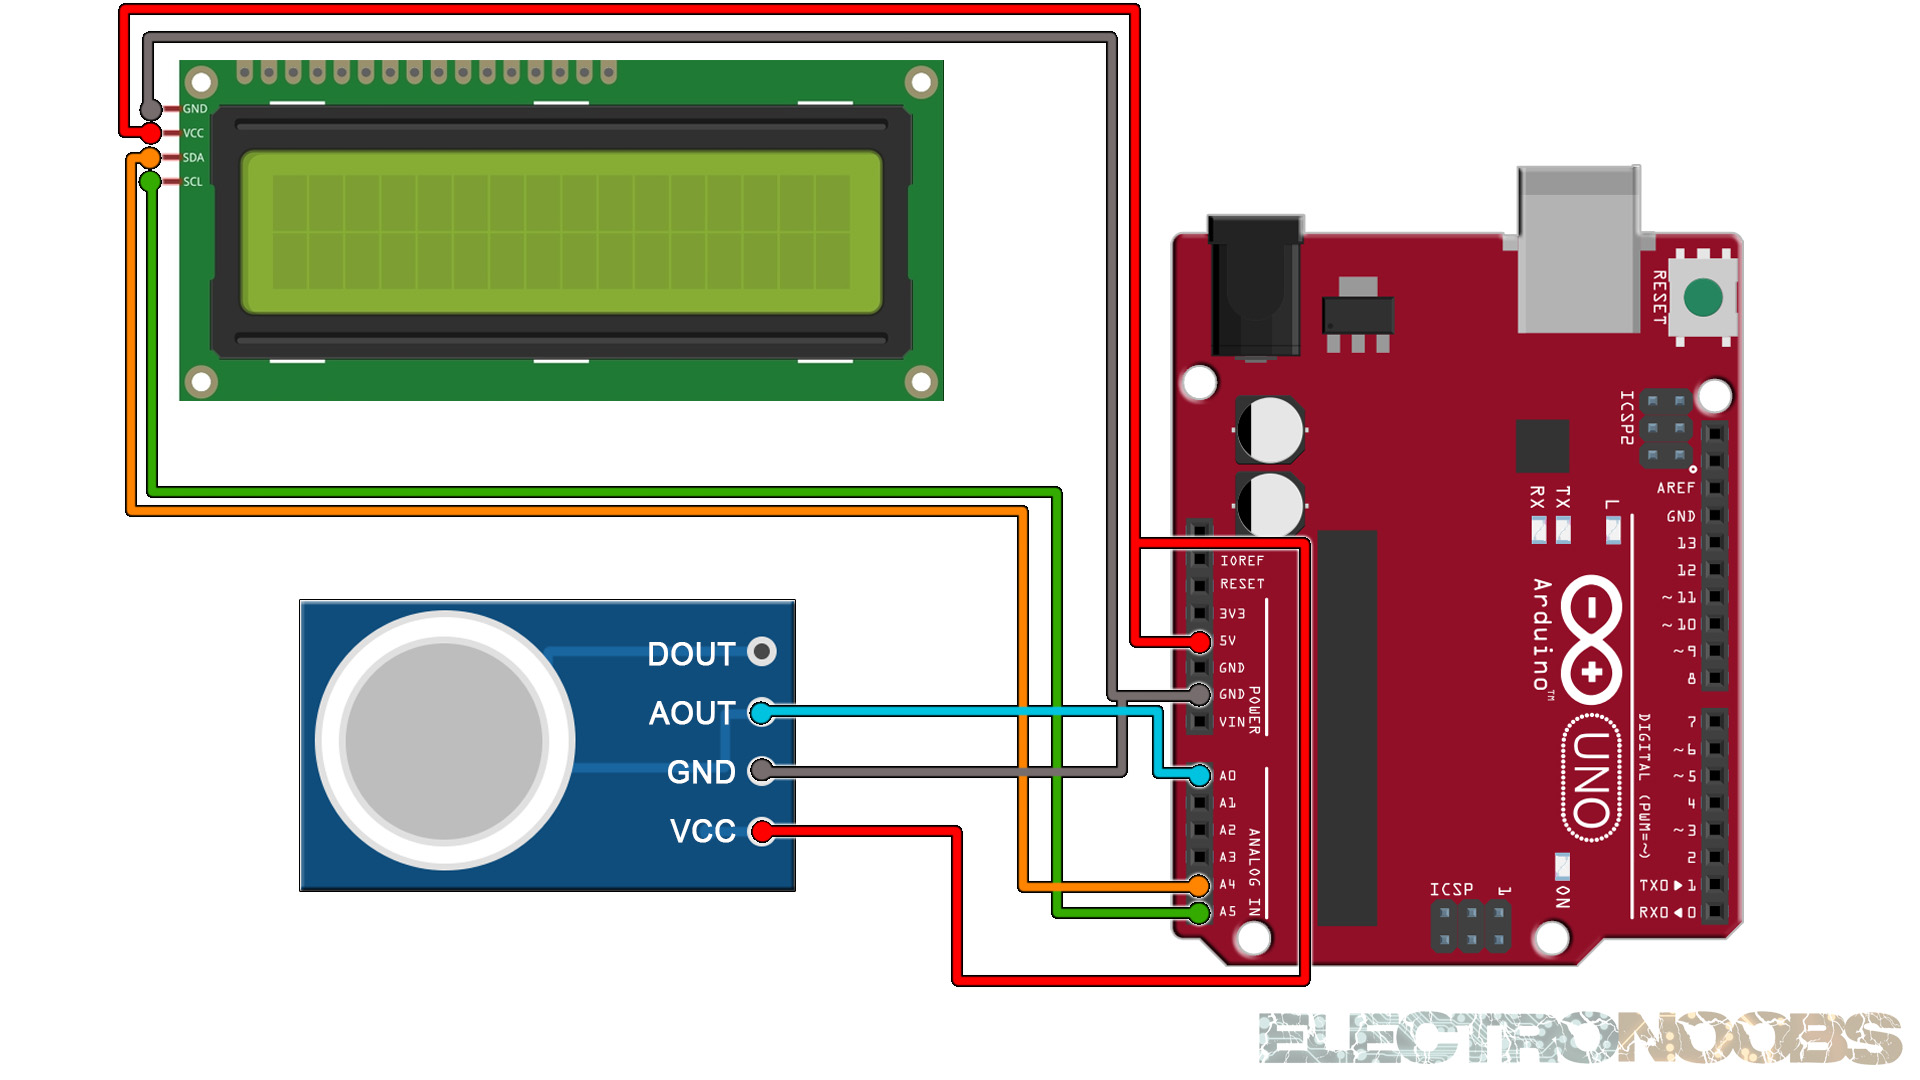
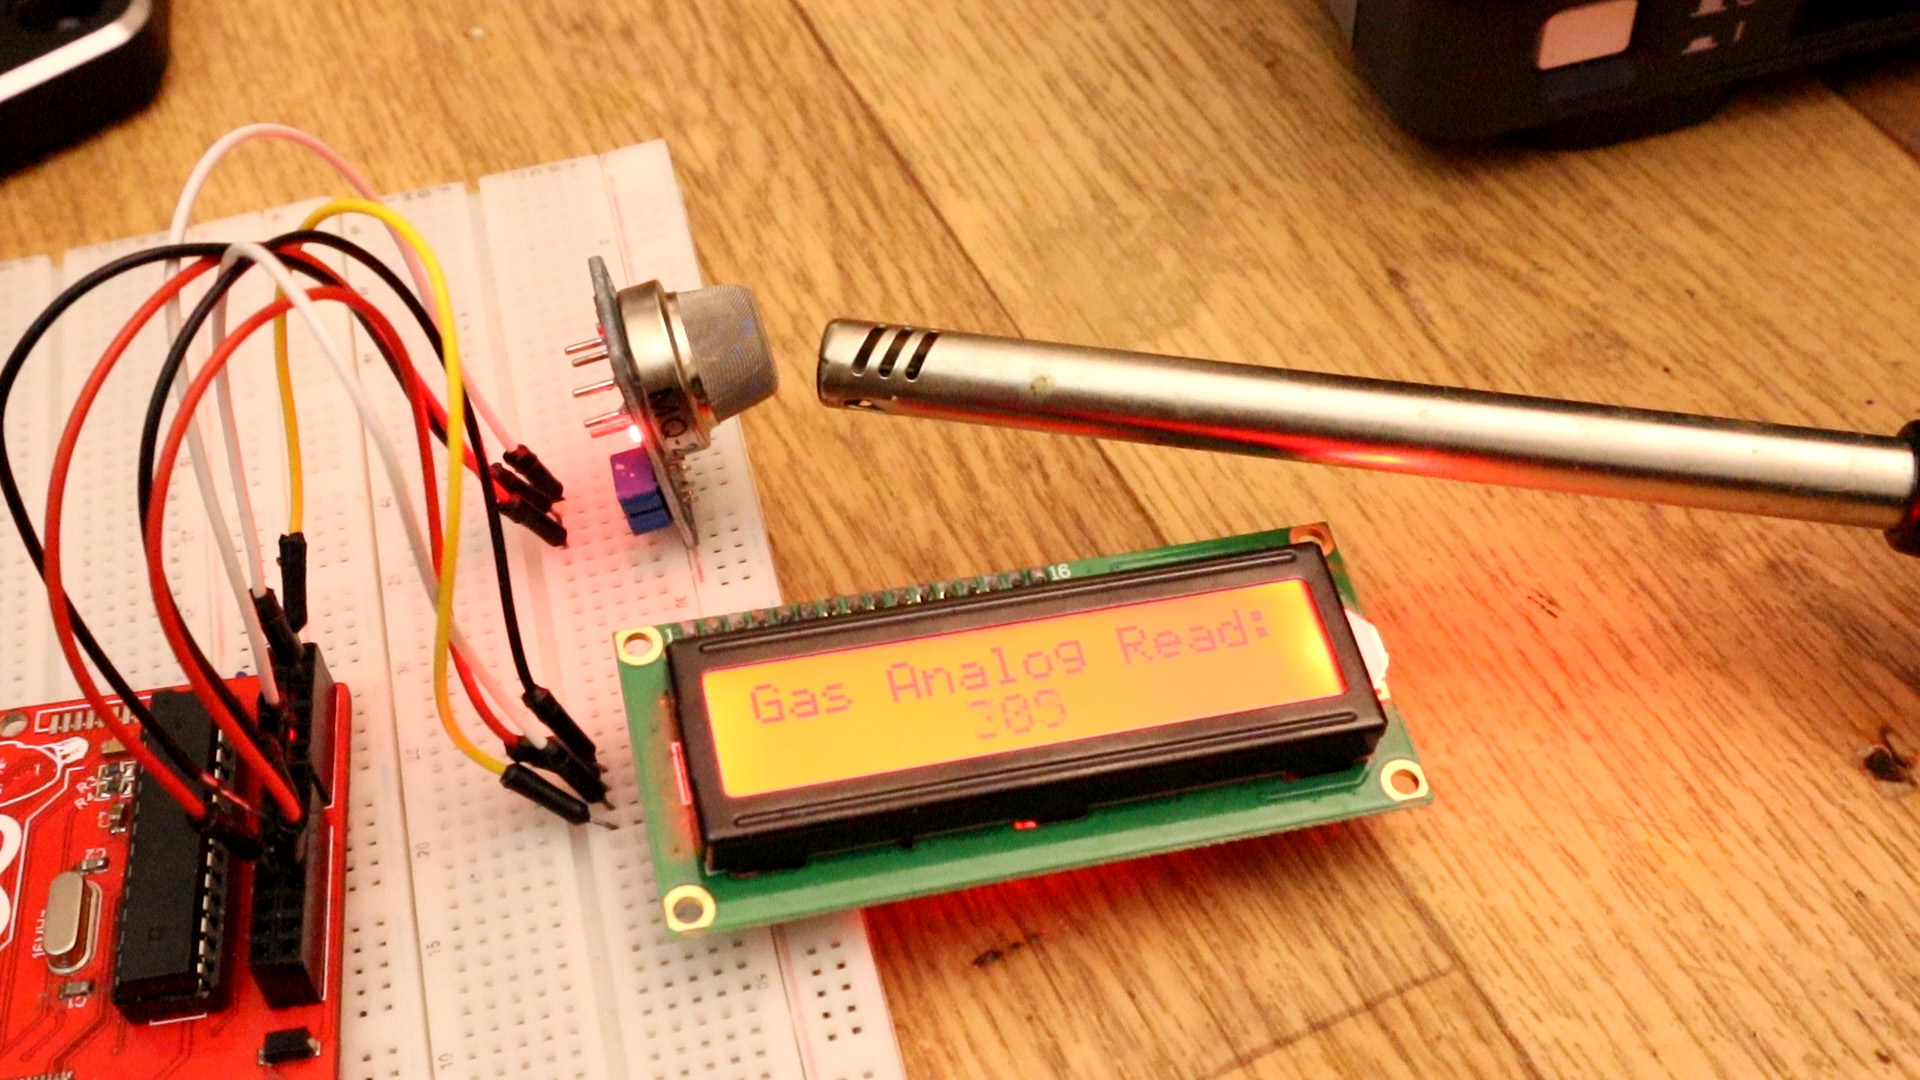
We read the analog read on the A0 input. This sensor will measure the air pureness. If we havea different gas detected, the analog read will get lower. We print the values on the serial monitor or LCD. See codes below.
int LED = 13; // Use the onboard Uno LED
int analog_IN = A0;  // This is our input pin

void setup() {
  pinMode(LED, OUTPUT);
  pinMode(analog_IN, INPUT);
  Serial.begin(9600);

}

void loop() {

  int Value = analogRead(analog_IN);
  Serial.print("Analog read: ");
  Serial.println(Value);

  if(Value < 300)
  {
    digitalWrite(LED,HIGH);
  }
  else
  {
    digitalWrite(LED,LOW);
  }
  delay(200);
}
Upload the code and make the connections. Then open the serial monitor at 9600 bauds and you will have the results printed to the serial monitor. Or go below and download the code with the i2c LCD.
#include <Wire.h>
#include <LiquidCrystal_I2C.h>
// Set the LCD address to 0x27 or 0x3f for a 16 chars and 2 line display
LiquidCrystal_I2C lcd(0x27, 20, 4);

int LED = 13; // Use the onboard Uno LED
int analog_IN = A0;  // This is our input pin


void setup() {
  lcd.init();
  lcd.backlight();
  pinMode(LED, OUTPUT);
  pinMode(analog_IN, INPUT);
  Serial.begin(9600);
}

void loop() {

  int Value = analogRead(analog_IN);
  Serial.print("Analog read: ");Serial.println(Value);

  lcd.clear();
  lcd.setCursor(0,0);
  lcd.print("Gas Analog Read:");
  lcd.setCursor(6,1);
  lcd.print(Value);

  if(Value < 300)
  {
    digitalWrite(LED,HIGH);
  }
  else
  {
    digitalWrite(LED,LOW);
  }

  delay(200);
}
Upload the code and make the connections. Then open the serial monitor at 9600 bauds or just see the results on the LCD screen.