
The barometric pressure sensor BMP180 is designed to read the atmospheric pressure and thus indirectly estimate the height above sea level. The atmospheric pressure is the force exerted by the air (atmosphere) on the surface of the earth. The atmospheric pressure is due to the weight of the air column over a certain area, that is why when measuring the atmospheric pressure in higher altitude points, the pressure value is lower because the amount of air is lower. The atmospheric pressure also varies with the climate, mainly with the temperature, since it changes the density of the air, which is reflected in a change in the weight and therefore in a change of pressure.
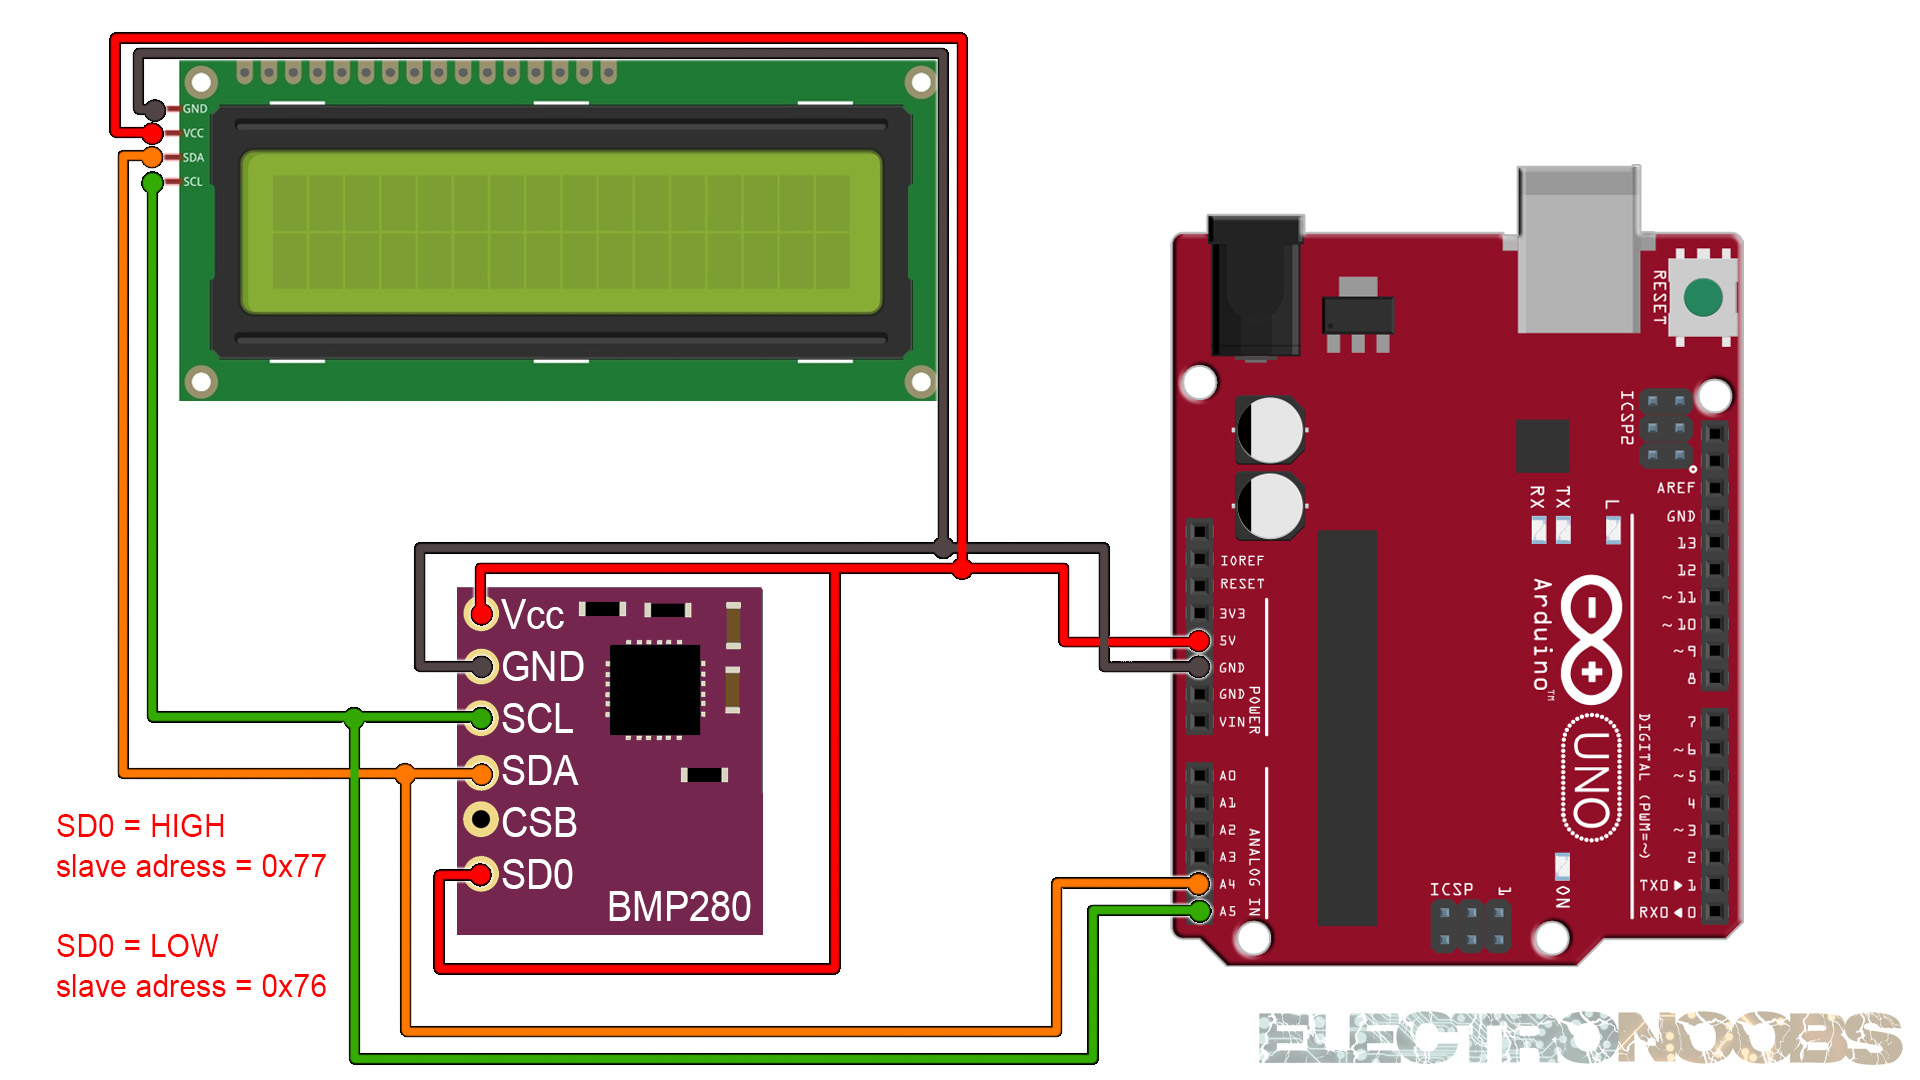
The connections are pretty easy, see the image below with the breadboard circuit schematic. The BMP280 uses i2c communication so connect SCL to A5 of the Arduino and SDA to A4 of the Arduino. Do the same for the i2c LCD incase that you want to print the results on the LCD. The LED is extra. The SD0 pin will set the slave adress, in this case it's connected to Vcc so slave adress is 0x77.
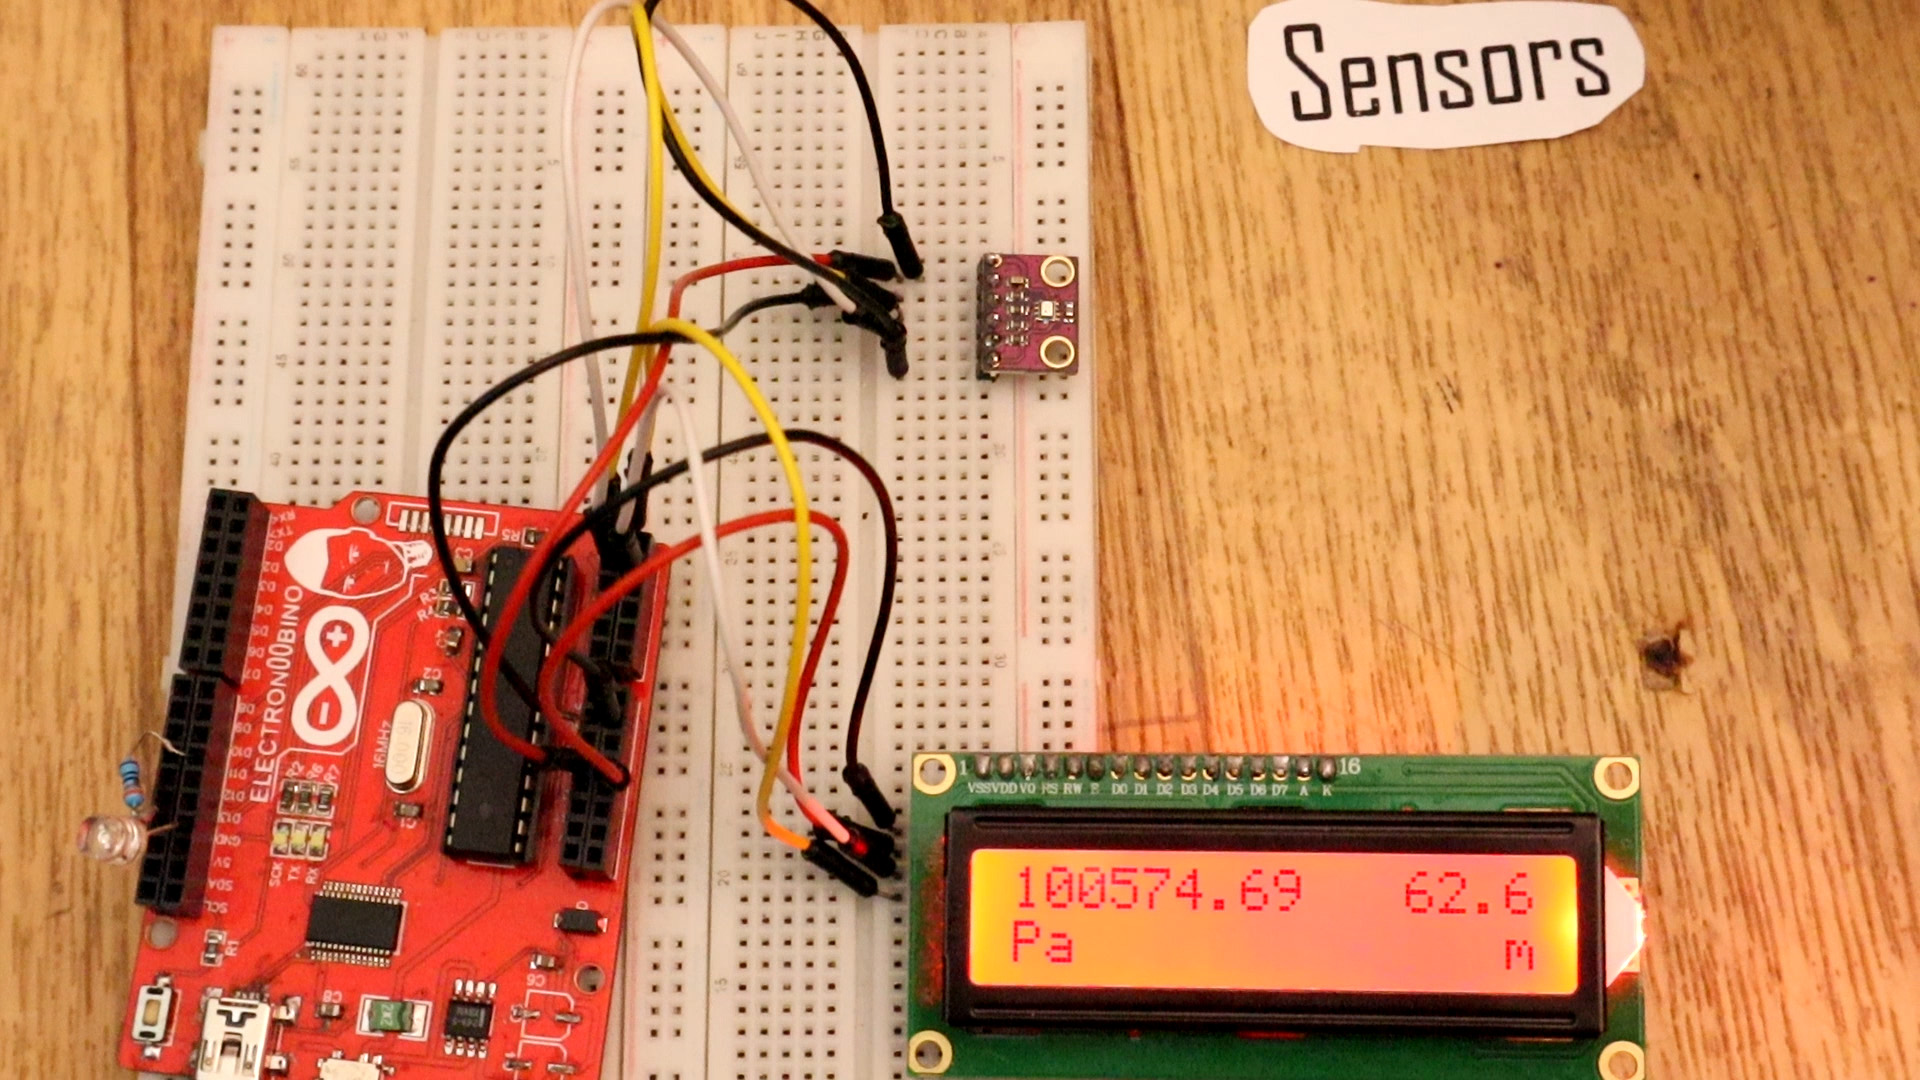
We use i2c to get the raw data from the module and with the pressure we get the altitude. We print the data to the Serial monitor or to the LCD if we use the other code. Download the code, compile and upload.
#include <Wire.h>
#include <SPI.h>
#include <Adafruit_Sensor.h>
#include <Adafruit_BMP280.h>

#define BMP_SCK 13
#define BMP_MISO 12
#define BMP_MOSI 11
#define BMP_CS 10

Adafruit_BMP280 bme; // I2C  if this is definded we use i2c communication
//Adafruit_BMP280 bme(BMP_CS); // hardware SPI
//Adafruit_BMP280 bme(BMP_CS, BMP_MOSI, BMP_MISO,  BMP_SCK);

void setup() {
  Serial.begin(9600);
  Serial.println(F("BMP280 test"));

  if (!bme.begin()) {
    Serial.println("Could not find a valid BMP280 sensor, check wiring!");
    while (1);
  }
}

void loop() {
    Serial.print("Temperature = ");
    Serial.print(bme.readTemperature());
    Serial.println(" *C");
    Serial.print("Pressure = ");
    Serial.print(bme.readPressure());
    Serial.println(" Pa");
    Serial.print("Approx altitude = ");
    Serial.print(bme.readAltitude(1013.25)); // this should be adjusted to your local forcase
    Serial.println(" m");
    Serial.println();
    delay(2000);
}
Upload the code and make the connections. Then open the serial monitor at 9600 bauds and you will have the result printed to the serial monitor. Or go below and download the code with the i2c LCD.
#include <Wire.h>
#include <SPI.h>
#include <Adafruit_Sensor.h>
#include <Adafruit_BMP280.h>
#include <LiquidCrystal_I2C.h>
// Set the LCD address to 0x27 or 0x3f for a 16 chars and 2 line display
LiquidCrystal_I2C lcd(0x27, 20, 4);

#define BMP_SCK 13
#define BMP_MISO 12
#define BMP_MOSI 11
#define BMP_CS 10

Adafruit_BMP280 bme; // I2C  if this is definded we use i2c communication
//Adafruit_BMP280 bme(BMP_CS); // hardware SPI
//Adafruit_BMP280 bme(BMP_CS, BMP_MOSI, BMP_MISO,  BMP_SCK);

void setup() {
  lcd.init();
  lcd.backlight();
  Serial.begin(9600);
  Serial.println(F("BMP280 test"));

  if (!bme.begin()) {
    Serial.println("Could not find a valid BMP280 sensor, check wiring!");
    while (1);
  }
}

void loop() {
    Serial.print("Temperature = ");
    Serial.print(bme.readTemperature());
    Serial.println(" *C");
    Serial.print("Pressure = ");
    Serial.print(bme.readPressure());
    Serial.println(" Pa");
    Serial.print("Approx altitude = ");
    Serial.print(bme.readAltitude(1013.25)); // this should be adjusted to your local forcase
    Serial.println(" m");
    Serial.println();
    lcd.clear();
    lcd.setCursor(0,0);
    lcd.print(bme.readPressure());
    lcd.setCursor(12,0);
    lcd.print(bme.readAltitude(1013.25));
    lcd.setCursor(0,1);
    lcd.print("Pa             m");
    delay(2000);
}
Upload the code and make the connections. Then open the serial monitor at 9600 bauds or just see the results on the LCD screen.


