
The ADS1115 is an external digital analog converter (ADC) that we can connect to a processor like Arduino to measure analog signals.
Arduino has internal ADCs that we use when we use the Arduino analog inputs. On the Arduino Uno, Mini and Nano models, we have 6 ADC of 10 bits.
The ADS1115 provides 4 16-bit ADCs, 15 for the measurement and one last for the sign. The ADS1115 is connected by I2C, so it is easy to read. It has 4 addresses, which is chosen by connecting the ADDRESS pin.
The interest of using an ADC such as the ADS1115 is to obtain greater precision, in addition to freeing the processor from this burden. In addition, in certain configurations, it is possible to measure negative voltages.
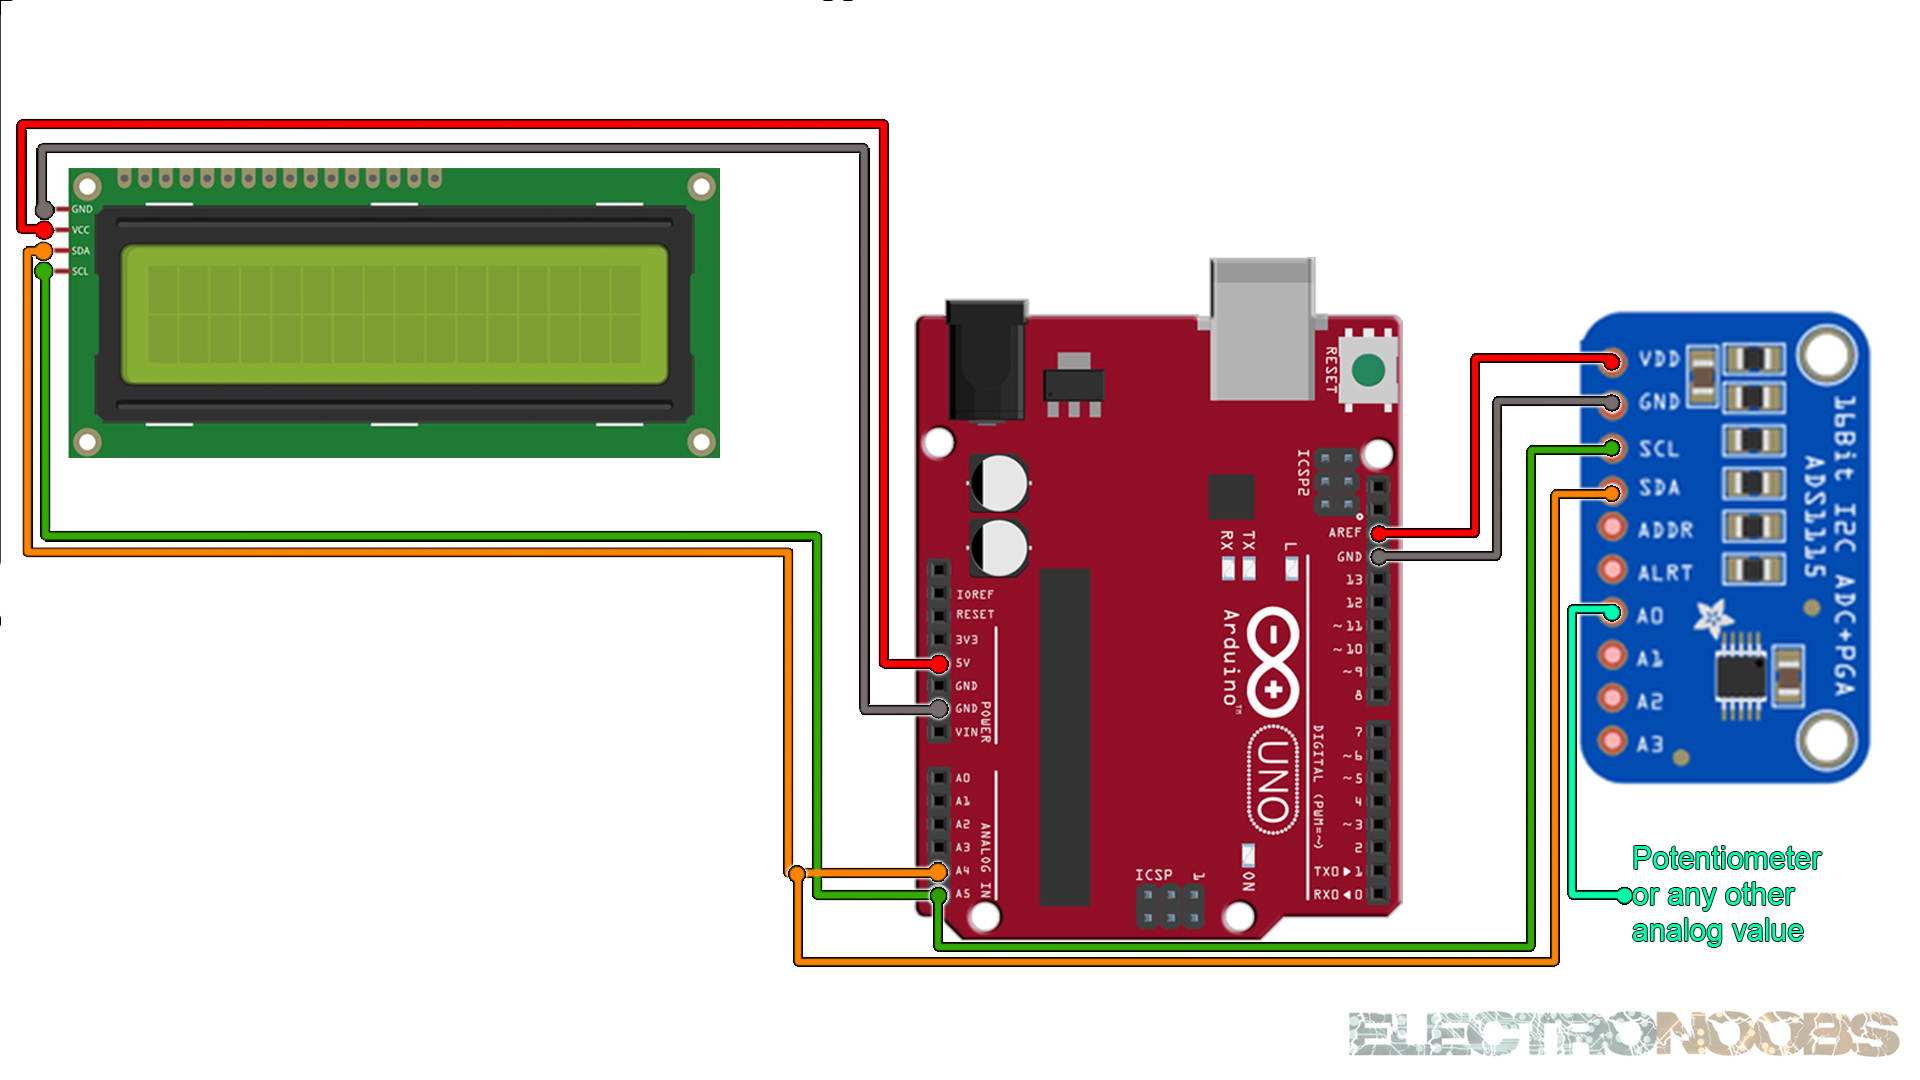
The connection is simple. On the one hand, we feed the module from Arduino through GND and 5V and connect the SDA and SCL pin of Arduino with the corresponding pins of the sensor. The ADDR pin determines the I2C address of the device, according to the following table. The default mode is to connect the ADDR pin to GND, which results in the address 0x48.
The following code shows the use of single end mode. We read the four channels and show the value per serial port. To convert the value to voltage it is necessary to use a multiplier, which at the same time depends on the gain of the PGA that we have set. We print the values on the serial monitor or LCD. See codes below.
#include <Wire.h>
#include <Adafruit_ADS1015.h>

Adafruit_ADS1115 ads;
const float multiplier = 0.1875F;

void setup(void)
{
  Serial.begin(9600);

  // Descomentar el que interese
  // ads.setGain(GAIN_TWOTHIRDS);  +/- 6.144V  1 bit = 0.1875mV (default)
  // ads.setGain(GAIN_ONE);        +/- 4.096V  1 bit = 0.125mV
  // ads.setGain(GAIN_TWO);        +/- 2.048V  1 bit = 0.0625mV
  // ads.setGain(GAIN_FOUR);       +/- 1.024V  1 bit = 0.03125mV
  // ads.setGain(GAIN_EIGHT);      +/- 0.512V  1 bit = 0.015625mV
  // ads.setGain(GAIN_SIXTEEN);    +/- 0.256V  1 bit = 0.0078125mV
  ads.begin();
}

void loop(void)
{
  int16_t adc0, adc1, adc2, adc3;


  adc0 = ads.readADC_SingleEnded(0);
  adc1 = ads.readADC_SingleEnded(1);
  adc2 = ads.readADC_SingleEnded(2);
  adc3 = ads.readADC_SingleEnded(3);
  Serial.print("AIN0: "); Serial.println(adc0 * multiplier);
  Serial.print("AIN1: "); Serial.println(adc1 * multiplier);
  Serial.print("AIN2: "); Serial.println(adc2 * multiplier);
  Serial.print("AIN3: "); Serial.println(adc3 * multiplier);
  Serial.println(" ");

  delay(1000);
}
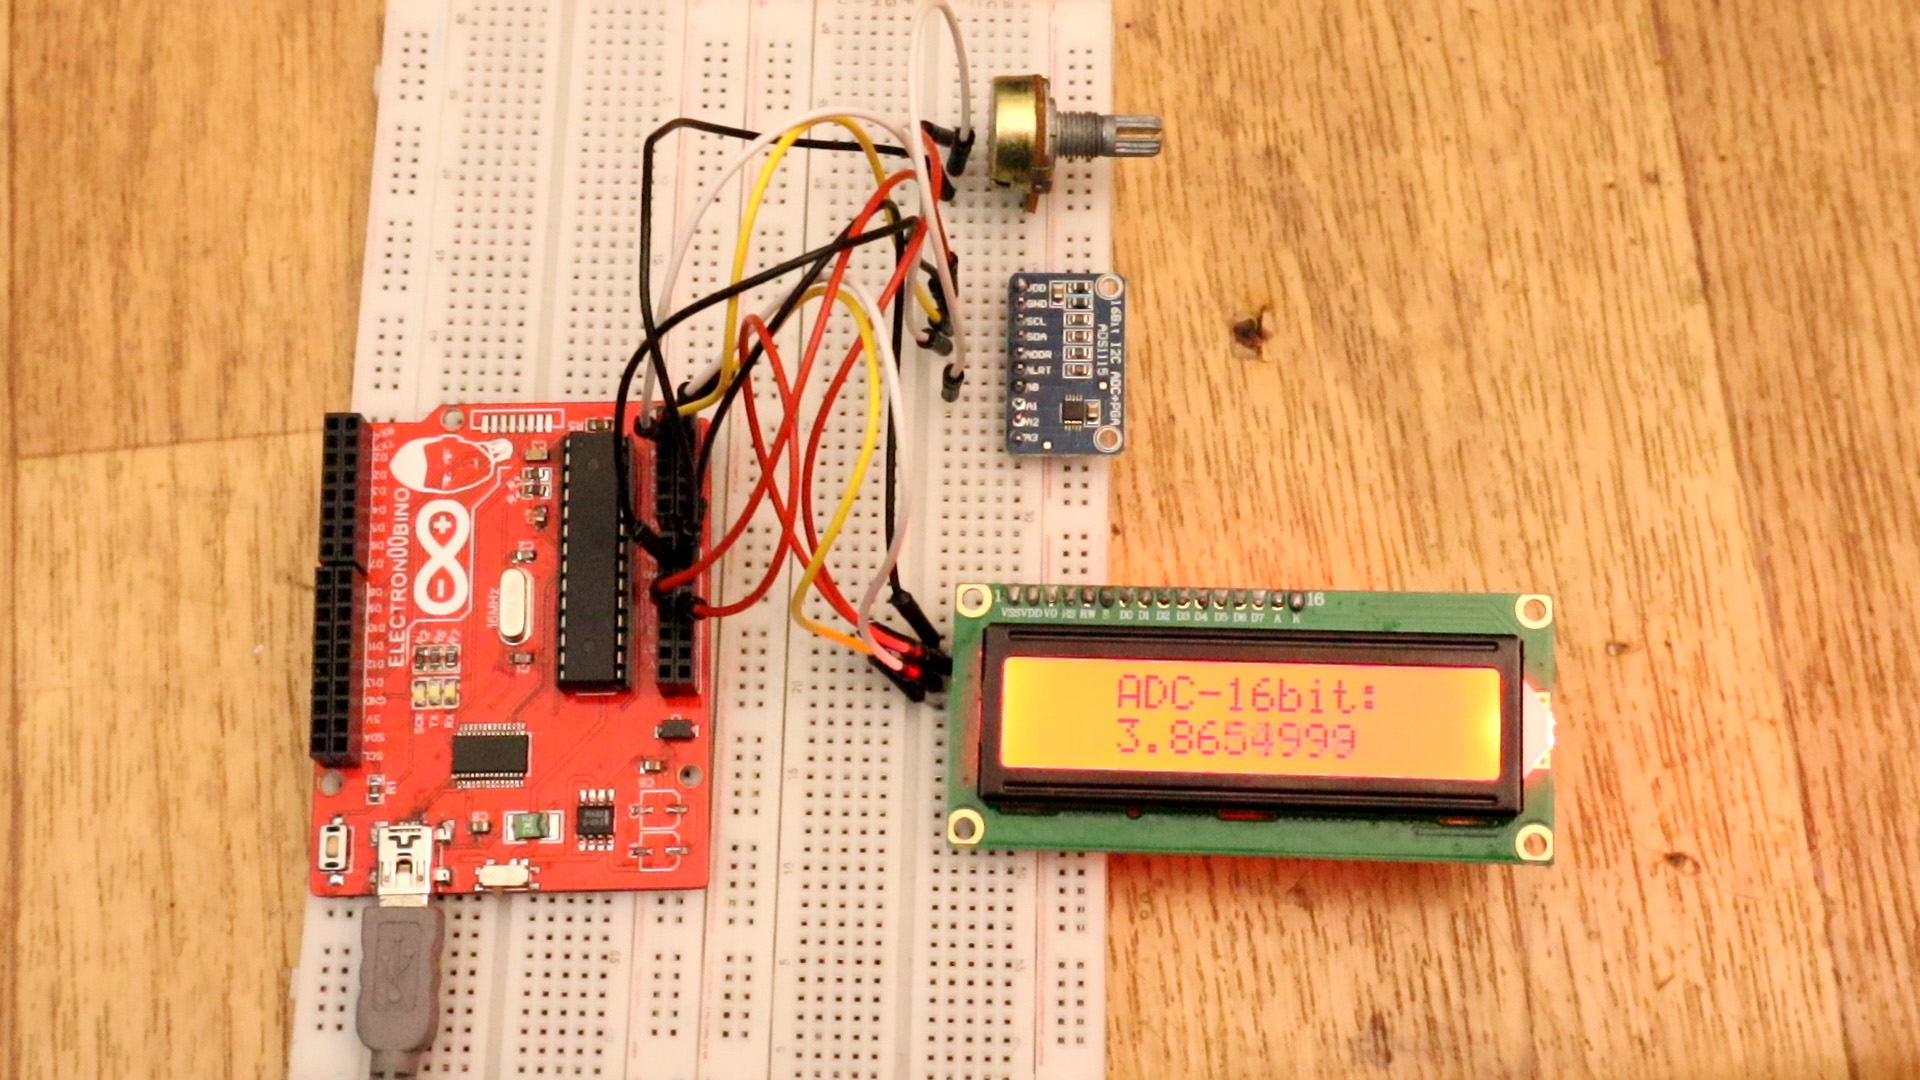
Upload the code and make the connections. Then open the serial monitor at 9600 bauds and you will have the results printed to the serial monitor. Or go below and download the code with the i2c LCD.
#include <Wire.h>
#include <LiquidCrystal_I2C.h>
// Set the LCD address to 0x27 or 0x3f for a 16 chars and 2 line display
LiquidCrystal_I2C lcd(0x27, 20, 4);
#include <Adafruit_ADS1015.h>
Adafruit_ADS1115 ads(0x48);
float Voltage = 0.0;

void setup(void)
{
  lcd.init();
  lcd.backlight();
  Serial.begin(9600);
  ads.begin();
}

void loop(void)
{
int16_t adc0; // 16 bits ADC read of input A0
adc0 = ads.readADC_SingleEnded(0);
Voltage = (adc0 * 0.1875)/1000;

  Serial.print("AIN0: ");
  Serial.print(adc0);
  Serial.print("\tVoltage: ");
  Serial.println(Voltage, 7);
  Serial.println();
  lcd.clear();
  lcd.setCursor(0,0);
  lcd.print("   ADC-16bit:   ");
  lcd.setCursor(3,1);
  lcd.print(Voltage,7);
delay(100);
}
Upload the code and make the connections. Then open the serial monitor at 9600 bauds or just see the results on the LCD screen.


